Final Project draft 1 – Ecosystem simulation

My project aims to create an immersive and artistic simulation that explores the delicate balance of ecosystems through interactive user engagement. This Ecosystem Simulation will leverage the Matter.js physics engine to bring to life a visually stunning representation of nature where users can influence and observe the dynamics of a virtual ecosystem.

Objectives:

  1. Artistic Representation: Develop a visually appealing ecosystem with vibrant flora and fauna, utilizing the capabilities of Matter.js for realistic physics and animations. Each element in the ecosystem will be meticulously designed to convey a sense of interconnected beauty.
  2. Interactive User Engagement: Implement mouse interaction to allow users to influence the ecosystem. Users will have the ability to introduce new species, adjust environmental conditions, and observe the resulting impact on the ecosystem. This interactive element will serve as a metaphor for the symbiotic relationship between human actions and the natural world.
  3. Symbolic Narrative: Infuse the simulation with a symbolic narrative that explores broader themes such as environmental sustainability, biodiversity, and the consequences of human intervention. The changing dynamics within the ecosystem will reflect the consequences of user choices, fostering awareness and reflection.

Features:

  • Flora and Fauna: Diverse and visually captivating plant and animal life, each contributing to the ecosystem’s overall balance.
  • Realistic Physics: Matter.js will be employed to simulate realistic interactions between elements, including growth, predation, and environmental factors.
  • User Interaction: Mouse-driven interactions will allow users to introduce or remove species, manipulate environmental variables, and observe the evolving ecosystem.

Target Audience: The Artistic Ecosystem Simulation is designed for audiences interested in the intersection of art, technology, and environmental awareness. It caters to individuals who appreciate immersive experiences that provoke thoughtful contemplation about our relationship with nature.

Outcomes: The project aims to deliver an engaging and thought-provoking simulation that not only showcases the aesthetic potential of Matter.js but also serves as a platform for reflection on ecological themes. By providing users with an interactive canvas to explore, we hope to foster a deeper understanding of the intricate connections within ecosystems and the impact of human choices.

Through this project, we aspire to contribute to the growing discourse on the intersection of art and environmental consciousness while offering a unique and memorable interactive experience.

code assignment – week 11 – Tiny Critters

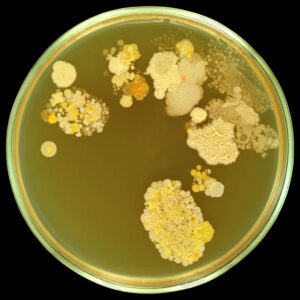
Inspired by the intricate patterns of microscopic life, this week, my latest sketch offers a visual interactive exploration of the cellular automata ecosystem.

Inspiration: Microscopic Organisms Under the Microscope

The project draws inspiration from the mesmerizing appearance of microscopic organisms observed under a microscope. The delicate dance of amoeba, the vibrant hues of microorganisms, and their ever-changing patterns became the driving force behind creating a dynamic simulation using the p5.js library.

The overarching theme revolves around simulating an artistic ecosystem where each cell represents a microscopic organism. The cells evolve based on a set of rules, creating visually appealing patterns reminiscent of the microscopic world. The color palette, cell shapes, and interactive features are carefully curated to capture the essence of this microscopic realm.

Iterations

Scroll on touchpad – First I set out to build the main interactions of the project. I wanted to mimic the motion of magnification do when using a microscope. To zoom in and out if the sample. I did this by controlling the size of cells using the scrolling on touchpads. This was it looks as if we are sliding through different magnification lenses on the microscopic, examining the microbes.

Mouse click – this restarts the sketch on every left click.

Color scheme and figure – Next I focused on making the appearances more like the microorganisms I am used to seeing. I created two versions.

Lastly I also played around with the rulesets. Below is one I found particularly interesting.

Technical Aspects: Bringing the Microscopic World to Life

Code Snippet: Cellular Automata Ruleset

function updateCellState(x, y, neighbors) {
  if (board[x][y].state == 1 && (neighbors < 2 || neighbors > 5)) {
    // Any live cell with fewer than 2 or more than 5 neighbors dies
    board[x][y].state = 0;
  } else if (board[x][y].state == 0 && neighbors == 3) {
    // Any dead cell with exactly 3 neighbors becomes alive
    board[x][y].state = 1;
  }
  // Otherwise, the cell state remains unchanged
}

This code snippet showcases the heart of the simulation – the ruleset governing the evolution of each cell. By adjusting these rules, we can create a myriad of fascinating patterns resembling the behaviors of microscopic life.

The updatecellstate() function encapsulates the logic, taking into account the current state of the cell, the number of neighbors, and applying the rules to simulate the dynamic evolution of the cellular automaton.

Challenges Faced: Iterative Refinement and Debugging

Throughout the development process, one of the main challenges was fine-tuning the ruleset to strike a balance between creating visually engaging patterns and ensuring interactive responsiveness. Debugging intricate interactions within the cellular automaton required iterative refinement and careful consideration of the aesthetic and thematic goals.

Future Improvements: Dynamic Interactivity and Realistic Simulation

As I look ahead, future improvements could include enhancing the interactive elements, such as introducing dynamic user-controlled parameters or integrating more realistic simulations of microscopic behaviors. Exploring optimizations for larger-scale simulations and incorporating additional visual elements would further enrich the immersive experience.

Coding Assignment #11 – CA

Concept:

In this week’s assignment, I tried to recreate water droplet ripples using Cellular Automata. To do that, I created a simple cellular automaton with rules that propagate a disturbance/wave across the grid. Ripples start at the corners then in random positions in the grid and propagate outward based on the defined rules. As for user interaction, I gave the user the ability to modify the cell size up/down using the arrow keys to seem as if they are zooming in/out. I chose to use a grayscale palette for an aesthetic and more abstract look.

View post on imgur.com

Sketch:

Code Walkthrough:

Code link:https://editor.p5js.org/bdr/sketches/XuyWHkF4S

Cell class:

Creates a cell within a cellular automaton grid. It has the following properties:

x: X-position of the cell.
y: Y-position of the cell.
prevState: Previous state of the cell.
newState: New state of the cell.
currState: Current state of the cell.
neighbors: Array containing neighboring cells.

The methods are:

Change(): Adds a new updated neighbor to the cell.
Display(): Displays the cell in the grid.
ChangeState(): Updates the state of the cell based on its neighbors.

changeState() {
        // Get the total
        let t = 0;
        for (let i = 0; i < this.neighbours.length; i++) {
            t += this.neighbours[i].currState;
        }
        // Get the average
        let avg = int(t / 8);
        if (avg === 255) {
            this.newState = 0;
        } 
        else if (avg === 0) {
            this.newState = 255;
        } 
        else {
            this.newState = this.currState + avg;
            if (this.prevState > 0) {
                this.newState -= this.prevState;
            }
            if (this.newState > 255) {
                this.newState = 255;
            } else if (this.newState < 0) {
                this.newState = 0;
            }
        }
        this.prevState = this.currState;
    }
Start() Function:

Initializes a grid of cells and sets up the neighbors for each cell within a cellular automaton simulation. In each iteration, it sets the neighbors positions depending on the pixels (up, down, left, right)

function start() {
    // Create a grid of cells
    for (let x = 0; x < 64; x++) {
        cells[x] = [];
        for (let y = 0; y < 64; y++) {
            let newCell = new Cell(x, y);
            cells[x].push(newCell);
        }
    }
    // Setup the neighbors
    for (let x = 0; x < 64; x++) {
        for (let y = 0; y < 64; y++) {
            // Cell above
            let up = y - 1;
            if (up < 0) {
                up = 64 - 1;
            }
            // Cell in left
            let left = x - 1;
            if (left < 0) {
                left = 64 - 1;
            }
            // Cell below
            let down = y + 1;
            if (down === 64) {
                down = 0;
            }
            // Cell in right
            let right = x + 1;
            if (right === 64) {
                right = 0;
            }
            // Update the cells
            cells[x][y].change(cells[left][up]);
            cells[x][y].change(cells[left][y]);
            cells[x][y].change(cells[left][down]);
            cells[x][y].change(cells[x][down]);
            cells[x][y].change(cells[right][down]);
            cells[x][y].change(cells[right][y]);
            cells[x][y].change(cells[right][up]);
            cells[x][y].change(cells[x][up]);
        }
    }
}
User Interaction:

Using the Up and Down keys, the user is able to change the cells size and give the impression that they are zooming in and zooming out. Further error control was set to avoid decreasing the cell to a size where it can fit the canvas.

Assignment Week #10 – Bacterial Game of Life

Concept

In this assignment, I tried to use Conway’s Game of Life to emulate how a bacterial colony grows in a petri dish. The aim was to blend the classic algorithm with a twist, introducing alternating rulesets based on iterations and a hexagonal pattern. This would allow the sketch to resemble a bacterial colony growing and dying out, leading to an ever-evolving and visually appealing display.

Sketch

User Interaction

  1. The user can spawn new living cells by holding down the mouse button and moving it around.
  2. There is a slider at the bottom that alters the framerate/speed of the sketch

Code

  1. Creating the Hexagonal Grid
function drawHexagon(x, y, size) {
    beginShape();
    for (let i = 0; i < 6; i++) {
        let angle = TWO_PI / 6 * i;
        let vx = x + cos(angle) * size;
        let vy = y + sin(angle) * size;
        vertex(vx, vy);
    }
    endShape(CLOSE);
}

This function draws a hexagon on the canvas. It starts by creating a shape and iterates six times (once for each side of the hexagon). In each iteration, it calculates the vertex coordinates using trigonometric functions (cos and sin) and then adds these vertices to the shape. Finally, the shape is closed to complete the hexagon.

  1. Updating the Grid State
function updateGrid() {
    for (let col = 0; col < cols; col++) {
        for (let gridRow = 0; gridRow < rows; gridRow++) {
            let neighbors = calculateNeighbors(col, gridRow);
            let newCellState = calculateNewCellState(grid[col][gridRow], neighbors);
            nextGrid[col][gridRow] = newCellState;
        }
    }
    // Swap grids for next iteration
    let temp = grid;
    grid = nextGrid;
    nextGrid = temp.map(gridRow => [...gridRow]);
}

The updateGrid function is the core of the simulation. It loops through each cell in the grid and determines its next state (alive or dead) based on the current state and the number of neighbors. This is done by calling calculateNeighbors to count living neighbors and calculateNewCellState to apply the Game of Life rules. After calculating the new states for all cells, the function swaps the current and next grids, preparing for the next iteration.

  1. Calculating Neighboring Cells
function calculateNeighbors(col, gridRow) {
    let count = 0;
    let neighborPositions = col % 2 === 0 ? 
        [[-1, 0], [0, -1], [1, -1], [-1, 1], [0, 1], [1, 0]] : 
        [[-1, -1], [0, -1], [1, 0], [-1, 1], [0, 1], [1, -1]];

    neighborPositions.forEach(pos => {
        let newCol = col + pos[0];
        let newRow = gridRow + pos[1];
        if (newCol >= 0 && newCol < cols && newRow >= 0 && newRow < rows) {
            count += grid[newCol][newRow];
        }
    });

    return count;
}

This function calculates the number of living neighbors for a given cell in a hexagonal grid. It first determines the relative positions of neighboring cells, which differ based on the row being even or odd (due to the staggered nature of the hexagonal grid). It then iterates through these positions, checking each neighboring cell’s state and counting how many are alive. Implementation

  • Hexagonal Grid: The simulation uses a hexagonal grid, offering a twist to the traditional square cells, which influences the pattern formations and interactions.
  • Ruleset Alternation: The game alternates between two rulesets based on the number of iterations. This variation introduces new dynamics and allows the bacterial colonies to regrow and continue the cycle.
  • Color Dynamics: To enhance visual interest, each cell changes color depending on its state, adding a layer of visual complexity to the simulation.

Challenges

  • Hexagonal Logic: Implementing the Game of Life on a hexagonal grid presented unique challenges, particularly in calculating neighbors and defining rules specific to the hexagonal arrangement.
  • Ruleset Implementation: Crafting the logic for alternating rulesets while maintaining a coherent and continuous simulation required alot of trial and error.

Future Improvements

  • User-Controlled Variables: Allowing users to adjust parameters like the iteration count for ruleset changes or the rules themselves could offer a more interactive and customizable experience.
  • Advanced Interactions: Implementing additional interactions, such as dragging to create multiple cells or using gestures to influence the simulation, could enhance user engagement.
  • Enhanced Aesthetics: Further refinement of the visual elements, such as gradient color transitions or adding background animations, could make the simulation even more captivating.

Final Project Proposal

Concept

The concept of this sketch revolves around simulating a dynamic ecosystem where virtual entities, referred to as “Vehicles”, interact with their environment. These Vehicles exhibit behaviors akin to living organisms, such as seeking food, avoiding poison, and reproducing. The core idea is to create a system that demonstrates basic principles of life, such as survival, adaptation, and reproduction, in a controlled digital setting.

Sketch

Implementation

Mechanics

The Vehicles are programmed with various attributes controlling their motion and decision-making processes:

  • Motion: Defined by velocity, acceleration, and steering behaviors.
  • Energy: Acts as a life resource, gained by consuming food and lost by ingesting poison or over time.
  • Intelligence (Intel): Influences decisions, such as prioritizing food over poison.

Environment

The Vehicles inhabit a space with two primary elements:

  • Food: Beneficial items that increase a Vehicle’s energy.
  • Poison: Harmful items that decrease energy and can lead to death.

Reproduction

Vehicles reproduce upon reaching a certain energy threshold. Offspring inherit traits from their parents, allowing for the potential evolution of more adapted Vehicles over time.Expected Challenges

  • Balancing: Ensuring a stable ecosystem where Vehicles neither overpopulate nor die out quickly.
  • Performance: Managing computational load, especially as the number of Vehicles increases.
  • Adaptation: Fine-tuning the evolution mechanism so that beneficial traits are meaningfully passed on to offspring.

Next Steps

  • Stats: Adding certain stats to each species like energy, hunger, and evolution.
  • Diversity: Introducing different types of Vehicles with unique characteristics. The goal is to add 3 new species: prey, predator, and apex predator.
  • User Interaction: At certain time intervals, the user is given an option between 2 modifiers for the species, and must pick between them to try and keep the ecosystem alive

Week 11 Assignment: Social Cellular Automata

Overview

Purpose: To simulate the Conway’s Game of Life with a focus on visualizing the connections between neighboring living cells, symbolizing social interactions in society.

Concept

  • Inspiration: Based on the concept of Conway’s Game of Life, the project extends the idea to visually represent social interactions by clustering neighboring cells.
  • Symbolism: The clusters and connections between cells symbolize how individuals in society interact predominantly with those in close proximity.

Technical Description

Key Features:

  1. Cell Representation: Each cell is initially represented as a circle.
  2. Connection Mechanics: Alive neighboring cells are connected by lines, forming clusters.
  3. Interactivity:
    • Speed Control Slider: Allows users to adjust the speed of interactions and animations.
    • Freeze/Unfreeze Button: Users can pause and resume the animation at any time.

Implementation Details

  • Cellular Automata Logic: Describe the logic you used for the cell birth, survival, and death rules.
  • Cluster Visualization: Explain how you determined which cells are neighbors and the logic for connecting them with lines.
  • User Interface Components:
    • Speed Control Slider: Detail its implementation and how it affects the animation speed.
    • Freeze/Unfreeze Button: Explain the functionality and its impact on the animation state.

Challenges and Solutions

  1. Challenge: Visualizing connections between neighboring cells while keeping the visualization coherent and not overly cluttered was challenging, especially with many active cells.
    Solution: Introduced a threshold for connection visualization; only cells within a certain proximity are connected. Also, used varying line thickness and opacity to represent the strength or proximity of the connection, making the visualization more intuitive.
  2. Challenge: Ensuring that the UI elements like the speed control slider and freeze/unfreeze button responded swiftly to user interactions was challenging, particularly when the simulation was complex and resource-intensive.
    Solution: Decoupled the UI thread from the simulation thread. Implemented asynchronous updates to ensure UI responsiveness, allowing users to interact with controls without lag, irrespective of the simulation’s complexity.
  3. Challenge: Creating a visually appealing interface that also clearly conveys the underlying simulation principles was challenging, as too much emphasis on aesthetics could overshadow the functional aspect.
    Solution: Engaged in iterative design, incorporating user feedback to find the right balance. Simplified the UI to focus on essential controls and used color schemes and design elements that enhanced both the visual appeal and clarity of the simulation.

DEMO

  • Link to source code

Future Enhancements

1. Advanced Visualization Options

  • Description: Incorporate more sophisticated visualization techniques to represent the connections between cells. This could include 3D rendering or using advanced graphics effects like glow or dynamic color transitions to represent different states of cell clusters.
  • Purpose: To enhance the visual appeal and make the simulation more engaging, providing deeper insight into the patterns formed.

2. Customizable Rules for Cell Interactions

  • Description: Allow users to modify the rules governing cell birth, survival, and death. This could be done through a user-friendly interface where parameters can be adjusted to see how different rules affect the evolution of the pattern.
  • Purpose: To increase the educational value and interactivity of the simulation, giving users a hands-on experience in understanding the dynamics of cellular automata.

Conclusion

  • The “Social Cellular Automata” project in P5.js successfully achieved its primary goal of simulating Conway’s Game of Life with a unique twist. By visualizing the connections between neighboring living cells, the project not only presented a novel approach to cellular automata but also elegantly symbolized social interactions within communities.

Technical Accomplishments

  • The project demonstrated innovative use of P5.js, showcasing how programming and creative design can intertwine to produce a visually appealing and conceptually rich simulation. The implementation of interactive elements like the speed control slider and the freeze/unfreeze button added a layer of engagement, allowing users to interact with the simulation dynamically.

Conceptual Significance

  • The metaphorical representation of social interactions through the clustering and connecting of cells provided a thoughtful perspective on how individuals in society are interconnected. This aspect of the project goes beyond mere visual appeal, offering insights into the nature of social structures and interactions.

Final project draft: Many-worlds

Design Concept

Inspiration

Storyline and Artistic Intention

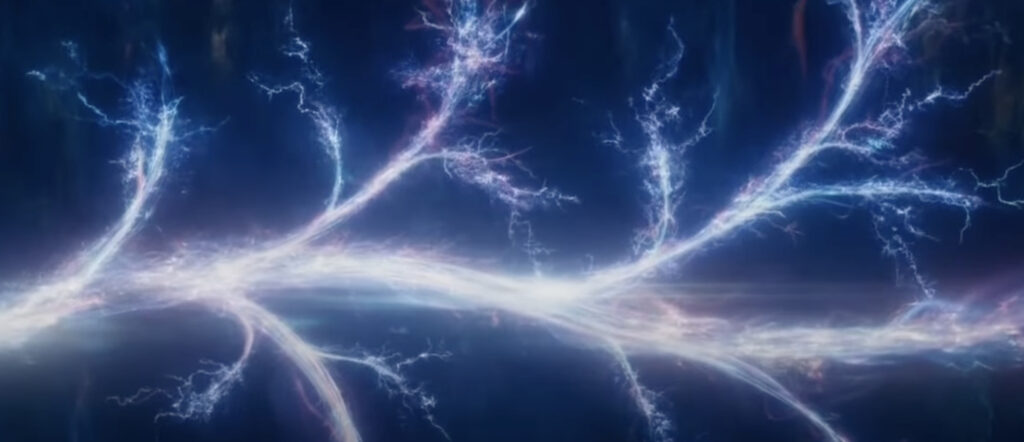
The core concept of this project is to visually explore the theories of multiverses and timelines in physics. Inspired by the idea that our universe is just one of many possible worlds, the project seeks to simulate the creation, divergence, and interaction of multiple timelines. Incorporating the butterfly effect, it demonstrates how minor decisions can lead to significant changes, emphasizing the interconnectedness and complexity of our universe.

Direction

The project will visually represent time as a network of lines, symbolizing different timelines that twist, intersect, and evolve. This ‘net of timelines’ will be dynamic, continuously changing and growing in response to user interactions.

Theories to be used

  1. Multiverse Theory:
    • Description: This theory suggests that there are multiple, perhaps infinite, universes coexisting alongside our own. Each universe within the multiverse can have different physical laws and fundamental constants.
    • Relation to Project: Representing each timeline as a part of a broader multiverse, where every decision branches out into a new universe or timeline.
  2. Many-Worlds Interpretation (MWI):
    • Description: An interpretation of quantum mechanics, MWI proposes that all possible alternative histories and futures are real and exist in a vast array of parallel universes.
    • Relation to Project: Simulation of the divergence of timelines in the canvas, reflecting the idea that every quantum event leads to a branching of the universe into a multitude of possible outcomes.
  3. Timeline Theory:
    • Description: This concept revolves around the notion of time as a linear or branching path, where events are ordered from past to future. It suggests that different choices or events can lead to different timelines.
    • Relation to Project: There will be a visual ‘net of timelines’ in my project that will embody this theory, with the user’s actions causing divergences and convergences in the timelines, illustrating how different choices can lead to different futures.
  4. Butterfly Effect:
    • Description: A principle of chaos theory stating that small causes can have large effects. The classic example is that the flap of a butterfly’s wings might ultimately cause a tornado.

Interaction Methodology

Chosen Interaction Method

The primary mode of interaction will be through a mouse. Users will influence the timeline network by clicking and dragging within the canvas.

Implementation Plan

  • Clicking on a blank area of the canvas will create a new timeline.
  • Dragging the mouse will cause the timelines to twist and merge.
  • Right-clicking (or a similar gesture) will allow users to erase or alter segments of the timelines.

Canvas Design

User-Interaction Instructions

Clear instructions will be provided on the canvas, guiding users on how to create, alter, and interact with the timelines.

Parameters and User Experience Plan

  • The canvas will be designed to be intuitive, with minimal instructions needed.
  • The parameters will include the thickness of the timelines, their color, and the degree to which they interact with each other.
  • A plan to guide the user experience will be illustrated, ensuring that the project is both visually captivating and easy to understand.

Sketch

Collision handling – week 10

To be very honest, I missed a lecture and was just trying to figure out how to use the basics of matter.js. I know for my final, I probably want something to be detected like a collision so I just played around with the different features such as gravity, collisions, ground or body.

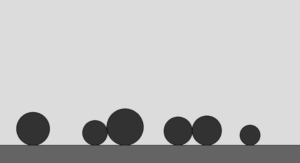
I started off with a very basic program that just had the ground and the circles wherever the user clicked the screen.

I then added some code to identify whenever there was a collision or when they are collided.

if (circle.collided) {
      fill(255, 0, 0); // Red if collided
    } else {
      fill(0, 150,0); // Green if not collided
    }
function collisionEvent(event) {
  let pairs = event.pairs;
  for (let i = 0; i < pairs.length; i++) {
    let bodyA = pairs[i].bodyA;
    let bodyB = pairs[i].bodyB;

    // Check for collisions involving circles
    if ((circles.includes(bodyA) || circles.includes(bodyB)) && !isGroundCollision(bodyA, bodyB)) {
      circles.forEach(circle => {
        if ((circle === bodyA || circle === bodyB) && circle.collided !== true) {
          circle.collided = true; // true for collisions 
        }
      });
    }
  }
}

function isGroundCollision(bodyA, bodyB) {
  return (bodyA === ground || bodyB === ground);
}


function collisionEndEvent(event) {
  let pairs = event.pairs;
  for (let i = 0; i < pairs.length; i++) {
    let bodyA = pairs[i].bodyA;
    let bodyB = pairs[i].bodyB;

    // Find collided bodies and reset their state
    circles.forEach(circle => {
      if (circle === bodyA || circle === bodyB) {
        circle.collided = false; // Reset collided state to false
      }
    });
  }
}

The code above is to show if the circles are touching as before, the ball touching the ground would be considered a collision which I did not want. I needed the code to also traceback and see if the circles don’t touch anymore, and if they do not touch anymore, the ball should be green again.

This was my final code.


Coding Assignment Week #10 – Program+Reading Reflection

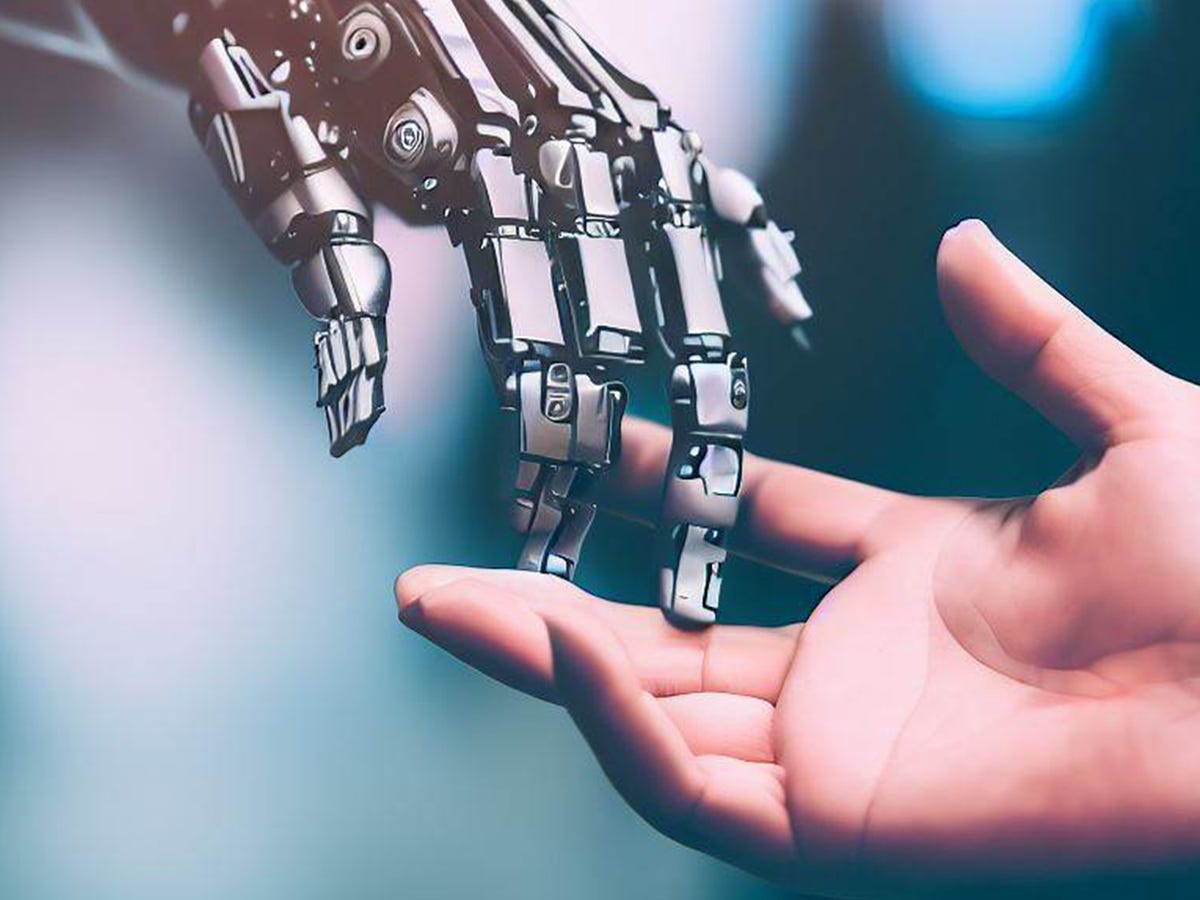
Alien Intelligence By Neil Leach: Reflection

In summary, Neil Leach’s lecture at thE FIU School of Architecture mainly revolves around the topics of what is AI, the future of AI, AI image generation, and predictions around the future of AI and architecture. One key concept Leach continues to shed light on is how AI holds this “kind of” intelligence, and it really is not the same as human intelligence at all, but is superior to our capabilities. Leach also brings up how AI could be invisible, and really all around us but we tend to naturally associate AI to physical or tangible things. One thing that leach brings up that I was thinking about before watching the lecture is how terrifying AI can be. Not because it possess capabilities to harm individuals or cause chaos, but more in the sense that it has overly fascinating and shocking capabilities, and I quote Leach’s words “Anything we can do, AI can do better”.

What is AI? Everything to know about artificial intelligence | ZDNET

Coding Assignment: Description 

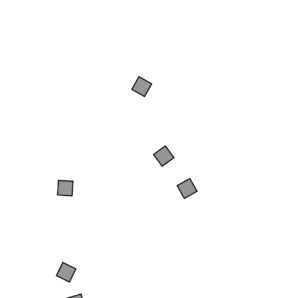
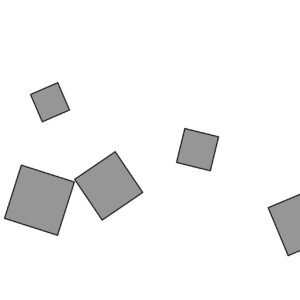
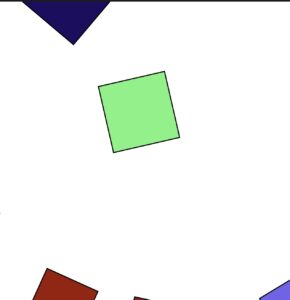
In this project I mainly use the Matter.js physics engine to create a program  where geometric shapes with random color. The main components consist of two classes: “Boundary” for creating static rectangular boundaries, and “CustomShape” for generating dynamic square objects with random attributes. The Matter.js engine mainly handles collisions and movements. The setup function initializes the canvas and Matter Engine, creating fixed boundaries within the canvas. The draw function continuously updates and displays the boundaries, shapes, and their interactions.

An Introduction to Matter.js

Beginning Sketches:

Final Program:

Reflections and Future improvements:

For this weeks coding assignment, I struggled a bit because I still find that the matter.js library and implementing it is new to me and I definitely need to practice and work on more programs utilizing it.

If I hopefully manage to improve my skills in using the library, since it can create very creative programs that are aesthetically pleasing, I plan to hopefully integrate it in my final project and see how it would work with other methods such as attraction, fleeing, seeking, etc.

Core Principles: Critical Reflection - Center for the Professional  Education of Teachers


Continue reading “Coding Assignment Week #10 – Program+Reading Reflection”

Week #10 Assignment: The Volcano by Abdelrahman Mallasi

Concept

This project aims to simulate a volcanic eruption using  Matter.js for physics. Particles representing lava are ejected with a mouse press. These particles are subject to gravity and collisions. Each particle changes color upon collision, enhancing the visual feedback of the simulation, visually indicating interactions between particles and their environment. There’s also the ability  for the user to add wind forces by pressing the spacebar.

The environment includes a triangular volcano and a ground set as static bodies in a physics world. Particles are initialized with an initial force applied to mimic the explosiveness of a volcanic eruption.

Embedded Code

Link to Sketch

Highlight of Code

Events.on(engine, 'collisionStart', function(event) {
    event.pairs.forEach(pair => {
 
        const { bodyA, bodyB } = pair;

        if (bodyA.render && bodyA.circleRadius) bodyA.render.fillStyle = color(random(255), random(255), random(255));
        if (bodyB.render && bodyB.circleRadius) bodyB.render.fillStyle = color(random(255), random(255), random(255));
    });
});

The above code is under the setup function and is responsible for the colour changing collisions. Let’s break it down:

  • Events.on(engine, ‘collisionStart’, function(event)): Sets up a ‘listener’ on the physics engine to react when two bodies collide
  • event.pairs.forEach(pair =>…): Iterates over each pair of colliding bodies in the collision event
  • const { bodyA, bodyB } = pair: Extracts the two colliding bodies from each pair.
  • if (bodyA.render && bodyA.circleRadius) bodyA.render.fillStyle = color(random(255), random(255), random(255)): bodyA’s color is changed to a new random color.
  • if (bodyB.render && bodyB.circleRadius) bodyB.render.fillStyle = color(random(255), random(255), random(255)): bodyA’s color is changed to a new random color.

Reflections and Future Additions

  • Working with Matter.js made the project both easier and more difficult to implement. It was quicker to use the predefined physics functions rather than hardcoding them from scratch. However, it was difficult getting used to another workspace with a whole new set of functions and elements.
  • Adding acoustic elements: It would exciting to have each collision create a unique sound, turning the simulation into a symphony of sorts. This auditory layer would  provide a more multi-sensory experience.