Project Concept:
This past summer, I had the incredible opportunity to spend time in Accra during a June term, and I quickly fell in love with the city. Everything about it—the culture, the people, the food, and even the clothing—felt so 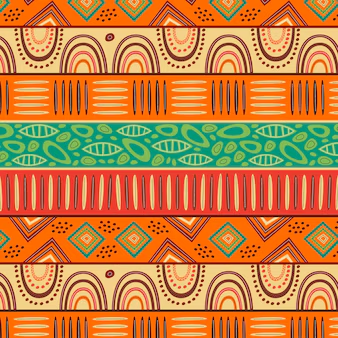 familiar, like a vibrant reflection of home. It was as if I had stepped into a living blueprint of my own country. The connections between Accra and home were unmistakable, especially in the patterns woven into the fabric of daily life.
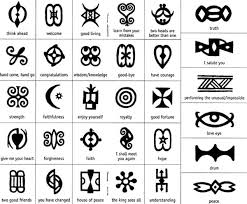
I found myself especially drawn to the Adinkra symbols, which originated from the Ashanti tribe. These symbols, while simple to the untrained eye, carry deep significance. They appear on fabrics, pottery, logos, and are even on walls as decor—integrated into everyday life with meaning and tradition. Although I cannot fully capture the weight of their history and symbolism, I have been deeply inspired by them.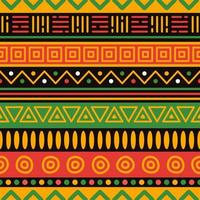
This project is my way of paying homage to these symbols by integrating their essence into a generative art form that reflects the patterns I admired so much.
Project Approach:
My goal is to create a dynamic, generative pattern that evolves with each click of the mouse. Not only will the patterns themselves change, but I also want the process to unfold visibly allowing the viewer to see the art as it’s being created. By adjusting the frame rate and tracking oscillations, I hope to give each sketch a sense of fluidity and movement.
The key elements of this project will be variations in color and symbol placement, ensuring that each generated pattern feels unique. While some patterns may repeat, my challenge is to make them complement one another seamlessly.
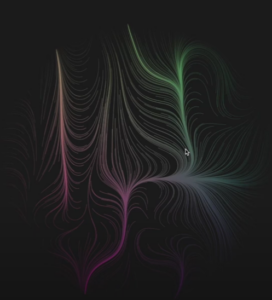
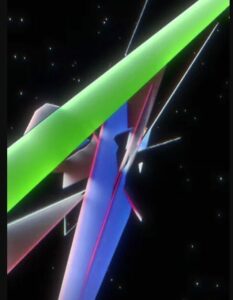
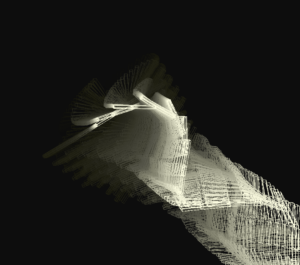
Embedded sketches:
code:
This is a piece of the code that I wrote that generates some of the patterns that you see in the sketches. Overall, I’m really proud of them so far but there are a lot of things that I want to add and possibly some things that I may remove as well. Currently, I’m working on some more patterns and continuing to test them within the code before I produce another sketch.
// Geometric Triangles
function drawGeometricTriangles(x, y, size) {
  let numTriangles = 5;
  let colorPick = random(colors);
  stroke(colorPick);
  noFill();

  let triangleSize = size;
  for (let i = 0; i < numTriangles; i++) {
    triangle(-triangleSize / 2, triangleSize / 2, triangleSize / 2, triangleSize / 2, 0, -triangleSize / 2);
    triangleSize *= 0.7;
  }
}

// Harmonic Motion Style Sine Waves
function drawSineWaves(x, y, size) {
  let waveHeight = size / 4;
  let frequency = 0.2;
  strokeWeight(2);
  noFill();

  beginShape();
  for (let i = 0; i < size; i++) {
    let xOffset = i;
    let yOffset = sin(i * frequency) * waveHeight;
    vertex(xOffset - size / 2, yOffset);
  }
  endShape();
}

// Nested Triangles
function drawNestedTriangles(x, y, size) {
  let triangleSize = size;
  noFill();
  stroke(random(colors));
  for (let i = 0; i < 4; i++) {
    triangle(-triangleSize / 2, triangleSize / 2, triangleSize / 2, triangleSize / 2, 0, -triangleSize / 2);
    triangleSize *= 0.7;
  }
}

// West African Symbols/Geometric Shapes
function drawSymbols(x, y, size) {
  noFill();
  let symbolSize = size * 0.6;
  stroke(random(colors));

  // Circle with horizontal/vertical line cross
  ellipse(0, 0, symbolSize, symbolSize);
  line(-symbolSize / 2, 0, symbolSize / 2, 0);
  line(0, -symbolSize / 2, 0, symbolSize / 2);

  // Small triangles within
  for (let i = 0; i < 3; i++) {
    let triSize = symbolSize * (0.3 - i * 0.1);
    triangle(0, -triSize / 2, triSize / 2, triSize / 2, -triSize / 2, triSize / 2);
  }
}

// Zebra Print
function drawZebraPrint(x, y, size) {
  let stripes = 10;
  for (let i = 0; i < stripes; i++) {
    let step = i * (size / stripes);
    line(-size / 2 + step, -size / 2, size / 2 - step, size / 2);
    line(size / 2 - step, -size / 2, -size / 2 + step, size / 2);
  }
}

// Diamonds within Diamonds
function drawDiamondsInDiamond(x, y, size) {
  let dSize = size;
  noFill();
  for (let i = 0; i < 5; i++) {
    beginShape();
    vertex(0, -dSize / 2);
    vertex(dSize / 2, 0);
    vertex(0, dSize / 2);
    vertex(-dSize / 2, 0);
    endShape(CLOSE);
    dSize *= 0.7;
  }
}

// Bezier Curves
function drawCurves(x, y, size) {
  noFill();
  strokeWeight(2);
  for (let i = 0; i < 6; i++) {
    bezier(-size / 2, -size / 2, random(-size, size), random(-size, size),
           random(-size, size), random(-size, size), size / 2, size / 2);
  }
}
Challenges:
The biggest challenge lies in generating patterns that I can feel genuinely proud of, especially given the personal connection I have to the source of inspiration. It’s a bit daunting to try and replicate the visual and symbolic depth of Adinkra, but I believe in trial and error as my guide. I’m starting by setting up a grid-based design in my sketches, generating initial patterns based on what we’ve learned in class. From there, I plan to randomly assign patterns to grid positions. The tricky part is not the overall pattern, but the design of each individual grid symbol—finding the balance between randomness and intentionality.
Risk Management:
To reduce the uncertainty, I simply dove in. I knew I wouldn’t find the right direction without first experimenting with the code. While the process is still evolving, I’m happy with some of the early results. I’m now focusing on refining the color combinations and continuing to develop patterns that are both visually compelling and meaningful. At the moment, I have two sketches—one that’s a modified version of the other—and I’m letting the process guide me, tweaking the code until I find something that truly resonates.