Week 4- DNA

Concept:

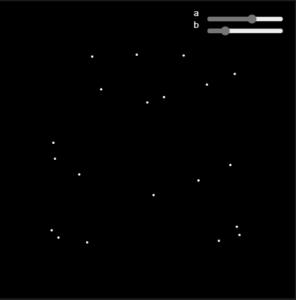
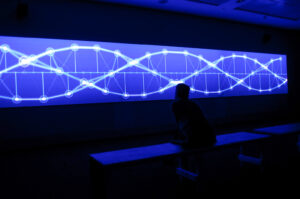
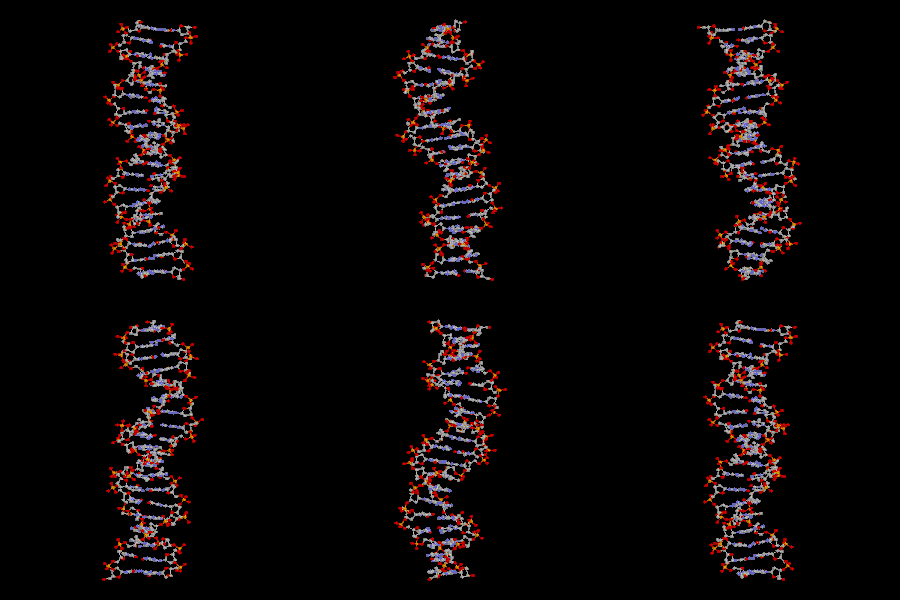
This week, we were tasked with gathering inspiration from Memo Akten’s work, focusing on visualizing simple harmonic motion (SHM). When I looked through his work I was reminded of the structure of DNA, with its two intertwining sine waves resembling the periodic motion characteristic of SHM. So, for my assignment I wanted to replicate that and try to mimic the movement and design of a DNA structure.
Key Features:

  • Sine Waves as DNA Backbones: Two sinusoidal waves form the backbone of the DNA structure. These waves oscillate vertically and reflect the nature of simple harmonic motion.
  • Bunched Particles: Along both sine waves, I added clusters of red particles to mimic the molecular bonds on a DNA strand, creating a more organic and dynamic feel.
  • Colorful Connecting Rungs: The colorful “rungs” between the two sine waves change color as they move along the structure, representing the diversity and vibrancy found in DNA.
  • 3D Rotation: The entire DNA strand rotates around the y-axis, adding a three-dimensional element to the animation.

embedded sketch:

Code I’m Most Proud Of:

I’m particularly proud of the code that generates the particles along the sine waves and the rungs. By combining randomness and structured positions, I was able to create visually interesting clusters that closely mimic the complexity of a DNA strand. Additionally, the color transitions in the connecting rungs add an appealing vibrancy to the piece, making it more engaging to look at.

// Function to draw bunched-up red particles along the sine waves
function drawParticles(x, y) {
  noStroke();
  fill(255, 0, 0);  // Red particles
  let numParticles = 5;  // Number of particles in each bunch
  let particleSize = 4;  // Size of each particle
  let spread = 5;  // Spread between particles in a bunch

  for (let i = 0; i < numParticles; i++) {
    // Create small offsets for the particles to make them appear bunched
    let offsetX = random(-spread, spread);
    let offsetY = random(-spread, spread);

    // Draw particle at each offset position
    ellipse(x + offsetX, y + offsetY, particleSize, particleSize);
  }
}

// Function to draw particles along the connecting strands (rungs)
function drawRungParticles(x1, x2, y) {
  noStroke();
  fill(0, 255, 0);  // Green particles for the connecting rungs
  let numRungParticles = 4;  // Number of particles along each rung
  let particleSize = 4;  // Size of each particle

  for (let i = 0; i < numRungParticles; i++) {
    // Calculate positions along the line between x1 and x2
    let t = i / (numRungParticles - 1);  // Normalize t to range [0, 1]
    let x = lerp(x1, x2, t);  // Linear interpolation between x1 and x2

    // Draw particle along the line connecting x1 and x2 (rung)
    ellipse(x, y, particleSize, particleSize);
  }
}

main functions:

  1. drawParticles():
    • Red Particles: Randomly places red particles along each sine wave.
    • Bunching: The function creates clusters of particles by adding random offsets (offsetX, offsetY) to the position. This simulates the bunched look of molecules along DNA strands.
  2. drawRungParticles():
    • Green Particles: Particles along the rungs (the connections between the two sine waves).
    • Structured Positions: The function calculates positions between the two sine waves using linear interpolation (lerp()), ensuring that the particles are evenly distributed along the connecting lines.

Reflections for Future Work:

In the future, I’d like to explore further how I can simulate more biological properties in this visualization. One idea is to add more complexity to the particles, making them behave like molecules interacting with one another. I also think it would be interesting to explore interactivity, where users can manipulate the DNA strand’s rotation, zoom, or even the particle behavior, allowing for a more immersive experience.

Week 4 | Lissajous Rainbows

Concept

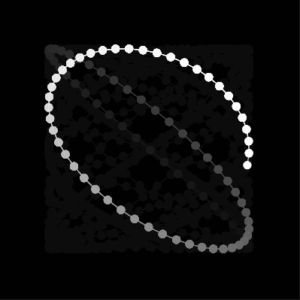
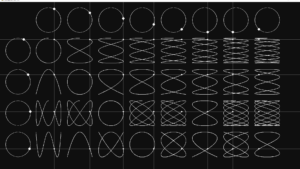
While scouring through the internet looking for harmonic motions, I stumbled upon a mathematical figure called the Lissajous Figures.  Essentially, we put a grid table of circles of both the x and y axes. Then, if we unite the value of just one axis of one dot on the top and the value of the other axis of a dot on the side, you’ll get the coordinates of the dot where the rows intersect. And since they are moving at different speeds they make shapes. This phenomenon was studied cohesively by mathematician Jules-Antoine Lissajous in 1857 (Wolfram).

The most basic use of Lissajous figures is as the phase-space plots of harmonic motion in multiple dimensions. In other words, we can observe the speed-location graphs of repeating motion in 2D, 3D and beyond by using this graph.

Sketch

Development & How it works

Initially, I followed Shiffman’s tutorial regarding this particular harmonic motion. However, after giving it some thought, I wanted to experiment with it further. Instead of having a line drawing the shapes, what if I used multiple ellipses connected by lines, to expand beyond the initial shapes?  To do that, I had to simplify the code from arrays into singular objects.

for (let i = 0; i < pointNum; i++) {
    // Added phase to smooth out things 
    var phase = i * TWO_PI / pointNum;

    // Calculating the x and y positions
    var x = 160 * sin(a * t * phase + PI / 2);
    var y = 160 * sin(b * t * phase);

By utilizing for loops and the mathematical formula of LIssajous’ pattern, I was able to get somewhat a series of ellipses drawing just like the pattern. However, it was not close enough to the smooth, harmonic-like motion that I was aiming for.

Next, I added a trail lines between each ellipses by storing the information of each lines in a trails array. Combined with an added RGB color based off the x and the y positions, we get something like the sketch above.

// Store the trail information
    var trail = {
      x: width / 2 + x,
      y: height / 2 + y,
      r: r,
      g: g,
      bColor: bColor,
      alpha: 255
    };

    trails.push(trail);
Challenges Faced & Future Improvements

One particular challenge that I faced was making the motion smoother. After a bit of messing around with fading background and what nots, I discovered that by adjusting the time increment (t +=) to a very little amount, we can essentially, slice down into the tiniest fraction of frames, which results in a super smooth motion that I envisioned.

Playing around with the alpha values of the lines also somewhat affected the entire ellipses and canvas too, which results in a visual that I wanted to avoid very much. For future improvements, I wanted to see how the figures could be affected by other waves, such that they resemble something else, while oscillating back into its original forms. Perhaps even accompany it with acoustics to make it more appealing.

Resources Used

Lissajous Table in Processing – Daniel Shiffman

About Lissajous Curve – Wolfram

Lissajous Curve Discussions – Reddit

Reading Lissajous – Flemming, J., and A. Hornes.

Week #4 – 2000s qwerty

Introduction

For this assignment, I tried to challenge myself a bit more by implementing a different concept. I spent some days thinking about what I could implement for this assignment, for example, I was thinking about making either an abstract pattern or a “musical face”. Although, one thought led to another, and I arrived at mechanical keyboards and the 2000s aesthetic!

Full-screen version: Full-screen version

The concept

Since in this week we saw the concepts of oscillation and, mainly, we had to be inspired by the artist Memo Akten, it was necessary to implement something similar. That means, almost synchronized movements via mathematical functions, and peaceful timed sounds.

As mentioned, I was thinking in implementing an abstract design, but I found myself more interested in creating a more cohesive canva. This cohesive design combines things I am fond of, which include 2000s aesthetics, nostalgia and computers.

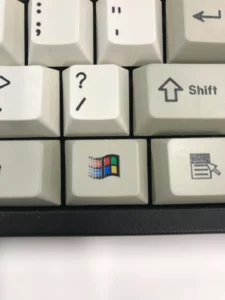
Old key caps.
Figure 1. 2000s keyboard uploaded by an anonymous user on r/MechanicalKeyboards.

Highlight of the code I am proud of

The main challenge of this code was to implement the sound system. I am not very proud of some parts of the code of this system, since I had to implement quick fixes. Nevertheless, one of the key features of this is that, according to the letter specified, it will assign a certain value to start the audio for the key, since all the sound effects are integrated into a single file.

Since all the system of the audio is distributed in the class Keycap, I will share the corresponding code.

class Keycap{
    constructor(x,y,letter){
        this.sound = loadSound("files/sound.ogg"); //The only solution to avoid overlaps and sudden sound stops was to do this.
        this.position = createVector(x,y);
        this.w = 40;
        this.h = 40;
        this.letter = letter;
        this.soundstart = 0;  //This variable will keep a value to jump the sound to play the sound.
        this.sound_played = 0;
        this.sound_time = 0; ///Check by how much time the sound played.
    }

    //Displays and also determines which sound to play according to the key cap.
    display(){
        push();
        noStroke();

        fill(235, 235);
        rect(this.position.x-5,this.position.y-2,this.w+10,this.h+10);

        fill(224, 223);
        rect(this.position.x,this.position.y,this.w,this.h);


        strokeWeight(30);
        textSize(23);
        fill(0);

        switch (this.letter) {
            case "q":
                text("q",this.position.x+15,this.position.y+25);
                this.soundstart = 2.90;
                break;
        
            case "w":
                text("w",this.position.x+15,this.position.y+25);
                this.soundstart = 4.90;
                break;

            case "e":
                text("e",this.position.x+15,this.position.y+25);
                this.soundstart = 5.90;
                break;
            
            case "r":
                text("r",this.position.x+15,this.position.y+25);
                this.soundstart = 6.90;
                break;

            case "t":
                text("t",this.position.x+15,this.position.y+25);
                this.soundstart = 7.90;
                break;

            case "y":
                text("y",this.position.x+15,this.position.y+25);
                this.soundstart = 8.90;
                break;

            default:
                break;
        }
        pop();
    }

    keypressed(){

        //Highlight that the key was pressed.
        push();
        strokeWeight(10);
        fill(235, 235, 235);
        rect(this.position.x-5,this.position.y-2,this.w+10,this.h+10);
        fill(235, 235, 235);
        rect(this.position.x,this.position.y,this.w,this.h);
        textSize(15);
        fill(0);
        pop();
    
        ///Then play a sound according to the letter.
        this.play_sound();
    }
  
    play_sound(){
      if (this.sound_played == 0){
        this.sound.play();
        this.sound.jump(this.soundstart);
        this.sound_played = 1;
      } 
    }
  
    stop_sound(){
        this.sound.stop();
        this.sound_played = 0;
      }
  
}

In a very summarized version, what is happening is the following:

      • According to the letter specified when creating the class, and in the constructor, it will go through a switch() case to determine the start point of the audio.
      • Once one of the moving rectangles enters one of the key caps (or the range of it), will activate the function keypressed().
      • Once keypressed() is started, it changes the visual design of the key caps for a short moment, to then play the sound via the function play_sound().
      • Once the function is called, it determines if the audio is currently playing via the variable this.sound_played, and once it is determined that it has not started, it will play using the specific start point. Likewise, to avoid overlapping, the audio then assigns this.sound_played to 1.
      • Once the moving rectangle leaves the area of the key cap, it calls the function stop_sound().

Reflection

Compared to last assignments, I am happy with the end result. It feels that the ideas that I wanted to implement on my mind could become real. Nevertheless, I would say that for future assignments I would like to improve upon the code, since I feel it is a bit redundant this time, as well as not very optimized.

References

    1. 17.3: Timing, Jumps and Cues – p5.js Sound Tutorial
    2. CherryMX Black – ABS keycaps
    3. JavaScript Switch Statement
    4. Late-night Sim City 2000
    5. text()
    6. Where can I get a windows keycap that looks like this?


Week 4 – Dancing Wave

Concept:

For this project, I was inspired by the Memo Akten Simple Harmonic Motion project. What stood out to me in this project was the sound and how particles would change if they approached a different line or object. For this project, I decided to experiment with a Dancing wave that would function similarly.

Highlight of code:

I had so many challenges in this code and debugging and figuring out the logic behind the functionality took me some time. There are many parts that I am proud of in this code. I am particularly the flow I created of the animated video.

rotate(PI / 3);

  for (let i = 0; i < angles.length; i++) {
    beginShape();
    for (let i = 0; i < angles.length; i++) {
      let y = map(sin(angles[i]), -1, 1, -150, 150);
      let x = map(i, 0, angles.length, -350, 350);

      let particleSize = r * 0.9; // Default particle size

      // Check if the particle touches the line (y is close to 0)
      if (abs(y) < 5) {
        //draw the shape gradually on canvas

        fill(touchedLineColor); // Change color when touching
        particleSize = r * 2.5; // Increase the size of the particle
      } else {
        fill(getWaveColor(y)); // Get color based on y value
      }

      stroke(getWaveColor(y));
      strokeWeight(1);
      line(cos(x), 0, x, y); // Draw line from middle to particle
      noStroke();
      circle(x, y, particleSize); // Draw the particle
      noFill();
      vertex(x, y);

      endShape();
    }
 angleV[i] = constrain(angleV[i], -0.01, 0.5);
    angles[i] -= angleV[i];
    angleV[i] += angleA[i];
  }
}

The video starts by drawing a simple line that has a sort of random noise. This line is the point of transformation of the color of particles when they touch it. Then, I drew the wave, which gradually increases its acceleration over time. I initially wanted the wave to appear on the canvas slowly before the animation started. I tried so many ways to do that, for instance, making a static wave, then adding the animated one on it, and creating nested loops; however, none of the ways worked, so I decided to improve on it in future work.
Additionally, I am proud of being able to check if the particles are close to the invisible line so that they change color and size. Even though, though it has a simple logic, figuring it out took some time.

Embedded Sketch:


Future Work:
For future work, I want to play more with the wave’s acceleration so that it would accelerate and decelerate when I want it. I also want to experiment with different waves to see the different esthetics I can create, and finally, adding the wave gradually into the canvas would be a strong attribute to the design of this animation.

Reference:

Colorful Coding. (2021, January 22). Simple sine wave animation in p5.js | Coding Project #11 [Video]. YouTube. https://www.youtube.com/watch?v=ktPnruyC6cc

Colorful Coding. (2021b, January 30). Circular perlin noise in p5.js | Coding Project #12 [Video]. YouTube. https://www.youtube.com/watch?v=0YvPgYDR1oM

The Coding Train. (2021a, January 26). 3.1 Angles and rotation – Nature of code [Video],3.1-3.9 . YouTube. https://www.youtube.com/watch?v=DMg-WRfNB60

Memo Akten, Mehmet Selim Akten, The Mega Super Awesome Visuals Company. (n.d.-b). Simple Harmonic Motion (2011-). Memo Akten | Mehmet Selim Akten | the Mega Super Awesome Visuals Company. https://www.memo.tv/works/simple-harmonic-motion/

https://p5js.org/reference/


Week 4 – Fourier Coloring by Dachi

Sketch: 

Example drawing

Concept Inspiration

My project was created with a focus on intersection of art and mathematics. I was particularly intrigued by the concept of Fourier transforms and their ability to break down complex patterns into simpler components. After seeing various implementations of Fourier drawings online, I was inspired to create my own version with a unique twist. I wanted to not only recreate drawings using Fourier series but also add an interactive coloring feature that would make the final result more visually appealing and engaging for users.

Process of Development

I began by following the Coding Train tutorial on Fourier transforms to implement the basic drawing and reconstruction functionality. This gave me a solid foundation to build upon. Once I had the core Fourier drawing working, I shifted my focus to developing the coloring aspect, which became my main contribution to the project.

The development process was iterative. I started with a simple algorithm to detect different sections of the drawing and then refined it over time. I experimented with various thresholds for determining when one section ends and another begins and worked on methods to close gaps between sections that should be connected. Even now, it is far from perfect but it does what I initially intended to.

How It Works

The application works in several stages:

  1. User Input: Users draw on a canvas using their mouse or touchscreen.
  2. Fourier Transform: The drawing is converted into a series of complex numbers and then transformed into the frequency domain using the Discrete Fourier Transform (DFT) algorithm. This part is largely based on the Coding Train tutorial.
  3. Drawing Reconstruction: The Fourier coefficients are used to recreate the drawing using a series of rotating circles (epicycles). The sum of all these rotations traces out a path that approximates the original drawing.
  4. Section Detection: My algorithm analyzes the original drawing to identify distinct sections based on the user’s drawing motion.
  5. Coloring: Each detected section is assigned a random color.
  6. Visualization: The reconstructed drawing is displayed, with each section filled in with its assigned color.
  7. Re: User is able to start the process again and creature unique coloring look.
  8. Save: User is able to save the image to their local machine.

Code I’m Proud Of

While the Fourier transform implementation was based on the tutorial, I’m particularly proud of the section detection and coloring algorithm I developed:


function detectSections(points) {
  let sections = [];
  let currentSection = [];
  let lastPoint = null;
  const distanceThreshold = 20;

  // Iterate over each point in the drawing
  for (let point of points) {
    if (lastPoint && dist(point.x, point.y, lastPoint.x, lastPoint.y) > distanceThreshold) {
      // If the distance between the current point and the last point exceeds the threshold,
      // consider it a new section and push the current section to the sections array
      if (currentSection.length > 0) {
        sections.push(currentSection);
        currentSection = [];
      }
    }
    // Add the current point to the current section
    currentSection.push(point);
    lastPoint = point;
  }

  // Push the last section to the sections array
  if (currentSection.length > 0) {
    sections.push(currentSection);
  }

  // Close gaps between sections by merging nearby sections
  return closeGapsBetweenSections(sections, distanceThreshold * 2);
}

function closeGapsBetweenSections(sections, maxGapSize) {
  let mergedSections = [];
  let currentMergedSection = sections[0];

  // Iterate over each section starting from the second section
  for (let i = 1; i < sections.length; i++) {
    let lastPoint = currentMergedSection[currentMergedSection.length - 1];
    let firstPointNextSection = sections[i][0];

    if (dist(lastPoint.x, lastPoint.y, firstPointNextSection.x, firstPointNextSection.y) <= maxGapSize) {
      // If the distance between the last point of the current merged section and the first point of the next section
      // is within the maxGapSize, merge the next section into the current merged section
      currentMergedSection = currentMergedSection.concat(sections[i]);
    } else {
      // If the distance exceeds the maxGapSize, push the current merged section to the mergedSections array
      // and start a new merged section with the next section
      mergedSections.push(currentMergedSection);
      currentMergedSection = sections[i];
    }
  }

  // Push the last merged section to the mergedSections array
  mergedSections.push(currentMergedSection);
  return mergedSections;
}

This algorithm detects separate sections in the drawing based on the distance between points, allowing for intuitive color separation. It also includes a method to close gaps between sections that are likely part of the same continuous line, which helps create more coherent colored areas.

Challenges

The main challenge I faced was implementing the coloring feature effectively. Determining where one section of the drawing ends and another begins was not straightforward, especially for complex drawings with overlapping lines or varying drawing speeds. I had to experiment with different distance thresholds to strike a balance between oversegmentation (too many small colored sections) and undersegmentation (not enough color variation).

Another challenge was ensuring that the coloring didn’t interfere with the Fourier reconstruction process. I needed to make sure that the section detection and coloring were applied to the original drawing data in a way that could be mapped onto the reconstructed Fourier drawing.

Reflection

This project was a valuable learning experience. It helped me understand how to apply mathematical concepts like Fourier transforms to create something visually interesting and interactive. While the core Fourier transform implementation was based on the tutorial, developing the coloring feature pushed me to think creatively about how to analyze and segment a drawing. Nevertheless, following tutorial also helped me comprehend mathematical side of the concept.

I gained insights into image processing techniques, particularly in terms of detecting continuity and breaks in line drawings. The project also improved my skills in working with canvas graphics and animation in JavaScript.

Moreover, this project taught me the importance of user experience in mathematical visualizations. Adding the coloring feature made the Fourier drawing process more engaging and accessible to users who might not be as interested in the underlying mathematics.


Future Improvements

Looking ahead, there are several ways I could enhance this project:

  1. User-defined Colors: Allow users to choose their own colors for sections instead of using random colors.
  2. Improved Section Detection: Implement more sophisticated algorithms for detecting drawing sections, possibly using machine learning techniques to better understand the user’s intent.
  3. Smooth Color Transitions: Add an option for smooth color gradients between sections instead of solid colors.
  4. Interactivity: Allow users to manipulate the colored sections after the drawing is complete, perhaps by dragging section boundaries or merging/splitting sections.
  5. Improved interface: make interface look more modern and polished.

References

  1. The Coding Train’s Fourier Transform tutorial by Daniel Shiffman
  2. P5.js documentation and examples
  3. Various online sources

Week 4 – Assignment

My goal was to use p5.js to build a dynamic visualisation of Simple Harmonic Motion (SHM), inspired by Memo Akten. Vibrant circles oscillate vertically in the sketch, adding to its visual attractiveness with a trace effect. The intention was to play with colour and motion while capturing the essence of oscillation’s beauty.

//Assignment 4 - SP
let numCircles = 15;
let circles = [];
let amplitude = 50; // maximum displacement
let frequency = 0.08; // speed of the motion

function setup() {
  createCanvas(400, 400);
  background(0); //
  for (let i = 0; i < numCircles; i++) {
    circles.push({
      x: width / 2 + (i - numCircles / 2) * 30,
      angle: random(TWO_PI),
      color: color(random(255), random(255), random(255)),
    });
  }
}

function draw() {
  fill(0, 20); // semi-transparent black
  rect(0, 0, width, height);

  for (let circle of circles) {
    // calculate y position using sine function
    let y = height / 2 + amplitude * sin(circle.angle);

    fill(circle.color);
    noStroke();
    ellipse(circle.x, y, 30, 30);

    // increment the angle to create motion
    circle.angle += frequency;
  }
}

Highlighted Code:

One part I’m particularly proud of is the fading background, which enhances the trace effect. The use of fill(0, 50) allows for gradual fading and creates a more immersive experience as the circles move.

Reflection:

This project taught me a lot about using p5.js for visualizations. I encountered challenges with managing the transparency and ensuring the circles maintained their vibrancy against the fading background.

For future iterations, I’d like to:

  • Experiment with varying the amplitude and frequency based on user input.
  • Add interactivity, such as changing colors or shapes when the mouse hovers over the circles.
  • Explore other wave patterns beyond simple harmonic motion.

Week 4: Simple Harmonic Motion

Concept:

For this week’s assignment, I used simple harmonic motion to create a cyclone-looking animation.

Cyclone - Wikipedia
from Wikipedia

Sketch:

Code snippet:

// circles re-iteration
  for (let i = 0; i < total; i++) {
    let y = map(sin(angles[i]), -1, 1, -100, 100);
    let x = map(i, 0, total, -200, 200);
    
    push(); // saves the current state
    
    stroke(235);
    rotate(angles[i]);
    circle(y, x, r);

    pop(0); //pop() restores the previous state after rotation is complete

    // incrementation
    let increment = TWO_PI / 60;
    angles[i] += increment;
  }

This part of the code continuously draws the circles to create the animation. I used push() and pop() to not affect other parts of the code.

Reflection and Improvements:

  • One of the difficulties I faced was getting the background to be a blue-ish color while also having it re-drawn to give the animation a fading effect.
  • For improvement, I would want it to look more like a cyclone and have some sort of user interaction. I would also add sounds to it.

Week 3 | I’ve come to bargain!

Check out the sketch here!
Concept & Inspiration

This weekend, a lot of things happened. Because some unfortunate things happened, I decided to re-watch a few Marvel movies. After this I got an inspiration for Week 3’s assignment to create an eye that looks like Dormamu’s, the main antagonist of Doctor Strange.

Sketch
How it works

A particle class called Particle takes a few arguments (position, velocity, color). Overall, the class defines the behavior of a particle in the sketch. It contains a display() method that checks whether the particle is in a certain position, within a certain distance from the attractor, and whether it should be reflected or not. The particle’s path is visualized as a line between its current and previous positions.

class Particle {
  constructor(pos, v, color) {
    this.pos = pos; //Current Position
    this.pos_before = pos; //Previous Position
    this.v = v; //Velocity
    this.a = createVector(0, 0); //Acceleration, starting at 0,0
    this.color = color; //Color
  }
display() {
push();
stroke(this.color.x, this.color.y, this.color.z); //Stroke color based on XYZ
line(this.pos.x, this.pos.y, this.pos_before.x, this.pos_before.y); //Line from current to prev. pos this gives a trail effect.
pop();

If a particle comes into contact with an attractor (the one in the middle), a reflection occurs:

  1. The particle is moved to the surface of the attractor by adjusting its position vector.
  2. The velocity vector is  (multiplied by -1), and the particle is slightly rotated to simulate a reflection angle.
  3. The velocity is also scaled down by multiplying 0.9 to simulate some loss of energy upon reflection.

The main sketch sets up the canvas, initializes particles, and controls their movement under the influence of gravity and collision dynamics. A central attractor is created as a rotating ring of gravitational points. Particles are randomly spawned outside the central attractor and move according to gravitational forces. Each particle reacts to the gravitational field by accelerating toward attractor points, and each particle can reflect off the surfaces of attractors if they collide.

Challenges and things to improve

I wanted to create a particle simulation that does not rely on particle systems. As an alternative, I relied mostly on arrays. Due to this, some calculations required me to deep dive into a bit of mathematics more than I initially planned. Also, initially, I wanted to make two eyes, but having two attractors provided to break the entire simulation, perhaps part of n-body problem characteristics. Thus, I did not want to go further into that concept.

Resources Used

Mutual Attraction – Daniel Shiffman

Inverse Square Law – Derek Owens

angleBetween – p5.js

rotate – p5.js

Moths to a Light Source

For this week’s assignment, the first thing I thought of when I saw “attractors,” I thought of moths and other insects flying around a light. Right outside my home’s front door is a light that always has bugs flying around it. Whenever I leave or return home, I see them while unlocking my front door. So, I decided I would try to emulate this with a program. It can be seen here:

Code on GitHub here.

The image in the background is the lamp in front of my house. Since I can’t easily get home from Abu Dhabi, I asked my brother to take a picture of it at night, while the light was on. The code is simple, it has a point that is an attractor and then a Moth class that will move towards and away from the light, simulating insects hovering around a light. I also added some random positioning when calculating the movement of the moths, to emulate the erratic way insects sometimes fly. The colors of the moths get lighter or darker depending on the distance from the light, to emulate actual light. I also tried to add wings to the moth that would constantly move. It’s not perfect, but it is at least somewhat animated. The moths also rotate themselves so they are always facing the light. This all can be seen here:

display(light) {
    noStroke();
    let distance = Math.abs(Math.sqrt(Math.pow(this.pos.x-light.pos.x, 2)+Math.pow(this.pos.y-light.pos.y, 2)))
    let theta = this.vel.heading() + PI / 2;
    map(distance, 0, height, 50, 200)
    fill(Math.abs(255-distance));
    push()
    translate(this.pos.x, this.pos.y)
    rotate(theta);
    ellipse(0, 0, this.size*0.6, this.size);
    if (this.counter%2 == 0) {
      rotate(290)
    } else {
      rotate(310)
    }
    fill(Math.abs(200-distance));
    ellipse(4, -2, this.size*0.8, this.size*0.5);
    ellipse(-4, -2, this.size*0.8, this.size*0.5);
    pop()
    this.counter++
  }

If I were to improve this, I think I would try to make the wings more accurate for the moths. Also, I would want to try making the movement better, perhaps adding variable speeds for the insects or allowing them to stop and land on the light, before taking off into flight again.

Attractors

Concept and Inspiration:

Clifford attractors are fascinating mathematical objects that produce intricate patterns when iteratively calculated. I was inspired by the work of Paul Bourke who uses similar concepts to create mesmerizing visuals.

Code Breakdown:

class Attractor {
  constructor() {
    // Generate random parameters for the attractor equation
    this.a = random(-2, 2);
    this.b = random(-2, 2);
    this.c = random(0.5, 2);
    this.d = random(0.5, 2);
    this.pos = createVector(0, 0); // Initial position

    // Assign two random colors for interpolation
    this.color1 = color(random(255), random(255), random(255));
    this.color2 = color(random(255), random(255), random(255));
  }

  update() {
    // Calculate the next position based on the attractor equation
    let xNext = sin(this.a * this.pos.y) + this.c * cos(this.a * this.pos.x);
    let yNext = sin(this.b * this.pos.x) + this.d * cos(this.b * this.pos.y);
    this.pos.set(xNext, yNext);
  }

  show() {
    // Map the attractor's position to screen coordinates
    let xScreen = map(this.pos.x, -3, 3, 0, width);
    let yScreen = map(this.pos.y, -3, 3, 0, height);

    // Interpolate between the two colors based on position magnitude
    let lerpAmount = map(this.pos.mag(), 0, 5, 0, 1);
    let lerpedColor = lerpColor(this.color1, this.color2, lerpAmount);

    stroke(lerpedColor); // Set the stroke color
    point(xScreen, yScreen); // Draw a point at the calculated position
  }
}

let attractors = [];

function setup() {
  createCanvas(400, 400);
  background(220);

  // Create an array of attractors
  for (let i = 0; i < 5; i++) {
    attractors.push(new Attractor());
  }
}

function draw() {
  background(220, 10); // Fade the background slightly

  for (let attractor of attractors) {
    for (let i = 0; i < 100; i++) {
      attractor.update();
      attractor.show();
    }
  }
}

function mousePressed() {
  if (mouseButton === LEFT) {
    attractors = []; // Clear existing attractors
    for (let i = 0; i < 5; i++) {
      attractors.push(new Attractor());
    }
  }
}

Highlight:

I’m particularly proud of the show() function, which handles the color interpolation based on the attractor’s position. This creates a smooth transition between two randomly generated colors, adding depth and visual interest to the patterns.

Embedded Sketch: (click screen to render new art)

Reflection and Future Work:

This project was a fun exploration of generative art and p5.js.

Future improvements:

  • User Interaction: Allow users to interact with the sketch by changing parameters or adding new attractors.

  • Animation: Introduce animation to the attractors, making them move or change over time.

Problems Encountered:

  • Visual Fidelity: Finding a good balance of colors was challenging. As well, when rendering, the images come out very grainy. I must experiment further to see if that can be improved

  • Performance: With a large number of attractors, the sketch can become slow. I might explore optimization techniques to improve performance.

Overall, this project was a rewarding experience that allowed me to learn more about generative art and p5.js.

Works cited:

Clifford Attractors : r/p5js (reddit.com)

Clifford Attractors (paulbourke.net)