
Concept: 
My concept is an interactive electric fan. The user can control its movement using the right or left arrow buttons so it would move clockwise or anti-clockwise accordingly.
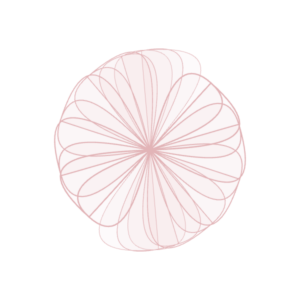
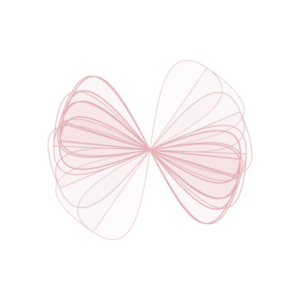
Sketch:
Sketch images:
Code logic:
In the sketch.js file:
- The text giving instructions to the user fades after 7 milliseconds.
- New blades are created and added to the array. The ones in the front are shorter and the ones in the back are longer.
- Fan accelerates right on right arrow click and accelerates left on left arrow click.
- Friction force slows it down gradually when no key is pressed.
- The velocity is limited to 0.3 so that it does not move too fast.
In the blade.js file:
The blade class contains all the functions needed for a single blade.
constructor:
- Includes length and phase offset for the wave.
drawBlade:
- Rotates the blade continuously using sin combined with amplitude.
- Draws the bezier curve’s control points using vectors.
Concepts used from class:
- Vectors
- Forces (Friction)
- Oscillation
Challenges and reference:
- It was quite challenging to figure out how to draw vectors as the bezier curve’s control points. For that, I watched this video which helped with that.
// use vectors for bezier control points
let lenVector = createVector(this.length / 4, 1); // base vector for length
for (let j = 0; j < 4; j++) {
  let curveOffset = map(j, 0, 4, -this.length / 2, this.length / 2);
  let controlPoint1 = lenVector.copy().mult(-1);   // start of the bezier
  let controlPoint2 = createVector(-this.length / 4, curveOffset); // control point 1
  let controlPoint3 = createVector(this.length / 4, -curveOffset); // control point 2
  let controlPoint4 = lenVector.copy();            // end of the bezier

  // draw the bezier curve using vector points
  bezier(
    controlPoint1.x, controlPoint1.y,
    controlPoint2.x, controlPoint2.y,
    controlPoint3.x, controlPoint3.y,
    controlPoint4.x, controlPoint4.y
  );
}
Pen plotting:
-
- For the pen plotting, I had to modify many things from my initial sketch (shown below). This one had many different opacity levels and colors that would not be ideal to plot.
- Instead, I modified the sketch to be much simpler, with curves instead of rectangles and without the fading effect. This turned out to be a better version to plot on the pen plotter. I also removed the filled color just for the pen plotting purposes.
Future improvements:
As an improvement, it would be nice to connect it to an arduino and create a DIY fan that would move based on the key input that the user chooses.