IM Showcase
Design Concept
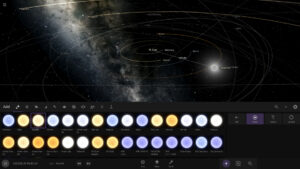
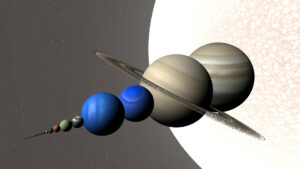
The project “Gravity Dance” aims to create an immersive simulation that explores the graceful and sometimes chaotic interactions within a celestial system. The inspiration comes from the game Universe Sandbox where you can play around with the solar system as a whole.
Project Overview
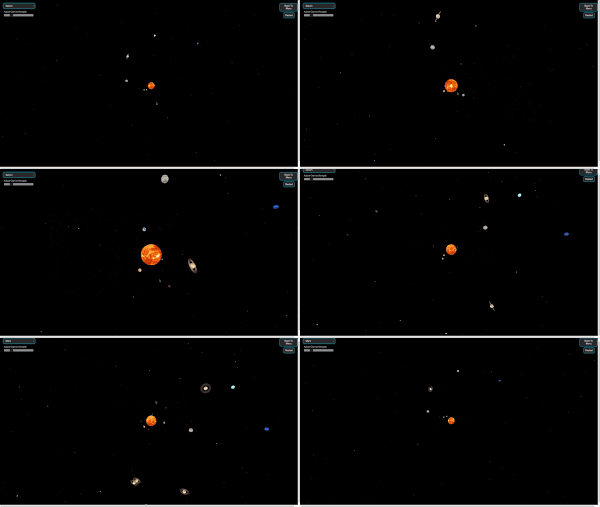
This project is a dynamic and interactive solar system simulation, where users can explore and engage with a digital recreation of the solar system. The simulation features 3D rendering, interactive planet placement, gravity manipulation, and a variety of other visual effects to create an immersive experience. Through this project, the user can visualize celestial bodies in motion, experience gravitational forces, and even interact with the simulation by selecting and placing new planets into the system.
Key Features
- 3D Solar System:
- The simulation includes a central sun and planets arranged based on their real-world distances and sizes.
- Users can observe the orbital motion of the planets around the sun, visualized in a 3D space environment.
- Planetary Interaction:
- The simulation allows the user to add new planets to the existing solar system, and each newly added planet exerts gravitational forces on other planets in the system.
- The gravitational forces dynamically affect the orbits of all planets, including both the pre-existing planets and the newly placed ones, making the system behave as a physically accurate model of the solar system.
- Gravity Control:
- A gravity slider allows users to adjust the gravitational strength of any newly added planets. This affects the force of gravity that the planet exerts on the other planets in the system, allowing the user to experiment with different gravitational strengths and see the effects on the orbits in real time.
- Planet Selection and Placement:
- A dropdown menu enables users to select from a range of planets (Earth, Mars, Jupiter, etc.). When a planet is selected, the user can click to place the planet in the simulation, where it will orbit the sun and interact with other celestial bodies.
- The planets are rendered with realistic textures (such as Earth’s surface, Mars’ red color, and Saturn’s rings), adding to the visual realism of the simulation.
- Visual Effects:
- The background features a dynamic starry sky, created using a cellular automata system that simulates star movement.
- Shooting stars are randomly generated across the simulation, adding further interactivity and realism.
- The planets themselves are visually rendered with rotating textures and effects, such as the Earth rotating to show its day/night cycle and Saturn’s rotating rings.
- Interactivity and Controls:
- The simulation allows the user to zoom in and out, rotate the camera, and drag the view to explore different angles of the solar system.
- A “Start” button launches the simulation, a “Back to Menu” button lets the user return to the main menu, and the “Restart” button resets the entire simulation, clearing all planets and stars.
- Responsive Design:
- The canvas and controls are designed to adjust dynamically to the screen size, ensuring that the simulation is functional and visually consistent across different device types and screen sizes.
- User Experience:
- The user interface is clean and easy to navigate, with buttons for various actions (fullscreen, back to menu, restart) and a gravity control slider.
- Planet selection and placement are simple and intuitive, and users are provided with clear instructions on how to interact with the simulation.
Technical Implementations
The Solar System Simulation integrates several technical concepts such as 3D rendering, gravitational physics, interactive controls, and dynamic object handling. Below, I’ll discuss some of the key technical aspects of the implementation, illustrated with code snippets from different sections.
1. 3D Rendering with p5.js
The entire simulation is rendered using p5.js’ WEBGL mode, which enables 3D rendering. The canvas size is dynamic, adjusting to the screen size to ensure that the simulation works well on various devices.
function setup() {
    createCanvas(windowWidth, windowHeight, WEBGL); // Use WEBGL for 3D rendering
    frameRate(30); // Set the frame rate to 30 frames per second
}
In the setup() function, I created a 3D canvas using createCanvas(windowWidth, windowHeight, WEBGL). The WEBGL parameter tells p5.js to render 3D content, which is essential for representing planets, orbits, and other 3D objects in the solar system.
2. Planet Placement and Gravitational Physics
Each planet’s position is calculated in 3D space, and they orbit the sun using Newtonian gravity principles. The gravitational force is computed between the sun and each planet, and between planets, influencing their movement.
planetData.forEach((planet, index) => {
    let angle = index * (PI / 4); // Evenly space planets
    let planetPos = p5.Vector.fromAngle(angle).mult(planet.distance);
    let distance = planetPos.mag();
    let speed = sqrt((G * sunMass) / distance); // Orbital speed based on gravity
    let velocity = planetPos.copy().rotate(HALF_PI).normalize().mult(speed);

    planets.push(new Planet(planetPos.x, planetPos.y, 0, planet.mass * 2, velocity, planet.name, planet.color, planet.radius));
});
Here, I iterate over the planetData array, calculating the initial position and velocity of each planet based on their distance from the sun. The planets are arranged in a circular orbit using trigonometric functions (p5.Vector.fromAngle) and are given initial velocity based on gravitational dynamics (speed = sqrt ((G * sunMass) / distance )).
3. User Interaction: Adding Planets
The user can click to place a planet into the simulation. The mouse position is mapped to 3D coordinates in the simulation, and the selected planet’s gravitational force is applied to other planets in real-time.
function mousePressed() {
    if (mouseButton === LEFT && !isMouseOverDropdown() && !isMouseOverSlider()) {
        let planetDataObject = planetData.find((planet) => planet.name === selectedPlanet);
        if (planetDataObject) {
            let planetMass = planetDataObject.mass * 2; // Adjust mass using gravity slider
            let planetColor = planetDataObject.color;
            let planetRadius = planetDataObject.radius;

            // Convert mouse position to 3D space using raycasting
            let planetPos = screenToWorld(mouseX, mouseY);

            // Set initial velocity to simulate orbit
            let initialVelocity = createVector(-planetPos.y, planetPos.x, 0).normalize().mult(10);

            planets.push(new Planet(planetPos.x, planetPos.y, planetPos.z, planetMass, initialVelocity, selectedPlanet, planetColor, planetRadius));
        }
    }
}
The mousePressed() function checks if the user clicks the canvas and places a planet at the clicked position. The screenToWorld() function maps the 2D mouse coordinates to 3D space. The planet is then added with initial velocity to simulate its orbit around the sun.
4. Gravitational Force Calculation
Each planet is affected by gravitational forces, both from the sun and other planets. The gravitational force between two bodies is calculated using Newton’s law of gravitation. The force is then applied to the planet to adjust its acceleration and velocity.
xapplyForce(force) {
    let f = p5.Vector.div(force, this.mass); // Calculate acceleration based on force and mass
    this.acc.add(f); // Add the acceleration to the planet's total acceleration
}

update() {
    this.acc.set(0, 0, 0); // Reset acceleration

    // Calculate gravitational force from the sun
    let sunForce = p5.Vector.sub(createVector(0, 0, 0), this.pos);
    let sunDistance = constrain(sunForce.magSq(), (this.radius + sunSize) ** 2, Infinity);
    sunForce.setMag((G * sunMass * this.mass) / sunDistance);
    this.applyForce(sunForce); // Apply the force from the sun

    // Calculate gravitational force between this planet and all other planets
    planets.forEach(other => {
        if (other !== this) {
            let distance = this.pos.dist(other.pos);
            if (distance < this.radius + other.radius) {
                this.resolveCollision(other); // Resolve collision if planets collide
            }
        }
    });

    // Update velocity and position based on applied forces
    this.vel.add(this.acc); // Update velocity
    this.pos.add(this.vel); // Update position
}
In the update() method, the planet is subjected to gravitational forces from the sun, and the distance and mass are used to compute the force. The applyforce() method is used to apply this force to the planet, which updates its acceleration, velocity, and position.
5. Planet Collisions
Planets in the simulation can collide with one another. When a collision occurs, the velocities of the planets are adjusted based on their masses and the physics of the collision.
resolveCollision(other) {
    let normal = p5.Vector.sub(this.pos, other.pos); // Calculate direction vector between two planets
    normal.normalize();

    let relativeVelocity = p5.Vector.sub(this.vel, other.vel); // Calculate relative velocity
    let speedAlongNormal = relativeVelocity.dot(normal); // Find velocity along the collision normal

    if (speedAlongNormal > 0) return; // If planets are moving away from each other, no collision

    // Calculate the impulse to apply based on the restitution factor and masses
    let restitution = 0.1; // Coefficient of restitution (bounciness)
    let impulseMagnitude = (-speedAlongNormal * (1 + restitution)) / (1 / this.mass + 1 / other.mass);
    impulseMagnitude *= 0.1; // Scale down the impulse to make the collision lighter

    let impulse = p5.Vector.mult(normal, impulseMagnitude); // Calculate the impulse vector

    // Apply the impulse to the planets' velocities
    this.vel.add(p5.Vector.div(impulse, this.mass));
    other.vel.sub(p5.Vector.div(impulse, other.mass));
}
When a collision occurs, the resolveCollision() method is called. It calculates the normal vector (direction of the collision) and the relative velocity between the two planets. Using this, it computes an impulse (force) to apply to the planets to change their velocities, simulating a physical collision.
6. Visual Representation of Planets
Each planet’s visual representation depends on its name, with textures applied to different planets (e.g., Earth, Mars, Jupiter). The display() method renders the planet in 3D space and applies the corresponding texture to each planet.
display() {
    push(); // Save the current transformation state

    translate(this.pos.x, this.pos.y, this.pos.z); // Move the planet to its position in space

    noStroke(); // Disable outline for planets

    if (this.name === "Earth") {
        rotateY(frameCount * 0.01); // Rotate Earth for a spinning effect
        texture(Earth); // Apply Earth texture
        sphere(this.radius); // Draw Earth
        texture(clouds); // Apply clouds texture
        sphere(this.radius + 0.2); // Draw slightly larger cloud layer on top
    }
    // Handle other planets like Mars, Jupiter, Saturn similarly with textures
    pop(); // Restore the previous transformation state
}
The display() method checks the planet’s name and applies the appropriate texture. It uses the rotate() function to rotate the planet (for a day/night cycle effect) and the sphere() function to draw the planet in 3D.
Project Reflection
When I began working on this solar system simulation project, it started with a very basic and simple concept: to simulate gravitational forces and planetary motion in a 2D space. The goal was to create a static representation of how gravity influences the orbits of planets around a central star, with the ability for users to add planets and observe their behavior. The initial version of the project was functional but fairly rudimentary.
Initial State: Basic Gravitational Simulation
First Sketch
The first iteration of the project was minimalistic, with just a few lines of code that allowed for the creation of planets with a mouse click. These planets moved under the influence of a simple gravitational force, pulling them toward a central sun. The planets were drawn as basic circles, with their movement governed by the gravitational pull of the sun based on Newton’s law of gravitation. The background featured a cellular automata effect to simulate the stars in space.
At this stage, the simulation was static and lacked much interactivity beyond adding new planets. The gravitational interactions were limited to just the planet and the sun, with no other planetary interactions, making the system unrealistic and overly simplified.
Midway Evolution: Transition to 3D and Planetary Interactions
Second Sketch
As I progressed with the project, I realized that the 2D view was restrictive and did not provide the immersive experience that I was hoping for. I wanted users to experience the simulation from different angles and explore the solar system in a more interactive manner. This led to the transition from 2D to 3D, which was a major milestone in the development of the simulation.
The introduction of 3D rendering using p5.js’ WEBGL was a game-changer. It allowed me to visualize the planets, the sun, and their orbits in three-dimensional space, adding depth and realism to the simulation. The users were now able to zoom in, rotate, and interact with the solar system in ways that made the experience more engaging. Planets were not just static objects—they were part of a dynamic, interactive system.
Additionally, I implemented gravitational interactions between all planets, which was a significant step forward. In the earlier version, the planets were only influenced by the sun. However, as I added more planets to the simulation, I wanted them to interact with each other as well. This was crucial for making the simulation feel more like a real solar system, where planets’ movements are constantly affected by one another’s gravitational pull.
Further Enhancements: User Interaction and Control
Third Sketch (Draft)
As the project became more sophisticated, I added features that enabled users to interact with the simulation in a more hands-on way. One of the key features was the planet selection dropdown and the gravity slider. The user could now choose which planet to add to the simulation and adjust its gravitational strength, adding a layer of customization and experimentation.
The gravity slider allowed the user to adjust the gravitational force applied by newly spawned planets. This made the simulation more dynamic and responsive to the user’s input, allowing for different behaviors depending on the gravity settings.
I also implemented a menu system with options for starting, restarting, and going fullscreen, providing a user-friendly interface. This made the project more polished and intuitive, inviting users to experiment with the solar system’s dynamics in a more controlled environment.
Final State: A Fully Interactive and Realistic Solar System
Final Version
– Best to use a mouse
By the end of the development process, the project had transformed from a basic 2D simulation to a fully interactive and immersive 3D solar system.
Users could now:
- Select and add planets to the system.
- Adjust the gravity of newly spawned planets.
- Rotate, zoom, and explore the solar system from different angles.
- Watch the gravitational forces between planets affect their orbits in real time.
The solar system simulation was no longer just a visual tool—it had become an interactive learning experience. It demonstrated the complexity of gravitational interactions and the dynamic nature of planetary orbits in a way that was both educational and engaging.
The project’s evolution also highlighted the importance of user feedback and iteration. As the project progressed, I continuously added features based on my initial goals, iterating on the design to make it more interactive and realistic. The journey from a static gravitational simulation to a dynamic, interactive 3D solar system was an incredibly valuable learning experience.
Feedback and Reflection
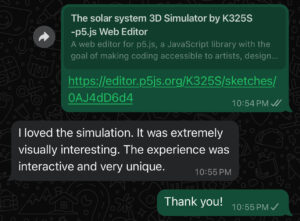
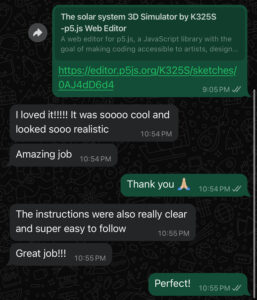
After completing the solar system simulation project, I decided to share it with a few friends to gather feedback on the final product. The responses were overwhelmingly positive, which was incredibly encouraging.
Conclusion: The Journey from Concept to Completion
Reflecting on the project, it’s clear that it has come a long way from its humble beginnings. What started as a simple 2D simulation with basic gravitational physics has evolved into a fully interactive 3D simulation, with realistic planetary interactions and user control. This transformation highlights the importance of iterative development, where each small change builds on the previous one, resulting in a more sophisticated and polished final product.
The project not only deepened my understanding of gravitational mechanics but also taught me important lessons in user interface design, interactivity, and the power of simulation to convey complex concepts in an engaging way.
Future Improvements
While the current solar system simulation offers a solid foundation for understanding gravitational interactions, there are several ways it can be further enhanced to provide a richer and more interactive experience. Some potential future improvements include:
- Improved Orbital Mechanics
- Interactive Space Exploration: The simulation could allow users to interact with planets more directly by traveling through space.
- Expansion to Other Star Systems
- Performance Optimization
Sources Used:
- https://www.solarsystemscope.com/textures/
- https://webglfundamentals.org/
