
Embedded Sketch and Link
https://editor.p5js.org/ss14740/sketches/HiD0F6V9R
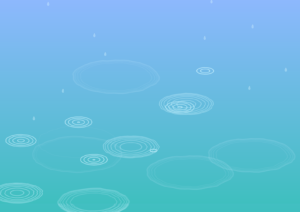
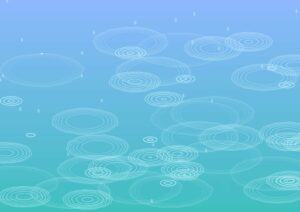
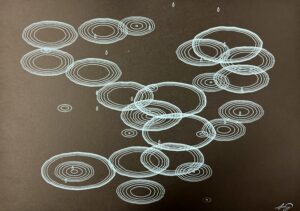
Exported Images
Concept and Artistic Vision
At first, I was inspired by the concept of identity and was attempting to create fingerprint patterns. However, I couldn’t get the shape to look the way I wanted to. Here is my sketch.

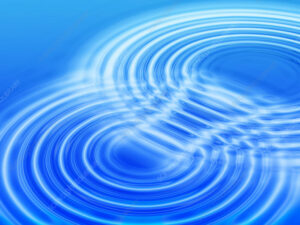
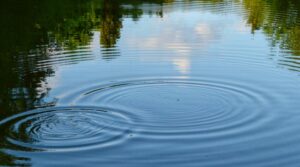
Although I am proud of the work I put into the fingerprints, but they did not have the organic shape I wanted, and I couldn’t figure out how to generative movement while still making the sketch feel natural and organic. In brainstorming other ideas, I revisited my other sketches for this class. Many of my sketches were of natural elements. I think it’s interesting to use computation to create more fluid, nature-related objects. So, I re-imagined my midterm to show rain falling on a lake, and the creation of the ripples to be the main artistic element of my sketch. Here are some of the images I was inspired by.
Luckily, I was able to draw from my previous draft in creating the new sketch, as both shared the same logic in creating the circular shapes and in modifying these shapes with Perlin noise.
Coding Translation and Logic
I planned the sketch by first modifying my fingerprint sketch to create the ripples. I created a class for the ripples and a class for the raindrops, as these were my main two elements
class Raindrop {
  constructor(x, y) {
    this.pos = createVector(x, y); // Initial position
    this.size = 15; // Size of the raindrop
    this.speed = random(initialRaindropSpeedRange[0], initialRaindropSpeedRange[1]); // Random speed
    this.acceleration = 1.2; // Acceleration (gravity)
    this.targetY = random(height / 6, height); // Random point at which raindrop will stop
  }

  update() {
    this.speed += this.acceleration; // Increase speed due to acceleration (gravity)
    this.pos.y += this.speed; // Move the raindrop down by updating its y-coordinate

    // If mouse is pressed, make the raindrop fall faster
    if (mouseIsPressed) {
      this.speed = random(10, 15);
    } else {
      this.speed = constrain(this.speed, initialRaindropSpeedRange[0], initialRaindropSpeedRange[1]);
    }
  }

  display() {
    fill(201, 243, 255, 100); // Light blue, semi-transparent fill
    stroke(255); // White stroke
    strokeWeight(0.2); // Thin stroke weight

    // Draw a bezier curve to represent the raindrop's shape
    beginShape();
    vertex(this.pos.x, this.pos.y);
    bezierVertex(this.pos.x - this.size / 2, this.pos.y + this.size, this.pos.x + this.size / 2, this.pos.y + this.size, this.pos.x, this.pos.y);
    endShape(CLOSE);
  }

  hitsBottom() {
    return this.pos.y >= this.targetY; // Checks if the raindrop has reached the target Y position
  }
}
In the Raindrop class, I initialized all the elements to the raindrop. I made the speed random and added acceleration as each raindrop falls so it creates a more natural effect. When the mouse is pressed, the raindrops fall faster, creating a rainstorm-like effect. The shape of the raindrops are created with bezierVertex so that they look fluid. If the raindrop returns true that it hit the ‘ground’, then a ripple is created.
class Ripple {
  constructor(x, y) {
    this.pos = createVector(x, y);
    this.size = 0;
    this.alpha = 230; // Initial transparency
    this.growthRate = 2; // How fast the ripple grows
    this.fadeRate = 4; // How fast the ripple fades
    this.layers = 6; // Number of ripple layers
    this.wideningFactor = 1.1; // Factor to widen the ripple's oval shape
  }

  update() {
    // Increase ripple size
    this.size += this.growthRate;
    // Decrease transparency so ripple fades out
    this.alpha -= this.fadeRate;
  }

  display() {
    noFill();
    stroke(201, 243, 255, this.alpha);
    strokeWeight(2);

    // Draw multiple layers of ripples
    for (let i = 0; i < this.layers; i++) {
      let layerSize = this.size - i * 10;
      let widening = pow(this.wideningFactor, i); // Widen each subsequent ripple
      if (layerSize > 0) {
        this.drawOvalRipple(layerSize * 2 * widening, layerSize * widening); // Draw each ripple layer
      }
    }
  }

  // Draw ripples with distortion using Perlin noise
  drawOvalRipple(ovalWidth, ovalHeight) {
    beginShape();
    for (let angle = 0; angle < TWO_PI; angle += 0.1) {
      let xoff = cos(angle) * 5; // X offset for Perlin noise
      let yoff = sin(angle) * 5; // Y offset for Perlin noise

      // Apply Perlin noise to distort the ripple shape
      let distortion = map(noise(xoff + this.size * noiseScale, yoff + this.size * noiseScale), 0, 1, 0.95, 1.05);

      // Calculate the X and Y coordinates for the ripple based on the oval's size and the distortion
      let x = this.pos.x + (ovalWidth / 2 * cos(angle)) * distortion;
      let y = this.pos.y + (ovalHeight / 2 * sin(angle)) * distortion;

      vertex(x, y); // Add vertex to the shape
    }
    endShape(CLOSE);
  }

  // Check if the ripple is fully faded
  isDone() {
    return this.alpha <= 0;
  }
}
In the Ripple class, I initialized all the elements to the ripple. I updated the ripple’s size and level of opacity. I drew multiple layers of ripples, with each growing larger. Each ripple has Perlin noise applied to it to distort the shape and make it look more organic. If the ripple is fully faded, it is removed from the simulation. In the draw function, I used ‘splice’ to remove each ripple and raindrop from their respective arrays.
Challenges
I wanted to make the background more interesting and fluid. Instead of just having a one colour background, I want to make a gradient background of two colours. Although this is usually a simple process that I have worked with in the past, I found it hard to implement into my code as my code worked with objects that changed and moved. This meant I needed to find a way to the gradient to be drawn as the background without affecting the raindrop or ripple objects (both objects have transparency to them and thus are visually effected) To do this, I drew the gradient on PGraphics (gradientBG) rather than directly onto the canvas. This way, the gradient is stored and I don’t need to redraw it every frame. In the draw function the gradient is applied using “image(gradientBG, 0, 0)”.
Pen Plotting
I did not have to change my sketch for the pen plotting. The process was enjoyable and informative, as it was my first time using a pen plotter. One improvement that I think could have been made is drawing different layers, and using a light colour for some of the individual ripples, as in the code the ripples become lighter in colour as they fade out. Here is my pen plot and the video of the process.
Future Improvements
To improve this project, I would add rainfall sounds and music in the back to create a calming ambiance. I would create other objects to add to the ambiance, such as lily pads or lake animals. I would also create a boundary for each ripple, and modify the ripples when they collide with each other, such as increasing the Perlin noise. I was attempting to do this, but kept running into errors/having glitches.