Final Project – Pearls

Concept:

My concept is to create a playful pearl diving experience where the user is collecting pearls with their index finger.

Sketch:

Code Logic:

  • Background: I created a gradient animated background to give an underwater sea effect.
  • Flock: I added a school of fish to make the sketch more vibrant and dynamic.
  • Pearls: The pearls are randomly added to any position in the canvas, the contain function is used to check whether the finger has touched it or not so that it can pop it and place another one.

Concepts used from class:

  • Particle systems (flow field)
  • Oscillation
  • Autonomous agents (flocking)

Challenges:

I faced some challenges as I initially wanted the background to just be some waves created by the flow field, but everything else was also fading out along with it so it did not work out as I wanted. Instead, I created the gradient background to show a more underwater sea effect.

// Gradient Background
  for (let i = 0; i < height; i++) {
    let inter = map(i, 0, height, 0, 1);
    let c = lerpColor(color(0, 30, 100), color(0, 155, 255), inter);
    // Add slight bg with the 'sin' function based on time
    c = lerpColor(c, color(0, 0, 100), sin(bg * 0.01 + i * 0.05) * 0.1);
    stroke(c);
    line(0, i, width, i);
  }

  // Create an ocean floor wave pattern that moves over time
  stroke(255, 255, 255, 50);
  beginShape();
  for (let x = 0; x < width; x++) {
    let y = height * 0.75 + sin(TWO_PI * 0.002 * x + bg * 0.05) * 10;
    // vertex(x, y);
  }
  endShape();

  // Increment time for the bg
  bg += 1;

User testing:

Most of the comments I got were regarding the scale of everything. As I was working on a 400×400 canvas, I had not realized everything looked so small. When it was set to fullscreen I had to make some changes to the pearl size and the finger circle. I also made a few more changes when I saw it on the iMac since they still appeared small. Overall, the users really enjoyed playing the game and kept going to make a new high score for themselves.

IM Showcase:
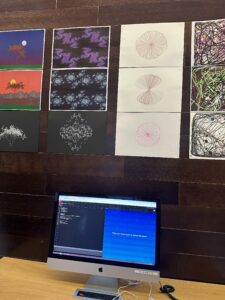
IMG_6642

IMG_6639

References:

Future Improvements:

For future improvements, I would add more sea elements to enhance the visuals and some pearl shells that open and close to make the game more challenging.

Final project draft 2

For my second draft, I improved my sketch further by controlling the flow field with the mouse position rather than perlin noise. I also added a boat image just for visualization purposes.

Sketch:

Challenges:

    • Getting the flow field to leave a trail without the boat repeating itself ✅
    • Have a fading effect for the flow fields ❎

Things to add:

  • boat created with p5.js (bezier curves and decorated with fractals)
  • more realistic water background with ripples
  • fix edge issue

Final project draft 1

For my final project, I want to create a marine themed sketch with some sailboats and pearls. So far I have created a flow field which would be the water waves.

Sketch (first draft):

Interaction methodology:

As for the interactivity part, by using the ml5 library, the position of the user’s hand would be mapped and would show a sailboat drifting and creating those flow fields.

Design of canvas:

Water: Flow field

Boat: Fractals

Week 11: Honeycomb

Concept:

For this week’s assignment, I created an interactive honeycomb, where the mouse acts as a bee and the honeycomb swaps its color on hover.

Sketch:

Code Snippet & Challenges:

// Check if mouse is over the hexagon
if (isMouseOverHexagon(x, y, w)) {
  // Swap the color (state)
  board[i][j] = 1 - board[i][j];
}

This is the part of code that was the most challenging where I had to check if the mouse is over the hexagon and change the color of it.

Future Improvements:

I would add a bee in the place of the mouse to make it look nicer visually and more realistic.

Week 10: Falling apples

Concept:

For this week’s assignment, I made mini game using matter.js. The user is required to move the basket (boundary) with the right arrow or left arrow key and catch as many apples as possible. Once three apples have fallen, the game restarts on its own.

Sketch:

Code and challenges:

let moveAmount = 6; 

if (keyIsDown(LEFT_ARROW)) {
  let pos = movableBoundary.body.position;
  Body.setPosition(movableBoundary.body, { x: pos.x - moveAmount, y: pos.y });
} else if (keyIsDown(RIGHT_ARROW)) {
  let pos = movableBoundary.body.position;
  Body.setPosition(movableBoundary.body, { x: pos.x + moveAmount, y: pos.y });
}

In this code snippet, I made the boundary move according to the user’s key press.

Future Improvements:

I would want to make it look more visually appealing as well as make the apples move to wherever the basket is moving.

Reference:

  • https://nature-of-code-2nd-edition.netlify.app/physics-libraries/#static-matterjs-bodies (Example 6.5)

Week 9: School of Fish

Concept:

For this week’s assignment, my dynamic flocking system is a school of fish. I added some oscillation to their weights by using sin(). I also randomized their maxSpeed and maxForce to make it seem more natural.

.

Code Snippet & Challenges:

function mousePressed() {
  let attractionPoint = createVector(mouseX, mouseY);
  for (let boid of flock.boids) {
    let attraction = p5.Vector.sub(attractionPoint, boid.position);
    attraction.setMag(0.6);
    boid.applyForce(attraction);
  }
  
  for (let i = 0; i < 20; i++) {
    particles.push(new Particle(mouseX, mouseY));
  }
}

In this part of the code, I added a mousePressed() function in which the fish get attracted to wherever the mouse is at the time when it is clicked on the canvas. I also added some food particles for the fish, which is what they attracted to. I would say the most challenging part was figuring out what the formula is for the attraction part.

Future Improvements:

  • I would definitely add a more colorful background and some sounds, for now I wanted to focus on more of the technical aspect of the school of fish.

MUJO guest visit

I really enjoyed the guests’ visit to our class as they showed us their project and gave us a more detailed insight into what it really represents. Looking at the project from the project space, I had not really thought of the meaning behind each aspect of the project and what the performers are representing.

It was also really cool to see some of the code and how each part really works. I loved the little details when the sand is being drawn as well as when it starts falling. It made it really seem like a real desert with the bits of sand. As someone who went to the desert often, I found it very interesting to see a digital version of it. This was very inspiring and I am hopefully looking forward to creating such realistic visuals in my future projects.

Week 8: Bee & Flower

Concept:

For this week’s assignment, I decided to have a bee as my vehicle and a flower as the target. The concepts used are wander, arrival and staying within canvas boundaries. I also adjusted the bee’s behavior based on how it really behaves and added a bit of jitter to its movement by randomizing the wander angle.

Sketch:

Code Snippet:

// Determine behavior based on distance to target
 let d = dist(vehicle.pos.x, vehicle.pos.y, target.x, target.y);
 let steering;
 if (d < 150) {
   // If Bee is close to flower, "arrive" behavior with edge avoidance
   steering = vehicle.arrive(target);
 } else {
   // If Bee is far from the flower, "wander" behavior with edge avoidance
   steering = vehicle.wander();
 }

In this code snippet, I made sure that the bee goes on wandering around until it reaches a specific distance from the flower, then it arrives to the center of the flower.

Future Improvements: 

I would add more bees and flowers and make the bees randomly arrive on any flower.

Midterm Project – Interactive Fan 𖣘

Concept: Electric fan Royalty Free Vector Image - VectorStock

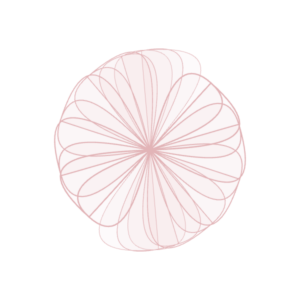
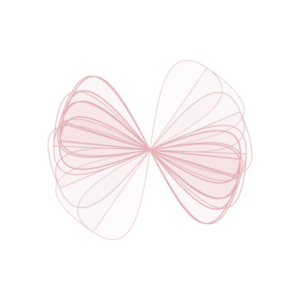
My concept is an interactive electric fan. The user can control its movement using the right or left arrow buttons so it would move clockwise or anti-clockwise accordingly.

Sketch:

Full-screen here

Sketch images:

Code logic:

In the sketch.js file:

  • The text giving instructions to the user fades after 7 milliseconds.
  • New blades are created and added to the array. The ones in the front are shorter and the ones in the back are longer.
  • Fan accelerates right on right arrow click and accelerates left on left arrow click.
  • Friction force slows it down gradually when no key is pressed.
  • The velocity is limited to 0.3 so that it does not move too fast.

In the blade.js file:

The blade class contains all the functions needed for a single blade.

constructor:

  • Includes length and phase offset for the wave.

drawBlade:

  • Rotates the blade continuously using sin combined with amplitude.
  • Draws the bezier curve’s control points using vectors.

Concepts used from class:

  • Vectors
  • Forces (Friction)
  • Oscillation

Challenges and reference:

  • It was quite challenging to figure out how to draw vectors as the bezier curve’s control points. For that, I watched this video which helped with that.
// use vectors for bezier control points
let lenVector = createVector(this.length / 4, 1); // base vector for length
for (let j = 0; j < 4; j++) {
  let curveOffset = map(j, 0, 4, -this.length / 2, this.length / 2);
  let controlPoint1 = lenVector.copy().mult(-1);   // start of the bezier
  let controlPoint2 = createVector(-this.length / 4, curveOffset); // control point 1
  let controlPoint3 = createVector(this.length / 4, -curveOffset); // control point 2
  let controlPoint4 = lenVector.copy();            // end of the bezier

  // draw the bezier curve using vector points
  bezier(
    controlPoint1.x, controlPoint1.y, 
    controlPoint2.x, controlPoint2.y, 
    controlPoint3.x, controlPoint3.y, 
    controlPoint4.x, controlPoint4.y
  );
}

Pen plotting:

    • For the pen plotting, I had to modify many things from my initial sketch (shown below). This one had many different opacity levels and colors that would not be ideal to plot.

  • Instead, I modified the sketch to be much simpler, with curves instead of rectangles and without the fading effect. This turned out to be a better version to plot on the pen plotter. I also removed the filled color just for the pen plotting purposes.

Pen Plotted Photo

Future improvements:

As an improvement, it would be nice to connect it to an arduino and create a DIY fan that would move based on the key input that the user chooses.


Midterm Progress

Concept

While experimenting with different functions and colors, I saw how different iterations of the sketch produced different visuals. I would say it kind of looks like a spanish-looking dress/skirt flowing or a japanese fan, both rotating clockwise and anti-clockwise.

Sketch

Interactivity

For an improved user experience, I have a few ideas but still unsure which one of them I will be going for.

  • Change of color
  • Changing speed
  • Changing angles

This will be done either by mouse press or button press.

Reducing Risks

I want to ensure a smooth transition when the states of the sketch are changed. For that, I will make sure that the states change gradually.