Final Project – A Trip Down Memory Lane

A Trip Down Memory Lane

Concept and Inspiration:

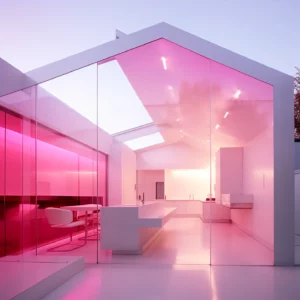
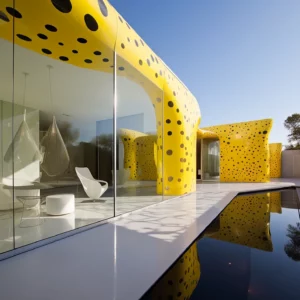
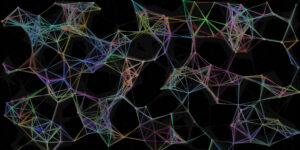
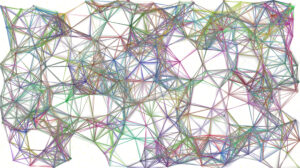
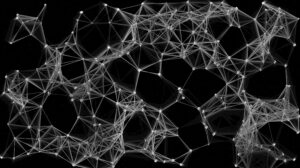
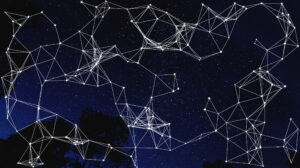
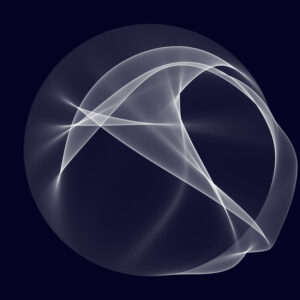
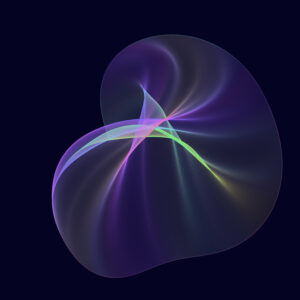
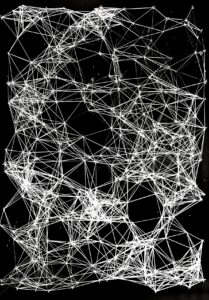
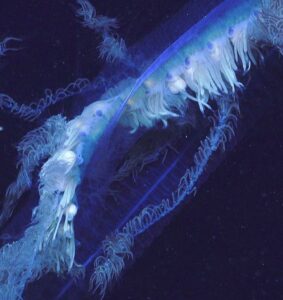
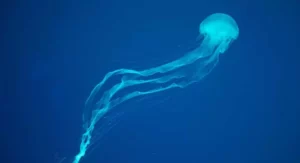
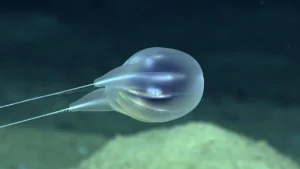
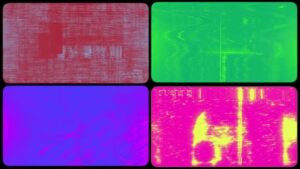
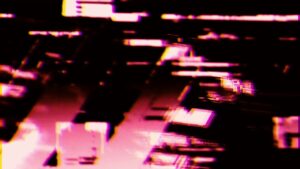
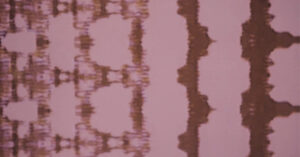
For my final project I was inspired by an idea I had for a film I made last semester. The film’s idea revolved around the concept of archives and old retrieved footage which immediately sparks the thought of old film strips in my mind. Now that films are, for the most part, recorded on digital cameras, I think the idea of recreating the feel of old running film strips through different forms of art is very interesting. I have not seen this exactly being done by any artist however I have definitely came across several who have experimented with developing film tapes in interesting unconventional ways to observe the possible artistic outcomes. One of these artists was an MFA student at NYUAD whose work, similar to the images below, generated films that had a glitching effect because of the way they were developed. Having his work, as well as my film and these images images in mind, I decided to have my final project be a running film strip that is of the color pink, similar to the theme of my film. I also had the added element of user interactivity to it through creating an effect that allows the user’s image to be reflected through the film strip to create the experience of being part of the memory or the archived footage.
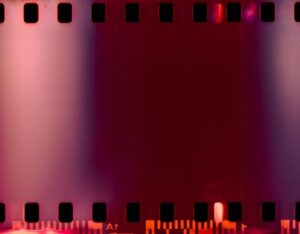
 

Final Result:

Methodology and Application:

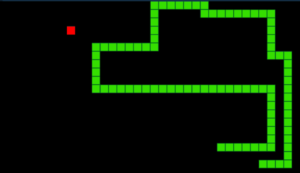
I began by experimenting with different ways through which I could achieve the intended design. I started first with the cellular automata mechanisms applying them to a simple sketch that somewhat generated the feel I was going for. In this sketch I mainly worked on applying the regular game of life rules, with an added element of movement, to attempt to generate the running effect of a film strip.

This was simply done by incrementing the horizontal position of the next alive cell as shown below:

// Move the special cells in the next generation
for (let cell of movingCells) {
  let newX = (cell.x + 1) % cols;
  next[newX][cell.y] = {
    alive: 1,
    color: cell.color
  };
}

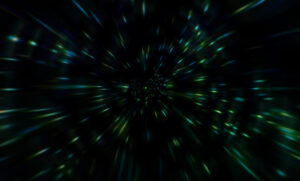
This code provided the basis of what I ended up creating however, I initially was not satisfied with the outcome because I felt like it felt somewhat static and did not deliver the idea I was going for. I tried to continue experimenting with cellular automata but I felt stuck so I moved on to work with the physics libraries, and I used the video below as inspiration for what my design would look like exactly:

In this draft I started simply by working on the scrolling effect. This was fairly simple to achieve, I create a function that generated squares that spread across the canvas and have basic physics that allows them to update their position, velocity and acceleration.

// Update scroll speed based on direction
    if (moveDirection !== 0) {
        scrollSpeed = min(scrollSpeed + SCROLL_ACCELERATION, MAX_SCROLL_SPEED);
    } else {
        scrollSpeed = 0;
    }

Moving on from there I worked on the static in the background. I created a class of columns that are basically small rectangles that update their horizontal positions while keeping their vertical positions static, this way they appear as though they’re lines moving across the screen. I also worked on adding forces between the rectangles and between the different columns to accentuate the glitching effect within and between the columns.

    update(speed) {
        this.vel.x = speed;
        this.pos.add(this.vel);
        this.vel.mult(0.95);
        this.pos.y += random(-1, 1);
    }

    edges() {
        if (this.pos.x - this.originalX > width / NUM_COLUMNS) {
            this.pos.x = this.originalX;
            this.pos.y = random(height);
        }
    }

    display() {
        fill(255, this.opacity);
        noStroke();
        rect(this.pos.x, this.pos.y, 1, 10);
    }

    applyForce(force) {
        this.vel.add(force);
    }
}

function applyGlitch(particle) {
    if (random(1) < 0.05) {
        particle.pos.y += random(-10, 10);
        particle.opacity = random(50, 255);
    }
}

To further amplify the design I also created a class of different sized dots that play the role of the grain in the background. From there I worked on having the colors change based on columns’ proximities and I also added sounds to create the nostalgic feel of memories.

I then came across this sketch that generated a pixelated image of the user through webcam input. It basically did so by incrementing the position of the pixel from the webcam input so that it displays in a pixelated manner. I really liked the aesthetic of it and decided to include it in my sketch.

I did so by creating a layer that only appears when the flashing effect occurs. This layer appears as the opacity of the main sketch decreases. Below is the final outcome of what I created.

I did basic user testing and presented this sketch to the class and received two main comments, one that it is too slow and two that there is somewhat of a disconnect between the film strip and the image that appears. Hence I decided to give it another try and experiment once again with what I had created earlier using cellular automata.

I started off by adding the squares to my sketch that used regular game of life rules because I felt like it is what adds the essence of a film strip to the sketch. I then moved on to work on the part I found most challenging in my sketch which is coordinating between the webcam and the cellular automata mechanisms. I looked into several tutorials and learnt different methods from each of them.

From this tutorial I understood the way in which I could translate the pixels inputted from the webcam in order to be able to generate them as pixels based on cellular automata rules. It showed that the indices of the pixels inputted could be read as well as their colors and opacities through the function below which generally reads the red, green, blue, and opacity levels of each pixel inputted.

//Capture the webcam input as pixels
   capture.loadPixels();
   
   // Calculate the scale based on board columns and rows
   let captureScaleX = capture.width / columns;
   let captureScaleY = capture.height / rows;
   
   // Loop through all columns and rows of board
   for (let i = 0; i < columns; i++) 
   {
     for (let j = 0; j < rows; j++) 
     {
       // Then calculate the position corresponding to the cell from the webcam input 
       let x = i * captureScaleX;
       let y = j * captureScaleY;
       
       // Also calculate the index of each pixel in the webcam input to access its brightness and adjust its life
       //Multiplying by 4 because each pixel has 4 color channels to go through
       let webcamPixelIndex = (floor(y) * capture.width + floor(x)) * 4; 
       
       // Calculate the brightness of the webcam input as average of RGB values
       let brightness = (capture.pixels[webcamPixelIndex] + capture.pixels[webcamPixelIndex + 1] + capture.pixels[webcamPixelIndex + 2]) / 3; 

I then applied a general cellular automata rule to have the cells alive or dead based on their brightness. Following that I added other elements that I had included in previous iterations of this project such as the random pink color generating function, the grain in the background, the trail of the squares and the cells, the sounds, the image exporting function, and finally the menu and return button.

The menu I created was quite simple, it used the film strip’s squares to keep the aesthetic continuous, and contained simple instructions to guide the user through using the program. The button was something I hadn’t worked with in this class but it was simple to achieve, I just had to match the mouse coordinates with the position of the button and edit the mouse clicked function.

//.. This function draws the menu with the instructions
function drawMenu() 
{
  background(0);
  fill(0, TRAIL_OPACITY); 
  rect(0, 0, width, height);

  // Draw the squares in the menu
  drawAndUpdateSquares();
  const buttonWidth = 200;
  const buttonHeight = 50;
  const buttonX = (width - buttonWidth) / 2;
  const playButtonY = height / 2 - 65;
  
  .... 

  text('Press the key "e" to export your image', width / 2, height / 4 + 280);
    text('Press the key "b" to return back to the main menu', width / 2, height / 4 + 300);
  
  fill(randomPink());
  rect(buttonX, playButtonY, buttonWidth, buttonHeight, 20);
  fill(255);
  textSize(28);
  text('START', buttonX + 93, playButtonY + 25);
}

Challenges and Aspects I am Proud of: 

In terms of challenges I think the main challenge I faced was in terms of translating the webcam input as mentioned previously, but also understanding the general idea of how cellular automata works was something I had to figure out to be able to generate results that did not seem so static like my initial sketch. I relied on the sketches we did in class for reference as well as a few tutorials like the one below that showed me how I could create my own rules that are based on cellular automata which is what inspired me to have the cells react to brightness and work accordingly.

User Testing: 

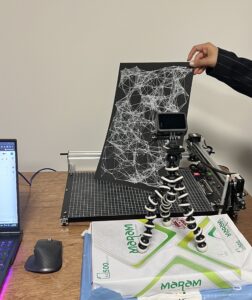
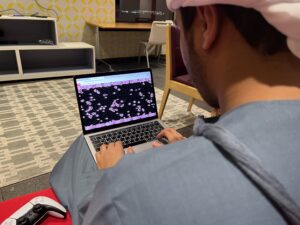
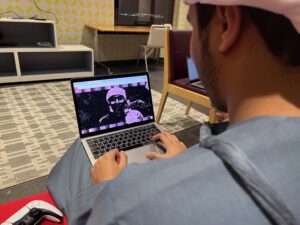
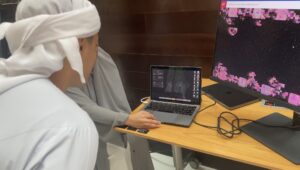
Once I had the code working I tested it with some of my friends who really enjoyed exporting their pixelated images and running through the film tape but made a comment on the way the image appears and dies instantly when the mouse is released. Below are some of the images I took while they were testing the project:

Based on my friend’s comment I worked on the part that I think I am most proud of which is the speed at which the images die or disappear. When I first managed to get the effect to work, the cells inputted from the webcam would die as soon as the mouse was released, leaving somewhat of a disconnect between the two effects. This was a simple fix that I feel really transformed the effect and made it a lot nicer and fun to interact with because it allowed the user to view their image as it passed through the film strip and slowly disappeared.

// Determine the life of the cells based on the brightness of webcam input 
        if (brightness > 128) 
        {
        // If pixel is bright cell is alive and lifespan is 15 so it stays on canvas for a while
          board[i][j].alive = 1;
          lifespan[i][j] = 15; 
        } else 
        {
          // If pixel is dark cell is dead
          board[i][j].alive = 0;
        }

Ideas and Further Improvement: 

For future improvements I think I would add more interactivity in terms of color, I want to add more choices for the user to allow them to create their own color pallet and generate their own film strip that is based on how they picture their memories. I think the mouse clicked function could also be switched to a key or something that is easier for the users to interact with to allow them to enjoy their images without having to worry about clicking any buttons. One thing I also think I should work on improving is the general reaction to light and brightness because I found after the show last night that users dressed in lighter clothing had their clothing appear as alive cells and everything else as dead which meant that their faces were barely visible. This was also due to the fact that the area we were presenting in was very well-lit which meant that the camera detected other brighter objects from the background. With that said, I think the project was fun to work on and generally interact with.

Images from IM Show: 

Final Project Proposal – Week 11

Concept and Inspiration: 

For my final project I plan on creating a sketch that is inspired by a very dear to my heart film project that I worked on last semester. The film generally revolved around the concept of memory retrieved through archival footage which is what I aim to reflect in my sketch. When I think of archival footage I immediately think of old film tapes although most of the footage retrieved for the film I created was filmed on digital cameras, and only a the photos were on tapes, there’s still something about images and videos that are recorded on old cameras and film tapes that deeply resonates with me and reflects the idea of an old archived memory for me. Hence, I want to attempt to reflect this idea of memory through a running film tape simulation that is achieved through different mechanisms to showcase the way in which archived film tapes and memories run before our eyes. I am hoping to add the element of human interactivity through the computer vision mechanism. In a way I’ll try to have the user’s image be intertwined with the running tape effect to make the experience more personalized and to accentuate the feeling of retrieving a memory and almost living through it.

The film I made was based off of an essay that I wrote about sisterhood and memories, and the theme of that essay was the color pink. Hence, similar to the way I had manipulated the footage to make resonate with the essay and reflect the color pink, I plan on making the film tape effect be of different shades of pink.

Methodology and Application: 

The sketch will mainly utilize mechanisms of game of life and cellular automata, but I’ll work on it in a way to have entire columns changing rather than singular cells. I plan on also including particles that could mimic the glitching effect in film tapes. These particles will have forces of attraction and repulsion to alter their movement and add more of a chaotic nonuniform feel to the sketch. Below is a rough base experimentation of what I envision my project to look like. So far, I only worked with the cellular automata rules but moving forward I will be incorporating the other elements that I discussed.

Further Ideas: 

The particles that I spoke about earlier will especially come into play when computer vision detects the presence of a user. Here, the user image will be what interferes with the consistency of the tape suggesting different interpretations of the project, whether that be the trapping of individuals in their memories, or their alteration of them, or even the way individuals observe their memories and watch them playing. Of course this will all be detailed to the user with either a welcoming menu or a brief text below the sketch. I am also considering including the voice over of the essay that I incorporated in my film to show how both projects are tied together and to also allow users to get the full experience that I am trying to deliver. These are all ideas that I am hoping for my sketch to tap into, I might be reworking certain aspects of my project as I work through it but generally I believe my concept is clear to me.

Coding Assignment – Week 11

Concept and Approach: 

For this assignment I was inspired by the snakes game we used to play as kids especially since I used to play one that grew with blocks, very similar to the way the cells look in our cellular automata sketches. I tried to initially have the cells within the snake interact with one another based on the game of life rules, but that did not depict what I was envisioning. So I decided to have the background be based on the game of life rules while the snake travels around the canvas following the mouse. I also added an element of interactivity wherein the cells die or come to life based on their condition when pressed on by the user.

The method I followed was pretty simple I created a grid of cells whose visibility (life) is determined by the condition of their neighboring cells. I followed the same methodology we did in class creating a loop that checks through all the cells in the rows and columns and then applies the rules of game of life.

For the snake, I created a class that has several functions. First of all in its constructor it has the body of the snake as an array where the length of the cells that make up the body are collected. The length is limited to 20 cells, and the cells are adapted from the ones used to make up the game of life mechanism in the background. The snake grows as it follows the mouse and remains as one single cell when the mouse is still. I used the unshift() method which I learned is a method that works on an array similar to pop() and push() except the unshift() adds new elements to the beginning of an array overwriting the original array, which is what I need to be done to have the head of the snake constantly following the mouse’s direction.

update() 
 {
   // Copy the current head position of the snake
   let head = this.body[0].copy();
   // Asssign position of the mouse in terms of board cells
   let mousePos = createVector(mouseX / cellSize, mouseY / cellSize);
   // Calculate the direction vector from the head to the mouse position and limit its magnitude to 1
   let direction = p5.Vector.sub(mousePos, head).limit(1);
   // update head position based on direction vector
   head.add(direction);
   // Add the updated head to the front of the snake's body
   this.body.unshift(head);
   // Keeping the body shorter than 20 segments
   if (this.body.length > 20) 
   {
     this.body.pop();
   }
 }

Reflection and Ideas: 

What I find interesting about this code is the element of interactivity that makes it look as though the snake is consuming the cells or leading to their explosion in some way or another. This was pretty easy to achieve but I think it could be changed to make the game look more realistic. As of now, pressing on the cells just switches their condition from alive to dead or vice versa. For future improvements I could work on making the relationship between the snake and the cells in the background seem more uniform and less separate.

Reading Response – Week 10

Neil Leach on AI & Architecture

The talk by Neil Leach interestingly sheds light on the relationship between architecture and artificial intelligence (AI) which is one I have never considered before, simply because AI was always associated with technology for me and architecture was rather something physical and more related to intricately calculated engineering mechanics. Through the talk Neil makes multiple comparisons to describe the evolution of AI. One comparison he makes is between GANs and diffusion models in their approaches to generative modeling. The difference between them marks a significant shift, emphasizing the transformative nature of the AI technologies. According to Leach AI is an “invisible super-intelligent alien species”. This statement is not an exaggeration especially after observing the examples Leach proposes in terms of AI applications in architecture. What I specifically found interesting was the leap from neural networks to diffusion models that was enabled through AI. Examples on these models are SpaceMaker and Look X which are just a few from a lot more. Leach predicts AI will add a forward-looking dimension to the world of architecture especially for how adaptable and changeable it is. He also explains that through embracing emerging platforms and adapting them to the architectural world concerns about economic shifts in the profession will doubtlessly arise. This point that he mentions I find very interesting because it opens up a conversation about the extent to which is going to take over our lives and will we as a result of AI become slowly less intelligent as a species? Overall, this talk serves as a comprehensive and insightful guide for architects navigating the ever-evolving landscape of AI, and also brings up questions generally about how much we can adapt AI into our lives and how can we have these technologies work for our advantage and not against us.

Coding Assignment – Week 10

Concept and Approach: 

In this assignment I found experimenting with matter.js somewhat challenging so I decided to have my sketch be simple. My inspiration was the few rainy days that we had on campus, and specifically the one day over fall break where it rained heavily. I remember looking at the raindrops hitting the floor and then bouncing back until there was a thin layer of water forming on the ground. Through introducing matter.js into my sketch I attempted to create a similar effect wherein the raindrops would fall and hit one another on their way down, eventually they collide with the ground and form a layer of water on it.

Knowing I wanted to create a particle falling from the sky effect I began first by just looking into how I could do that. Getting inspiration from the revolute constraints example that we did in class, I was able to create a bunch of circles falling through the canvas. I realized then that I needed to create a ground of some sort to have the raindrops land on it. This is when I came across The Nature of Code’s tutorial on matter.js. I learnt through it how to create a world based on the matter.js engine, and have this world contain all the attributes of my sketch including the ground and the raindrops.

I think what I found a bit challenging was deciding on the effects that would take place at collisions, so when the raindrops collide with one another, as well as when they collide with the ground. I decided that the effect that could possibly mimic reality would be having the raindrops become less apparent, that is, they dried out, or merged into one upon impact with one another. I did that by having their opacities decrease upon collisions. For colliding with one another I created the isColliding function which basically measures the distance between the raindrops. If they were found to be colliding then their opacities would decrease. Eventually once they fall on the ground two elements get checked, their position (on or off screen) and their opacities (<=0). If either is true the raindrops get removed.

 // Check if the particle is off the screen or has zero opacity
  isOffScreen() {
    let pos = this.body.position;
    return pos.y > height + 100 || this.opacity <= 0;
  }

  // Check if the particle is colliding with another particle
  isColliding(otherParticle) {
    let distance = dist(this.body.position.x, this.body.position.y, otherParticle.body.position.x, otherParticle.body.position.y);
    return distance < this.body.circleRadius + otherParticle.body.circleRadius;
  }
}
// Check for collisions with other particles and adjust opacity
   for (let other of otherParticles) {
     if (other !== this && this.isColliding(other)) {
       this.opacity -= 2; // Decrement opacity when it collides with other particles
     }
for (let i = particles.length - 1; i >= 0; i--) 
{
  if (particles[i].isOffScreen()) 
  {
    particles.splice(i, 1); // Remove the particle at index i
  }
}

An element that I was glad I included was the wind force. Prior to having it, the rain drops all fell in the exact same way making the sketch seem somewhat consistent and less realistic. With that said, I am still very bothered with the way they land on the ground, as the change in their opacities still does not reflect the disperse of water particles that I was looking for. I couldn’t really think of way to incorporate that though I experimented with having the raindrops change into lines upon impact, it still just looked unnatural.

// Apply wind force
   let wind = createVector(0.01, 0);
   Matter.Body.applyForce(this.body, this.body.position, wind);

Reflection and Ideas:

For future improvements I think the main thing I would work on is the issue of colliding with the ground because as of now they look like solid particles rather than liquid raindrops. I could possibly incorporate sound effects and other forces that could cause disturbances to the way raindrops fall. I think one other thing I could work on is having them bounce back a bit higher to mimic the way raindrops fall when there is already a heavy layer of water that has formed on the ground. Otherwise, I am pretty satisfied with the outcome of the sketch especially since running the matter.js engine was causing a lot of lags on my computer that made sketching any thing on the canvas a lot harder.

Coding Assignment – Week 9

Concept and Approach: 

For this assignment my approach was inspired by a game I used to play with my siblings as a child. Every time we’d go out to play under the sun, we’d come back into the house to see a bunch of lines forming in our eyes as we close them based on the rays of light that hit our eyes. The harder we rubbed our eyes the more lines would form with tiny colored dots. The lines quickly disappeared and new ones formed constantly. Turns out these lines are called phosphenes and are considered to be images of light and color seen when eyes are closed. They could be indicators of serious health conditions, but in most cases they are just results of exposure to light, and rubbing of the eyes. I tried to recreate these images using the flocking system and boids. The particles in my sketch would start off moving around in a chaotic manner on the canvas, eventually they begin colliding and decreasing in number. A while later new ones appear repeating the same manner as the previous particles. The system is constantly changing and the movement of the particles is randomized.

I applied different forces to the boids’ class to achieve the mechanism I was looking for, and then I had a number of boids be created in the flock array through which each boid could be called to run and update. Similar to what we had done previously in the semester, the boids had mechanics of position, velocity, acceleration, etc. What is interesting in this however is that the bodies get impacted by their neighbors and the physics behind them changes accordingly. Once they collide with one another, they concentrate in the same area for a while and then disperse and disappear.

This collision and concentration element was a bit more difficult to achieve because I was unsure of how to navigate the forces exactly. However, drawing inspiration from a previous assignment that I had worked on, I realized that the first step is to measure the distance between the boids, and accordingly I could apply if statements. I created a loop that runs through all the boids, measures the distance between them, and then adds the ones in close proximity to the closeBoids array. From there, if there are more than two boids close to each other, their position is updated based on the center vector, this gives the spiraling effect when they collide. The second if statement looks into creating a concentration wherein more boids collide and continue spiraling, moving to the concentration center, then disperse away from the center. Finally, the else statement looks into activateing a concentration period if there isn’t one yet.

  // Find close Boids and calculate the center of concentration
  let closeBoids = [];
  for (let i = 0; i < boids.length; i++) {
    let other = boids[i];
    if (this.position.dist(other.position) < 30 && other !== this) {
      closeBoids.push(other);
    }
  }

  if (closeBoids.length > 1) {
    let center = createVector(0, 0);
    for (let i = 0; i < closeBoids.length; i++) {
      let boid = closeBoids[i];
      center.add(boid.position);
    }
    center.div(closeBoids.length);

    if (this.concentrationCountdown > 0) {
      // If concentration countdown is active so its more than 0, move towards the concentration center
      let direction = p5.Vector.sub(center, this.position);
      direction.setMag(2);
      this.applyForce(direction);

      // Apply force away from the concentration center to simulate dispersing
      let dispersalForce = p5.Vector.sub(this.position, center);
      dispersalForce.setMag(0.5); // Adjust the strength of dispersal
      this.applyForce(dispersalForce);

      this.concentrationCountdown--;
    } else {
      // Otherwise, activate concentration for a brief period
      this.concentrationCountdown = 60;
    }
  }
}

Reflection and Ideas: 

I think this code relatively achieves what I had in mind but for future developments I could work on making the boids change their speed over time. So that when they come to disperse and disappear they start moving slowly because that is how I remember seeing them. Also, this will enhance the majestic feeling of the sketch further relating to the images of light we see when our eyes our closed. I attempted to introduce this element just through updating the velocity after dispersal, however that didn’t work. It could be a matter of introducing an entirely new vector and updating the velocity and acceleration accordingly, but that is something I could look into moving forward.

Coding Assignment – Week 8

Concept and Approach:

My approach for this assignment was quite simple, I thought of things I could create with the seek and flee dynamic involved between them. The first thing that came to mind was mice and cheese, which was completely inspired by the cartoon Tom and Jerry, and Jerry’s love for cheese. I read a bit around the topic and found that in fact mice’s love for food, and cheese in specific, is over exaggerated, they just tend to be attracted to foods that are high in carbohydrates in general. Hence, I decided to create a sketch that shows their attraction to cheese in a way that also demonstrates the idea that they are not extremely fond of it.

The method I followed was very similar to what we had done in class. I created a class of mice that have different functions including seeking and fleeing and I had an image of cheese be their target. In my Draw function I called a number of mice, all seeking the cheese. Once one of them had arrived to the cheese, it ‘eats’ it and all the other mice flee away rather than gathering around it and ‘eating’ it all together.

The way I separated their actions was through incorporating boolean values that are set as false in the beginning of the code. Once the distance between the position of the closest mouse and the cheese is less than 10, the boolean value changes to true, leading that specific mouse and the cheese to disappear. The other if function checks that this happened (one mouse arrived at the cheese and basically left the array of mice), and accordingly calls the flee function on all the other mice.

if (!targetReached) 
  {
    // First loop through all the mice array and call the Mouse class functions
    for (let i = 0; i < mice.length; i++) 
    {
      mice[i].seek(cheese);
      mice[i].update();
      mice[i].display();
      image(cheesePic, cheese.x, cheese.y, 20, 20);

      // Check if the mouse has reached the cheese by measuring distance between mouse and cheese
      if (mice[i].position.dist(cheese) < 10) 
      {
        // set the boolean to true
        targetReached = true;
        mice[i].arrived = true;
      }
    }
  } 
  //now for the other mice
  else 
  {
    // Loop through all the array. The mouse that reached the cheese would have disappeared by now
    for (let i = 0; i < mice.length; i++) 
    {
      // If there was a mouse that arrived
      if (!mice[i].arrived) 
      {
        // Then have all the other mice flee and call the other functions of the class
        mice[i].flee(cheese);
        mice[i].update();
        mice[i].display();
      }
    }
  }
}

Reflection and Ideas:

I think the only challenging part was coordinating the boolean values and knowing when to set them to true/ false and how to have everything follow based on them. But overall, this wasn’t that difficult, with a few trials and errors I was able to get the code to work in the way I needed.

An improvement that I tried to actually apply but was not successful in doing so, was having the mice be images rather than just triangles. My issue with that was being unable to rotate the images based on the velocity’s angle. In my attempt, they did rotate, however, they weren’t all pointed towards the cheese which made the sketch look unrealistic. Moving forward I’d like to learn if it possible to implement that, because I think images would definitely make the sketch more interesting.

Midterm Project “Starry Sketches” – Week 7

Starry Sketches

Starry Sketches is a creative generative art project that generates a range of continuously transforming constellation-like patterns. Different iterations of the project accentuate certain elements, like the feel of the sky and its ambiance, the feel of mesmerization, and the feel of amusement.

Source Code

Concept & Artistic Vision

For my midterm project I began with a route that focused on creating underwater species through creative coding and having each creature evolve into the other in some way or form. This idea was quite interesting and the vision I had in mind was relatively executable. Especially when I came across this project that presented the idea of an evolving circle that led to outcomes similar to what I had envisioned.

Source

To get the exact feel of an underwater environment, I read about sea creatures, their physical characteristics, and their movement manner. I decided finally to focus on four creatures; sea horses, starfish, jellyfish, and octopuses, which each depict unique movement mechanisms. I found that sea horses only hovered in place to move around, whereas starfish crawled and rowed like crabs did, while jellyfish drifted along the currents of the ocean, and octopuses propelled the current and crawled with their tentacles.

Source

Unfortunately, I was not able to go so far with my idea for it felt static despite my attempts to produce a generative piece. This led me to decide to shift my focus away from underwater environment and onto the skies for some sort of inspiration. Given that I began by working on the starfish for my initial idea, I was very keen on incorporating stars in my project, hence I began looking into that field. When reading about stars and looking through. Images for inspiration, I came across star/ zodiac constellations, which are basically stars in close proximity that create “two-dimensional maps for astronomers to find objects and explain their location and for navigators to use stars to determine their position”. However, nowadays, these constellations are often linked with astrology, and are brought up in the context of zodiac signs. The problem with this based on the article is that it has not scientific foundation, for they are just groups of stars that appear close to each other and are named after objects, animals etc.

Source

When reading that the constellations have no exact shapes that confine them and the zodiac constellations have no scientific basis, I felt a sense a freedom for exploration, unlike with the underwater species where I was unable to come up with an abstract representation of already existing creatures. This enabled me to come up with the idea of creating a sketch that constantly generates new constellations by drawing lines based on the proximity of the stars to one another. That way I was able to incorporate the element of the star that I had already began working on while also ensuring that my project was generative and did not appear static.

Coding Translation, Logic, & Challenges

When I began working on the starfish for my underwater project attempt, I was mostly focused on perfecting the shape of the creature and its movement, failing to consider the bigger picture of how the project will translate to a generative piece.

This led me to creating one long ‘for loop’ which, although eventually unused, was a learning process for me that allowed to explore the function of ‘noise’ in so many different ways, whether that be directly on the coordinates, lines, or even colors,  which later came in handy when I worked on the constellations project. Another important take out of this part of my process were ‘nested for loops’ that allowed me to iterate not only through the circumference of a circle but also through its diameter, hence leading to a bunch of nested stars that increase in size with every loop creating one big star.

for(let j=0; j<= 50; j++)
  {
  for (let angle = 0; angle <= TWO_PI; angle += PI/2.5) 
{
  let x = centerX + radius * cos(angle);
  let y = centerY + radius * sin(angle) + (3.5 - noise((angle), i / 15) * 7);
  curveVertex(x + noiseX, y + noiseY);
  let x2 = (centerX) + radius2 * cos(angle + HALF_PI / 2.5);
  let y2 = (centerY) + radius2 * sin(angle + HALF_PI / 2.5);
  curveVertex(x2 + noiseX, y2 + noiseY);
}
  //endShape(CLOSE);
  radius-=2;
  radius2-=2;
  }
}

While I was happy with the outcome of the starfish in terms of how it moved and looked, I was not satisfied with the fact that it seemed relatively predictable, and was moving only based on the ‘noise’ that was added to the coordinates, making me feel like I had not incorporated enough from what we have learnt into the project. Hence, moving forward in my process I created a solid plan of what will take place in my sketch.

I started my process simple by creating a class of stars that were of random sizes, positions, velocities, and acceleration, and called a hundred of them to see what the outcome would look like. I immediately realized two main issues with the stars eventually leaving the canvas, and the acceleration increasing nonstop.

class Star 
{
  constructor() 
  {
    this.position = createVector(random(width), random(height));
    this.size = random(3, 7);
    this.velocity = createVector(random(-0.3, 0.3), random(-0.3, 0.3));
    this.acceleration = createVector(random(-0.01, 0.01), random(-0.01, 0.01));
  }

  update() 
  {
    // Update the velocity and position based on acceleration
    this.position.add(this.velocity);
    this.velocity.add(this.acceleration);

   }

  display() {
    let starPoints = random(1, 5);
    let externalRadius = this.size;
    let internalRadius = this.size * 0.4;
    let angle = TWO_PI / starPoints;
    let halfAngle = angle / 2.0;
    fill(255);
    beginShape();
    for (let a = 0; a < TWO_PI; a += angle) {
      let starX = this.position.x + cos(a) * externalRadius;
      let starY = this.position.y + sin(a) * externalRadius;
      vertex(starX, starY);
      starX = this.position.x + cos(a + halfAngle) * internalRadius;
      starY = this.position.y + sin(a + halfAngle) * internalRadius;
      vertex(starX, starY);
    }
    endShape(CLOSE);
  }
}

I added the checkEdges() function like we had previously done with the movers which resolved the issue of the stars flying out of the canvas, however despite adding the ‘limit’ function to the acceleration, the stars continued to accelerate rapidly. I resolved this issue by including an ‘if-statement’ as shown below.

update() 
  {
    // Update the velocity and position based on acceleration
    this.position.add(this.velocity);
    // Limit acceleration 
    if (this.velocity < 5)
      {
        this.velocity.add(this.acceleration);
      }
   }

Once I had the stars set I began working on the lines which were somewhat a challenge to achieve as envisioned, however I am quite proud of how they came out. I had five different main trials which yielded different results, some of which were actually interesting, but not exactly what I had in mind.

 Attempt 1:

In the first trial, my thought process was simple, I need to draw a line between two stars. So, let the first star be ‘i’ and the second one be ‘j’. Through a ‘for loop’ I thought I was incrementing both the i and j values, however, I came to realize that despite thinking I was incrementing the ‘j’ value, the loop constantly equated its value to one position.

let j;
for (let i = 0; i < stars.length; i++) 
{
  j = 0;
  stroke (255);
  line(stars[i].position.x, stars[i].position.y,        stars[j].position.x, stars[j].position.y); 
  j++;
}
}

Attempt 2:

For my second trial, I tried to have the line drawn between the star ‘i’, and the star that followed it so, star ‘i + 1’. This also yielded an interesting outcome, but again, the issue was that each star was only connecting  to two other stars, leading to a static outcome.

for (let i = 0; i < stars.length - 1; i++) {
  stroke(255);
  line(stars[i].position.x, stars[i].position.y, stars[i + 1].position.x, stars[i + 1].position.y);
}
}

Attempt 3:

For my third trial, I knew I was on the right track with the previous two attempts, I had to find a ‘j’ value that was an incrementation of the ‘i’ value but still have that looping and incrementing to avoid static connections between the same stars. Inspired by the nested ‘for loops’ that I had initially created for my starfish, I created a nested loop that produced incrementing values for both ‘i’ and ‘j’. The issue with this attempt however was that there were endless connections between all the stars regardless of their positions.

 for (let i = 0; i < stars.length; i++) {
  for (let j = i + 1; j < stars.length; j++) {
      stroke(255);
      line(stars[i].position.x, stars[i].position.y, stars[j].position.x, stars[j].position.y);
  }
}
}

Attempt 4:

In my fourth trial, I built onto the previous trial. I measured the distance between the stars ‘i’ and ‘j’ using the ‘dist’ function and included an ‘if-statement’ that only allowed for a line to be drawn if the stars were in close proximity.

 for (let i = 0; i < stars.length; i++) {

  for (let j = i + 1; j < stars.length; j++) {
    let d = dist(stars[i].position.x, stars[i].position.y, stars[j].position.x, stars[j].position.y);
    
    if (d < 100) {
      stroke(255);
      line(stars[i].position.x, stars[i].position.y, stars[j].position.x, stars[j].position.y);
    }
  }
}
}

Attempt 5:

By my fourth attempt I was very happy with the outcome, my only issue was that it seemed like it was not representing constellations accurately because each star was connecting to an endless number of stars. I resolved this issue by a count for the lines to the ‘ if statement’ that measured the distance, that way, a line would only be drawn if the stars are in close proximity and if they are not connected to more than two stars.

 for (let i = 0; i < stars.length; i++) {
  let linesConnected = 0; // Initialize the count of lines connected to the current star

  for (let j = i + 1; j < stars.length; j++) {
    let d = dist(stars[i].position.x, stars[i].position.y, stars[j].position.x, stars[j].position.y);
    
    // Add a condition to check if the number of lines connected to the star is less than 4
    if (d < 100 && linesConnected < 2) {
      stroke(255);
      line(stars[i].position.x, stars[i].position.y, stars[j].position.x, stars[j].position.y);
      linesConnected++; // Increment the count of lines connected to the star
    }
  }
}
}

Moving on from there, I tried to find ways in which I could improve my code and I looked into any further issues that could be resolved. I realized then that my stars overlapped when moving which did not seem realistic to me. I read into that and found that the likelihood of stars overlapping is very small, if not impossible. So, I created a function within the stars that prevents overlapping.

noOverlap() 
  {
    // Loops through every star in the stars array
    for (let singleStar of stars) 
    {
      // Checks if the singleStar is the same current star called in the sketch
      if (singleStar !== this) 
        {
      // If not then measure the distance between this star and the singleStar
        let distance = dist(this.position.x, this.position.y, singleStar.position.x, singleStar.position.y);
      // Making the minimum possible distance between the stars be equal to their sizes combined
        let minDistance = this.size + singleStar.size;
        if (distance < minDistance) 
        {
      // Calculate a vector to move this star away from the singleStar
          let repel = createVector(this.position.x - singleStar.position.x, this.position.y - singleStar.position.y);
          repel.normalize();
          repel.mult(0.5); // Adjust the strength of the repulsion
          this.position.add(repel);
        }
      }
    }
  }

This function was one that I explored in one of my previous assignments, it basically loops for every star in the stars array measuring the distance between it and the current ‘this’ star that is being called. It then creates a repulsion force through a vector that subtracts the position of the stars being compared. This force is then added to the position which leads to the stars repelling or moving away from each other.

To further improve my project I looked into more images of constellations to try and find what is missing in my sketch. I realized that in most images the represent constellations the sky is shown with not only the bright stars that create the constellation but also with all the tiny stars that surround. Hence, I decided to create a class that produces tiny stars of varying sizes for the background. This came out really nice especially since the constructor of the class had 10 stars initialized, hence 10 new stars appeared with every frame creating a sparkling effect in the background.

To accentuate the feeling of stargazing and constellations, I decided to change the background to an image of the sky with stars and I added a music track to further draw in the audience.

Source Code

I also attempted to create different versions applying the function of ‘noise’ on multiple elements of my project like I did initially when working on the starfish.

Version 1:

update() 
  {
    this.position.x += map(noise(this.noiseX), 0, 1, -2, 2);
    this.position.y += map(noise(this.noiseY), 0, 1, -2, 2);
    this.colors = color(noise(this.noiseColor) * 255);
    this.noiseX += 0.01;
    this.noiseY += 0.01;
    this.noiseColor += 0.01;
    // Update the velocity and position based on acceleration
    this.position.add(this.velocity);
    // to limit acceleration
    if (this.velocity < 5)
      {
        this.velocity.add(this.acceleration);
      }
   }

In this version I added noise to the position of the stars and allowed for that noise to constantly update, leading to a trail behind the stars that made them look somewhat like shooting stars. Because of the looping update of the noise and the unlimited change of position the stars move in rapid speeds and seem to be leaving the canvas despite the bounds.

Version 2: 

update() 
  {
    this.colors = color(noise(this.noiseColor) * 255);
    this.noiseColor += 0.01;
    // Update the velocity and position based on acceleration
    this.position.add(this.velocity);
    // to limit acceleration
    if (this.velocity < 5)
      {
        this.velocity.add(this.acceleration);
      }
   }

In this version I only added noise to the color of the lines and the stars, and changed the alpha/ opacity which was sufficient to create the starry effect I was looking for with having the stars mov out of the frame as in the previous version.

Version 3 & 4:

In these two versions I added an element of color and changed the background to experiment with the effects that I can achieve.

rainbowColors() {
   // Calculate a color based on noise for the star & lines
   let noiseColorR = noise(this.noiseColor);
   let noiseColorG = noise(this.noiseColor + 1000);
   let noiseColorB = noise(this.noiseColor + 2000);
   let noiseColorA = noise(this.noiseColor + 3000);

     starColor = color(
     Math.round(255 * noiseColorR),
     Math.round(255 * noiseColorG),
     Math.round(255 * noiseColorB),
     Math.round(255 * noiseColorA)
   );
 }

Pen Plotting Process

My process with the pen plotting was luckily simple, although I did struggle initially with exporting the SVG files, however, once I had that figured out the process was relatively smooth.

The issue that arose with the SVG file was from the beginning of my project process when I was working on the starfish. I realized after multiple trials that the problem was not with my method of exporting but rather with the size and elements of the sketch itself. Given that my sketch of the starfish had a great deal of ‘noise’ embedded in its design it made exporting the file into an SVG impossible.

I took that into account when working on my new project with the constellations, and made sure that I worked based on that leaving any ‘noise’ or extensively large elements out of my design for plotting purposes.

In doing so I was able to get an SVG file ready for plotting. The only editing I had to do on Inkscape was remove the background. From there we imported the sketch to the plotter and it began the process which was quite lengthy since I decided to give the star the flexibility to connect to an endless number of nearby stars and I also called 300 stars on the canvas.

Areas of Improvement & Future Work

In terms of improvement and future work, I came across an article that details collisions of stars when reading about whether or not stars overlap. This article mentioned an interesting detail about stars’ collisions explaining that in the rare cases that they collide, if moving at a slow pace they merge to create brighter stars, and if traveling at a fast pace during the collision then they disappear leaving behind only hydrogen gas. I attempted to add this to my sketch however,  I was unsure of how to go about it and since I was somewhat tight on time I decided to leave this as a future addition to the project.

Source

One thing that I realized later could be improved is the way in which the lines appear. Right now the lines immediately connect the stars once the sketch is played. What I think would look nice if the lines connected slowly and gradually to one another. I attempted to work on this issue by adding by only allowing the lines to appear after a certain frame count, however, that only postponed the time of which all the lines appeared simultaneously. I am hoping to edit this soon to create a more smooth-looking environment.

Midterm Project Progress 2 – Week 6

To begin working on my project I started off with a plan of what creatures I want to include in my underwater simulation. I decided on four creatures that belong to relatively different species: Starfish, Seahorses, Jellyfish, and Octopi.

My approach was to begin first by sketching out the shapes on the p5js canvas using the beginShape() and endShape() functions. I started off with the starfish which I sketched initially using polar coordinates of a circle. I introduced an inner radius, and outer radius, then had the ‘cos’ and ‘sin’ waves impact the angles of the coordinates of the curves that are drawn based on the two different radii. Putting all this in a loop that ran for a full circle ’TWO_PI’, and incremented its loops at a rate ‘PI/2.5’ I was able to achieve a star looking shape with 5 points.

  for (let angle = 0; angle <= TWO_PI; angle += PI/2.5) 
{
  let x = centerX + radius * cos(angle);
  let y = centerY + radius * sin(angle);
  curveVertex(x, y);
  let x2 = (centerX) + radius2 * cos(angle + HALF_PI / 2.5);
  let y2 = (centerY) + radius2 * sin(angle + HALF_PI / 2.5);
  curveVertex(x2, y2);
}
   endShape(CLOSE);
}

Moving on from there I began introducing noise to all the elements of the star, from its colors to its coordinates. I then also added the incremented I value at the beginning of the draw function to create the animated effect on the star.

let i = 0;
function draw()
{
  i++;
  let radius = 200 * noise(i / 300) + 100;
  let radius2 = 100 * noise(i / 150) + 50;
  let centerX = width / 2;
  let centerY = height / 2;
  translate(0, -40);
  for (let angle = 0; angle <= TWO_PI; angle += 100) 
  {
    background(0, 1);
    let noiseStrokeR = noise(angle);
    let noiseStrokeG = noise(i / 2);
    let noiseStrokeB = noise(angle, i / 2);
    stroke(
      Math.round(255 * noiseStrokeR + 10),
      Math.round(120 * noiseStrokeB + 40),
      Math.round(255 * noiseStrokeG),60
      );
      beginShape();
      fill(0,10)
      let noiseY = noise(radius / 1000) * 100;
      let noiseX = 20 - noise(angle, i / 2000) * 200;
    for (let angle = 0; angle <= TWO_PI; angle += PI/2.5) 
  {
    let x = centerX + radius * cos(angle);
    let y = centerY + radius * sin(angle) + (3.5 - noise((angle), i / 15) * 7);
    curveVertex(x + noiseX, y + noiseY);
    let x2 = (centerX) + radius2 * cos(angle + HALF_PI / 2.5);
    let y2 = (centerY) + radius2 * sin(angle + HALF_PI / 2.5);
    curveVertex(x2 + noiseX, y2 + noiseY);
  }
     endShape(CLOSE);
  }
}

For the trails left behind the star I worked with the alpha value of the stroke, and of the background that is drawn constantly through the draw() function.

Once I was somewhat satisfied with the look of the star I added it to a class so that I’d be able to introduce it at randomized amounts and positions on the canvas moving forward.

One thing I am also still working on as a development on the starFish class is introducing elements of motion to the object, so far I have added velocity, similar to how we’ve been doing so far with the movers, however I am yet to introduce an anti collision function to prevent my starfish from colliding.

class StarFish {
  constructor(x, y, dimensions, velocity) {
    this.i = 0;
    this.centerX = x;
    this.centerY = y;
    this.radius = dimensions;
    this.radius2 = dimensions / 2;
    this.velocity = velocity;
  }

  update(starFishes) {
    this.i++;
    this.radius = 200 * noise(this.i / 300) + 100;
    this.radius2 = 100 * noise(this.i / 150) + 50;
    this.centerX += this.velocity.x;
    this.centerY += this.velocity.y;

Another thing I want to develop on this class is have the movement appear a lot more organic, and perhaps have the stars rotate and not remain stable in angle to bring them to life. When noise was the only element effecting their animation they looked quite organic but they only seemed to vibrate in one position, that is why I felt the need to include motion, which, while allowing the star to move it seemed to give it a more unrealistic feel.

I believe that these issues could be resolved by adding forces working with acceleration and velocity at extremely low rates to mimic the movement of starfish.

My plan is to continue developing this class and then hopefully introducing its elements to the classes of the different creatures.

With the other three creatures, I have a plan on how I will execute them, in terms of sketching them, but so far, I only have the seahorse drawn using the beginShape() function. I have some concerns regarding how the seahorse is gonna come out, as well as the other creatures, mainly because I am not sure how much noise and to which parts of the drawing exactly could I include it. However, this of course will only be figured out with trial and error and trying different methods of approach just like I did with the starfish.

One other element I am hoping to be able to achieve but I am still unsure of how to execute is having the creatures morph or transform into one another. I don’t really have a plan of how to execute that but I am still looking into it.

During this process, I faced two main difficulties, first with the SVG file, which unfortunately I could not get no matter that different sketches I tried it with. I am not sure of whether the issue is in my methodology or my sketches themselves.

The second difficulty was in terms of the trail and the overall look of the star, I was hoping to draw it as a series of lines but I ended up with one continuous line. The reason I thought a series of line stemming from the center would work better is because I imagined a more organic look to appear through introducing noise to every single line. I wasn’t able to achieve that, unfortunately, however, I think what I have so far, for the star, looks relatively good.

Midterm Project Progress 1 – Week 5

Creating an Underwater Immersive Experience

Concept:

For my midterm project I plan on creating a design that reflects life under water and produces abstract shapes that mimic the possible look and movement nature of unknown species. I aim to create a visually pleasing design that combines gradients of color with constantly evolving floating shapes to showcase the beauty while also sparking curiosity about what lies under the surface of the ocean. To further amplify the experience I plan on adding sound effects or music tracks that would allow for the design to be more immersive.

Process:

I began researching and attempting certain approaches to achieve my intended goal:

My first step was to look into how I could create the shapes that look like underwater species. For that I had to put in mind the gravity force that affects the species underwater, and the need to achieve a floating/ undulating movement effect on the shapes. Similar to what I had done in my last assignment, I could possibly create that through using Perlin noise to affect the position of the shapes over time. Perlin noise could also be introduced when creating the lines that formulate my shape. In doing so, I will be able to achieve a smooth moving surface for the creatures. Another thing I am looking into is introducing noise into the RGB values to have a smooth change of color over time.

However, I am still unsure of how I could be creating shapes that are constantly evolving while still looking like underwater creatures. I thought of starting off with a circle of lines. These line could be randomized in amount and position using noise. From there I’ll be able to create a floating circle-like shape. But when it comes to having this shape change I will have to introduce some mathematics into the structure of the circle itself. I looked through some tutorials, and one that inspired is below. It shows how to create a constantly looping circle that is in the shape of a mathematical cardioid shape.

I am still learning more about how to apply this to my shapes, perhaps by creating different anchor points to the lines other than just the center of the circle I could get somewhere. Once I am able to create these evolving shapes I plan on putting them into a class to play with the frequency and number of which they appear on screen. I also am hoping to include forces of attraction/ repulsion between the shapes and add introduce acceleration like we did with the movers to make an even more realistic underwater environment.

One other thing I hope to apply is have the background look like its a water rather than just blank. When searching into that I found that patterned surfaces like rough floors could be achieved through what is called Worley noise, similar in its use but different in its outcome than Perlin noise. Below is the video I began exploring and hopefully relying on that and other tutorials ill be able to achieve the desired effect.