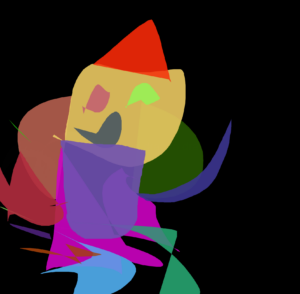
Week 4 – Fourier Coloring by Dachi

Sketch: 

Example drawing

Concept Inspiration

My project was created with a focus on intersection of art and mathematics. I was particularly intrigued by the concept of Fourier transforms and their ability to break down complex patterns into simpler components. After seeing various implementations of Fourier drawings online, I was inspired to create my own version with a unique twist. I wanted to not only recreate drawings using Fourier series but also add an interactive coloring feature that would make the final result more visually appealing and engaging for users.

Process of Development

I began by following the Coding Train tutorial on Fourier transforms to implement the basic drawing and reconstruction functionality. This gave me a solid foundation to build upon. Once I had the core Fourier drawing working, I shifted my focus to developing the coloring aspect, which became my main contribution to the project.

The development process was iterative. I started with a simple algorithm to detect different sections of the drawing and then refined it over time. I experimented with various thresholds for determining when one section ends and another begins and worked on methods to close gaps between sections that should be connected. Even now, it is far from perfect but it does what I initially intended to.

How It Works

The application works in several stages:

  1. User Input: Users draw on a canvas using their mouse or touchscreen.
  2. Fourier Transform: The drawing is converted into a series of complex numbers and then transformed into the frequency domain using the Discrete Fourier Transform (DFT) algorithm. This part is largely based on the Coding Train tutorial.
  3. Drawing Reconstruction: The Fourier coefficients are used to recreate the drawing using a series of rotating circles (epicycles). The sum of all these rotations traces out a path that approximates the original drawing.
  4. Section Detection: My algorithm analyzes the original drawing to identify distinct sections based on the user’s drawing motion.
  5. Coloring: Each detected section is assigned a random color.
  6. Visualization: The reconstructed drawing is displayed, with each section filled in with its assigned color.
  7. Re: User is able to start the process again and creature unique coloring look.
  8. Save: User is able to save the image to their local machine.

Code I’m Proud Of

While the Fourier transform implementation was based on the tutorial, I’m particularly proud of the section detection and coloring algorithm I developed:


function detectSections(points) {
  let sections = [];
  let currentSection = [];
  let lastPoint = null;
  const distanceThreshold = 20;

  // Iterate over each point in the drawing
  for (let point of points) {
    if (lastPoint && dist(point.x, point.y, lastPoint.x, lastPoint.y) > distanceThreshold) {
      // If the distance between the current point and the last point exceeds the threshold,
      // consider it a new section and push the current section to the sections array
      if (currentSection.length > 0) {
        sections.push(currentSection);
        currentSection = [];
      }
    }
    // Add the current point to the current section
    currentSection.push(point);
    lastPoint = point;
  }

  // Push the last section to the sections array
  if (currentSection.length > 0) {
    sections.push(currentSection);
  }

  // Close gaps between sections by merging nearby sections
  return closeGapsBetweenSections(sections, distanceThreshold * 2);
}

function closeGapsBetweenSections(sections, maxGapSize) {
  let mergedSections = [];
  let currentMergedSection = sections[0];

  // Iterate over each section starting from the second section
  for (let i = 1; i < sections.length; i++) {
    let lastPoint = currentMergedSection[currentMergedSection.length - 1];
    let firstPointNextSection = sections[i][0];

    if (dist(lastPoint.x, lastPoint.y, firstPointNextSection.x, firstPointNextSection.y) <= maxGapSize) {
      // If the distance between the last point of the current merged section and the first point of the next section
      // is within the maxGapSize, merge the next section into the current merged section
      currentMergedSection = currentMergedSection.concat(sections[i]);
    } else {
      // If the distance exceeds the maxGapSize, push the current merged section to the mergedSections array
      // and start a new merged section with the next section
      mergedSections.push(currentMergedSection);
      currentMergedSection = sections[i];
    }
  }

  // Push the last merged section to the mergedSections array
  mergedSections.push(currentMergedSection);
  return mergedSections;
}

This algorithm detects separate sections in the drawing based on the distance between points, allowing for intuitive color separation. It also includes a method to close gaps between sections that are likely part of the same continuous line, which helps create more coherent colored areas.

Challenges

The main challenge I faced was implementing the coloring feature effectively. Determining where one section of the drawing ends and another begins was not straightforward, especially for complex drawings with overlapping lines or varying drawing speeds. I had to experiment with different distance thresholds to strike a balance between oversegmentation (too many small colored sections) and undersegmentation (not enough color variation).

Another challenge was ensuring that the coloring didn’t interfere with the Fourier reconstruction process. I needed to make sure that the section detection and coloring were applied to the original drawing data in a way that could be mapped onto the reconstructed Fourier drawing.

Reflection

This project was a valuable learning experience. It helped me understand how to apply mathematical concepts like Fourier transforms to create something visually interesting and interactive. While the core Fourier transform implementation was based on the tutorial, developing the coloring feature pushed me to think creatively about how to analyze and segment a drawing. Nevertheless, following tutorial also helped me comprehend mathematical side of the concept.

I gained insights into image processing techniques, particularly in terms of detecting continuity and breaks in line drawings. The project also improved my skills in working with canvas graphics and animation in JavaScript.

Moreover, this project taught me the importance of user experience in mathematical visualizations. Adding the coloring feature made the Fourier drawing process more engaging and accessible to users who might not be as interested in the underlying mathematics.


Future Improvements

Looking ahead, there are several ways I could enhance this project:

  1. User-defined Colors: Allow users to choose their own colors for sections instead of using random colors.
  2. Improved Section Detection: Implement more sophisticated algorithms for detecting drawing sections, possibly using machine learning techniques to better understand the user’s intent.
  3. Smooth Color Transitions: Add an option for smooth color gradients between sections instead of solid colors.
  4. Interactivity: Allow users to manipulate the colored sections after the drawing is complete, perhaps by dragging section boundaries or merging/splitting sections.
  5. Improved interface: make interface look more modern and polished.

References

  1. The Coding Train’s Fourier Transform tutorial by Daniel Shiffman
  2. P5.js documentation and examples
  3. Various online sources

Week 3 – “Be Not Afraid” by Dachi

Sketch

Concept Inspiration

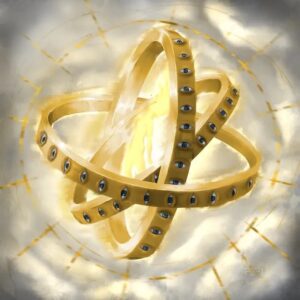
My project, titled “Be Not Afraid,” was inspired by the concept of biblically accurate angels, specifically the Thrones (also known as Ophanim). In biblical and extrabiblical texts, Thrones are described as extraordinary celestial beings. The prophet Ezekiel describes them in Ezekiel 1:15-21 as wheel-like creatures: “Their appearance and structure was as it were a wheel in the middle of a wheel.” They are often depicted as fiery wheels covered with many eyes.

I wanted to recreate this awe-inspiring and somewhat unsettling image using digital art. The multiple rotating rings adorned with eyes in my project directly represent the wheel-within-wheel nature of Thrones, while the overall structure aims to capture their celestial and otherworldly essence. By creating this digital interpretation, I hoped to evoke the same sense of wonder and unease that the biblical descriptions might have inspired in ancient times.

Process of Development

I started by conceptualizing the basic structure – a series of rotating rings with eyes to represent the Thrones’ form. Initially, I implemented sliders for parameter adjustment, thinking it would be interesting to allow for interactive manipulation. However, as I developed the project, I realized I preferred a specific aesthetic that more closely aligned with the biblical descriptions and decided to remove the sliders and keep fixed values.

A key requirement of the project was to use invisible attractors and visible movers to create a pattern or design. This led me to implement a system of attractors that influence the movement of the entire Throne structure. This is mainly expressed in rotation around the center and more turbulent up and down movement. Values for these were adjusted to make motion smooth and graceful, corresponding to that of divine being.

As I progressed, I kept adding new elements to enhance the overall impact and atmosphere. The central eye came later in the process, as did the cloud background and sound elements. The project was all about refinement after refinement. Even at this stage I am sure there are lots of things to improve since lot of is visual representation which at times can be quite subjective.

How It Works

My project uses p5.js to create a 3D canvas with several interacting elements:

  1. Rings: I created four torus shapes with different orientations and sizes to form the base structure, representing the “wheel within a wheel” form of Thrones. Those wheels or rings were taken to be different values but eventually settled for four as it is not too overcrowded while delivering needed effect.
  2. Eyes: I positioned multiple eyes of varying sizes on these rings, reflecting the “full of eyes” description associated with Thrones.
  3. Central Eye: I added a larger eye in the center that responds to mouse movement when the cursor is over the canvas, symbolizing the all-seeing nature of these beings.
  4. Attractors and Movement: I implemented a system of invisible attractors that influence the movement of the entire structure. This includes:
  5. A central attractor that creates a circular motion.
  6. Vertical attractors that add turbulence and complexity to the movement. These attractors work together to create the organic, flowing motion of the Throne structure, evoking a sense of constant, ethereal rotation as described in biblical texts.
  7. Background: I used a cloud texture to provide a heavenly backdrop.
  8. Audio: I incorporated background music and a rotation sound whose volume correlates with the ring speeds to enhance the atmosphere.

Code I’m Proud Of

There are several pieces of code in this project that I’m particularly proud of, as they work together to create the complex, ethereal movement of the Thrones:

  1. The attractor system:
// Calculate attractor position
let attractorX = cos(attractorAngle) * attractorRadius;
let attractorY = sin(attractorAngle) * attractorRadius;

// Calculate vertical attractor position with increased turbulence
let verticalAttractorY = 
  sin(verticalAttractorAngle1) * verticalAttractorAmplitude1 +
  sin(verticalAttractorAngle2) * verticalAttractorAmplitude2 +
  sin(verticalAttractorAngle3) * verticalAttractorAmplitude3;

// Move the entire scene based on the attractor position
translate(attractorX, attractorY + verticalAttractorY, 0);

This code creates complex, organic motion by combining a circular attractor with vertical attractors. It achieves a nuanced, lifelike movement that adds significant depth to the visual experience, simulating the constant, ethereal rotation associated with the biblical descriptions of Thrones.

2. The ring and eye movement, including fading effects:

// Update outer ring spin speed
outerRingTimer++;
if (outerRingTimer >= pauseDuration && !isOuterRingAccelerating) {
  isOuterRingAccelerating = true;
  outerRingTimer = 0;
  fadeOutStartTime = 0;
} else if (outerRingTimer >= accelerationDuration && isOuterRingAccelerating) {
  isOuterRingAccelerating = false;
  outerRingTimer = 0;
  fadeOutStartTime = frameCount;
}

if (isOuterRingAccelerating) {
  outerRingSpeed += ringAcceleration;
  rotationSoundVolume = min(rotationSoundVolume + 0.01, 1);
} else {
  outerRingSpeed = max(outerRingSpeed - ringAcceleration / 3, 0.01);
  
  if (frameCount - fadeOutStartTime < decelerationDuration - fadeOutDuration) {
    rotationSoundVolume = 1;
  } else {
    let fadeOutProgress = (frameCount - (fadeOutStartTime + decelerationDuration - fadeOutDuration)) / fadeOutDuration;
    rotationSoundVolume = max(1 - fadeOutProgress, 0);
  }
}

rotationSound.setVolume(rotationSoundVolume);

// Update ring spins
rings[1].spin += outerRingSpeed;
rings[3].spin += innerRingSpeed;

// Draw and update eyes
for (let eye of eyes) {
  let ring = rings[eye.ring];
  let r = ring.radius + ring.tubeRadius * eye.offset;
  let x = r * cos(eye.angle);
  let y = r * sin(eye.angle);
  
  push();
  rotateX(ring.rotation.x + sin(angle + ring.phase) * 0.1);
  rotateY(ring.rotation.y + cos(angle * 1.3 + ring.phase) * 0.1);
  rotateZ(ring.rotation.z + sin(angle * 0.7 + ring.phase) * 0.1);
  if (eye.ring === 1 || eye.ring === 3) {
    rotateZ(ring.spin);
  }
  translate(x, y, 0);
  
  let eyePos = createVector(x, y, 0);
  let screenCenter = createVector(0, 0, -1);
  let directionVector = p5.Vector.sub(screenCenter, eyePos).normalize();
  
  let rotationAxis = createVector(-directionVector.y, directionVector.x, 0).normalize();
  let rotationAngle = acos(directionVector.z);
  
  rotate(rotationAngle, rotationAxis);
  
  if (eye.isInner) {
    rotateY(PI);
  }
  
  texture(eyeTexture);
  sphere(eye.size);
  pop();
}


This code manages the complex movement of the rings and eyes, including acceleration, deceleration, and fading effects. It creates a mesmerizing visual that captures the otherworldly nature of the Thrones. The fading of the rotation sound adds an extra layer of immersion.

I’m particularly proud of how these pieces of code work together to create a cohesive, organic motion that feels both alien and somehow alive, which is exactly what I was aiming for in this representation of biblically accurate angels.


Challenges

The biggest challenge I faced was definitely the movement and implementing the attractor system effectively. Creating smooth, organic motion in a 3D space while managing multiple rotating elements was incredibly complex. I struggled with:

  1. Coordinating the rotation of rings with the positioning and rotation of eyes.
  2. Implementing the acceleration and deceleration of ring rotations smoothly.
  3. Balancing the various movement elements (ring rotation, attractor motion, eye tracking) to create a cohesive, not chaotic, visual effect.

Another significant challenge was accurately representing the complex, wheel-within-wheel structure of Thrones. Balancing the need for a faithful representation with artistic interpretation and technical limitations required careful consideration and multiple iterations.

Reflection

Looking back, I’m satisfied with how my “Be Not Afraid” project turned out. I feel I’ve successfully created an interesting  and slightly unsettling visual experience that captures the essence of Thrones as described in biblical texts. The layered motion effects created by the attractor system effectively evoke the constant rotation associated with these beings. I’m particularly pleased with how the central eye and the eyes on the rings work together to create a sense of an all-seeing, celestial entity.

Future Improvements

While I’m happy with the current state of my project, there are several improvements I’d like to make in the future:

  1. Blinking: I want to implement a sophisticated blinking mechanism for the eyes, possibly with randomized patterns or reactive blinking based on scene events. This could add to the lifelike quality of the Throne.
  2. Face Tracking: It would be exciting to replace mouse tracking with face tracking using a webcam and computer vision libraries. This would allow the central eye to follow the viewer’s face, making the experience even more immersive and unsettling.
  3. Increased Realism: I’d like to further refine the eye textures and shading to create more photorealistic eyes, potentially using advanced shaders. This could enhance the “full of eyes” aspect described in biblical texts.
  4. Interactive Audio: Developing a more complex audio system that reacts to the movement and states of various elements in the scene is definitely on my to-do list.
  5. Performance Optimization: I want to explore ways to optimize rendering and calculation to allow for even more complex scenes or smoother performance on lower-end devices.
  6. Enhanced Wheel Structure: While the current ring structure represents the wheel-like form of Thrones, I’d like to further refine this to more clearly show the “wheel within a wheel” aspect. This could involve creating interlocking ring structures or implementing a more complex geometry system.
  7. Fiery Effects: Many descriptions of Thrones mention their fiery nature. Adding particle effects or shader-based fire simulations could enhance this aspect of their appearance.

References

  1. Biblical descriptions of Thrones/Ophanim, particularly from the Book of Ezekiel
  2. Provided Coding Train video about attractors
  3. Various Art depicting thrones
  4. General internet
  5. Royalty free music
  6. Eye texture PNG (Eye (Texture) (filterforge.com))
  7. https://www.geeksforgeeks.org/materials-in-webgl-and-p5-js/

Update: Added eye movement, removed torus shape, increased eye frequency

Update2: removed outer frame, increased distance to Ophanim, fog effect, 2x zoom effect, modified picture (Photoshop Generative AI). Added more extensive comments. Eye twitch movement (random).

Week 2 – Algae Simulation by Dachi

Sketch:


Concept: My project is an interactive digital artwork that simulates the movement and appearance of algae in a swamp environment. Inspired by what I have seen in my home country many times, it aims to capture the flow of algae in a river. I used different methodologies to create a dynamic, visually interesting scene that mimics the organic, flowing nature of algae. By incorporating various elements such as multiple algae clusters, water particles, and background rocks, I tried to recreate a cohesive river like ecosystem.

Inspiration: The inspiration for this project came from my trip to Dashbashi Mountain in Georgia. I saw algae flowing in a river near the waterfall, and it was very pretty, almost from a fantasy world. This happened very recently so it was the first thing that came to mind when I was thinking about this project. This brief encounter with nature became the foundation for my work, as I tried to translate the organic movement of algae and water into an interactive digital format.

IMG_7042 – Short clip of moving Algae

Process of Development: I developed this project iteratively, adding various features and complexities over time:

At first I visualized the algae movement. I realized it had to do something with waves and sinusoidal shapes were first thing that came to my mind. Unfortunately, few hours in implementation I realized assignment specifically asked for acceleration. Soon after implementing acceleration, I realized this movement alone limited me in creating algae flow so I had to go back and forth multiple times to get at result that somewhat resembled the movement while using acceleration. Unfortunately, I did not find any definitive tutorials of such movement. As such this is more of a strand like simulation which I slowly built up, line by line, also looking at other works like hair movement for inspiration, I will mention them in references.

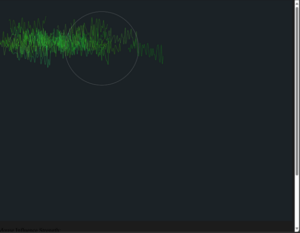
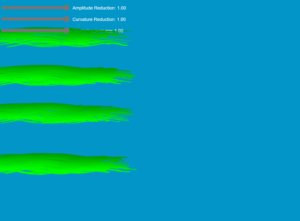
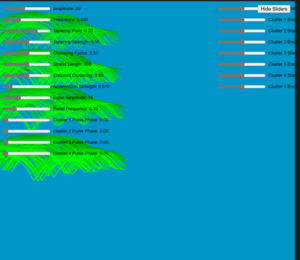
These screenshots are from earlier development of the simulations:

As you can see by adding various parameters to each strand as well as overall cluster, we are able to achieve similar wavy pulsating pattern that algae have. I also added particle systems and noise-based algorithms for water movement (you can see inspiration of this from reference). To enhance the environment, I included rock formations and a sky.  I integrated sliders and toggles for user interaction. Finally, I kept refining values till I achieved desire perfomance and visuals. The simulation is pretty heavy to run and you can expect drastic FPS drops, based on number of strands we are running. Water simulation is a significant culprit here despite multiple scaling that was needed to achieve even that. 

How It Works:

Algae Simulation: I created multiple clusters of algae strands, each with unique properties. I animate each strand using sine waves and apply tapering effects and clustering forces for a more natural-looking movement. I also calculate acceleration and velocity for each strand to simulate fluid dynamics.

Water Effects: I used a particle system to create the illusion of flowing water, with Perlin noise for natural-looking movement. I applied color gradients to enhance the swamp-like appearance. There is also background audio of waterfall that helps the immersion.

Environmental Elements: I drew rocks using noise-based shapes with gradients and added a toggleable sky for depth.

Interactivity: I included multiple sliders that allow users to adjust various parameters in real-time.

If you want to know more about in depth working and how everything is related, it will be better to check out my code as it is commented thoroughly.

Code: 

One piece of code I’m particularly proud of is the function that generates and animates individual algae strands:

function algae(strandPhase, strandLength, strandAmplitude, clusterEndX, clusterPulsePhase) {
  beginShape();
  
  let taperingPoint = taperingPointSlider.value() * strandLength;
  let taperingStrength = taperingStrengthSlider.value();
  
  for (let i = 0; i <= strandLength; i += 10) {
    let x = i;
    let y = 0;
    
    let progress = i / strandLength;
    
    let taperingFactor = 1;
    if (i > taperingPoint) {
      taperingFactor = pow(map(i, taperingPoint, strandLength, 1, 0), taperingStrength);
    }
    
    let currentAmplitude = strandAmplitude * (1 - progress * 0.8) * taperingFactor;
    
    let movementFactor = sin(map(i, 0, strandLength, 0, PI));
    let movement = sin(strandPhase + i * 0.02) * currentAmplitude * movementFactor;
    
    let angle = map(i, 0, strandLength, 0, PI * 2);
    x += cos(angle) * movement;
    y += sin(angle) * movement;
    
    let curvature = sin(i * 0.05 + phase + clusterPulsePhase) * 5 * (1 - progress * 0.8) * taperingFactor;
    y += curvature;
    
    let clusteringForce = map(i, 0, strandLength, 0, 1);
    let increasedClusteringFactor = clusteringFactor + (progress * 0.5);
    x += (clusterEndX - x) * clusteringForce * increasedClusteringFactor;
    
    vertex(x, y);
  }
  endShape();
}

This code incorporates acceleration and velocity calculations to simulate realistic fluid dynamics, creating more natural and unpredictable movement. The function also creates a tapering effect along the strand’s length, generates wave-like movement using sine functions, and applies a clustering force to mimic how algae clumps in water. I’m especially pleased with how it combines mathematical concepts like acceleration, sine waves, and mapping with artistic principles to create a visually appealing and believable representation of algae in motion. The integration of user controls allows for real-time adjustment of parameters like acceleration strength, making the simulation highly interactive and customizable.

Challenges

Balancing visual quality with smooth performance was tricky, especially when animating multiple elements at once. Getting the algae to move naturally in response to water currents took a lot of tweaking. The water particle system was also tough to optimize – I had to find ways to make it look good without slowing everything down. Another challenge was making the user controls useful but not overwhelming.

Reflection:

This project was a good learning experience for me. I enjoyed turning what I saw at Dashbashi Mountain into a digital artwork. It was challenging at times, especially when I had to figure out how to make the algae move realistically. I’m happy with how I combined math and art to create something that looks pretty close to real algae movement. The project helped me improve my coding skills and while it’s not perfect, I’m pleased with how finished product looks.

Future Improvements:

Speed it up: The simulation can be slow, especially with lots of algae strands. I’d try to make it run smoother.
Better water: The water effect is okay, but it could look more realistic.
Add more stuff: Maybe include some fish or bugs to make it feel more like a real ecosystem.

References:

p5.js Web Editor | Blade seaweed copy copy (p5js.org)

p5.js Web Editor | sine wave movement (hair practice) (p5js.org)

p5.js Web Editor | Water Effect (p5js.org)

YouTube

Internet


Week 1 – Fireflies by Dachi

Sketch

Code:

let fireflies = [];
const numFireflies = 50;
const avoidanceRadius = 150;  // Radius around cursor where fireflies start avoiding
let backgroundImage;
let canteenImage;
let mainTheme;

function preload() {
  // Load assets before setup
  backgroundImage = loadImage('background.png');
  canteenImage = loadImage('canteen2.png');
  soundFormats('mp3', 'ogg');
  mainTheme = loadSound('grave_of_fireflies_theme.mp3');
}

function setup() {
  createCanvas(800, 600);

  // Initialize fireflies
  for (let i = 0; i < numFireflies; i++) {
    fireflies.push(new Firefly());
  }

  noCursor();  // Hide default cursor

  // Start background music
  mainTheme.setVolume(0.5);
  mainTheme.loop();
}

function draw() {
  image(backgroundImage, 0, 0, width, height);

  drawShadow();

  // Update and display fireflies
  for (let firefly of fireflies) {
    firefly.move();
    firefly.display();
  }

  drawCanteen();
}

function drawShadow() {
  let canteenSize = 100;
  let shadowSize = canteenSize * 1.5;

  // Calculate shadow offset based on simulated light source
  let lightX = width / 2;
  let lightY = height / 2;
  let shadowOffsetX = map(mouseX - lightX, -width/2, width/2, -20, 20);
  let shadowOffsetY = map(mouseY - lightY, -height/2, height/2, -20, 20);

  push();
  translate(mouseX + shadowOffsetX, mouseY + shadowOffsetY);

  // Create and draw radial gradient for shadow
  let gradient = drawingContext.createRadialGradient(0, 0, 0, 0, 0, shadowSize/2);
  gradient.addColorStop(0, 'rgba(0, 0, 0, 0.3)');
  gradient.addColorStop(1, 'rgba(0, 0, 0, 0)');
  drawingContext.fillStyle = gradient;
  ellipse(0, 0, shadowSize, shadowSize * 0.6);

  pop();
}

function drawCanteen() {
  let canteenSize = 100;
  let tiltAmount = 10;

  // Tilt canteen based on mouse position
  let tiltX = map(mouseX, 0, width, -tiltAmount, tiltAmount);
  let tiltY = map(mouseY, 0, height, -tiltAmount, tiltAmount);

  push();
  translate(mouseX, mouseY);
  rotate(radians(tiltX));
  rotate(radians(tiltY));
  image(canteenImage, -canteenSize/2, -canteenSize/2, canteenSize, canteenSize);
  pop();
}

class Firefly {
  constructor() {
    this.reset();
  }

  reset() {
    // Initialize firefly properties
    this.x = random(width);
    this.y = random(height);
    this.brightness = random(150, 255);
    this.blinkRate = random(0.01, 0.03);
    this.speed = random(0.2, 0.5);
    this.size = random(10, 15);
    this.angle = random(TWO_PI);
    this.turnSpeed = random(0.05, 0.1);
  }

  move() {
    let d = dist(this.x, this.y, mouseX, mouseY);

    if (d < avoidanceRadius) {
      // Avoid cursor
      let avoidanceSpeed = map(d, 0, avoidanceRadius, this.speed * 5, this.speed);
      let angle = atan2(this.y - mouseY, this.x - mouseX);
      this.x += cos(angle) * avoidanceSpeed;
      this.y += sin(angle) * avoidanceSpeed;
    } else {
      // Normal movement using Perlin noise
      let noiseScale = 0.01;
      let noiseVal = noise(this.x * noiseScale, this.y * noiseScale, frameCount * noiseScale);
      this.angle += map(noiseVal, 0, 1, -this.turnSpeed, this.turnSpeed);
      this.x += cos(this.angle) * this.speed;
      this.y += sin(this.angle) * this.speed;
    }

    // Wrap around edges of canvas
    if (this.x < -this.size) this.x = width + this.size;
    if (this.x > width + this.size) this.x = -this.size;
    if (this.y < -this.size) this.y = height + this.size;
    if (this.y > height + this.size) this.y = -this.size;

    // Update brightness for blinking effect
    this.brightness += sin(frameCount * this.blinkRate) * 5;
    this.brightness = constrain(this.brightness, 150, 255);
  }

  display() {
    noStroke();
    let glowSize = this.size * 2;
    let alpha = map(this.brightness, 150, 255, 50, 150);

    // Draw firefly with layered glow effect
    fill(255, 255, 150, alpha * 0.3);
    ellipse(this.x, this.y, glowSize, glowSize);
    fill(255, 255, 150, alpha * 0.7);
    ellipse(this.x, this.y, this.size * 1.5, this.size * 1.5);
    fill(255, 255, 150, alpha);
    ellipse(this.x, this.y, this.size, this.size);
  }
}

Concept

This project is an interactive simulation inspired by the Studio Ghibli film “Grave of the Fireflies”. It aims to capture mesmerizing fireflies which is connected to the main movie theme. The simple movement creates an atmospheric environment where glowing fireflies interact with the user’s cursor, represented by the famous candy tin from the film. This concept seeks to evoke the bittersweet feelings of the movie, allowing users to subtly engage with its symbolism.

How It Works

Each firefly is represented by a glowing orb that moves automatically across the screen. The movement of these digital insects is controlled by Perlin noise. This technique results in firefly movements that appear organic and natural, where the erratic flight patterns of real fireflies are mimicked.

The visual representation of the fireflies is achieved through different layers. Each firefly consists of multiple semi-transparent circles of varying sizes which create a soft bloomy look. The brightness of each firefly pulsates over time, simulating the flashing characteristic of these insects.

As the user moves this cursor across the screen, nearby fireflies react by moving away, creating a dynamic and responsive environment. This small interaction element is quite smooth and I fine-tuned it to not appear too rapid.

Background music is the theme of the movie which enhances the experience and is quite emotional.
I used Adobe Photoshop to modify the background image to create a suitable environment for the fireflies. Additionally, the candy tin image used for the cursor was edited to include a subtle red glow, helping it integrate seamlessly with the illumination of the fireflies.

Potential Improvements

While the current implementation achieves its basic goals, there are many ways to improve. The most significant one would be, adding more interactive elements that could enhance user engagement. This might include implementing sound effects that respond to firefly movements or user interactions or introducing environmental factors like wind or obstacles that influence firefly behavior.
Lastly, providing user controls to adjust parameters such as firefly count, speed, or glow intensity could allow for a more personalized experience, enabling users to experiment with different atmospheres.

Difficulties and Challenges

One of the main challenges in this project was creating a natural-looking movement pattern for the fireflies that didn’t appear too random or too uniform. Initially, the fireflies tended to drift in one direction over time, which required careful tuning of the Perlin noise parameters to correct. Another significant challenge was implementing the avoidance behavior in a way that felt organic; early iterations had the fireflies reacting too abruptly to the cursor, which broke the illusion of natural movement.

References

1. Studio Ghibli. (1988). Grave of the Fireflies [Motion Picture]. Japan.
2. Coding Train from Youtube

(This project satisfies the assignment requirements by experimenting with motion through the implementation of Perlin noise-based movement and avoidance behavior of the fireflies. Additionally, it applies rules of motion to another medium of expression by translating the movement algorithms into visual representations of color and brightness in the fireflies’ glow effect.)

Week 1 – Reading Reflection by Dachi

The introduction chapter in The Computational Beauty of Nature by Gary William Flake uses principles of Computer Science to address significant biological phenomena. He starts with reductionism or more simply comprehension through dissection which can also be viewed as an altered interaction of different agents at distinct levels. We have various pieces of evidence (naturally occurring at that) that support this perspective. For example, Ant Colonies have a peculiar behavior that cannot be understood by examining each ant. It is the interaction between individuals that eventually form a colony’s complex patterns. Evolution operates with a similar mechanism. Over time, individual organisms interact via which new species might be produced. Our high level of consciousness or intelligence, also can’t be reduced to properties of individual neurons. These are some of the examples I found most interesting, and they align and deliver the main message of the author. This is to consider parallelism, iteration, feedback, adaption, and more to understand the full system of these complex pictures.

The author does truly bring many examples with this holistic approach, but I feel like it undermines the significance of reductionism. At a simple level, it is a very important scientific tool that is used by many scientists all over the world, even I used it repeatedly in school as it remained a core component in the analysis of many phenomena. Furthermore, yes while on its own it might not offer the full picture, dismissing it is not the right approach. I think the combination of reductionist and interactionist approaches is what works the best, where they make up for each other’s weaknesses. While the author acknowledges it, the overall tone still feels biased towards interactionism. The author also argues that the widespread introduction of computers has unified lots of disciplines by enabling combination of theory and experiments.Such methods include the use of fractals (modeling plant growth) and chaos (applied in physics, bio, econ, etc.) to provide a merger of those disciplines. Despite this, significant fragmentation is still relevant as scientists may use those methods but struggle to connect them to domain-specific insights. In theory, it’s possible, but how far can we extend the computation metaphor before we lose its predictive power? I think the author’s arguments are compelling but more nuance is needed in some cases.