Final-Bringing a Flower to Life + IM Show

Concept:

My concept is about creating a flower that is both digital and physical, making it come to life with user interaction. On the screen, the flower sways in the wind and reacts to how you move your mouse and blow into a microphone. At the same time, a real flower-like structure made with Arduino mirrors this behavior, with its petals moving using a motor and LED lights changing color.

The screen version uses code to draw a flower that looks alive. The petals change size and color when you move your mouse, and the flower sways gently like it is in the wind. If you blow into the microphone, the sway becomes more dramatic, like a strong gust of wind.

The physical version is controlled by an Arduino board. The motor moves the petals, and the LED lights change brightness and color. It reacts to the same inputs as the digital version. Data flows between the digital and physical versions in real time, making them feel connected.

This idea mixes art and technology. It is interactive and fun while also showing how digital and physical systems can work together.

Images:

 mouse is moved downwards

 mouse is moved upwards

mouse is moved horizontally

User Testing:


Description of Interaction Design:

  • Mouse Movement:
    • Moving the mouse up or down changes the size of the flower petals.
    • Moving the mouse left or right changes the LED color of the physical flower and the digital flower’s appearance.
  • Sound Input:
    • Blowing into a microphone connected to the Arduino makes the flower sway more dramatically. Both the digital and physical flowers respond to the intensity of the blowing.
  • Real-Time Synchronization:
    • The digital flower sends data (servo angle, LED brightness, and color) to the Arduino over a serial connection.
    • The Arduino processes this data to control the physical flower’s movement and lighting.

How Does the Implementation Work?

The implementation brings the flower to life through interaction and synchronization between a digital animation (p5.js) and a physical flower model (Arduino). The interaction happens in real-time as data flows between the two systems via serial communication.

Since the p5 should control the arduino it means that the p5 should send data to arduino over serial and the arduino should keep listening to the serial port for any data to control the servo motor and the LED.

Arduino Code:

The Arduino code controls the physical flower’s servo motor (petals) and LED lights. It also listens to the microphone input to adjust the flower’s sway.

Key Logic:

Serial Communication: The Arduino reads input data from p5.js to control the servo angle and LED properties.

if (Serial.available() > 0) {
    String data = Serial.readStringUntil('\n'); // Read data from p5.js
    parseData(data); // Parse angle, brightness, and color
}
  • Servo Movement: Smoothly moves the servo motor to the target angle to simulate natural petal motion.
void smoothServoMove() {
    if (currentServoAngle != targetServoAngle) {
        currentServoAngle += (currentServoAngle < targetServoAngle) ? 1 : -1;
        petalServo.write(currentServoAngle); // Adjust servo position
    }
}
  • LED Control: Updates LED brightness and color based on values received from p5.js.
void updateLEDs() {
    uint32_t color = calculateColor(ledBrightness, ledColorValue); 
    for (int i = 0; i < NUM_LEDS; i++) {
        strip.setPixelColor(i, color); // Set LED color
    }
    strip.show();
}
  • Microphone Input: Reads sound intensity from the microphone to determine the sway effect.
int mn = 1024, mx = 0;
for (int i = 0; i < 100; ++i) {
    int val = analogRead(MIC_PIN);    
    mn = min(mn, val);
    mx = max(mx, val);
}
Serial.println(mx - mn); // Send sound intensity to p5.js

P5.js Code:

The p5.js code creates a dynamic flower animation and sends control data to the Arduino. It receives microphone input values to update the digital flower’s behavior.

Key Logic:

  • Sending Data to Arduino: Sends data in the format servoAngle,brightness,colorValue to control the physical flower.
let servoAngle = constrain(int(map(mouseY, 0, height, 75, 0)), 0, 75);
let ledBrightness = constrain(int(map(mouseY, 0, height, 0, 200)), 0, 200);
let ledColor = constrain(int(map(mouseX, 0, width, 0, 255)), 0, 255);
let dataString = `${servoAngle},${ledBrightness},${ledColor}\n`;
serial.write(dataString); // Send data to Arduino
  • Flower Animation: Draws a flower that sways using Perlin noise for natural motion. The petals’ size and color respond to mouse movement.
function flower() {
    let windFactor = noise(frameCount * 0.01) * 30; 
    let targetSway = inData > 20 ? map(inData, 20, 1024, 0, 50) : 0;
    windSway += (targetSway - windSway) * 0.1; // Smooth sway transition
    
    push();
    translate(width / 2 + windSway, height / 2);
    for (let i = 0; i < 10; i++) {
        let petalSize = map(mouseY, 0, height, 25, 50);
        let petalColor = lerpColor(color(230, 190, mouseY), color(255, mouseY, mouseY), i / 10);
        fill(petalColor);
        ellipse(0, 40, petalSize, petalSize * 2);
        rotate(PI / 5);
    }
    pop();
}
  • Leaf Falling Effect: Creates falling leaves when the microphone detects strong wind.
if (inData > 40 && !isBlowing) {
    isBlowing = true;
    fallingLeaves.push(new fallingLeaf(width / 2.1, height * 0.6));
}

Together, these systems create a synchronized and interactive flower experience. The digital and physical elements complement each other, making it both engaging and technically impressive.

Embedded Sketch:

Aspects of the Project I’m Particularly Proud Of:

  • Seamless Synchronization: The real-time interaction between the digital and physical flower is smooth and responsive. This makes the project feel alive and dynamic, as the changes on the screen and in the physical flower happen instantly.
  • Interactive Design: The project responds intuitively to user inputs like mouse movement and sound. For instance, the way the flower sways naturally with Perlin noise and the dramatic movement triggered by blowing into the mic make the interaction feel organic.
  • Creative Use of Technology: Combining p5.js for digital visuals with Arduino for physical movements and lights was challenging but rewarding. The servo motor, LED lights, and microphone sensor work together to mirror the digital animation.
  • Visual Appeal: The gradient background, dynamic petals, and swaying effect are visually engaging. Adding elements like falling leaves and soil patterns enriches the experience and makes the animation more immersive.
  • Problem-Solving and Optimization: Addressing challenges like abrupt movements, serial communication errors, and performance issues (e.g., limiting leaves per blow) helped make the project smoother and more efficient.

Links to Resources Used:

  1. p5.js Official Documentation:
  2. Arduino Official Documentation:
  3. Adafruit TiCoServo and NeoPixel Libraries:
  4. p5.serialport.js:
  5. Node.js Serial Server:
  6. Articles and Tutorials:
    • “How to Use Perlin Noise in Creative Coding”
      https://thecodingtrain.com/
      Helped with implementing smooth sway effects for the flower and leaves.
  7. Arduino and p5.js Community Forums:

Challenges Faced and How I Overcame Them:

  • Synchronization Issues:
    • Problem: The digital flower and the physical flower did not always behave the same due to delays in serial communication.
    • Solution: Optimized the data sent over the serial connection by minimizing unnecessary updates and using a consistent format. Added smoothing functions to reduce abrupt changes.
  • Abrupt Movement:
    • Problem: The flower’s sway and servo movements were jerky, making the animation feel unnatural.
    • Solution: Used Perlin noise for smooth sway effects and gradually interpolated servo angles with windSway += (targetSway - windSway) * 0.1.
  • Serial Communication Errors:
    • Problem: Occasionally, the Arduino would fail to read the data correctly, leading to erratic behavior or crashes.
    • Solution: Implemented error handling by trimming data and ensuring the format was consistent. Added checks for valid data ranges before processing.
  • Overloading the System:
    • Problem: Generating too many falling leaves or frequent updates caused performance issues.
    • Solution: Limited the number of leaves generated during each blow cycle and optimized the logic for removing off-screen leaves.
  • Mic Input Sensitivity:
    • Problem: The microphone often picked up background noise, causing unintentional flower movements.
    • Solution: Calibrated the microphone by adding a threshold to filter out low-intensity sounds and used the map function to scale input values proportionally.
  • User Understanding of Controls:
    • Problem: Users found it challenging to understand how to interact with the system.
    • Solution: Added an instructional overlay with text and icons to guide users on how to use mouse movement and microphone input effectively.

Future Improvement:

  1. Improved Interaction Design:
    • Add more user interaction options, such as touch inputs for mobile devices or keyboard controls.
    • Allow users to customize the flower’s appearance (e.g., petal shape, color palette) through an interface.
  2. Enhanced Physical Integration:
    • Use more advanced sensors, like an IMU (Inertial Measurement Unit), to detect hand gestures for controlling the physical flower.
    • Add more LEDs or motors to create a multi-layered flower for a more complex and realistic effect.
  3. Better Performance Optimization:
    • Explore using faster communication protocols like Bluetooth or Wi-Fi instead of serial communication to reduce latency.
    • Optimize the falling leaf particle system for smoother animation with larger leaf counts.
  4. Visual Enhancements:
    • Make the background gradient dynamic, transitioning based on user interactions or environmental factors like sound intensity.
    • Add weather effects, like raindrops or sunlight, to complement the flower’s animation.
  5. Educational Features:
    • Include real-time data visualization (e.g., a graph showing microphone input or servo angle changes).
    • Add explanations of how the flower’s behavior is controlled, making it a teaching tool for IoT and creative coding.
  6. Scalability:
    • Expand the project to include a garden of flowers, each responding differently to inputs.
    • Enable networked interaction, where multiple users can control different flowers from different locations.

These improvements can make the project more engaging, robust, and versatile for various applications, from education to art installations.

IM SHOW

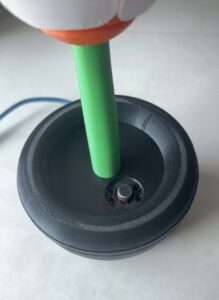
For the IM Show, I wanted my interactive flower project to be as intuitive and engaging as possible. One key element of the setup was the microphone, which is essential for controlling the flower’s dramatic sway. To make it clear where visitors should blow, I printed out a small microphone image and taped it to the actual microphone sensor. This simple addition helped guide people, ensuring they could interact with the project effortlessly without needing additional instructions.

Challenges:

While setting up the project at the IM Show, I encountered an unexpected issue: when I switched the p5.js animation to full-screen mode, the application started lagging. This was frustrating because the smooth motion of the flower and leaves is a big part of the experience.

After some quick troubleshooting, I realized the issue was related to rendering performance on larger canvases. To fix it, I adjusted the canvas dimensions to be slightly smaller than the full screen. Here’s how I did it:

function setup() {
    let width = window.innerWidth * 0.9; // 90% of screen width
    let height = window.innerHeight * 0.9; // 90% of screen height
    createCanvas(width, height);
    noStroke();
}

This solution maintained the immersive feel of a full-screen display while reducing the computational load. The animation ran smoothly for the rest of the show, and visitors enjoyed interacting with the flower.

With the microphone image and the optimized display, people were able to blow into the mic, move the mouse, and watch both the digital and physical flowers come alive in real-time. Seeing the excitement and curiosity on people’s faces as they controlled the flower made all the effort worth it. It was a fantastic opportunity to share my work and learn from the feedback of others!

Final Project Draft 2-Bringing a Flower to Life

Concept:

The idea of this project is to use art and technology to make a flower come alive. It’s about creating a flower that moves, reacts to sound, and interacts with people through mouse movements. Instead of being just a simple object, the flower feels lifelike and connected to its surroundings.

This is done using an Arduino Nano, sensors, and p5.js. The flower sways like it’s in the wind, reacts to sounds, and changes based on where you move your mouse. The project shows how we can use technology to make everyday objects interactive and bring them to life in creative ways.

Setting up the Flower:

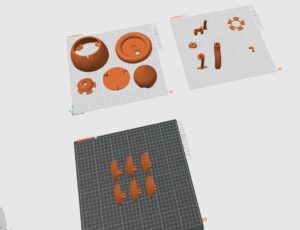
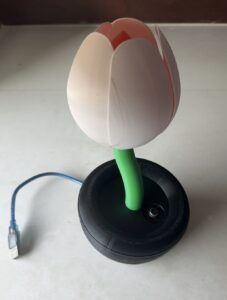
Setting up the flower was simple but really exciting. I started by 3D printing the parts. The petals are white with a hint of orange inside, which gives them a soft, natural look. The stem is bright green, making it feel like a real flower, and the base is black to keep everything stable and balanced.

Inside the base, I will add all the electronics. I will use an Arduino Nano, a microphone sensor, and an RGB LED. The microphone will listen to sounds, like clapping or blowing, and the flower will react by swaying more when it detects them. I will carefully hide all the wires and parts inside the base, so from the outside, it will still look clean and simple—just like a real flower.

Arduino Code:
The Arduino code will handle the hardware interactions, making the flower responsive to its environment. It will be uploaded to an Arduino Nano and will collect data from the microphone sensor. This sensor will detect sounds like clapping or blowing and send the data to the p5.js program. The Arduino will also control the RGB LED at the base of the flower, allowing it to change colors in response to user interactions.

The microphone readings will be processed and sent over a serial connection to the computer. This data will allow the p5.js code to adjust the flower’s sway based on the intensity of the sounds. The Arduino code will ensure smooth communication between the hardware and the software, acting as the bridge that connects physical inputs to the digital flower.

p5.js Code:
The p5.js code will bring the visual and interactive elements of the flower to life. It will process the data received from the Arduino and use it to control the flower’s movements and reactions. For example, when louder sounds are detected, the code will make the flower sway more dramatically, as if pushed by strong wind.

The petals will respond to mouse movements, with their size changing when the mouse moves up or down, and the RGB LED’s color changing as the mouse moves left or right. Perlin noise will be used to create smooth and natural-looking swaying motions for the flower and its leaves. The background will display a gradient that blends soft colors, like a sunset, to set a peaceful scene.

The p5.js code will integrate all these elements, creating a system where the flower not only looks alive but also reacts and interacts in real time. Together with the Arduino code, it will make the flower feel connected to its environment and user inputs.


Final Project Draft 1-Bringing a Flower to Life

Bringing a Flower to Life with Arduino and p5.js

This project combines visual and physical components to create an interactive flower that reacts to user input. The concept involves a flower visual in p5.js and a physical flower built with an Arduino and LED lights. The goal is to bring the flower to life, allowing users to interact with it using gestures and sensors.

Visual Flower (p5.js)

The digital flower is animated in p5.js with layers of oscillating petals and a dynamic stem. The flower reacts to mouse movement and user actions:
1. Mouse Movement Interaction:
• Moving the mouse up causes the flower to “open” as petals expand outward.
• Moving the mouse down closes the flower by reducing the size of petals.
• This is achieved using sinusoidal oscillation and dynamic petal scaling.
2. Blow Interaction (Simulated in p5.js):
•A gentle blow causes the flower to sway slightly, like a light breeze. A stronger blow or louder sound makes the flower sway more dramatically, mimicking the effect of a strong gust of wind


Physical Flower (Arduino)

3D printing the flower

The physical flower uses servo motors to open and close petals and LED lights to illuminate it in various colors. The Arduino and sensors (like a microphone module or temperature sensor) make the flower interactive:
1. Petal Movement:
• Servo motors control physical petals, opening and closing in sync with the digital flower when the user moves the mouse.
2. Light Interaction:
• The LED lights inside the flower change colors based on interactions, such as the mouse position or sound intensity.
3. Blow Interaction:
• A gentle blow causes the flower to sway slightly, like a light breeze. A stronger blow or louder sound makes the flower sway more dramatically, mimicking the effect of a strong gust of wind


Week 11- Snake Game with Dynamic Obstacles

Concept:

When I first read the assignment to use Cellular Automata to create dynamic and interesting patterns, I had no idea what to do. I was stuck for a while. Then, I remembered the classic Snake game I used to play and thought, “What if I could make it more exciting?”

I decided to add obstacles that change over time, making the grid feel alive and unpredictable. Using Cellular Automata, the obstacles evolve and move during the game, creating a challenge that grows as the game progresses. This small twist made the game much more engaging and fun.

Embedded Sketch:

Logic of the Code:

In my game, Cellular Automata is used to generate dynamic and evolving obstacles. Here’s how it works step by step:

  • Starting Grid: The grid starts with some random cells marked as “alive” (obstacles). This randomness ensures the starting grid is different every time you play.
  • Cellular Automata Logic: Every few frames, the code checks each cell on the grid to decide if it should become an obstacle, stay as one, or disappear. This decision depends on how many neighboring cells are also alive. For example:
    • If a cell is an obstacle and has too many or too few neighbors, it disappears.
    • If a cell is empty but has the right number of alive neighbors, it becomes an obstacle. This logic ensures the obstacles move and evolve naturally over time.
  • Obstacle Management: To keep the game challenging, I added a function to make sure there are always at least 10 obstacles on the grid. If the number of obstacles drops too low, the code randomly adds new ones.
  • Pulsing Effect for Obstacles: To make the obstacles visually dynamic, I added a pulsing effect. This effect changes the color intensity of obstacles smoothly over time using a sine wave. The sin() function creates a smooth wave that oscillates between values, giving the obstacles a “breathing” effect. Here’s the code:
    if (grid[x][y] === 1) {
      fill(150 + sin(frameCount * 0.05) * 50, 50, 50); // Pulsing red effect
    } else {
      fill(30);
    }
    

    In this code:

  • frameCount is a built-in variable that counts the number of frames since the sketch started. This makes the color change over time.
  • sin(frameCount * 0.05) creates a wave that oscillates between -1 and 1.
  • By multiplying the wave value by 50 and adding 150, the color smoothly pulses between lighter and darker shades of red. This effect makes the obstacles look alive and dynamic, matching the Cellular Automata theme.

Challenges:
One big challenge was balancing the speed of the Cellular Automata and the snake. At first, the obstacles were changing way too fast, making the game unplayable. To fix this, I slowed down how often the obstacles update compared to the snake’s movement. This kept the game smooth and manageable.

Another challenge was ensuring there were always enough obstacles on the grid. Sometimes, the Cellular Automata rules would clear too many obstacles, leaving the grid empty. To solve this, I added a check to add new obstacles whenever the number dropped below a certain threshold.

Future Improvements:
Here are some things I’d like to add in the future:

  • Player Options: Let players choose how obstacles behave, like making them grow faster or slower.
  • Dynamic Difficulty: Make the game harder as the player scores more points by speeding up the snake or increasing obstacle density.
  • Enhanced Visuals: Add glowing effects or different colors for obstacles to make the game look even better.
  • Sound Effects: Include sounds for eating food, hitting obstacles, or speeding up.

Week 10- Super Breakout Game

Concept:

When I saw the assignment to create a project using Matter.js, the first thing that came to mind was recreating the classic Super Breakout game. I wanted to take the concept of bouncing a ball to break blocks and add some extra dynamics and fun with a physics engine. Super Breakout is simple yet addictive: you control a paddle, bouncing a ball to break rows of blocks. The challenge grows as the ball speeds up and changes angles, keeping the player focused and engaged.

Embedded Sketch:

Logic of Code:

I started by setting up a canvas with Matter.js as the physics engine to handle everything from gravity to collisions.

  • Matter.js Basics: First, I created an engine and world using Matter.Engine and Matter.World, which handle the entire physics environment. To make the ball and paddle, I used Matter.Bodies to create specific shapes, including a rectangle for the paddle and a circle for the ball.
  • Applying and Changing Forces: The ball starts with an initial velocity that gives it an upward and slightly angled movement. Each time the ball hits a block, I apply a slight random force. This “slight random force” is a tiny push in a random direction, which makes the ball move in an unpredictable way after each collision. This force helps the ball take new paths, creating a more dynamic and challenging gameplay experience, as it doesn’t just keep following the same straight line.
  • Collision Events: Using Matter.Events.on, I could detect whenever the ball hit a block. Each time it does, the code removes that block from the world, applies a small random force to the ball, and slightly increases the ball’s speed, making the game progressively harder. Additionally, I added logic to make the ball bounce when it touches the canvas edges, keeping it in play.

Challenges:

One issue I encountered was the ball getting stuck bouncing horizontally, going left to right without moving much vertically. To solve this, I added a check to ensure the ball always has a minimum vertical speed (y velocity). If the y velocity is too low, the code adjusts it to a minimum value, ensuring the ball keeps moving in both directions. This way, the game remains challenging, and the ball doesn’t get trapped in a back-and-forth loop.

function increaseBallSpeed() {
    let speedFactor = 1.02; // Increase speed slightly after each collision
    let minYVelocity = 3; // Minimum vertical speed to prevent horizontal bouncing
    let currentVelocity = ball.velocity;
    
    // Set new velocity with minimum vertical speed
    let newVelocity = {
        x: currentVelocity.x * speedFactor,
        y: Math.abs(currentVelocity.y) < minYVelocity 
           ? (currentVelocity.y < 0 ? -minYVelocity : minYVelocity) 
           : currentVelocity.y * speedFactor
    };
    
    Body.setVelocity(ball, newVelocity); // Apply the new velocity to the ball
}

In this function:

  • speedFactor controls how much the ball’s speed increases with each hit, keeping it manageable.
  • minYVelocity sets a minimum speed for the y direction, so the ball keeps moving vertically.
  • The code checks if Math.abs(currentVelocity.y) is less than minYVelocity. If it is, the y velocity is adjusted to either minYVelocity or -minYVelocity based on its current direction.

This addition keeps the gameplay smooth and prevents the ball from getting stuck in horizontal motion, which makes it one of my favorite parts of the code!

Future Improvements: 

While I’m happy with the current version, there’s a lot more I could add to enhance the gameplay. Some ideas for future improvements include:

  • Power-Ups: Add special blocks that, when hit, might speed up the ball, slow it down, or make it larger, adding more excitement and strategy to the game.
  • Score Tracking and Levels: Keeping score and advancing to new levels as blocks get progressively harder to break or new rows appear.
  • Sound Effects: Adding sounds for when the ball hits a block, the paddle, or the canvas edges to make it more engaging.
  • Mobile Version: Modifying the controls for touch interaction so the game can be played on mobile devices.


Week 9- Dynamic Firework Simulation

Concept:
The idea was to create a dynamic simulation where fireworks launch, explode, and slowly fade away, all while maintaining a sense of development over time. I wanted it to feel like a live performance in the sky, starting from calm darkness to sudden bursts of light and color and back to calm again.

Embedded Sketch:

Code Logic:

Here’s how the flocking concept is applied in my code:

Cohesion (Launching): The initial firework is like a single leader particle that starts from the bottom of the screen and moves upward. This particle influences the others once it bursts.
Separation (Explosion): When the main firework particle reaches its peak and “explodes,” it releases smaller particles that spread out in random directions. The particles act like a flock momentarily repelling from the center, creating that explosion effect.
Alignment (Falling and Fading): As the particles start to slow down and fall due to gravity, they align more with each other to create the visual of embers gently dispersing and fading away.

Code I’m Proud Of:

One part of the code I’m particularly proud of is how the flocking system’s logic was adapted to control the explosion and fading of particles:

explode() {
  for (let i = 0; i < 100; i++) {
    let p = new Particle(this.firework.pos.x, this.firework.pos.y, false);
    this.particles.push(p);
  }
}

When the firework reaches its highest point, this explode() function kicks in. It creates 100 new Particle objects, each with its own direction and speed. This mimics the behavior of a flock splitting apart. Instead of moving together like traditional flocks, these particles use a random2D() vector to scatter and simulate an explosion.

Additionally, each particle follows a simple rule:

Velocity Adjustment: Each particle’s velocity is affected by gravity, making them fall and spread out more realistically.
Lifespan Control: Particles gradually lose opacity (this.lifespan -= 4) to simulate them fading as they fall, creating that “embers in the sky” look.
This adaptation of flocking logic is what makes the explosion feel dynamic and natural, allowing the particles to behave independently yet still appear as part of a cohesive firework.

Challenges I Faced:

One of the main challenges was making the explosion look natural. Initially, the particles either looked too rigid or didn’t spread out enough. To solve this, I played around with p5.Vector.random2D() and tweaked the speed multipliers until it felt right. Another challenge was getting the fading effect correct. It took some trial and error to adjust the lifespan so that particles would fade smoothly and not disappear too abruptly.

Future Improvements:

While I’m happy with how the project turned out, there’s always room for more! Here are some ideas I’m thinking about:

Sound Integration: Adding sound effects would make the fireworks feel even more real. I’d like to use the p5.sound library to sync explosions with audio.
Mouse Interaction: Letting users click to create their own fireworks would add an interactive element to the project.
Different Shapes and Trails: Experimenting with different particle shapes and trail effects could make each firework more unique and visually interesting.
Color Themes: Adding color gradients or changing themes over time to simulate different types of fireworks shows would enhance the overall look.

Week 8- Reflection


The guest lecture was really interesting and got me thinking about how everything changes—whether it’s sand dunes moving in the wind waves in the ocean or even our own thoughts and feelings. The way digital art was used to show things coming together staying for a while and then breaking apart was really creative. It made the idea of impermanence feel real even through technology. I realized that digital art can actually be a great way to explore big ideas in a new and modern way.

I liked that the visuals were not only beautiful but also had meaning. They weren’t trying to copy nature exactly but instead capture its essence in a unique way. I think that’s what makes digital art special—it can show things that are hard to put into words. At first I wasn’t sure if digital art could really make us feel the raw nature of change but this lecture made me more open to the idea. It left me excited to talk in class about whether digital art can help us understand abstract ideas or even make them feel more real.

Week 8- Fly Spray Simulation

Concept:
The core idea of this assignment is to create a realistic Fly Spray simulation where:

  1. Flies are attracted to food when it appears on the canvas.
  2. Flies flee from a spray can when it gets too close.
  3. The spray can follows the mouse cursor and sprays a burst when flies get too close.
    To make this happen, I used steering behaviors, a concept popularized by Craig Reynolds, to model realistic movement. Steering behaviors are all about adjusting an object’s acceleration to achieve goals like fleeing, seeking, and arriving.

Embedded Sketch:

The code for this fly spray simulation focuses on three main parts: flies, food, and the fly spray. Each of these parts has its own behaviors and interactions, using a coding technique called steering behaviors.

The flies move randomly but change direction based on what’s nearby. If food appears within a certain range, the flies move toward it using an attraction behavior. However, if the fly spray gets too close, the flies switch to a fleeing behavior, quickly steering away to escape. This creates a realistic effect of flies avoiding the spray while seeking food.

The food appears randomly on the canvas for a limited time, attracting nearby flies. It disappears after a while and then reappears at a new spot. This makes the flies constantly adjust their paths, adding excitement to the simulation.

The fly spray follows the mouse using a smooth arrive behavior and sprays when flies are within a certain range. The spray creates a visual burst when close to flies, simulating a spraying action. The code uses a loop to constantly check distances between the flies, food, and spray, adjusting their movements to create a lively and interactive simulation.

Code Snippet: 

Here’s the part of the code where I handled the spray effect when flies come near the fly spray:

// Spray effect when close to a fly
sprayEffect(flyPos) {
  let distance = dist(this.pos.x, this.pos.y, flyPos.x, flyPos.y);
  if (distance < sprayRadius) {
    push();
    translate(this.pos.x, this.pos.y);
    rotate(this.vel.heading());
    noStroke();
    fill('rgba(0, 0, 0, 0.5)'); // Black spray effect with transparency
    triangle(10, -60, 60, -100, 60, -20); // Bigger spray burst
    pop();
  }
}

I’m particularly proud of this snippet because it brings the fly spray to life! The spray burst animates when flies come too close, making the simulation feel more realistic and interactive. It’s a simple but satisfying visual element that adds a lot of character to the spray can.

Challenges Faced:
Like any coding project, this one came with its fair share of challenges:

  1. Ensuring Consistent Spray Behavior: Initially, the spray effect wasn’t triggering consistently, and it sometimes missed flies that were within range. I had to fine-tune the logic and adjust the proximity checks to make sure the spray worked every time.
  2. Balancing Attraction and Repulsion: Making the flies switch seamlessly between attraction (to food) and repulsion (from the spray) required careful control of their acceleration and speed. It was tricky to get the right balance so that the flies didn’t act erratically.
  3. Managing Timing: The food appears randomly and disappears after a set duration, which added an extra layer of complexity. I used a timer to handle the food’s lifecycle, but it took some tweaking to get it to behave consistently.

Future Improvements:
There’s always room for improvement! Here are some ideas I’d love to implement in the future:

  1. More Realistic Fly Movements: Right now, the flies have basic behaviors. Adding more randomness and making them swarm together around food could add realism.
  2. Better Spray Animation: The spray burst is a simple triangle, but I’d love to add particles or make it look more like a mist.
  3. Multiple Food Sources: Currently, only one food source appears at a time. Adding multiple food sources that attract flies in different directions would make the simulation more dynamic.
  4. Scoring System: Adding a scoring system could make the simulation more game-like, where users earn points for getting close to the flies.

Midterm Project – Fibonacci Dream: A Journey Through Spirals

For my midterm project, I wanted to explore the mesmerizing nature of the Fibonacci spiral through a generative art system. I named the project “Fibonacci Dream” because it combines the beauty of mathematical spirals with dynamic, flowing petals that continuously change over time.

Concept and Artistic Vision:
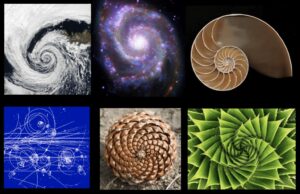
The Fibonacci sequence and the golden angle have always fascinated me. I love how these mathematical principles appear in nature—from sunflowers to seashells. My goal was to mimic this natural elegance by creating a digital flower that grows and oscillates, combining organic movement with vibrant color palettes.

While researching Fibonacci spirals, I learned how deeply they connect to growth patterns in nature. This connection inspired me to build a visual system that transitions between different moods through rotating petals, oscillating sizes, and shifting color schemes. The final sketch uses a Fibonacci spiral to control the petal arrangement, creating a dynamic, mesmerizing flower with endless possibilities.

I used colors inspired by the natural world, with gradients of pink, yellow, blue, and green to evoke different emotional states. This color-changing feature makes the flower feel alive, as if it’s reacting to its environment.

Embedded Sketch:

https://editor.p5js.org/ha2297/full/Eo2Yntsgr

Coding Logic and Translation:

The logic behind “Fibonacci Dream” revolves around creating a dynamic, generative artwork using a Fibonacci spiral, with petals that oscillate, rotate, and change color over time. Here’s how each part of the code works:

  1. Fibonacci Spiral Arrangement
    The petals follow a Fibonacci spiral pattern, where each petal’s position is determined by an angle (137.5°) and a radius that grows as the square root of the petal index. This ensures that the petals are evenly spaced and spread outward in a natural spiral.
let angle = i * spiralAngle + time * 10;
let radius = sqrt(i) * 8;
let x = radius * cos(angle);
let y = radius * sin(angle);

2.Oscillation and Rotation
To give the petals life, they oscillate in size using the sine function, creating a smooth breathing effect. The petals also rotate in a spiral, and the speed of rotation is controlled by a user-adjustable slider.

let oscillation = map(sin(time + i), -1, 1, 0.8, 1.2);
let dynamicPetalLength = petalLength * oscillation;
let dynamicPetalWidth = petalWidth * oscillation;
rotate(angle + time);

3.Color Palettes
The code includes six color palettes that the user can switch between. Each palette uses gradients like pink to yellow or blue to green, adding variety to the artwork

switch (colorPalette) {
  case 0:
    colorVal = map(i, 0, numPetals, 255, 100); // Pink to yellow gradient
    fill(255, colorVal, 150, 200);
    break;
  // Other palettes...
}

4.User Interaction
Two sliders let the user control the rotation speed and zoom level, while a button switches between color palettes. These interactive elements make the artwork more engaging and customizable.

rotationSpeedSlider = createSlider(1, 50, 10);
zoomSlider = createSlider(0.5, 2, 1, 0.01);
colorChangeButton = createButton('Switch Color Palette');
colorChangeButton.mousePressed(switchColorPalette);

5. SVG Export
The artwork can be saved as an SVG image by pressing the ‘s’ key, allowing users to export and preserve the visual as a vector graphic.

function keyPressed(){
  if(key == "s" || key =="S"){
    save("image.svg");
  }
}

Code Snippet:

let oscillation = map(sin(time + i), -1, 1, 0.8, 1.2);
let dynamicPetalLength = petalLength * oscillation;
let dynamicPetalWidth = petalWidth * oscillation;

This code snippet is key to creating a “breathing” effect for the petals by making them grow and shrink over time. It uses the sin() function to generate oscillating values between -1 and 1, which are then mapped to a range between 0.8 and 1.2. This controls the petal size fluctuation, where petals shrink to 80% of their original size and grow to 120%, giving the effect of rhythmic breathing.

The combination of time and petal index (i) ensures that each petal oscillates with a slight variation, making the motion feel more organic. The mapped oscillation value is applied to both petal length and width, making the petals dynamically change in size.

This subtle movement brings the generative art to life. Without this oscillation, the flower would feel static and mechanical. The breathing effect, combined with the spiral pattern and color changes, adds a layer of depth, making the artwork more engaging and lifelike.

Challenges:

One of the biggest challenges was ensuring that the oscillation and rotation worked smoothly together, especially when combined with user input. It took several iterations to get the timing and size oscillation just right without breaking the flow of the petals.

Another challenge was handling the zoom function. Initially, zooming affected the positioning of the sliders and button, but I managed to fix this by anchoring them to the screen while zooming the canvas content independently.

Another issue that took some time to resolve was an error I encountered when trying to save the SVG file. Initially, I was using the following HTML file. However, I kept getting an error when trying to export the SVG. After some debugging, I realized that the issue was with the version of the p5.js SVG library I was using. I switched to an older version of the HTML file.The error occurred because the version of p5.js-svg I was initially using wasn’t compatible with the main p5.js version in my project. By switching to an older, more stable version, I was able to fix the issue and successfully save the SVG files.

Pen Plotting Experience:

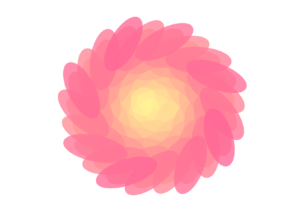
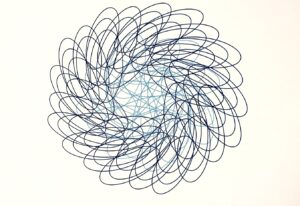
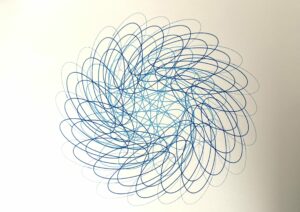
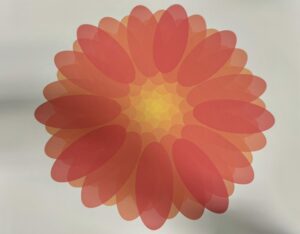
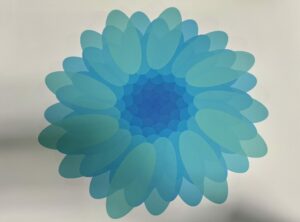
For the pen plotting experience, I initially wanted to make the image of the flower more interesting by dividing it into two color layers. I chose to have the inner layer in yellow and the outer layer in pink to create a subtle contrast. When I printed it with the pen plotter, I used light blue for the inner part and dark blue for the outer part.

Unfortunately, the video I recorded didn’t save. So, I decided to reprint the image with the same colors and setup. However, while printing the second layer (the outer part in dark blue), the ink started running out—not completely, but enough to create a faded effect. I thought about pausing the process to replace the pen, but I ended up liking the way it looked with the gradual fading. It gave the piece a more unique, unexpected quality, so I let the print finish as it was. This added an element of spontaneity to the final artwork that I hadn’t initially planned for, but really enjoyed.

First Version:
Second Version:

A3 Printed Images:

Areas for Improvement and Future Work
In future versions of this project, I have several ideas to improve and expand on:

  1. More User Interaction:

I want to add mouse or touch gestures, so users can control the flower’s rotation and zoom by dragging or pinching the screen. This would make the interaction more natural and fun, especially on touch devices like tablets.

2. 3D Elements:

I’m thinking of adding 3D effects to make the flower feel more immersive. For example, the petals could rise and fall, creating a sense of depth. This would make the flower seem more realistic, almost like it’s floating on the screen.
I also want to explore how natural forces like gravity or wind could affect the petals in 3D, adding a new layer of interaction and visual complexity.

3. Improving Pen Plotting:

I plan to refine the line quality for smoother transitions between layers of the flower when using the pen plotter.
I want to try different styles like stippling (dot patterns) or crosshatching (overlapping lines) to create shading and color effects similar to the digital version.
Experimenting with different pens and inks, like metallic or gradient colors, could help capture the vibrant look of the digital artwork in physical form.
These improvements will make the project more interactive and visually rich, both in the digital version and the pen-plotted version.

References: 

https://editor.p5js.org/xiao2202/sketches/vkHJQX4gy

https://github.com/Jttpo2/flowers

Week 5- Midterm Progress 1

 Fibonacci spiral

Concept: 

I’ve always found the Fibonacci spiral fascinating. It’s a beautiful pattern that shows up in nature, like in seashells and the way leaves are arranged on plants. The spiral is created by drawing quarter-circle arcs inside squares, and the size of these squares follows the Fibonacci sequence—a series of numbers where each one is the sum of the two before it. To me, the spiral represents the balance between structure and natural growth.

For my midterm project, I’ll bring this spiral to life by making it grow and change dynamically. I’ll use moving patterns and shifting colors to give it a more organic, natural feel. The result will combine the exactness of math with slight, natural variations to create something both structured and alive.

Designing the Code

Here’s my plan for designing the Fibonacci spiral visualization:

Fibonacci Sequence Generator: I will write a function to generate the Fibonacci sequence, which will determine the side lengths of the squares. These squares will serve as the framework for the spiral’s construction.

Arc Drawing Function: I will create a function that draws quarter-circle arcs within each square. These arcs will be positioned based on rotating angles, allowing the spiral to take shape.

Dynamic Spiral Growth: I intend to animate the spiral’s growth by using oscillation to control the pace of arc creation. This will give the artwork a sense of life as the spiral grows dynamically on the canvas.

Color Gradients: I will integrate shifting color gradients, ensuring each new arc or section of the spiral has a slightly different hue, reflecting continuous growth and change over time.

Perlin Noise for Organic Variation: Lastly, I will add subtle randomness using Perlin noise to slightly alter the placement and shape of the arcs, which will give the spiral a more natural, organic feel.

Tackling the Most Complex Part
The most challenging aspect of this project will be integrating Perlin noise without disrupting the geometric accuracy of the Fibonacci spiral. To reduce this risk, I will write a test program to explore how noise affects the arcs. By fine-tuning the noise parameters early on, I will ensure that the randomness enhances rather than detracts from the overall design.