Final Project Summary + Last Progress

Concept:

My concept actually came from my recent obsession of a Korean historic drama series. I always harbored huge passion in the traditional art of Korea because my childhood consisted of visiting museums and palaces in Seoul, so the traditional arts and music of Korea was always dear to my heart. Last year in my Intro to IM class, I wanted to recreate the Korean traditional patterns for my final project, but because I had limited knowledge in p5.js back then compared to now, I gave up the idea. However, this time, I wanted to challenge myself and make my project based on this, especially while I felt motivated to do so because I was obsessed with a historical drama.

Another feature that I wanted to implement for a long time was having users be able to manipulate audio as well, and this gave me the idea of the final project I came up with, which was: having the users control and create their own visual and music by having both the sketch and the audio be interactive with the theme of introducing the Korean traditional art.

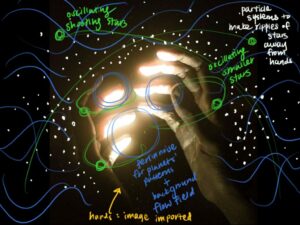
I thought it’d be easier to show Korean traditional art if I could have a basic “background layout” for both the audio and visual aspect.

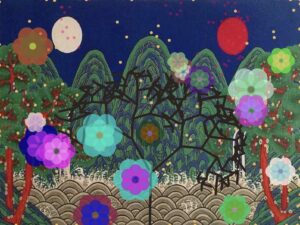
For the visual aspect, I decided to have a backdrop of a Korean traditional landscape that is called Irworobongdo, which is a folding screen with peaks, sun, moon, etc. painted on it that was set behind the king’s throne during the Joseon dynasty, and have different coded aspects such as flowers, trees, fireflies, etc. “grow” or be added on top of that background.

As for the audio, I decided to use a Korean traditional song named 比翼連里, because I thought the melody and the general atmosphere fits the visuals of my sketch well.

Process:

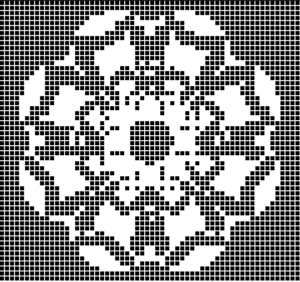
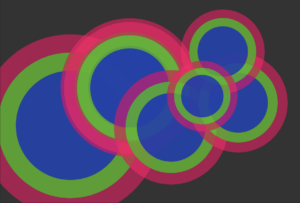
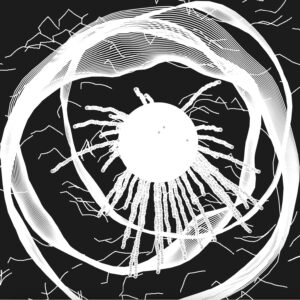
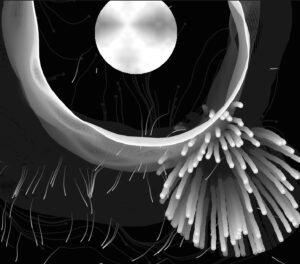
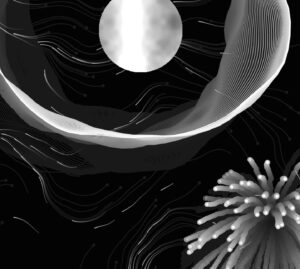
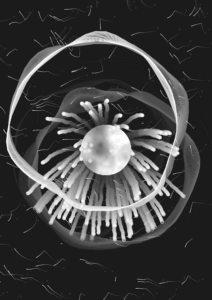
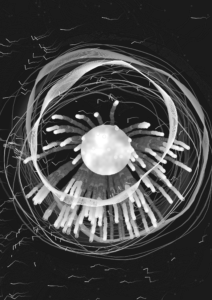
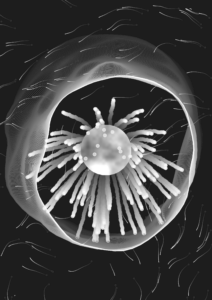
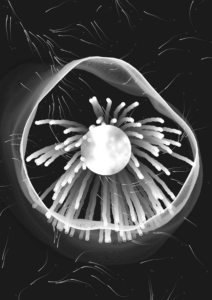
Here are a few different images of various renditions I tried out before settling with my final concept and sketch:

I also included all the trials I’ve tried in detail in my last post, which you can read here.

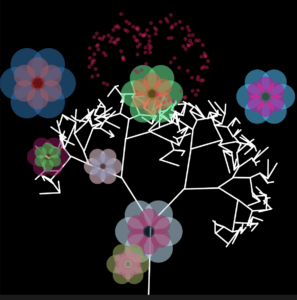
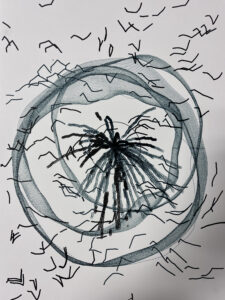
The final sketch layout I settled with last week was this:

After I settled on the basic layout of my sketch, I set out to make progress from my previous post’s sketch progress, for which I did the following:

  • Making the branches so that they won’t grow to be that long (I don’t really like how long they’re growing because it loses its original shape) –> I adjusted the below code snippet to 0.7 from 0.9 to decrease the lengths of the branches A and B.
branchA() {
  let dir = p5.Vector.sub(this.end, this.begin);
  dir.rotate(PI / 4);
  dir.mult(0.7); // adjust this to adjust the lengths of the branches
  • Implementing audio files and linking them to the keyboard –> multiple different snippets of sound from varying traditional instruments that are triggered by different keys on the keyboard, so that they form a harmony as the user generates more flowers onto the canvas. This was honestly the most important and urgent feature that I was nervous to experiment with, for I wasn’t sure how it was going to work because I never tried it before.

Here are the audio files that I’ve used:

The main track that plays when the sketch opens

Sound of janggu (I added two versions of this)

Sound of percussion triangle

Sound of rainstick

I first made a demo sketch before implementing it into my actual sketch because I wanted to focus on testing the audio only; below is the demo sketch with each A, B, C, D, and E key triggering respective audio files:

(you can try pressing the canvas once first, and then press any of the A, B, C, D, E keys on your keyboard, and make sure they’re capitalized when you do so. doing so will play the corresponding audio.)

A code highlight of this demo was the function keyPressed () and the details that I learned to implement inside this function.

function keyPressed() {
  // Check if the key corresponds to a loaded audio file
  if (key === 'A') {
    // Play or stop the audio file based on its current state
    if (A.isPlaying()) {
      A.stop();
    } else {
      A.play();
    }
  } else if (key === 'B') {
    if (B.isPlaying()) {
      B.stop();
    } else {
      B.play();
    }

Because I wanted the users to be able to control the sounds, I implemented the if/else function so that once the key was pressed once, the audio will play, and when pressed again, it’ll pause.

Once this was done and I was sure it’ll work smoothly, I added the code to my actual sketch.

After this, I decided that adding a page of instructions in my code will be helpful, so I wrote the basic instructions and had it appear before the actual sketch began running. For this, I took my last year’s Intro to IM final project code’s homepage portion and changed the properties accordingly, which was the code snippet below:

// Declare variables for home screen
let startButton;

// Initialize home screen
function initializeHomeScreen() {
  // Create start button
  startButton = createButton('Start');
  startButton.position(width / 2 - 30 , height -250);
  startButton.mousePressed(startMainCode);
}

// Draw home screen
function drawHomeScreen() {
  background(255); // Set background color for home screen
  textSize(15);
  fill(0);
  textAlign(CENTER, CENTER);
  
  // Display instructions
  let textY = height / 4;
  text('Welcome! Here are some basic instructions before you begin:', width / 2, textY);
...(REST OF THE INSTRUCTIONS)
  
  startButton.show();
}

12/7 In-Class User Testing & Progress Since Then:

Here are suggestions I got from my classmates during the Thursday class, which I thought were very helpful:

  • Give more options for background 

I thought this was a neat idea, and I decided to give another background option that users could manipulate via sliders. Xiaozao gave an idea of having one of the background options being a coded background, so from this idea I developed a code of pixelated sunset in which users could control the colors of the sunset using sliders. Here’s the sketch I’ve created as a demo using this sample image:

However, when I implemented this code into my sketch, it didn’t exactly give an outlook that I wanted; I also noticed that the sketch was running slower, which I wanted to avoid. At this point, my sketch was like this:
I still wanted to give two options for the backdrop, but instead of coding the background, I decided to give two image backdrop options instead. The idea of having the second backdrop as a modern landscape of Korea came unexpectedly, and I thought this would be a fun comparison to draw! Therefore, I created a toggle button that could switch the background image at mouse click, and added another landscape image from this link. After adjusting the toggle button to the bottom right corner, I had this sketch:

  • Idea i had: when mouse is pressed, flowers keep being generated

For this, I added a new function called mouseDragged(), which made it so that once the mouse is pressed and dragged across the canvas, it continuously generates multiple flowers, as shown in the image below.

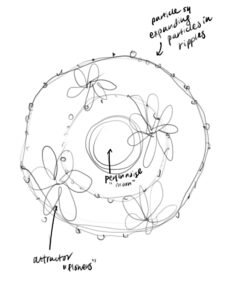
  • Adjust the particles (their positions, number, repelling distance, etc.)

For this, I adjusted the “flee(target)” aspect, the “update()” aspect inside the function particle, as well as “function initializeMainCode()” to 1) increase the number of particles, 2) limit the particles to the upper half of the canvas, and 3) make the repelling of the particles more clear.

  • SVG file export –> Screenshot feature

Lukrecija suggested this idea, and I thought this was so clever. However, I thought adding a screenshot feature might be easier than SVG file export feature, because I remember the SVG feature making my sketch lag a lot last time during my midterm project.

For this, I also created a button named “Take Screenshot,” and added the following code snippet after declaring the screenshotButton as a variable and adding the button in the function initializeMainCode():

function takeScreenshot() {
  // Save the current canvas as an image
  saveCanvas('screenshot', 'png');
}

Once I had the finalized sketch, I just adjusted it to go into full screen mode, and I was good to go!
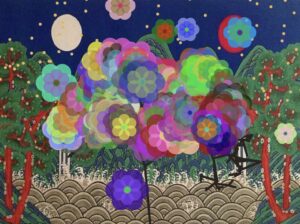
Final Sketch:

Implementation: 

The interactive aspects of this sketch are the following:

  • Particles — used steering, fleeing, wandering, etc.; the user can hover the mouse nearby the particles, and they will see that particles are repelling the mouse.

Code snippet:

flee(target) {
  let desired = p5.Vector.sub(this.position, target);
  let d = desired.mag();

  if (d < 150) {
    // Normalize the desired vector
    desired.normalize();

    // Set a fixed magnitude for consistent repelling force
    let repelMagnitude = 10; // Adjust the repelling force as needed

    // Scale the vector to the fixed magnitude
    desired.mult(repelMagnitude);

    let steer = p5.Vector.sub(desired, this.velocity);
    steer.limit(this.maxSpeed);
    this.applyForce(steer);
  }
}

This is the fleeing behavior that I added in the class Particle, and this was the main feature that I kept changing in the particle class in order to get the desired speed and distance of the particles’ repelling behavior.

  • Flowers — flowers will grow on canvas per mouse click, and there’s two options for the users: 1) one single mouse click — one flower generated, 2) keeping the mouse pressed on the canvas — multiple flowers continuing to be generated.

Code snippet:

function mousePressed() {
  if (currentPatternIndex === 0) {
    let flower = new KoreanFlower(mouseX, mouseY);
    flowers.push(flower);
    patterns.push(flower);
  } else if (currentPatternIndex === 1) {
    let tree = new FractalTree(mouseX, mouseY);
    patterns.push(tree);

    // Generate additional flowers around the tree
    for (let i = 0; i < 10; i++) {
      let flower = new KoreanFlower(tree.x + random(-50, 50), tree.y + random(-50, 50));
      flowers.push(flower);
      patterns.push(flower);
    }
  }
}

The function mousePressed() generates one flower per mouse click.

function mouseDragged() {
  // Check if the mouse is continuously pressed
  if (mouseIsPressed) {
    // Generate a flower at the current mouse position
    if (currentPatternIndex === 0) {
      let flower = new KoreanFlower(mouseX, mouseY);
      flowers.push(flower);
      patterns.push(flower);
    }
  }
}

The function mouseDragged() generates multiple flowers as you drag the mouse on the canvas while it’s pressed.

  • Background — users can choose between gradient background/image background, which they can choose by using buttons below the canvas; they can also adjust the colors of the gradient using sliders.

Code snippet:

let backgroundImage1;
let backgroundImage2;
let currentBackgroundImage;

I first declared both images as a variable, and I also set the first background image (the traditional painting) as the initial background image.

function toggleBackground() {
  // Toggle between the two background images
  if (currentBackgroundImage === backgroundImage1) {
    currentBackgroundImage = backgroundImage2;
  } else {
    currentBackgroundImage = backgroundImage1;
  }
}

A key feature of the background images was the toggleBackground function, which was a new feature I tried implementing in my code! This allowed me to go back and forth between the two backdrops with least difficulty as possible.

  • Audio — users can use the keyboard keys A, B, C, D, and E to mix and play the different audio files as they wish, thus generate a music of their own.

Code snippet:

// declare audio files
let A;
let B;
let C;
let D;
let E;

...

function preload() {

...
    // Load audio files
  A = loadSound('A.MP3');
  B = loadSound('B.MP3');
  C = loadSound('C.MP3');
  D = loadSound('D.MP3');
  E = loadSound('E.MP3');
}

I first uploaded, called, and declared them.

// for audio files
function keyPressed() {
  // Check if the key corresponds to a loaded audio file
  if (key === 'A') {
    // Play or stop the audio file based on its current state
    if (A.isPlaying()) {
      A.stop();
    } else {
      A.play();
    }
  } else if (key === 'B') {
    if (B.isPlaying()) {
      B.stop();
    } else {
      B.play();
    }
  } else if (key === 'C') {
    // Play or stop the audio file associated with the 'C' key
    if (C.isPlaying()) {
      C.stop();
    } else {
      C.play();
    }
  } else if (key === 'D') {
    // Play or stop the audio file associated with the 'D' key
    if (D.isPlaying()) {
      D.stop();
    } else {
      D.play();
    }
  } else if (key === 'E') {
    // Play or stop the audio file associated with the 'E' key
    if (E.isPlaying()) {
      E.stop();
    } else {
      E.play();
    }
  }
}

Then, I created a function keyPressed() specially for the audio files, where I linked each key to an audio file and established the playing and stopping functions on first and second click, respectively.

Links Used: 

I watched a few tutorials such as the following (video1, video2, video3) for various parts of my sketch, whether it be the gradient background, creating a fractal tree, or implementing audio into my sketch. All the other images/audios I’ve used were linked either in the previous post or in the other parts of this post.

Parts I’m Proud Of:

Honestly, I’m very proud of the entire sketch without a particular part that I’m especially fond of, for I think it’s very packed with different details, options, and functions because I hoped to provide as many variations for the users as possible so that they can have as much creative freedom as they wish. I still think I’m the most proud of successfully having both the visual sketch and the audio music be manipulated by the user using methods such as sliders, keyboard, and the mouse, making the entire sketch be an embodiment of interactivity.

I also had many new features I tried out, such as toggle background and take screenshot functions. I was also proud of running them smoothly in my sketch as well!

Challenges:

Something I struggled with for a long time was loading the audio files and having them play, because I couldn’t figure out why the sketch kept having error messages for a long time; it turned out that it was because I didn’t capitalize the “.mp3” part of the audio file names when I wrote it in the code. It was one of those “ah-ha” moments with p5.js and being extra cautious with the details, haha.

function preload() {
  // Load audio files
  A = loadSound('A.MP3');
  B = loadSound('B.MP3');
  C = loadSound('C.MP3');
  D = loadSound('D.MP3');
  E = loadSound('E.MP3');
}

I also struggled with implementing a coded pixelated sunset background, for I had many different difficulties every time I tried a new method; for example, the canvas was recognizing the gradient and original background buttons as just simply mouse pressing against the sketch, which was triggering the multiple generations of flowers instead of having the buttons be pressed and switch the background.

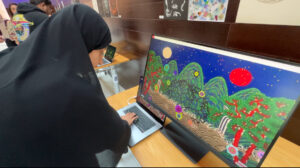
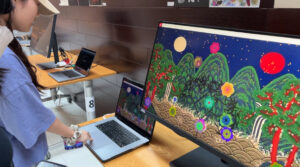
User Interaction Videos from the IM Showcase:

Today’s showcase was a success! It was really rewarding to see people enjoying the interaction and appreciating my work.

Here are a few videos:

IMG_2671 IMG_2673

As well as photos:

Future Improvements:

For the future, I’d like to code multiple fractal trees so that it’ll be like a forest of fractal trees altogether forming a landscape of its own.

Another feature I’d like to try out is associating different audio files depending on the backdrop so that the audio fits the time period or the atmosphere of the image better; for example, for my modern landscape, I’d like to add K-pop tracks or more modern instruments such as guitar, piano, etc.

Overall, I felt like I could really showcase all the lessons and skills I’ve learned during this class this semester into this final project, and I’m very satisfied with my work!

Final Project Progress

Current Stage + Reflection:

There’s been many changes to my initial idea, and for now I settled with the below sketch:

There’s still many aspects about the sketch that I want to change, such as:

  • Making the branches so that they won’t grow to be that long (I don’t really like how long they’re growing because it loses its original shape)
  • Adjusting the particles so that they are limited to a certain area (i.e. only having them roam around at the top of the canvas like stars)
  • Modifying the fractal tree so that the thickness of the tree is varying (i.e. the branches are thinner, while the trunk of the tree is thicker)
  • Implement audio so that it’s either playing one track that is responsive to the growth of the flowers, or multiple different snippets of sound from varying traditional instruments per mouse click so that they form a harmony as the user generates more flowers onto the canvas.
  • Make the initial placement of the flowers less random.

There were the key characteristics I wanted to include prior to settling with this sketch:

  • gradually draw patterns (i.e. each mouse click = each new drawn line/curve) that are correlating with the triggered audio sound at each mouse click.
  • have one pattern drawn fully and completed before another pattern is drawn.
  • incorporate the randomness/generative aspect for the designs while still keeping korean traditional pattern’s general principles.
  • incorporate colors.

Process:

Here are many different stages that I went through:

    1. Playing with generative patterns. –> My main theme that I wanted to experiment with was creating generative artwork that showcases the beauty of Korean traditional art such as patterns and colors, so I played around with cellular automana and random generations of these patterns.

(at mouse click, a new pattern will show up and create a pattern onto the canvas)
(click the canvas and cells will draw a traditional Korean pattern)
(click on the canvas multiple times to make the sketch more clear/brighter)
(each time you refresh the code it’ll generate random patterns)

2. Incorporating audio into my sketch. –> I wanted to implement a function where the user not just manipulates and controls the visuals (art) but also the audio, so I decided to trigger the creation new patterns and playing of audio simultaneously at mouse press.

(Press the canvas to play the audio and generate patterns)

(The flowers are floating upwards on their own, but once you keep the mouse pressed onto the canvas, the flowers will speed up and play the audio)

(Basically the same as above but color palette limited to warm colors and now they’re being floated downwards by gravity)

3. Playing with mouse click and generating new patterns. –> I still felt like I wanted to give user more freedom in terms of manipulating the locations of the patterns that appear rather than having them be in clumps like the ones above, so I decided to generate one full pattern per mouse click.

I was also contemplating between generating ripples, flowers, or traditional patterns per mouse click, which will trigger a Korean traditional audio track. I also began to envision a more concrete and complete sketch starting this point, and I was sure I wanted a: fractal tree, randomly generated pattern of some sort, and an audio aspect.
(Here’s a ripples one.)

(Here’s a flowers one.)
(This one generated flowers and a tree at mouse click, but because the tree was too complex, the sketch was lagging too much.)

Because of the above lag that I experienced, I decided to limit the number of branches so that it won’t interfere with the rest of the sketch.

4. Implementing particles as well as steering, fleeing, wandering, etc. behaviors. –> I thought it’d be fun to have the user to recreate a specific significant Korean traditional painting that was used by the royalty, and because the painting was showing a night sky, I remembered the particle system sketch that I created a while ago and thought it’d be fun to incorporate them to be the “stars” on the sketch.

(The particles are wandering to the right side of the canvas, and they’re also steering away from the mouse position.)

5. Final current stage where I’m at. –> Now that I had a clear idea of what elements (tree, particles, flower patterns, background image) and skills I’ll use for my sketch (particle system, fractals, generative art), I set onto creating a demo sketch to test it before combining all of them together.
(At mouse click, the flowers are generated.)

I also used this image for the background image and this hex color code website for the Korean traditional color palette.

I can’t wait to expand my sketch and come up with a final design this week!

Final Project Concept

A concept that I’ve been thinking of is experimenting with fractals. An immediate idea that came into my mind was creating Korean traditional pattern designs using the concept of fractals, such as these:

This idea was specifically inspired by the professor’s demonstration of “building” or “growing” a tree with a mouse click during our latest lecture, and I thought I could implement the same logic using these patterns. I’ve always had a deep interest in the Korean traditional art and promoting about it, so this topic in particular intrigued me.

I was thinking of ways to make this more interactive and “complicated,” and I thought of using music as an additional element to do so — by having the screen show a person playing the gayageum, which is a Korean traditional instrument, the user can interact with the screen by pressing keys on the keyboard, which will generate different sounds as well as different patterns at the click.

For example, I’d have the key “ENTER” set as a key that plays the note “re” and builds/completes a pattern once it is pressed a certain number of times.

As the final result, I’m imagining something like this, where patterns will be drawn at different parts of the canvas with different keys playing notes:

This is a rough concept I have for now, but I’m sure it’s subjected to change as I brainstorm over the break!

Week 11 Assignment — Cellular Automata

Concept:

I first wanted to do some research about the varying art pieces that I could generate using the cellular automata concept, and amongst the ones that popped up in my browser, I really liked how the pyramid ones were encompassing both creativity and simplicity; from a glance they seem like they are all similar, but once you take a closer look you realize that they are more different than you think. The general ones looked like these, which is from this link: Totalistic Cellular Automaton -- from Wolfram MathWorld

However, to me, these “cells” reminded me of the pixelated screens of the earlier televisions from the 1900s, like the one shown in the image below from this link:

Seamless pixelated tv noise texture. television signal noise grain. screen interferences glitches

Therefore, I decided to combine them so that I have a moving, colored pyramid pattern. I also referred to this video from the Coding Train before jumping into the assignment.

Process/Highlight: 

To make it interactive, I thought that it’d be fun if the user can actually modify the code sketch themselves by either subtracting/adding the colored cells onto the canvas with a mouse click.

To implement this function, I used the below snippet of code, which I consider as the highlight of my code:

function mousePressed() {
  // Toggle the state of the clicked cell
  let clickedCellX = floor(mouseX / cellSize);
  let clickedCellY = floor(mouseY / cellSize);

  if (clickedCellX >= 0 && clickedCellX < cells.length && clickedCellY >= 0 && clickedCellY < generations) {
    cells[clickedCellX][clickedCellY] = 1 - cells[clickedCellX][clickedCellY];
  }
}

I also experimented with different sizes of the cell and the canvas size, as attached below:

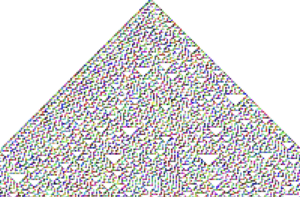
this was when cellSize = 3  
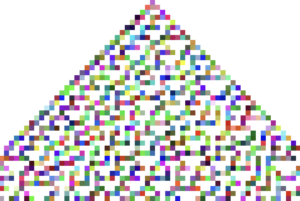
this was when cellSize = 10
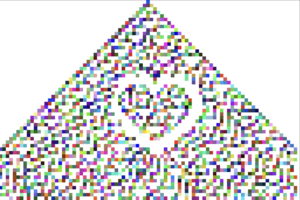
Although my initial vision was closest to the visuals of when the cellSize was set to 3, I wanted the users to interact with the cells by clicking on them to make them disappear/appear, and because I thought that might be harder to do when the cells were too tiny, I changed them to size 7 so that it’s still small enough to give that television’s pixelated screen effect but also big enough to be clicked on easily.

Final Sketch:

(Click on the canvas once and then you should be able to add/remove the cells from the canvas!)

Reflection:

It was really fun to use my own project to generate different patterns within the pyramid to give variations, and I attached a heart sketch I’ve made by clicking continuously on the canvas below:

This was a really fun project, and I think I might want to explore with this a bit more, whether it be my final project or on my own!

Week 10 Assignment

Concept:

While brainstorming, I randomly thought of glow-in-the-dark flubber bouncy balls that I used to play with, which look like this (link):

No.1(넘버원) 야광맨 - 야광 얌체 공 탱탱 볼 4.6cm 1pcs

With the different physics elements we learned in class through Matter.js, I wanted to create these bouncy balls that were changing colors once they collided, as well as applying and changing forces on them so that they will float/bounce against each other when prompted by a certain action.

Process/Highlight:

Initially, I made the background dark and made the balls rather size in size with big spacing between them by setting the following values:

// Add some circles in a square configuration from the center
const numRows = 7;
const numCols = 7;
const circleSize = 20;
const spacing = 1;
  // Draw the circles
  fill(0, 150, 255);
  for (let circle of circles) {
    push();
    translate(circle.position.x, circle.position.y);

    if (circle.colorChanging) {
      fill(random(255), random(255), random(255));
      circle.colorChanging = false; // reset the flag
    }

    ellipse(0, 0, circle.circleRadius * 2); // this is the code i modified to adjust the circle size
    pop();
  }
}

At this point, my sketch looked something like this:

However, while playing around with the values for these code snippets, I accidentally produced a sketch that I was much more pleased with, which I achieved by increasing the size of the circles themselves while decreasing the spacing between them. I also increased the number of circles significantly, and I was pretty happy with the result because it gave an illusion that the “background” is not really a background but is actually composed of multiple circles that eventually crash to the ground; and in the process of them hitting each other, they shine in different colors, which reminded me of the spangles.

There are two elements that I’m particularly proud of, which are:

  • The addition of force via click of a mouse, which was done in this code:
function mousePressed() {
  // Apply a random force to each circle when the mouse is pressed
  for (let circle of circles) {
    let force = Matter.Vector.create(random(-0.05, 0.05), random(-0.1, 0));
    Matter.Body.applyForce(circle, circle.position, force);
  }
}
  • The result of collisions being that the circles will change colors, which can be shown below:
// Collision event handler function
function handleCollision(event) {
  let pairs = event.pairs;

  for (let i = 0; i < pairs.length; i++) {
    let pair = pairs[i];

    // Change color on collision
    if (pair.bodyA.label === "Circle" && pair.bodyB.label === "Circle") {
      pair.bodyA.colorChanging = true;
      pair.bodyB.colorChanging = true;
    }
  }
}

Final Sketch:

(Try clicking the canvas to apply additional force to the circles!)

Reflection:

I had so much fun exploring with Matter.js because it opened up many ways for me to try applying force, gravity, etc. compared to the methods that we’ve already learned so far in the class. Next time, I’d like to experiment with making a game where a specific circle tries to go through an obstacle course with different forces being applied to it!

Lecture Reflection

Yesterday we attended a lecture by professor Neil Leach who talked about AI intelligence, its effect and progression on humanity, as well as the future that we should expect with its expansion. Something that I found really interesting was the quote that said “what we know how to do, machines will do better than us” because this was a fear that’s been nestled within my mind especially with the growing loss of job availabilities for young adults from our generation. While we only have ourselves to blame, — after all, we are the creators of machines and AI in the first place — it’s also important to remember that we won’t be “outdated” or “useless” because I’m a firm believer in the thought that there will always be a characteristic, skill, or an idea that can only be generated from a human. Overall, it was a really interesting lecture that helped me reflect on technology and our relationship on a day-to-day basis and what to be mindful of when utilizing these technological resources.

Week 9 Assignment – Flocking Behavior

Concept:

I was listening to one of my favorite songs called “Good-bye days” by a Japanese singer called YUI when I got the inspiration for this sketch. This song always reminded me of a summer night when the sun is starting to set and people chilling in an endless green field while trying to catch fireflies, and I thought this might be a fun idea to try to recreate using flocking.

Process/Highlight:

I used all three of the main skills that we learned in class by referring to our class slides as well as the Coding Train’s tutorial, which are:

  1. Alignment — I used this to align boids to their neighboring boids, so that they will all match velocities and also the direction of their movement instead of dispersing.
  2. Cohesion — this feature was what held the boids somewhat loosely together in a group so that they won’t be too spread out and will still somehow manage to stay close to each other.
  3. Separation — this was necessary because while I still wanted my boids to stay close to each other and move in a cohesive way towards a certain direction, I also didn’t want them to clash into each other because in real life, fireflies keep their distances from each other. This added a sort of “repelling” behavior amongst the boids.

A special feature I added was limiting the space of where the boids can travel to, which I did so by adding the “constrainToArea” function within the “Boid” class. At first, I made the area so that boids will only be able to travel in the upper half of the canvas, but this seemed too rectangular because the boid particles were very specifically outlining the rectangular area, so I modified it so that they’ll be active in 2/3 of the canvas area.

constrainToArea(x1, y1, x2, y2) {
  this.position.x = constrain(this.position.x, x1, x2);
  this.position.y = constrain(this.position.y, y1, y2);
}
...

Then I adjusted the following code elements in class Boid so that the boids were behaving in a way I wanted them to:

class Boid {
  constructor() {
    this.position = createVector(random(width), random(height));
    this.velocity = p5.Vector.random2D();
    this.velocity.setMag(random(2, 4));
    this.acceleration = createVector();
    this.maxForce = 0.6;
    this.maxSpeed = 10;
    this.repulsionRange = 70; // Distance to start separation
    this.alignmentRange = 90; // Distance for alignment
    this.cohesionStrength = 0.8; // Strength of cohesion behavior
    this.separationStrength = 1; // Strength of separation behavior
  }

For example, adjusting the this.maxForce and this.maxSpeed by increasing their values helped the particles to show their repulsion from the mouse cursor much clearer, as well as increasing the this.repulsionRange and this.alignementRange.

I was happy with the above values because they showed my desired picture when I simulated it, so I decided to stick with them. Then I simply added a background image that I got from this link to show that blue sky, summer night background, and changed the color of my boids to yellow so that they will be like fireflies.

Final Sketch:

And here’s the final sketch. Click on the sketch screen once and then feel free to move your mouse cursor around to observe how the boids repel from it!

Reflection: 

Next time I’d like to add a character to the mouse cursor so that it’ll be like a character chasing down the fireflies but the fireflies just flying away from her, just like a scene that could be in a Ghibli movie!

Additional Change:

After hearing professor’s feedback in class about adding trails to show the “glow” of the fireflies better, I added the below snippet of code:

class Boid {
...
    this.history = []; // New property to store position history

...

    // Store the current position in history
    this.history.push(createVector(this.position.x, this.position.y));

    // Limit the history length to control the trail length
    if (this.history.length > 50) {
      this.history.shift();
    }

...

  show() {
    noStroke();
    fill(255, 255, 102, 24); // Adjust the alpha value for transparency

    for (let pos of this.history) {
      ellipse(pos.x, pos.y, 6, 6); // Adjust the size of the ellipse
    }
  }

...

}

I adjusted the size and the transparency of the ellipse trail as I saw fit, and I’m really pleased with the outcome!

Week 7 Assignment

Concept: 

I came across “The Snow Queen” fairy tale a few days ago when I was browsing through the books in my Kindle, and this randomly crossed my mind when I was brainstorming for this assignment. Using the arrival, wander, etc. codes that we learned in class, I thought it’d be fun to show the scene of Kay’s heart being pierced and frozen from the Snow Queen’s snowflake pieces.

Process/Highlight:

I used this image for the heart, and I basically used similar structure of wander and arrival from class except I had the diamonds (“vehicles”) continuously moving even after arriving at the heart (“target’). A particular highlight would be the “separation” function I used so that the diamonds won’t be colliding into each other, which took some time for me to figure out how to use.

Here’s the code snippet:

// separation
separate(vehicles) {
  let desiredSeparation = 25; // Adjust as needed
  let steer = createVector(0, 0);
  let count = 0;

  for (let other of vehicles) {
    let d = p5.Vector.dist(this.position, other.position);
    if (other !== this && d < desiredSeparation) {
      let diff = p5.Vector.sub(this.position, other.position);
      diff.normalize();
      diff.div(d); // Weight by distance
      steer.add(diff);
      count++;
    }
  }

  if (count > 0) {
    steer.div(count);
  }

  if (steer.mag() > 0) {
    steer.setMag(this.maxSpeed);
    steer.sub(this.velocity);
    steer.limit(this.maxForce);
  }
  return steer;
}

And here’s the final sketch:

Reflection:

For some reason I couldn’t move the diamonds to be drawn at the front of the heart image for this sketch despite trying to rearrange the order of them, so that’s something I’d like to figure out and improve on next time!

Midterm Project – Burst in a Bubble [FINAL]

I have finally finished my midterm project, plotting and printing and all!

In this post I will mostly talk about the pen plotting experience and the necessary adjustments I’ve made to my original code in order to help the machine understand and read the code.

Process of SVG:

I have tried two methods in trying to save my code as an SVG file during this midterm, which are the following:

  1. Implementing the SVG system into my p5js code so that I’ll be able to export an SVG file directly from my p5.js sketch.
  2. Converting a PNG file that I took from my p5.js sketch into SVG using a third-party program (using this Adobe converter).

The first method did work in terms of exporting a snap of my sketch as an SVG file, but because my file was too big, I had to simplify my sketch a lot in order to make it successfully be exported as SVG like the following sketch:

The second method also worked, but but I couldn’t remove the background in Inkscape for some reason, for it exported with the black background included like this:

So I tried to manually remove snippets of the background, but it was too tedious and basically impossible to generate a completely clean sketch with my skills.

However, after discussing my SVG file code (the above embedded sketch) with professor Aya, we came to the conclusion that I can try to delete the perlin noise inside the circle while trying to maintain the other traces that perlin noise created for the lines, loops, ellipses, etc. For this I simply had to modify this snippet of code so that the below part is moved from function draw() to function setup():

background(0, 5); //the smaller the last number is, the longer the strokes stay visible + the slower the background color switches.

I also commented out the initial background drawing function I had in setup as well as the code that created the perlin noise pattern inside the circle:

//   // loop through each pixel inside the circle
//   for (let x = centerX - radius; x < centerX + radius; x++) {
//     for (let y = centerY - radius; y < centerY + radius; y++) {
//       let d = dist(x, y, centerX, centerY);

//       // check if the pixel = inside the circle
//       if (d < radius) {
//         // calculate Perlin noise value based on pixel's position
//         let noiseValue = noise(x * 0.01, y * 0.01);

//         // map the noise value to control the grayscale color
//         let gray = map(noiseValue, 0, 0.2, 50, 120);

//         stroke(gray); // stroke color
//         point(x, y); // draw a pixel at calculated position
//       }
//     }
//   }
  
  // noLoop(); // stop the draw loop after one frame
  //end of circle

After that, I modified the code so that both the “exploding” and “background flow field” ellipses will be smaller in quantity and size in hopes of decreasing the file size:

...

let particles1 = []; // exploding particles
let particles = []; // perlin noise flow field particles
const numParticles1 = 50; // exploding particles number
const numParticles = 500; // exploding particles number
const expansionLimit = 360; // Set your desired expansion limit

const num = 150; // flow field particles
const noiseScale = 0.01 / 2;
...

At this point, I had this sketch running that I was able to export into SVG successfully directly from p5.js!


This is also how it looked as an SVG file:

Although I had to make some adjustments, I was pretty happy with the amount of elements that I was able to keep. So afterwards, I set onto plotting my sketch on the pen plotter, which also took around two to three attempts because they kept stopping midway. Finally, for the last version, I decided to just try white paper and black pen because my sketch was pretty detailed and I didn’t want to risk eliminating those details using a white pen, which was less reliable compared to the black pens we had. It took way, way longer than I thought (two hours…), and I also had to change the pen midway because it ran out of ink, but it somehow worked and I’m very happy with the result:

Here’s a short clip of the printing process:

IMG_9857

…and the GoPro recording: GH010649

Evolution of my sketch:

I thought it’d be cool to list all the versions of the sketch that I made till my final product!

At first, I was leaning more towards the whole “universe in one’s palms” idea, hence the first sketch; however, after seeing this image from a performance, I kind of wanted to create a small “universe” that was kind of in a “bubble” with particle explosions and waves to showcase chaos that can be controlled yet randomized and unpredictable.

BTS's Jimin Reveals What Went Through His Head When The "Serendipity" Bubble Didn't Pop In Wembley, London - Koreaboo

These are also some research/videos that I referred to throughout my project:

  • class PerlinShape — expanding circular waves; the patterns that a black hole generates (tutorial)
  • class particle — perlin noise flow field particles; symbolizes the small stars/shooting stars that we see passing by in the universe (tutorial)
  • class particle1 — explosion of particles; signifies big stars exploding/being generated in space (tutorial)
  • ellipse — has perlin noise pattern inside; the “moon”

Once I had this basic outline of how I wanted my sketch to look like, I was able to apply skills that I learned in class for each of them:

  1. using perlin noise to create the surface of the planet (ellipse)
  2. particle systems to make an “ripple” explosion of particles from the ellipse
  3. using perlin noise to create a flow field for the background

2.

Then, I played around with the flow field and perlin noise as well as the direction change at mouse click.

3.
This was when I started to form a general idea of what kind of elements I’d specifically need, what kind of final product I wanted to achieve, etc., and I added the exploding particles and perlin noise ellipse in the middle.

4.
Then I began experimenting with combining perlin noise loop and the flow field background I already had, and although my initial idea was to only create one single line of perlin noise loop, I actually ended up liking this tracing of the loop that made it look like there’s multiple lines on canvas so I kept it.

5.
Then I combined all elements together and modified some elements (expansion limit of exploding particles, how long the traces will remain on canvas, etc.) — almost there to the end sketch!

6.
Finally, this is the end result of my code, in which I simply added a hand image at the bottom of the canvas — my very first idea was to create a smaller universe within two pairs of hands, and although I gave up on the idea because I made many modifications to my sketch since then, I still wanted to try implementing an image to combine it with a randomly generated art sketch even if it was only for my code and not my SVG sketch.

Link to code: https://editor.p5js.org/Clara0424/sketches/FLpwKaMgl

Reflection:

Here are some complications that I thought were significant during my process of creating this final sketch. These struggles were all documented in my previous posts, but I just wanted to make a compilation of them in one post so that it’s easier for me to identify and present.

  1. Combining all elements (flow field background, perlin noise loops, perlin noise ellipse, exploding particles, hand image) and readjusting all of their positions. For example, readjusting my exploding particles to the center after adding the perlin noise loops took a long time for me to crack the code (used the code below to readjust the position).
let particle1 = new Particle1(width/2, height/2); // Set initial position of the explosion WITHIN the circle boundary
// Check if the particle has exceeded the expansion limit; controlling this elongates the ellipse boundary limit of the particles 
if (dist(this.position.x*1, this.position.y*1, width/2, height/2) >= this.expansionLimit) {
  this.lifespan = 0;
}
display() {
  fill(255, this.lifespan);
  ellipse(this.position.x*1, this.position.y*1, 10, 10); // the position of the ellipse limit itself
}

2. SVG export (as mentioned above in this post) — I had many alterations, sketches, and experiments with the original code till the point where I was confused about which version is what, haha. The printing process itself was also a challenge not just because of the long hours it took but also because of the sudden pauses that disrupted my sketch from being plotted in one go.

However, I also had parts of my process/code that I was proud of, such as:

  1. Using function mouseReleased() to reset the noise seed every time I release the mouse. By setting the noise seed to the current millisecond value, I was able to increase the randomization, variety, and designs of my sketch for all of my elements. The snippet of code I used for this is shown below:
    function mouseReleased() {
      noiseSeed(millis());
    }

    2. Another element of my code that I’m particularly proud of is the PerlinShape.js class, which is the class that is responsible for generating the perlin noise loops in my sketch. Initially I didn’t expect there to be multiple loop lines, but although I implemented the code for just one loop it ended up generating multiple because of the perlin noise code that I already had in my sketch code. So it traced the movement of the loop, which gave this illusion that there’s multiple loops moving around fluidly. This look was something that I wanted to achieve but gave up on earlier on when I was brainstorming what to do for my project, so I was really happy to accidentally stumble upon it and create it for my final sketch.

Final Words:

As tedious, time-consuming, and challenging this project was, I genuinely learned so much about not just p5.js coding but also about pen plotters, creating an original work, and experimenting with randomization and rolling with the knowledge that you will likely discover something completely new and unexpected that might trigger your interest midway into the process of creating it, causing you to shift your whole idea for your project. As a planner who prefers knowing what my next steps will be, this was hard to accept at first, but by the end of the project, I ended up enjoying and even anticipating the new designs that I might end up with once I implemented the next snippet of my code. It was really rewarding to see your original creation come to life not just in p5.js but also on an actual paper! 🙂

Midterm Progress 2

From last post, I have changed many things, either accidentally or intentionally. I am still going with the initial concept of space, but I eliminated a lot of the elements from the original design, such as the hand images, rotating shooting stars, etc. Now, I have four main elements in my code to create the image that I currently have now:

  • class PerlinShape — expanding circular waves; the patterns that a black hole generates
  • class particle — perlin noise flow field particles; symbolizes the small stars/shooting stars that we see passing by in the universe
  • class particle1 — explosion of particles; signifies big stars exploding/being generated in space
  • ellipse — has perlin noise pattern inside; the “moon”

The ellipse and the perlin noise flow field has mainly stayed the same for the most part since the last progress post, but the two things that I newly  developed since then are the exploding particles and the perlin shape waves.

Progress:

At first, my goal was to create a simple singular circle loop that’s moving using perlin noise, as shown in this tutorial. However, once I implemented the code after modifications, I got a really cool result that looked like one of the images that I originally wanted to create, which were waves like these:

I had some trouble trying to position the ellipse back into the center of the canvas after adding the PerlinShape class into my code, but I realized that once I modified the following snippet below, I was able to get it back to the center:

//circle
let centerX = 20;
let centerY = 20;
let radius = 100;

At this point, I had reached this image in my code:

Then, I had to move the explosion of the particles class into the center as well so that they will spring from within the ellipse in the center, for it was positioned at the bottom right corner of the canvas at this point like how it’s shown above.

To do this, I tried adjusting the following part of the code’s x and y positions, but then I ended up with this image:

  // Check if the particle has exceeded the expansion limit
  if (dist(this.position.x*0.8, this.position.y*0.8, width/2, height/2) >= this.expansionLimit) {
    this.lifespan = 0;
  }
}

display() {
  fill(255, this.lifespan);
  ellipse(this.position.x/2, this.position.y/2, 10, 10);
}

Then I realized that if the value that is multipled to this.position.x and this.position.y are the same throughout in the above code snippet, the particles explode from the center of the ellipse limit that I wanted the particles to expand till, which gave me this image:

Now the only thing I had to do was move this explosion into the center, which I realized was supposed to be controlled from the sketch.js file.

These are the three elements of the code that I made adjustments to in order to control the location of the exploding particles:

let particle1 = new Particle1(width/2, height/2); // Set initial position of the explosion WITHIN the circle boundary
// Check if the particle has exceeded the expansion limit; controlling this elongates the ellipse boundary limit of the particles 
if (dist(this.position.x*1, this.position.y*1, width/2, height/2) >= this.expansionLimit) {
  this.lifespan = 0;
}
display() {
  fill(255, this.lifespan);
  ellipse(this.position.x*1, this.position.y*1, 10, 10); // the position of the ellipse limit itself
}

Finally, I kept the this.position.x and this.position.y values consistent so that the particles would expand in a perfect ellipse shape rather than an oval.

Then I adjusted the expansionLimit value so that it’ll expand in a smaller size, and at this point I had this:


I was pretty happy with what I had by this point, and although a lot of the code ended up being very random and unexpected, I had a lot of fun reaching till this point. A particular feature that I want to highlight is the redrawing of all the elements (perlin noise flow field, perlin noise circle loops, particle explosion, perlin noise pattern of the ellipse) that are on my canvas whenever I click the screen; this helped me generate a lot of interesting and different variations playing with colors, different-shaped lines and waves, directions, etc.

Here are a few different variations that I got:

I might add a few new elements such as stars that will appear in the background or bring back the hand images, etc. Or I might keep it simple like this, haha. But I’d say I’m 90% done with my project!