Midterm Project Progress

Concept:

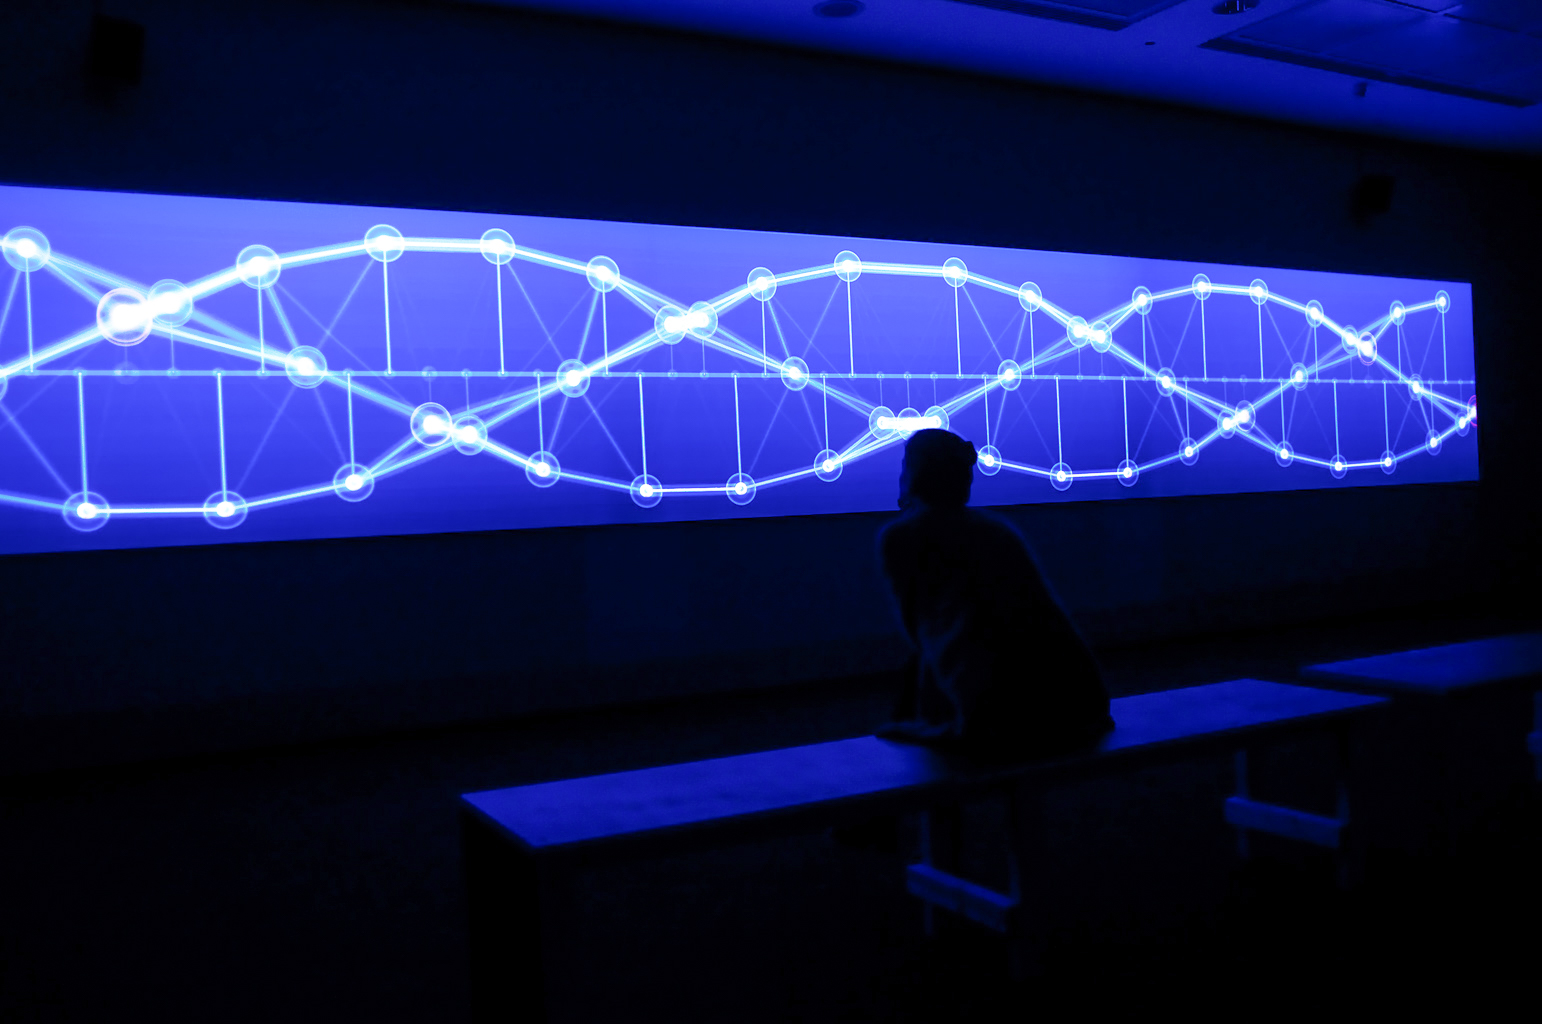
As I was brainstorming what kind of generative art I wanted to portray, I thought of these few images/visuals that gave a more futuristic vibe while also playing around with the lines, waves, etc.:
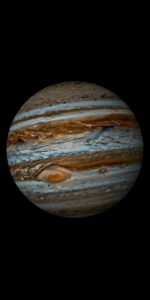
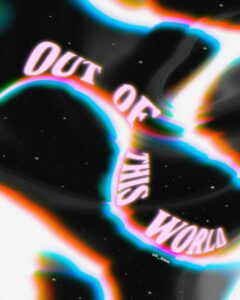
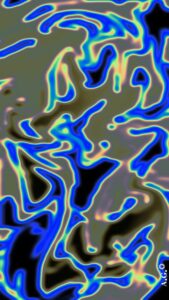
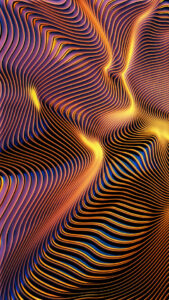
 

link 1link 2, link 3, link 4, link 5

I have always been a space fan, so I decided that I wanted my concept to be futuristic, bright pop of colors, etc., but I also wanted to portray the space in a more creative way. However, I wanted to incorporate some creativity into my project rather than simply recreating the space, so I wanted to add a person/person’s body part so that it shows our connection to the universe. This led me to think of two hands controlling the galaxy/planets inside the palms of the person’s hands, so I came up with the following sketch:

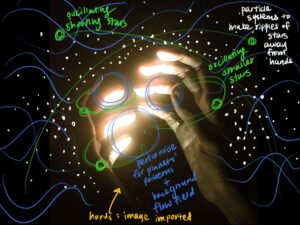
But as for the coding aspect, I decided to use the following skills we learned in class, such as:

  1. using perlin noise to create the surface of the planets as well as the background
  2. particle systems to make “ripples” of stars that are placed around the planets/hands that will scatter into the universe in a ripple pattern
  3. oscillation for the smaller stars/planets that will rotate around the set of hands as well as “shooting stars”

As much as it took for me to decide on a concept, once I had a vision of what I wanted to code, I was ready to move forward as quick as possible.

Design/Progress of my Code:
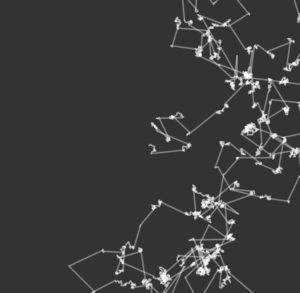
<Flow Field>

First, I created the flow field background so that it’ll signify the movement of the river/water, which I did so after reviewing how to create flow fields with perlin noise by watching this video.

A specific aspect that I am proud of was the “const num = ” part, because as simple as this is, I couldn’t figure out how to reduce the number of particle strokes in the background.

let particles = [];
const num = 150;
const noiseScale = 0.01 / 2;

Another part that I adjusted a lot was the following code, because for some reason the code kept glitching and wasn’t showing me a consistent transparency of the strokes when they were cleared and redrawn on canvas.

stroke(255, 60); // adjust the last number for the transparency of the strokes
strokeWeight(7); // adjust the thickness of the strokes
clear();

As for the main code that draws the flow field, I used the following code:

for (let i = 0; i < num; i++) {
  let p = particles[i];
  point(p.x, p.y);
  let n = noise(
    p.x * noiseScale,
    p.y * noiseScale,
    frameCount * noiseScale * noiseScale
  );
  let a = TAU * n;
  p.x += cos(a);
  p.y += sin(a);
  if (!onScreen(p)) {
    p.x = random(width);
    p.y = random(height);
  }

First, I made a loop for the particles array that runs for ‘num’ times, and I also set the position and how I want to draw the particle points so that it creates a visible trail on canvas. Then I calculated the angle a for each particle’s movement using perlin noise, as well as setting the particles so that if they go off screen, they will be reset at a random location.

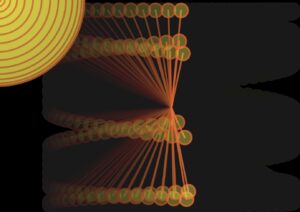
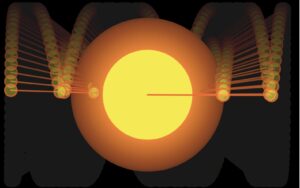
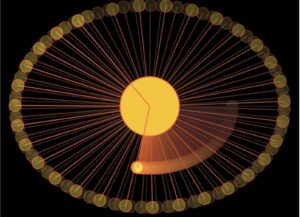
<Circle with Perlin Noise>

A highlight of my circle was the following code, which basically enabled me to draw the perlin noise pattern just INSIDE the circle only by checking if the pixel is inside the circle. I also adjusted the values inside the let gray = map(); part of the code to make it into my desired shade of gray.

// check if the pixel = inside the circle
if (d < radius) {
  // calculate Perlin noise value based on pixel's position
  let noiseValue = noise(x * 0.01, y * 0.01);

  // map the noise value to control the grayscale color
  let gray = map(noiseValue, 0, 0.2, 50, 120);

  stroke(gray); // stroke color
  point(x, y); // draw a pixel at calculated position
}

Finally, for both the circle and the background flow field, I used the following code to make it so that every time the user presses the screen with the mouse, the direction of the particles AND the perlin noise pattern in the circle will be randomly redirected/refreshed.

function mouseReleased() {
  noiseSeed(millis());
}

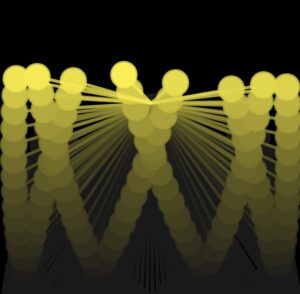
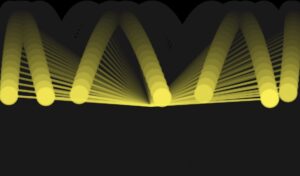
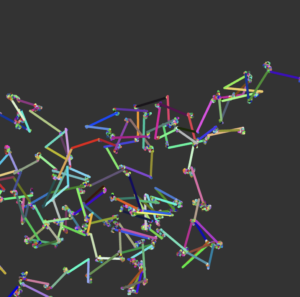
Here are a few different screenshots of my canvas so far:

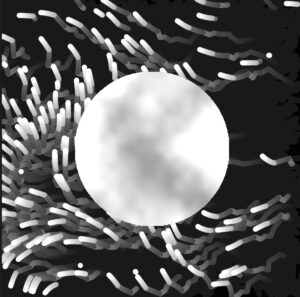
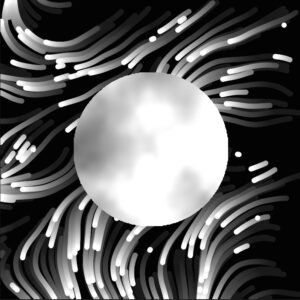
And this is what I have so far:

Uncertain Element:

For the ripples, I watched this link 1 to see what kind of ripple effect I wanted to create, and decided that small particles expanding in circles will be suitable, for I really liked the examples we did with the particles system chapter. I haven’t had the time to work on the ripples yet, though, and it’s still yet to be decided.

I’d also like to experiment with the audio and how it can affect different elements in my canvas, which is a rather scary area because I’ve never tried anything like that before.

Future Directions:

I think I will continue experimenting with different skills such as oscillation, particles system, etc. that I wanted to initially add and see if I like any accidental steps that I discover along the way. I need to create more of the perlin noise patterned planets, and also adjust their sizes and the canvas first as well as importing the hands before moving onto the other elements.

Week 4 Assignment

Concept:

Keeping in mind that we’re supposed to include oscillation, sine waves, and harmonic motion into this assignment, I went through a few examples that demonstrated each one to get a better grasp of each concept, such as the oscillation examples, sine waves example, and harmonic motion video. And taking inspiration from Memo Atken, I also wanted to give a glowing, echoing, almost a “neon” effect like how it’s shown below: 

After watching the tutorials and doing a few practice examples, I really liked the idea of creating x-oscillation and y-oscillation and playing with properties of the two, and the image that I could produce with that.

Highlights:

In order to create the yo-yo effect, I learned that I need to map the y-position instead of mapping the size of the circle itself.

I ended up trying a few different combinations with the x-oscillation and the y-oscillation and creating x1, x2, y1, y2 for each amplitude and angle.

Here are some pictures of the trials I had:

Finally, I decided to try to portray the sun and our solar system by altering this part of the code, which I can say is the biggest highlight from my entire coding process:

let x1 = map(cos(angle2), -1, 1, -ampx1, ampx1);
  let x2 = map(cos(angle1), -1, 1, -ampx2, ampx2);

let y1 = map(sin(angle2), -1, 1, -ampy1, ampy1);
  let y2 = map(sin(angle1), -1, 1, -ampy2, ampy2);

Some of the key variables in my code are:

angle1, angle2, angle3 –> represent the initial angles for the motion of the elements.
angleV1, angleV2, angleV3 –> control the speed and proximity of each “yo-yo.”

I played around by switching whether to put angle1 or angle2 into the x and y coordinates, and they all gave me different results and patterns, but this was the combination (x1 – angle2, x2 – angle1, y1 – angle2, y2 – angle1) that gave me the “spinning” or “orbiting” design.

Then I also added a oscillating/”breathing” circle in the middle of the canvas, which I took inspiration and made alterations from the class example that we did. This acted as my “sun,” for it is placed at the center of the orbit system; moreover, the “glowing” effect that I achieved through this snippet of code below was also helpful in making the circle look more like a sun.

background(0, 4); //gives that glowing effect

I also altered the number times the width or height of each ampx1, ampx2, ampy1, and ampy2 to set how big they will draw the patterns – setting both ampx1 and ampy1 to 0.55 *  width or height resulted in the drawing of the smaller orbit that’s closer to the sun, as shown below.

let ampx1 = (0.55 * width) / 2;
let ampx2 = (0.9 * width) / 2;

let ampy1 = (0.55 * height) / 2;
let ampy2 = (0.9 * height) / 2;

Finally, the last highlight of my code was altering the angleV function, which I realized controls the speed and proximity of each “yo-yo.” For example, when I set angleV1 to a small number (i.e. 0.2), it resulted in this visual outlook, which proved that it was moving in a much faster speed and also in a more spread out manner from each other. Below is the code snippet and the image of how it looked:

let angleV1 = 0.9;
let angleV2 = 0.015;

And here’s the final sketch:

Reflection:

Professor Aya suggested that I change the middle linear element that currently has a circular motion to behave as a pendulum or some sort of a spring to add further variation to my sketch, but unfortunately I didn’t have enough time or the brains to figure that out in time. However, I do think that would be a fun improvement that I can add to the sketch!

Another question I had was figuring out how to make the circle in the middle expand in a consistent speed, because I realized that the longer the code runs, the faster the circle expands and shrinks. However, as for the time being, I’m happy with the result that I have!

Week 3 Assignment

Concept

While looking through the examples that we went over class, I was reminded of how planets orbit in the space, which has always been something I was interested in. So I thought it’d be fun to trace the lines of the orbit without showing the actual attractor (in this case this would be the planet), so that they will look almost like flowers that bloomed in space. I got inspired by the Korean traditional flower patterns, which is shown below, and wanted to recreate something similar to it but in a much simpler outline and with a space background.

Process/Highlight

Taking professor Aya’s advice, I first made sure to watch these two tutorials (1, 2) from the Coding Train before beginning my project, during which I learned a few core rules such as:

  • establishing universal gravitational constant (written as G in the code), which is a property of attractor itself. It’s a way to tune the world to have  stronger/weaker gravitational attraction forces.
  • you need direction (vector, use sub() function) and magnitude when calculating the force.

Keeping these information in mind, the vision that I had was creating a total of 3-5 different flower patterns that were different in sizes, so I created a total of 3 individual attractors and movers and varied elements such as ellipse and this.vel.mult(); for each attractor and mover. I also varied the colors for each of them in order to make the canvas more vibrant.

Something that I had trouble with for a while was adjusting/movign the position of the mover3, but after trying out various combinations of numbers, I realized that I needed to edit this part of the code in order to move the position of the mover:

  show() {
    stroke(255,100); 
    strokeWeight(2);
    fill(255, 20);//adjust color
    ellipse(this.pos.x / 0.63, this.pos.y / 0.63, this.r * 2);
  }
}

And as for the attractor3, I also adjusted this part below in order to move its location:

  show() {
    noStroke();
    fill(255, 0, 100);
    ellipse(this.pos.x * 1.6, this.pos.y * 1.6, this.r * 2);
  }
}

Then I just hid all the attractor.show(); functions in order to make them invisible, and changed the colors and transparency of each mover and added a background image. I also added Daniel’s particle code so that it will act like stars in the background. I tried running it multiple times for variation, and I got 3-4 different versions.

Here’s the final sketch.

Reflection

Some possible rooms for improvement are:

  • setting the sketch so that it will stop drawing once it hits a certain number of repetition so that the movers’ traces won’t look so clumped together in the end.
  • limiting the freedom of randomized designs (sometimes the movers were moving in an unruly way so the pattern looked a little off).

I also couldn’t figure out how to add turbulance/resistance with the particles, because my original idea was to have the particles repel away from the movers. This is also something I’d like to work on next time.

Week 2 Assignment

Concept

The inspiration came out of nowhere when my friends and I were telling a running joke about how we can each be a character in the Ratatouille movie over our dinner, and it struck me that it’d be fun to create a mouse chasing its cheese for this assignment.

Highlight

I thought it’d be fun to have the mouse be the “cheese” by linking an image to it and another so the first thing I set to watch was this video about acceleration towards the mouse. Then I set onto creating my canvas, uploading images, and so on.

For the images I used these cute clip arts of cheese and mouse.

Something that I struggled with in this assignment was trying to get the mouse image to be portrayed on top of the cheese image, because it looked a little weird when it was vice versa — it was almost as if the cheese was eating the mouse, not the other way around. I tried searching up solutions for it, but I still couldn’t figure out the answer in the end.

Despite this complication, I managed to add the elements of velocity, acceleration, etc. correctly in a way such that the object (mouse) will move towards the cursor (cheese), thus tracking its movement — this part of the code is shown below:

class Mickey {
  constructor(x, y) {
    this.pos = createVector(x, y);
    this.vel = p5.Vector.random2D();
    this.vel.mult(random(3));
  }

  update() {
    let mouse = createVector(mouseX, mouseY);
    this.acc = p5.Vector.sub(mouse, this.pos);
    this.acc.setMag(1);

    this.vel.add(this.acc);
    this.vel.limit(5);

    this.pos.add(this.vel);
  }


Embedded sketch

I ended up adding a maze background to make this look a little more fun and exciting, which I drew inspiration from this image.

And here’s the final sketch.

Reflection

I think this could become much better after revisions, such as figuring out how to overlay the mouse image over the cheese image as well as setting edges to work for the right side’s x and y values of the canvas — for some reason, it seemed like only the left side of the canvas’ edges were working. I also thought it’d be fun to potentially turn this into a game similar to the concept of the good old Packman game!

Week 1 Assignment

After going through the class slides and watching a few videos from The Coding Train that demonstrated how to code the basic functions of random walker and vectors, etc., I decided to combine levi flight (a specific type of random walk) and walk through RGB space to add colors as well. I really liked how levi flight worked with its spontaneous stretches of lines, and I also thought it could be turned into an artwork if I added colors onto it, making both the direction and the color of the line unpredictable.

Concept

Watching the demonstrations of levi flight got me thinking about the traditional Korean painting classes that I used to take back at home, because the contrast between the long, shooting lines and concentrated, zig-zag lines were similar aspects between the two. Building upon this, I thought it might be fun to try to recreate these paintings’ general mood/style through the levi flight.

사군자매화 on Pinterest image link

Code Highlight

As for the process, I first created the vector element, then established levi flight (for which I referred to this video), then worked on the RGB aspect. A part of my code that I had a hard time with was adjusting the randomly generated probability and just how enlarged the size of steps were going to be based on that, which was this part:

var r=random(100); // setting probability
  if (r<5) {
    step.mult(random(25,50)) //enlargens the steps randomly from 25 to 50
  } else {
    step.setMag(2); //setting the magnitude
  }

After many trials, I finally settled on setting the step.mult factor to be randomly generated from 25 to 50 and the probability of r<5 because they gave me the product that is most similar to the “painting style” that I was aiming for. At this point of my progress, my assignment was looking something like this:

Then I began adding the RGB aspect, which I was really proud about just because adding colors into the canvas was so fun. I also referred to this link to learn more about the colorMode () function.

colorMode(RGB);
stroke(random(255), random(255), random(255));

At this point, I had this:

And here is the final sketch.

Reflection

I think I detoured a bit from my original inspiration/idea of what I wanted to create, but I actually ended up being happy with the final result! The pop of colors and the unpredictability really made me satisfied because it gave a futuristic/disco pop vibe.

For the future, I thought it’d be fun to also incorporate a sound element into this so that depending on each note, the graphics/lines will be affected in some ways such as color, direction, length, etc.! I also think it’d be great to add limits so that the lines won’t stay off the canvas for too long, which seemed to happen once in a while.

Reading Response no. 1 – Week 1

An interesting and core debate the author brings up in the reading was the clash and the balance between reductionism and taking a wider view when looking at the things around us. The author, despite bringing up valid points of view from both sides for the readers to make judgments themselves, seemed to be siding with the latter perspective, for he stresses on how reductionism and dissecting everything into its core elements is essentially no use if you are lacking the context behind them. Chewing on this, I found a correlation between the author’s example of reductionists describing the universe down to its “subatomic particles” can be isn’t necessarily the best way of explaining the entire picture as well as how I view my own life. If I had to pick a view that is more similar to my own, I also think having a wider perspective is how I live my life because I always put my emphasis on the “bigger picture” and rely on the general vision that I have for myself rather than focusing on smaller details such as which classes or even major I will choose, what kind of assistantships I will apply for at the moment, etc. Just like what the author points out, without context, or, for me specifically, without meaning or purpose, it doesn’t matter how detailed you are in planning out your actions or steps in life because you are bound to be lost without a general direction to guide you. 

Another thought that appealed to me was his mention of how the computer is the first invention that proved that engaging simultaneously in theory and experimentation is possible, because according to the reading, “someone who creates and uses a simulation” is utilizing both theory and experimentation at the same time. This made me realize just how unique and influential the invention of computers is because it is the first invention that allows us to also engage in combining these two elements together. Reflecting on my own experience with coding and computer science so far, I can definitely see how the computer wills us to use both skills at the same time because I might be learning the theoretical idea and methods of how the code will work in class or through videos, but I won’t be able to make it mine or know for sure whether it is actually applicable unless I try it out myself, which is the experimentation part.