Final Project (Draft 1) – Khalifa Alshamsi

Design Concept

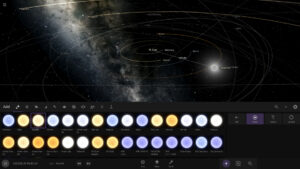
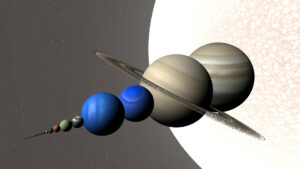
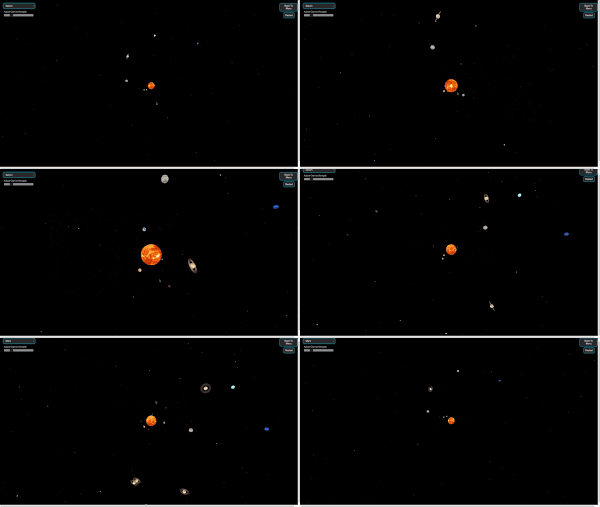
The project “Gravity Dance” aims to create an immersive simulation that explores the graceful and sometimes chaotic interactions within a celestial system.

Storyline

As participants engage with “Gravity Dance,” they will enter a dynamic universe where they can introduce new celestial bodies into a system. Each interaction not only alters the trajectory and speed of these bodies but also impacts the existing celestial dance, creating a living tapestry of motion that mirrors the interconnectivity of space itself.

Interaction Methodology

Users interact with the simulation through simple mouse inputs:

  • Clicking on the canvas adds a new celestial body at the point of click.
  • Dragging allows users to set the initial velocity of the celestial bodies, giving them tangential speed and direction.
  • Hovering provides details about the mass and current velocity of the celestial bodies.

Technical Setup and Code Insights

  • Gravitational Physics: Each planet’s movement is influenced by Newton’s law of universal gravitation.
  • Cellular Automata: The background is dynamically generated using cellular automata to create a starry night effect. Different shapes and brightness levels represent various types of celestial phenomena.

Design of Canvas

User Interaction Instructions:

  • Startup Screen: Instructions are displayed briefly when the user first enters the simulation, explaining how to add and manipulate celestial bodies.
  • During Interaction: Cursor changes to indicate different modes (add, drag).
  • Feedback: Visual cues such as changes in color or size indicate the mass and speed of the celestial bodies. Textual feedback appears when hovering over a body, showing details.

Current Sketch

Base p5.js Code

let planets = [];
let G = 6.67430e-11;  // Universal Gravitational Constant
let grid, cols, rows;
let resolution = 10;  // Adjust resolution for visual detail

function setup() {
  createCanvas(windowWidth, windowHeight);
  cols = floor(width / resolution);
  rows = floor(height / resolution);
  grid = Array.from({ length: cols }, () => Array.from({ length: rows }, () => random(1) < 0.1));
  frameRate(30);
}

function draw() {
  background(0, 20); // Slight fade effect for motion blur

  // Draw the space-themed cellular automata background
  drawSpaceCA();

  // Draw the central sun
  fill(255, 204, 0);
  ellipse(width / 2, height / 2, 40, 40);

  // Update and display all planets
  planets.forEach(planet => {
    planet.update();
    planet.display();
  });
}

function mouseClicked() {
  let newPlanet = new Planet(mouseX, mouseY, random(5, 20), random(0.5, 2));
  planets.push(newPlanet);
}

class Planet {
  constructor(x, y, mass, velocity) {
    this.pos = createVector(x, y);
    this.mass = mass;
    this.vel = createVector(velocity, 0);
  }

  update() {
    let force = createVector(width / 2, height / 2).sub(this.pos);
    let distance = force.mag();
    force.setMag(G * this.mass * 10000 / (distance * distance));
    this.vel.add(force);
    this.pos.add(this.vel);
  }

  display() {
    fill(255);
    ellipse(this.pos.x, this.pos.y, this.mass);
  }
}

function drawSpaceCA() {
  noStroke();
  for (let i = 0; i < cols; i++) {
    for (let j = 0; j < rows; j++) {
      let x = i * resolution;
      let y = j * resolution;
      if (grid[i][j]) {
        let shapeType = floor(random(3)); // Choose between 0, 1, 2 for different shapes
        let size = random(3, 6); // Size variation for visual interest
        fill(255, 255, 255, 150); // Slightly opaque for glow effect
        if (shapeType === 0) {
          ellipse(x + resolution / 2, y + resolution / 2, size, size);
        } else if (shapeType === 1) {
          rect(x, y, size, size);
        } else {
          triangle(x, y, x + size, y, x + size / 2, y + size);
        }
      }
    }
  }

  if (frameCount % 10 === 0) {
    grid = updateCA(grid); // Update less frequently
  }
}

function updateCA(current) {
  let next = Array.from({ length: cols }, () => Array.from({ length: rows }, () => false));
  for (let i = 0; i < cols; i++) {
    for (let j = 0; j < rows; j++) {
      let state = current[i][j];
      let neighbors = countNeighbors(current, i, j);
      if (state === false && neighbors === 3) {
        next[i][j] = true;
      } else if (state === true && (neighbors === 2 || neighbors === 3)) {
        next[i][j] = true;
      } else {
        next[i][j] = false;
      }
    }
  }
  return next;
}

function countNeighbors(grid, x, y) {
  let sum = 0;
  for (let i = -1; i <= 1; i++) {
    for (let j = -1; j <= 1; j++) {
      let col = (x + i + cols) % cols;
      let row = (y + j + rows) % rows;
      sum += grid[col][row] ? 1 : 0;
    }
  }
  sum -= grid[x][y] ? 1 : 0;
  return sum;
}

Next Steps

As I continue to develop “Celestial Choreography,” the next phases will focus on refining the physics model to include more complex interactions such as orbital resonances and perhaps collisions. Additionally, enhancing the visual aesthetics and introducing more interactive features are key priorities.


Week 11 – Cellular Automata – Khalifa Alshamsi

Concept

Cellular automata are mathematical models used to simulate complex systems with simple rules. I’ve built an interactive visualization using p5.js that not only demonstrates these concepts but also allows users to manipulate the simulation in real time.

Highlight of the Code

I’m particularly proud of how I implemented the function to update the grid based on cellular automata rules. Here’s the snippet that captures this logic:

function updateGrid(oldGrid, numRows, numCols) {
  let newGrid = new Array(numRows);
  for (let i = 0; i < numRows; i++) {
    newGrid[i] = new Array(numCols);
    for (let j = 0; j < numCols; j++) {
      let state = oldGrid[i][j];
      let neighbors = countNeighbors(oldGrid, i, j, numRows, numCols);
      if (state == 0 && neighbors == 3) {
        newGrid[i][j] = 1; // Birth
      } else if (state == 1 && (neighbors < 2 || neighbors > 3)) {
        newGrid[i][j] = 0; // Death
      } else {
        newGrid[i][j] = state; // Survival
      }
    }
  }
  return newGrid;
}

This function is central to the automata’s behavior, dynamically calculating each cell’s state in the next generation, creating patterns that can evolve from ordered or chaotic initial conditions.

Full Code

let grid;
let cellSizeSlider;
let colorButton;
let cellSize = 10;
let numRows, numCols;
let prevCellSize = 10; // Stores the previous cell size for comparison.
let colorIndex = 0; // Index to track the current color scheme.
let colorSchemes; // Array to hold different color schemes for the grid.

function setup() {
  createCanvas(600, 600);

  // Creates and position the slider for adjusting the cell size.
  cellSizeSlider = createSlider(5, 20, 10, 1);
  cellSizeSlider.position((width - cellSizeSlider.width) / 2 - 60, height + 10);

  // Initializes color schemes using the color function.
  colorSchemes = [
    [color(255), color(0)], // White and Black
    [color(255, 255, 0), color(0)], // Yellow and Black
    [color(64, 224, 208), color(128, 0, 128)], // Turquoise and Purple
    [color(255, 105, 180), color(255)] // Hot pink and White
  ];

  // Creates and position the button for changing colors, and set its event handler.
  colorButton = createButton('Color');
  colorButton.position(cellSizeSlider.x + cellSizeSlider.width + 10, height + 10);
  colorButton.mousePressed(changeColor);

  // Initializes the grid based on the current slider value.
  updateGridSize();
  grid = initializeGrid(numRows, numCols);
  displayGrid(grid, numRows, numCols);
}

function draw() {
  // Checks if the slider value has changed and update the grid if necessary.
  if (prevCellSize !== cellSizeSlider.value()) {
    prevCellSize = cellSizeSlider.value();
    updateGridSize();
    grid = initializeGrid(numRows, numCols);
  }
  // Updates and displays the grid according to the cellular automata rules.
  grid = updateGrid(grid, numRows, numCols);
  displayGrid(grid, numRows, numCols);
}

function updateGridSize() {
  // Adjusts the number of rows and columns based on the cell size.
  cellSize = cellSizeSlider.value();
  numCols = floor(width / cellSize);
  numRows = floor(height / cellSize);
}

function initializeGrid(numRows, numCols) {
  // Creates a new grid with random initial states.
  let grid = new Array(numRows);
  for (let i = 0; i < numRows; i++) {
    grid[i] = new Array(numCols);
    for (let j = 0; j < numCols; j++) {
      grid[i][j] = floor(random(2)); // Each cell randomly alive or dead.
    }
  }
  return grid;
}

function updateGrid(oldGrid, numRows, numCols) {
  // Applys cellular automata rules to create the next generation of the grid.
  let newGrid = new Array(numRows);
  for (let i = 0; i < numRows; i++) {
    newGrid[i] = new Array(numCols);
    for (let j = 0; j < numCols; j++) {
      let state = oldGrid[i][j];
      let neighbors = countNeighbors(oldGrid, i, j, numRows, numCols);
      if (state == 0 && neighbors == 3) {
        newGrid[i][j] = 1; // Birth
      } else if (state == 1 && (neighbors < 2 || neighbors > 3)) {
        newGrid[i][j] = 0; // Death
      } else {
        newGrid[i][j] = state; // Survival
      }
    }
  }
  return newGrid;
}

function countNeighbors(grid, x, y, numRows, numCols) {
  // Count the live neighbors around a given cell, considering wrap-around.
  let count = 0;
  for (let i = -1; i <= 1; i++) {
    for (let j = -1; j <= 1; j++) {
      if (i == 0 && j == 0) continue; // Skip the cell itself
      let col = (x + i + numRows) % numRows;
      let row = (y + j + numCols) % numCols;
      count += grid[col][row];
    }
  }
  return count;
}

function displayGrid(grid, numRows, numCols) {
  // Displays the grid on the canvas, coloring cells based on their state.
  background(255); // Clear the canvas before redrawing.
  for (let i = 0; i < numRows; i++) {
    for (let j = 0; j < numCols; j++) {
      let x = j * cellSize;
      let y = i * cellSize;
      noStroke();
      fill(grid[i][j] ? colorSchemes[colorIndex][1] : colorSchemes[colorIndex][0]);
      rect(x, y, cellSize, cellSize);
    }
  }
}

function changeColor() {
  // Cycles through the color schemes when the button is pressed.
  colorIndex = (colorIndex + 1) % colorSchemes.length;
}


Sketch

Reflection and Future Work

Reflecting on this project, I am satisfied with the final look. However, there’s always room for improvement and expansion. In future iterations, I would like to explore:

  • Additional Rulesets: Integrating more complex automata rules to show different dynamics and perhaps allow users to switch between them interactively.
  • Performance Optimization: As the grid grows larger, performance can become an issue. Optimizing the sketch to handle larger grids efficiently would be beneficial.
  • User Interaction: Adding more controls for users to configure initial conditions manually or even create presets of interesting patterns to start with.

Week 10 – Khalifa Alshamsi

Inspiration

The Coding Train’s tutorials on Matter.js, particularly on “Adding More Forces” and “Collision Events,” provided the foundation for this project. The tutorials demonstrated how applying varied forces to objects and managing their interactions through collision events can produce compelling visual dynamics. This inspired me to experiment with these concepts by creating a controlled environment where these physics phenomena could be observed and manipulated.

Sketch

Full Code

// Module aliases
const { Engine, Render, Runner, World, Bodies, Body, Events, Mouse, MouseConstraint } = Matter;

// Create an engine
const engine = Engine.create();

// Create a renderer
const render = Render.create({
    element: document.getElementById('canvas-container'),
    engine: engine,
    options: {
        width: 800,
        height: 600,
        wireframes: false
    }
});

// Create ground, roof, and walls
const ground = Bodies.rectangle(400, 590, 810, 40, { isStatic: true, render: { fillStyle: 'brown' } });
const roof = Bodies.rectangle(400, 10, 810, 40, { isStatic: true, render: { fillStyle: 'gray' } });
const leftWall = Bodies.rectangle(0, 300, 40, 600, { isStatic: true, render: { fillStyle: 'gray' } });
const rightWall = Bodies.rectangle(800, 300, 40, 600, { isStatic: true, render: { fillStyle: 'gray' } });

// Create a box
const box = Bodies.rectangle(400, 200, 80, 80, { restitution: 0.5 });

// Add all of the bodies to the world
World.add(engine.world, [box, ground, leftWall, rightWall, roof]);

// Add mouse control
const mouse = Mouse.create(render.canvas);
const mouseConstraint = MouseConstraint.create(engine, {
    mouse: mouse,
    constraint: {
        render: { visible: false }
    }
});
World.add(engine.world, mouseConstraint);

// Create runner
const runner = Runner.create();

// Run the engine
Runner.run(runner, engine);

// Run the renderer
Render.run(render);

// Apply a continuous upward force every update
Events.on(engine, 'beforeUpdate', function(event) {
    // Apply force only if the simulation is active
    if (!mouseConstraint.mouse.button) {
        Body.applyForce(box, { x: box.position.x, y: box.position.y }, { x: 0, y: -0.05 });
    }
});

// Collision events for aesthetic purposes
Events.on(engine, 'collisionStart', function(event) {
    const pairs = event.pairs;
    pairs.forEach(pair => {
        const colors = ['#FF4136', '#0074D9', '#2ECC40', '#FF851B', '#7FDBFF'];
        pair.bodyA.render.fillStyle = colors[Math.floor(Math.random() * colors.length)];
        pair.bodyB.render.fillStyle = colors[Math.floor(Math.random() * colors.length)];
    });
});

What is Matter.js?

Matter.js is an open-source library that facilitates the simulation of physical systems, providing tools to create objects that behave according to the laws of physics within a digital environment. It is perfect for developing games, educational simulations, and interactive graphics.

Key Functionalities & Code Breakdown

 1. Setting Up the Environment

The initial step involves setting up Matter.js with a rendering engine and a physics engine, which are crucial for running any physics-based simulation.

const engine = Engine.create();
const render = Render.create({
    element: document.getElementById('canvas-container'),
    engine: engine,
    options: { width: 800, height: 600, wireframes: false }
});

 2. Creating and Controlling Bodies

A singular box is created, bounded by static walls that prevent it from exiting the viewport. The simplicity of the setup allows for focused observation of physical interactions.

const box = Bodies.rectangle(400, 200, 80, 80, { restitution: 0.5 });
const ground = Bodies.rectangle(400, 590, 810, 40, { isStatic: true });

 3. Applying Forces

Reflecting on The Coding Train’s approach to adding dynamism through forces, a continuous upward force counters gravity, enhancing the box’s interaction with its environment.

Events.on(engine, 'beforeUpdate', function() {
    Body.applyForce(box, { x: box.position.x, y: box.position.y }, { x: 0, y: -0.05 });
});

 4. Managing Collision Events

Collision handling illuminates the points of impact, with each collision causing a change in the color of the bodies involved, thereby providing instant visual feedback.

Events.on(engine, 'collisionStart', function(event) {
    event.pairs.forEach(pair => {
        pair.bodyA.render.fillStyle = '#FF4136';
        pair.bodyB.render.fillStyle = '#0074D9';
    });
});

Visuals and Interaction

The simulation is enhanced with visuals from The Coding Train, which underlines, the beauty of physics in motion. By integrating interactive elements, users can directly influence the forces acting on objects, thereby deepening their understanding of physics through real-time feedback.

Future Enhancements

Future versions could include more complex simulations using toxiclibs.js for more intricate particle systems and simulations, further exploring the boundaries of web-based physics simulations. But overall, I am proud that I got it actually to work.

Week 9 – Khalifa Alshamsi

Inspiration & Concept

The inspiration for this project came from Robert Hodgin and Aditya Anantharaman. Robert Hodgin inspired the concept of creating a tree and birds flocking around it, while Aditya Anantharaman provided insights on how to implement a flocking mechanism.

Sketch

Code

let seed;
let flock = [];
let centerTree;

function setup() {
  createCanvas(windowWidth, windowHeight);
  angleMode(DEGREES);
  seed = Date.now();
  randomSeed(seed);
  noStroke();

  // Initialize the tree
  centerTree = new Tree(width / 2, height - 100);

  // Initialize the flock
  for (let i = 0; i < 200; i++) {
    flock.push(new Boid(random(width), random(height)));
  }
}

function draw() {
  background(255);
  centerTree.display();

    // Update and display each boid in the flock
  for (let boid of flock) {
    boid.flock(flock);
    boid.update();
    boid.edges();
    boid.show();
  }
}

// Tree class
class Tree {
  constructor(x, y) {
    this.x = x;
    this.y = y;
  }

  display() {
    push();
    translate(this.x, this.y);
    // Start drawing the branches of the tree with an initial length of 25
    branch(25);
    pop();

  }
}
function branch(len) {
  push();
  // Recursive branching if the length is greater than 5
  if (len > 5) {
    let newLen = len * 0.8;
    // Set the stroke weight relative to the branch length to create a tapering effect
    strokeWeight(map(len, 10, 120, 1, 8));
    stroke(0);
    line(0, 0, 0, -len);
    // Move to the end of the current branch to create the next branch
    translate(0, -len);
    
    rotate(20); branch(newLen);
    rotate(-40); branch(newLen);
  } 
  pop();
}

// Boid class for flocking behavior
class Boid {
  constructor(x, y) {
    // Set the initial position of the boid
    this.position = createVector(x, y);
    // Assign a random initial velocity to each boid
    this.velocity = p5.Vector.random2D();
    // Set the magnitude of the velocity to control the initial speed
    this.velocity.setMag(random(2, 4));
    // Initialize acceleration with zero vector
    this.acceleration = createVector();
    // Maximum steering force to apply, controls agility
    this.maxForce = 0.2;
    // Maximum speed of the boid
    this.maxSpeed = 4;
    // Size of the boid, represented as a dot
    this.size = random(2, 6);
  }

  // Handles wrapping of boids across the edges of the canvas to keep them in view
  edges() {
    if (this.position.x > width) {
      this.position.x = 0;
    } else if (this.position.x < 0) {
      this.position.x = width;
    }
    if (this.position.y > height) {
      this.position.y = height;
    } else if (this.position.y < 0) {
      this.position.y = height;
    }
  }

  // Alignment behavior: steer towards the average heading of nearby boids
  align(boids) {
    let perceptionRadius = 75;
    let steering = createVector();
    let total = 0;
    for (let other of boids) {
      let d = dist(
        this.position.x,
        this.position.y,
        other.position.x,
        other.position.y
      );
      if (other != this && d < perceptionRadius) {
        steering.add(other.velocity);
        total++;
      }
    }
    if (total > 0) {
      steering.div(total);
      steering.setMag(this.maxSpeed);
      steering.sub(this.velocity);
      steering.limit(this.maxForce);
    }
    return steering;
  }

  // Cohesion behavior: steer towards the average position of nearby boids
  cohesion(boids) {
    let perceptionRadius = 75;
    let steering = createVector();
    let total = 0;
    for (let other of boids) {
      let d = dist(
        this.position.x,
        this.position.y,
        other.position.x,
        other.position.y
      );
      if (other != this && d < perceptionRadius) {
        steering.add(other.position);
        total++;
      }
    }
    if (total > 0) {
      steering.div(total);
      steering.sub(this.position);
      steering.setMag(this.maxSpeed);
      steering.sub(this.velocity);
      steering.limit(this.maxForce);
    }
    return steering;
  }

  // Separation behavior: steer away from nearby boids to avoid crowding
  separation(boids) {
    let perceptionRadius = 24;
    let steering = createVector();
    let total = 0;
    for (let other of boids) {
      let d = dist(
        this.position.x,
        this.position.y,
        other.position.x,
        other.position.y
      );
      if (other != this && d < perceptionRadius) {
        let diff = p5.Vector.sub(this.position, other.position);
        diff.div(d * d);
        steering.add(diff);
        total++;
      }
    }
    if (total > 0) {
      steering.div(total);
      steering.setMag(this.maxSpeed);
      steering.sub(this.velocity);
      steering.limit(this.maxForce);
    }
    return steering;
  }

  // Apply the three flocking rules to determine the boid's acceleration
  flock(boids) {
    let alignment = this.align(boids);
    let cohesion = this.cohesion(boids);
    let separation = this.separation(boids);

    // Apply the three simple flocking rules
    alignment.mult(1.0); // Alignment: move in the average direction of nearby boids
    cohesion.mult(1.0);  // Cohesion: move towards the average position of nearby boids and occasionally towards the tree
    separation.mult(1.5); // Repulsion: move away if too close to neighbors

    this.acceleration.add(alignment);
    this.acceleration.add(cohesion);
    this.acceleration.add(separation);

    // Dynamic change: Modify size to create tension and release effect
    this.size = map(sin(frameCount * 0.05), -1, 1, 1, 4);
  }

  update() {
    this.position.add(this.velocity);
    this.velocity.add(this.acceleration);
    this.velocity.limit(this.maxSpeed);
    // Reset acceleration to 0 for the next frame to avoid compounding effects
    this.acceleration.mult(0);
  }

  show() {
    fill(0);
    ellipse(this.position.x, this.position.y, this.size);
  }
}

Setting the Scene

The project begins by defining a canvas that spans the entire window. A central tree is positioned at the bottom center of the canvas, and a flock of 200 birds (represented as dots) is initialized at random positions. The code uses randomSeed(seed) to ensure the system’s behavior remains consistent across different runs by fixing the random values generated for the tree and flock.

function setup() {
  createCanvas(windowWidth, windowHeight);
  angleMode(DEGREES);
  seed = Date.now();
  randomSeed(seed);
  noStroke();

  centerTree = new Tree(width / 2, height - 100);

  for (let i = 0; i < 200; i++) {
    flock.push(new Boid(random(width), random(height)));
  }
}

The setup() function also initializes the tree and the flock. The tree will remain fixed, while the birds will exhibit a behavior similar to a flock moving around and reacting to each other and their surroundings.

Flocking Behavior of Birds

The flock of birds is represented by instances of the Boid class. Each bird follows three simple rules that are inspired by Aditya Anantharaman work:

  1. Alignment: Birds attempt to move in the average direction of their neighbors within a certain perception radius. This helps ensure the flock is cohesive.
  2. Cohesion: Birds steer towards the average position of nearby birds to maintain the flock’s unity.
  3. Separation: Birds steer away if they come too close to their neighbors, preventing clustering and collisions.

Each bird’s behavior is implemented using three methods: align(), cohesion(), and separation(). These methods collectively determine the bird’s acceleration.

flock(boids) {
  let alignment = this.align(boids);
  let cohesion = this.cohesion(boids);
  let separation = this.separation(boids);

  alignment.mult(1.0);
  cohesion.mult(1.0);
  separation.mult(1.5);

  this.acceleration.add(alignment);
  this.acceleration.add(cohesion);
  this.acceleration.add(separation);
}

In the flock() method, the calculated steering forces for alignment, cohesion, and separation are combined and applied to each bird’s acceleration. The mult() function is used to control the influence of each behavior, making separation slightly more influential to avoid overcrowding.

Dynamic Movement and Visual Appeal

One of the features that makes this flocking system visually appealing is the dynamic change in the size of each bird. The size varies sinusoidally, creating a rhythmic pulsation that adds a sense of tension and release to the movement of the flock:

this.size = map(sin(frameCount * 0.05), -1, 1, 1, 4);

The sin() function is used to create a smooth oscillation effect, making the birds appear to “breathe” as they move. This subtle addition contributes to the natural, lifelike quality of the simulation.

Future Improvements

Moving forward, there are several potential improvements to enhance this project further. One idea is to add environmental changes, such as wind or obstacles, that the flock must navigate around. Adding interactivity, like allowing users to click and influence the direction of the birds or the growth of the tree, would also make the experience more immersive.

Week 8 – Khalifa Alshamsi

Concept

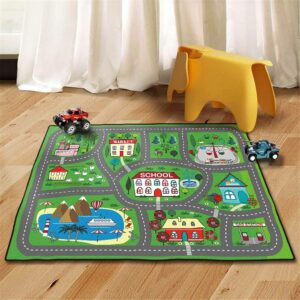
The goal was to make a virtual version of that beloved city rug, where a digital car can drive across different sections of the map, seamlessly moving from one side to the other. The two-part background gives the feel of exploring a bigger city, with distinct areas to travel through, just like on those old playmats.

Code Structure

  1. Main Components:
    • The project relies on three key files: sketch.js, space.js, and vehicle.js
    • sketch.js initializes the canvas, loads images, and manages the primary simulation loop.
    • space.js defines the space class responsible for displaying the background image and wrapping the car’s position when it exits the visible canvas.
    • vehicle.js includes the vehicle class, which controls the car’s movement and behaviors.
  1. Images and Background:
    • I used two images for the playmat, playmate0.jpg, and playmate1.jpg, representing the right and left sides of the digital rug. These images are loaded in the preload() function of sketch.js and displayed conditionally based on the car’s position on the canvas.
  1. Vehicle Movement:
    • The car has a random wandering behavior, simulating the playful movement of a child’s toy car on a mat.
    • The wrap() method in space.js ensures the car stays within the canvas bounds by wrapping it around horizontally and vertically if it moves out of view.
  1. Dynamic Background Switching:
    • The show() method in space.js dynamically changes the displayed background image based on the car’s location on the canvas. This method ensures that only one background is visible at a time, creating a realistic effect as the car transitions from one side of the playmat to the other.

Code Highlights

Here’s a snippet of how the show() function in space.js was set up to handle dynamic background switching based on the car’s position:

class Space {
    constructor(sectorWidth, sectorHeight) {
        this.sectorWidth = sectorWidth / 2;
    }

    show(vehicle) {
        let sectorIndex = vehicle.pos.x < this.sectorWidth ? 0 : 1;

        if (map[sectorIndex]) {
            image(map[sectorIndex], 0, 0, width, height);
        }

        fill(255);
        textSize(20);
        textAlign(CENTER, CENTER);
        let sideName = sectorIndex === 0 ? "Left Side" : "Right Side";
        text(sideName, vehicle.pos.x, vehicle.pos.y - 20);
    }

    wrap(vehicle) {
        if (vehicle.pos.x < 0) vehicle.pos.x = width;
        else if (vehicle.pos.x > width) vehicle.pos.x = 0;

        if (vehicle.pos.y < 0) vehicle.pos.y = height;
        else if (vehicle.pos.y > height) vehicle.pos.y = 0;
    }
}

This structure allows the playmat simulation to function smoothly, with the car wrapping around the canvas edges and triggering the appropriate background based on its location.

Embedded Sketch

Challenges and Solutions

  • Image Loading Issues: Initially, there were problems loading the images due to incorrect file paths. By ensuring the correct file names and paths, I resolved these loading errors.
  • Ensuring Proper Wrapping: The most complex aspect was achieving seamless wrapping of the car’s position without creating visual artifacts or making both images appear simultaneously. I refined the wrap() and show() functions in space.js to ensure that only the relevant background image is displayed as the car moves.

Looking Back and Forward

This project captures a slice of childhood by turning a traditional playmat into an interactive digital experience. Seeing the car navigate from one side to the other, transitioning between different parts of the city, really brings back memories of those endless games with toy cars.

In the future, it would be fun to add more interactivity, like giving users control over the car’s direction or adding sound effects to simulate the familiar hum of toy car wheels on the carpet.


Source: The Coding Train – Nature of Code Series

Week 8 – Reflection

Seeing MUJO was like seeing the desert transformed into a canvas for movement and light. The whole performance used the shifting sands and dunes to show how things are always changing, just like the wind reshapes the desert. Watching the visuals blend into the natural landscape made the idea of impermanence feel real.

What really struck me was how digital art brought out the idea without copying nature exactly. The projections and sounds created this amazing atmosphere, where it felt like the dancers were moving with and against the landscape. It made me realize that digital art can capture deep ideas in a way that feels both familiar and new.

Seeing digital art used in such a thoughtful way here makes me excited about the future of the arts in the UAE. It’s a reminder that our landscapes and stories can be shared with technology, not to replace nature, but to enhance our connection to it.

Midterm Project – Khalifa Alshamsi

Concept and Inspiration

The idea behind this project was to explore the concept of generative art—art created algorithmically through code. Using randomness and user input, the scene would evolve and change each time it was run. I was inspired by nature and its organic growth patterns, particularly how trees grow and how light changes throughout the day. I wanted to capture the serenity of these natural processes and translate them into a digital environment that users could interact with in real-time.

The project’s core focuses on creating a landscape that feels alive and constantly changing. The user’s ability to control elements like time and landscape features introduces a new level of engagement, making each session with the artwork feel unique.

Core Features

1. Time of Day Slider

The first element of user interaction is the time slider, which controls the day and night cycle in the landscape. As the slider is moved, the background color transitions smoothly from a warm sunrise to a vibrant midday, then to a calm sunset, and finally to a deep nighttime sky. The sun and moon move across the sky in sync with the slider, casting light and shadows that dynamically affect the scene. This gives users control over the atmosphere and mood of the landscape, allowing them to explore different times of day within the environment.

2. Dynamic Tree Growth

At the center of the landscape is a tree that grows organically with recursive branching patterns. The tree starts with a simple trunk, and as it grows, branches and leaves are added to create a natural-looking structure. The tree’s growth is controlled by randomness, ensuring that no two trees are ever the same. The recursive branch() function simulates the natural way that trees split and grow over time, and slight variations in angle and branch length introduce an element of unpredictability.

The tree’s presence in the landscape serves as the focal point, representing life and growth. Its organic form contrasts with the more structured features of the scene, like the background mountains.

3. Procedurally Generated Mountains

Behind the tree, procedurally generated mountains create a sense of depth and scale in the scene. Users can toggle the mountains on or off, and each time the mountains are generated, they are slightly different due to the random seed values used in their creation. The mountains are rendered in layers, creating a gradient effect that gives the impression of distance and elevation. This layered approach helps to simulate the natural terrain, adding complexity to the background without overpowering the main elements in the foreground.

The ability to toggle the mountains allows users to switch between a minimalist landscape and a more detailed environment, depending on their preference.

4. Background Trees

Smaller background trees are scattered across the landscape to fill out the scene and make it feel more immersive. These trees are procedurally generated as well, varying in size and shape. Their randomness ensures that the forest never feels static or repetitive. The background trees add a layer of depth to the scene, complementing the central tree and helping to balance the visual composition.

5. SVG Export Feature

A standout feature of the project is the ability to export the landscape as an SVG (Scalable Vector Graphics) file. SVGs are ideal for preserving the high-quality details of the landscape, especially for users who may want to print or use the artwork at different scales. The SVG export captures all of the generative elements, like the tree, background, and mountains, while excluding certain elements, such as shadows, that don’t translate well to vector format.

This functionality ensures that users can take their creations beyond the screen, preserving them as works of art in a flexible, scalable format.

Technical Breakdown

1. Background Color Transition

One of the key visual elements in the landscape is the smooth transition of background colors as the time slider is moved. The lerpColor() function handles this transition, which blends colors between sunrise, midday, sunset, and night. The gradual transition gives the scene a fluid sense of time passing.

function updateBackground(timeValue, renderer = this) {
  let sunriseColor = color(255, 102, 51);
  let sunsetColor = color(30, 144, 255);
  let nightColor = color(25, 25, 112);

  let transitionColor = lerpColor(sunriseColor, sunsetColor, timeValue / 100);
  
  if (timeValue > 50) {
    transitionColor = lerpColor(sunsetColor, nightColor, (timeValue - 50) / 50);
    c2 = lerpColor(color(255, 127, 80), nightColor, (timeValue - 50) / 50);
  } else {
    c2 = color(255, 127, 80);
  }

  setGradient(0, 0, W, H, transitionColor, c2, Y_AXIS, renderer);
}

This code adjusts the colors based on the time of day, providing a rich, dynamic background that feels hopefully alive and ever-changing.

2. Tree Growth and Branching

The tree at the center of the landscape is generated through a recursive branching algorithm. The branch() function ensures that each branch grows smaller as it extends from the trunk, mimicking how real trees grow.

function branch(depth, renderer = this) {
  if (depth < 10) {
    renderer.line(0, 0, 0, -H / 15);
    renderer.translate(0, -H / 15);

    renderer.rotate(random(-0.05, 0.05));

    if (random(1.0) < 0.7) {
      renderer.rotate(0.3);
      renderer.scale(0.8);
      renderer.push();
      branch(depth + 1, renderer);  // Recursively draw branches
      renderer.pop();
      
      renderer.rotate(-0.6);
      renderer.push();
      branch(depth + 1, renderer);
      renderer.pop();
    } else {
      branch(depth, renderer);
    }
  } else {
    drawLeaf(renderer);  // Draw leaves when the branch reaches its end
  }
}

The slight randomness in the angles and branch lengths ensures that no two trees look alike, providing a natural, organic feel to the landscape.

Challenges and Solutions

1. Handling Shadows

Creating realistic shadows for the tree and ensuring they aligned with the position of the sun or moon was a significant challenge. The shadow needed to rotate and stretch depending on the light source, and it had to be excluded from the SVG export to maintain a clean vector image. The solution involved careful handling of transformations and conditional rendering depending on whether the scene was being drawn on the canvas or the SVG.

2. Smooth Color Transitions

Achieving smooth color transitions between different times of day took some trial and error. I needed to carefully balance the lerpColor() function to ensure the transitions felt natural and did not introduce sudden jumps between colors. This was crucial to maintaining the peaceful atmosphere I aimed to create.

3. SVG Export Process

The ability to export the generated landscape as an SVG is a crucial part of the project. SVG, or Scalable Vector Graphics, allows the artwork to be saved in a format that retains its quality at any size. This is particularly useful for users who want to print the landscape or use it at different scales without losing resolution.

The process of exporting the landscape as an SVG involves creating a separate rendering context specifically for SVG, redrawing the entire scene onto this context, and then saving the resulting image.

function saveCanvasAsSVG() {
  let svgCanvas = createGraphics(W, H, SVG);  // Use createGraphics for SVG rendering

  redrawCanvas(svgCanvas);  // Redraw everything onto the SVG canvas

  save(svgCanvas, "myLandscape.svg");  // Save the rendered SVG file

  svgCanvas.remove();  // Remove the SVG renderer from memory
}

In this process:

  • Separate SVG Context: The createGraphics() This function creates a new rendering context specifically for SVG output. This ensures that the drawing commands translate into vector graphics rather than raster images.
  • Redrawing the Scene: The redrawCanvas() function is called with the SVG context, ensuring that all elements (trees, mountains, background, etc.) are redrawn onto the SVG canvas.
  • SVG Export: The save() function is then used to save the rendered SVG file to the user’s device. Shadows, which don’t translate well to SVG, are excluded during this process to maintain the export’s aesthetics quality.

This dual rendering (canvas and SVG) approach ensures that users can enjoy real-time interactivity while still being able to export high-quality vector images.

Understanding Seed Values and Randomness

In this project, seed values are crucial in ensuring that the randomness used in generating elements (like trees and mountains) remains consistent across renders. By setting a randomSeed(), we control the sequence of random values used, which ensures that the same landscape is generated each time the same seed is used.

For example, if a seed value is set before generating a tree, the randomness in branch angles and lengths will be the same every time the tree is drawn, giving users a predictable yet varied experience. Changing the seed value introduces a new pattern of randomness, creating a different tree shape while maintaining the same underlying algorithm.

randomSeed(treeShapeSeed);  // Controls the randomness for tree generation

By controlling the seed values for both trees and mountains, the landscape retains a level of predictability while still offering variation in each render.

The Midterm Code

index.html File:

<!DOCTYPE html>
<html lang="en">

<head>
   <!-- Loads the core p5.js library first -->
   <script src="https://cdnjs.cloudflare.com/ajax/libs/p5.js/1.4.0/p5.js"></script>
   
   <!-- Then loads p5 sound -->
   <script src="https://cdnjs.cloudflare.com/ajax/libs/p5.js/1.4.0/addons/p5.sound.min.js"></script>
   
   <!-- Load p5 SVG after p5.js is loaded -->
   <script src="https://unpkg.com/p5.js-svg@1.5.1"></script>
   
   <link rel="stylesheet" type="text/css" href="style.css">
   <meta charset="utf-8" />
</head>
  <body>
    <main>
    </main>
    <script src="sketch.js"></script>
  </body>
</html>


Sketch.JS File:

let W = 650;  
let H = 450;  

let timeSlider;  // Slider to control day and night transition
let shiftButton;  // Button to shift trees and mountain layout
let saveButton;  // Button to save the current drawing as an SVG
let mountainsButton;  // Button to toggle mountains on/off
let addTreesButton;  // Button to toggle trees on/off
let showMountains = false;  // Boolean to track if mountains are visible
let showTrees = false;  // Boolean to track if trees are visible
let treeShapeSeed = 0;  // Seed value to control tree randomness
let mountainShapeSeed = 0;  // Seed value to control mountain randomness
let sunX;  // X position of the sun (controlled by slider)
let sunY;  // Y position of the sun (controlled by slider)
let moonX;  // X position of the moon (controlled by slider)
let moonY;  // Y position of the moon (controlled by slider)
let mountainLayers = 2;  // Number of mountain layers to draw
let treeCount = 8;  // Number of background trees to draw

const Y_AXIS = 1;  // Constant for vertical gradient drawing
let groundLevel = H - 50;  // The ground level (50 pixels above the canvas bottom)

function setup() {
  createCanvas(W, H); 
  background(135, 206, 235);  

  // Creates the time slider that controls day-night transitions
  timeSlider = createSlider(0, 100, 50);
  timeSlider.position(200, 460);
  timeSlider.size(250);
  timeSlider.input(updateCanvasWithSlider);  // Calls function to update canvas when slider moves

  // Creates button to toggle mountains on/off
  mountainsButton = createButton('Mountains');
  mountainsButton.position(100, 460);
  mountainsButton.mousePressed(() => {
    toggleMountains();  // Toggle the visibility of mountains
    redrawCanvas();  // Redraws the canvas after the toggle
  });

  // Creates a button to toggle trees on/off
  addTreesButton = createButton('Add Trees');
  addTreesButton.position(10, 460);
  addTreesButton.mousePressed(() => {
    toggleTrees();  // Toggles the visibility of trees
    redrawCanvas();  // Redraws the canvas after the toggle
  });

  // Creates a button to shift trees and mountain layout (randomize positions and shapes)
  shiftButton = createButton('Shift');
  shiftButton.position(490, 460);
  shiftButton.mousePressed(() => {
    changeTreeCountAndShape();  // Randomize the trees and mountain layout
    redrawCanvas();  // Redraws the canvas after the layout shift
  });

  // Creates a button to save the canvas as an SVG file
  saveButton = createButton('Save as SVG');
  saveButton.position(550, 460);
  saveButton.mousePressed(saveCanvasAsSVG);  // Save the canvas as an SVG when clicked

  noLoop();  // Prevents continuous looping of the draw function, manual updates only
  redrawCanvas();  // Perform the initial canvas draw
}

// This is called whenever the slider is moved; to update the canvas to reflect the new slider value
function updateCanvasWithSlider() {
  redrawCanvas();  // Redraws the canvas to update the time of day
}

// Saves the current canvas as an SVG
function saveCanvasAsSVG() {
  let svgCanvas = createGraphics(W, H, SVG);  // Creates a new graphics context for SVG rendering

  redrawCanvas(svgCanvas);  // Redraws everything onto the SVG canvas

  save(svgCanvas, "myLandscape.svg");  // Saves the SVG with a custom filename

  svgCanvas.remove();  // Removes the SVG canvas once it's saved
}

// Main function to redraw the entire canvas (or an SVG) when something changes
function redrawCanvas(renderer = this) {
  // Clears the canvas or the SVG renderer
  if (renderer === this) {
    background(135, 206, 235);  // Light blue background for daytime sky
  } else {
    renderer.background(135, 206, 235);  // Same background for SVG output
  }

  // Get the slider value to adjust the time of day (0 to 100)
  let timeValue = timeSlider.value();  

  // Updates the background gradient and sun/moon positions based on the time of day
  updateBackground(timeValue, renderer);  
  updateSunAndMoon(timeValue, renderer);

  // Checks if the mountains should be drawn, and draws them if necessary
  if (showMountains) {
    randomSeed(mountainShapeSeed);  // Ensures randomness is consistent with each draw
    drawLayeredMountains(renderer);  // Draws the mountain layers
  }

  // Draws the simple green ground at the bottom of the canvas
  drawSimpleGreenGround(renderer);  

  // Checks if trees should be drawn, and draws them if necessary
  if (showTrees) {
    drawBackgroundTrees(renderer);  // Draws background trees
  }

  // Draws the main tree in the middle of the canvas
  if (renderer === this) {
    // Draws the main tree on the canvas itself
    push();
    translate(W / 2, H - 50);  // Positions the tree in the center at the ground level
    randomSeed(treeShapeSeed);  // Controls randomness for consistent tree shapes
    drawTree(0, renderer);  // Draws the tree
    pop();

    // Calculates and draw the shadow of the tree based on the sun or moon position
    let shadowDirection = sunX ? sunX : moonX;  // Uses the sunX if it's daytime, otherwise use moonX
    let shadowAngle = map(shadowDirection, 0, width, -PI / 4, PI / 4);  // Adjusts shadow direction

    push();
    translate(W / 2, H - 50);  // Translates to the same position as the tree
    rotate(shadowAngle);       // Rotates the shadow based on the angle
    scale(0.5, -1.5);          // Flips and scales down the shadow so it doens't pop outside the green grass and shows up in the sky
    drawTreeShadow(0, renderer);  // Draws the tree shadow
    pop();
  } else {
    // Draws the main tree in an SVG without shadow because it doesn't look nice
    renderer.push();
    renderer.translate(W / 2, H - 50);  // Positions for SVG
    randomSeed(treeShapeSeed);
    drawTree(0, renderer);  // Draws the tree in SVG mode
    renderer.pop();
  }
}

// Toggles mountains visibility on or off
function toggleMountains() {
  showMountains = !showMountains;  // Flips the boolean to show/hide mountains
  redrawCanvas();  // Redraws the canvas to reflect the change
}

// Toggles trees visibility on or off
function toggleTrees() {
  showTrees = !showTrees;  // Flips the boolean to show/hide trees
  redrawCanvas();  // Redraws the canvas to reflect the change
}

// Draws the tree shadow based on depth, used to create a shadow effect for the main tree
function drawTreeShadow(depth, renderer = this) {
  renderer.stroke(0, 0, 0, 80);  // Semi-transparent shadow
  renderer.strokeWeight(5 - depth);  // Adjust shadow thickness based on depth
  branch(depth, renderer);  // Recursively draw branches as shadows
}

// Randomizes tree and mountain layouts by changing seeds and tree count
function changeTreeCountAndShape() {
  treeShapeSeed = millis();  // Updates the tree shape randomness seed
  mountainShapeSeed = millis();  // Updates the mountain shape randomness seed
  treeCount = random([8, 16]);  // Randomly selects between 8 or 16 trees
  mountainLayers = random([1, 2]);  // Randomly select 1 or 2 mountain layers
  redrawCanvas();  // Redraw the canvas with the new layout
}

// Draws multiple layers of mountains based on the chosen number of layers
function drawLayeredMountains(renderer = this) {
  if (mountainLayers === 2) {
    let layers = [
      { oy: 200, epsilon: 0.02, startColor: '#888888', endColor: '#666666', reductionScaler: 100 },
      { oy: 270, epsilon: 0.015, startColor: '#777777', endColor: '#555555', reductionScaler: 80 }
    ];
    // Draw two layers of mountains, with different heights and colors
    layers.forEach(layer => {
      drawMountainLayer(layer.oy, layer.epsilon, layer.startColor, layer.endColor, layer.reductionScaler, renderer);
    });
  } else if (mountainLayers === 1) {
    let layers = [
      { oy: 250, epsilon: 0.02, startColor: '#777777', endColor: '#555555', reductionScaler: 80 }
    ];
    // Draw a single layer of mountains
    layers.forEach(layer => {
      drawMountainLayer(layer.oy, layer.epsilon, layer.startColor, layer.endColor, layer.reductionScaler, renderer);
    });
  }
}

// Draws a single layer of mountains
function drawMountainLayer(oy, epsilon, startColor, endColor, reductionScaler, renderer = this) {
  let col1 = color(startColor);  // Starts the color for the gradient
  let col2 = color(endColor);  // Ends the color for the gradient

  renderer.noStroke();
  for (let x = 0; x < width; x++) {
    // Generates random mountain height based on noise and epsilon value
    let y = oy + noise(x * epsilon) * reductionScaler;
    let col = lerpColor(col1, col2, map(y, oy, oy + reductionScaler, 0, 1));  // Creates color gradient
    renderer.fill(col);  // Fills mountain with the gradient color
    renderer.rect(x, y, 1, height - y);  // Draws vertical rectangles to represent mountain peaks
  }
}

// Draws trees in the background based on the current tree count
function drawBackgroundTrees(renderer = this) {
  let positions = [];  // Array to store the X positions of the trees

  for (let i = 0; i < treeCount; i++) {
    let x = (i + 1) * W / (treeCount + 1);  // Spaces the trees evenly across the canvas
    positions.push(x);
  }

  // Draws each tree at the calculated X positions
  positions.forEach(posX => {
    renderer.push();
    renderer.translate(posX, groundLevel);  // Positions trees on the ground
    renderer.scale(0.3);  // Scales down the background trees
    randomSeed(treeShapeSeed + posX);  // Uses a random seed to vary tree shapes
    drawTree(0, renderer);  // Draws each tree
    renderer.pop();
  });
}

// Updates the background gradient based on the time of day (slider value)
function updateBackground(timeValue, renderer = this) {
  let sunriseColor = color(255, 102, 51);  
  let sunsetColor = color(30, 144, 255);  
  let nightColor = color(25, 25, 112);  
  
  // Lerp between sunrise and sunset based on time slider
  let transitionColor = lerpColor(sunriseColor, sunsetColor, timeValue / 100);
  
  // If the time is past halfway (i.e., after sunset), lerp to nighttime
  if (timeValue > 50) {
    transitionColor = lerpColor(sunsetColor, nightColor, (timeValue - 50) / 50);
    c2 = lerpColor(color(255, 127, 80), nightColor, (timeValue - 50) / 50);
  } else {
    c2 = color(255, 127, 80);  // Defaults to an orange hue for sunrise/sunset
  }

  setGradient(0, 0, W, H, transitionColor, c2, Y_AXIS, renderer);  // Apply gradient to the background
}

// Updates the position of the sun and moon based on the time of day (slider value)
function updateSunAndMoon(timeValue, renderer = this) {
  // Update sun position during daytime
  if (timeValue <= 50) {
    sunX = map(timeValue, 0, 50, -50, width + 50);  // Sun moves across the sky
    sunY = height * 0.8 - sin(map(sunX, -50, width + 50, 0, PI)) * height * 0.5;
    
    renderer.noStroke();
    renderer.fill(255, 200, 0);  // Yellow sun
    renderer.ellipse(sunX, sunY, 70, 70);  // Draws the sun as a large circle
  }
  
  // Updates moon position during nighttime
  if (timeValue > 50) {
    moonX = map(timeValue, 50, 100, -50, width + 50);  // Moon moves across the sky
    moonY = height * 0.8 - sin(map(moonX, -50, width + 50, 0, PI)) * height * 0.5;
    
    renderer.noStroke();
    renderer.fill(200);  // Light gray moon
    renderer.ellipse(moonX, moonY, 60, 60);  // Draw the moon as a smaller circle
  }
}

// Creates a vertical gradient for the background sky
function setGradient(x, y, w, h, c1, c2, axis, renderer = this) {
  renderer.noFill();  // Ensures no fill is applied

  if (axis === Y_AXIS) {
    // Loops through each horizontal line and apply gradient colors
    for (let i = y; i <= y + h; i++) {
      let inter = map(i, y, y + h, 0, 1);  // Interpolation factor
      let c = lerpColor(c1, c2, inter);  // Lerp between the two colors
      renderer.stroke(c);  // Sets the stroke to the interpolated color
      renderer.line(x, i, x + w, i);  // Draws the gradient line by line
    }
  }
}

// Draws the green ground at the bottom of the canvas
function drawSimpleGreenGround(renderer = this) {
  renderer.fill(34, 139, 34);  // Set fill to green
  renderer.rect(0, H - 50, W, 50);  // Draws a green rectangle as the ground
}

// Draws a main tree in the center of the canvas
function drawTree(depth, renderer = this) {
  renderer.stroke(139, 69, 19);  // Sets the stroke to brown for the tree trunk
  renderer.strokeWeight(3 - depth);  // Adjusts the stroke weight for consistency
  branch(depth, renderer);  // Draws the branches recursively
}

// Draws tree branches recursively
function branch(depth, renderer = this) {
  if (depth < 10) {  // Limits the depth of recursion
    renderer.line(0, 0, 0, -H / 15);  // Draws a vertical line for the branch
    renderer.translate(0, -H / 15);  // Moves up along the branch

    renderer.rotate(random(-0.05, 0.05));  // Slightly randomize branch angle

    if (random(1.0) < 0.7) {
      // Draws two branches at slightly different angles
      renderer.rotate(0.3);  // Rotates clockwise
      renderer.scale(0.8);  // Scales down the branch
      renderer.push();  // Saves the current state
      branch(depth + 1, renderer);  // Recursively draws the next branch
      renderer.pop();  // Restores the previous state
      
      renderer.rotate(-0.6);  // Rotates counterclockwise for the second branch
      renderer.push();
      branch(depth + 1, renderer);  // Recursively draws the next branch
      renderer.pop();
    } else {
      branch(depth, renderer);  // Continues the drawing of the same branch
    }
  } else {
    drawLeaf(renderer);  // Once depth limit is reached, it draws leaves
  }
}

// Draws leaves on the branches
function drawLeaf(renderer = this) {
  renderer.fill(34, 139, 34);  // Set fill to green for leaves
  renderer.noStroke();
  for (let i = 0; i < random(3, 6); i++) {
    renderer.ellipse(random(-10, 10), random(-10, 10), 12, 24);  // Draws leaves as ellipses
  }
}

Final Midterm Result

Generated Art

Plotted Version:

Writing Robot A3 

Printed Versions on A3 paper:


I am genuinely proud of the generative landscape project’s end result. From the initial concept of creating a dynamic, evolving scene to the final implementation, the project beautifully balances aesthetic simplicity with technical complexity. Seeing the tree grow, the sky transitions seamlessly from day to night, and the mountains form in the background, each element comes together to create a peaceful yet engaging environment.

Areas of Improvement

  • Smoother Transitions and Animations when having multiple things on the canvas.
  • Enhancing the Complexity of the Environment with different sets of grass and water sources.
  • The rendering process for SVG differs from canvas rendering, and handling that discrepancy can sometimes result in mismatched visuals or loss of detail, such as scaling issues or slightly off positions.

Sources

  • https://p5js.org/reference/p5/randomSeed/
  • Coding Challenge #14 – The Coding Train on YouTube
  • https://github.com/zenozeng/p5.js-svg
  • Fractal Trees and Recursive Branching
  • https://www.w3.org/Graphics/SVG/
  • https://github.com/processing/p5.js/wiki

Midterm Progress – Khalifa Alshamsi

Concept and Idea

The main idea behind my midterm project was to create a generative landscape that evolves over time. This would allow users to interact with the scene via a slider and explore the beauty of dynamic elements like a growing tree, shifting daylight, and a clean, natural environment. I wanted to focus on simple yet beautiful visual aesthetics while ensuring interactivity and real-time manipulation, aiming for a calm user experience.

Code Development and Functionality

Time Slider: The time slider dynamically adjusts the time of day, transitioning from morning to night. The background color shifts gradually, and the sun and moon rise and fall in sync with the time value.

Main Tree Rendering: The project features a main tree at the center of the canvas. The tree grows gradually, with branches and leaves adjusting based on predefined patterns to give it a natural look. I worked hard to make sure that the tree’s behavior felt organic.

SVG Export:  One of the key functionalities of this project is the SVG Export feature, which allows users to save a snapshot of the generated landscape in high-quality vector format. This export option enables users to preserve the art they create during the interaction, offering a way to take a piece of the generative landscape.

Code Snippets Explanation:

Background Color

function updateBackground(timeValue, renderer = this) {
  let sunriseColor = color(255, 102, 51);
  let sunsetColor = color(30, 144, 255);
  let nightColor = color(25, 25, 112);

  let transitionColor = lerpColor(sunriseColor, sunsetColor, timeValue / 100);
  
  if (timeValue > 50) {
    transitionColor = lerpColor(sunsetColor, nightColor, (timeValue - 50) / 50);
    c2 = lerpColor(color(255, 127, 80), nightColor, (timeValue - 50) / 50);
  } else {
    c2 = color(255, 127, 80);
  }

  setGradient(0, 0, W, H, transitionColor, c2, Y_AXIS, renderer);
}

This part of the code gradually shifts the background color from sunrise to sunset and into night, giving the entire scene a fluid sense of time passing. It was highly rewarding to see the colors change with smooth transitions based on user input.

Tree Shape Rendering

At the heart of this project is the main tree, which dynamically grows and changes shape as part of the landscape. The goal is to have the tree shift in both its shape and direction each time it is rendered, adding an element of unpredictability and natural randomness. The tree is designed to grow recursively, with branches and leaves adjusting their position and angles in a way that mimics the organic growth patterns found in nature.

function drawTree(depth, renderer = this) {
  renderer.stroke(139, 69, 19);
  renderer.strokeWeight(3 - depth);  // Adjust stroke weight for consistency
  branch(depth, renderer);  // Call the branch function to draw the tree
}

function branch(depth, renderer = this) {
  if (depth < 10) {
    renderer.line(0, 0, 0, -H / 15);
    renderer.translate(0, -H / 15);

    renderer.rotate(random(-0.05, 0.05));

    if (random(1.0) < 0.7) {
      renderer.rotate(0.3);
      renderer.scale(0.8);
      renderer.push();
      branch(depth + 1, renderer);  // Recursively draw branches
      renderer.pop();
      
      renderer.rotate(-0.6);
      renderer.push();
      branch(depth + 1, renderer);
      renderer.pop();
    } else {
      branch(depth, renderer);
    }
  } else {
    drawLeaf(renderer);  // Draw leaves when the branch reaches its end
  }
}

Currently, the tree renders with the same basic structure every time the canvas is started. The recursive branch() function ensures that the tree grows symmetrically, with each branch extending and splitting at controlled intervals. The randomness in the rotation(rotate()) creates slight variations in the angles of the branches, but overall the tree maintains a consistent shape and direction.

This stable and predictable behavior is useful for ensuring that the tree grows in a visually balanced way, without unexpected distortions or shapes. The slight randomness in the angles gives it a natural feel, but the tree maintains its overall form each time the canvas is refreshed.

This part of the project focuses on the visual consistency of the tree, which helps maintain the aesthetic of the landscape. While the tree doesn’t yet shift in shape or direction with every render, the current design showcases the potential for more complex growth patterns in the future.

Challenges 

Throughout the development of this project, several challenges arose, particularly regarding the tree shadow, sky color transitions, tree shape, and ensuring the SVG export worked correctly. While I’ve made significant progress, overcoming these obstacles required a lot of experimentation and adjustment to ensure everything worked together harmoniously.

1. Tree Shadow Rendering One of the key challenges was handling the tree shadow. I wanted the shadow to appear on the canvas in a way that realistically reflects the position of the sun or moon. However, creating a shadow that behaves naturally while keeping the tree itself visually consistent was tricky. The biggest challenge came when trying to manage the transformations (translate()) and rotate()) needed to properly position the shadow, while ensuring that it didn’t overlap awkwardly with the tree or its branches.

I was also careful to ensure the shadow was neglected in the SVG export, as shadows often don’t look as polished in vector format. Balancing these two render modes was a challenge, but I’m happy with the final result where the shadow appears correctly on the canvas but is removed when saved as an SVG.

2. Sky Color Transitions Another challenge was smoothly transitioning the sky color based on the time of day, controlled by the slider. Initially, it was difficult to ensure the gradient between sunrise, sunset, and nighttime felt natural and visually appealing. The subtleness required in blending colors across the gradient presented some challenges in maintaining smooth transitions without sudden jumps which happened way more then I needed it to.

Using the lerpColor() function to blend the sky colors as the slider changes allowed me to create a more cohesive visual experience. Finding the right balance between the colors and timing took a lot of trial and error. Ensuring this transition felt smooth was critical to the overall atmosphere of the scene.

3. SVG File Export One of the more technical challenges was ensuring that the SVG export functionality worked seamlessly, capturing the landscape in vector format without losing the integrity of the design. Exporting the tree and sky while excluding the shadow required careful handling of the different renderers used for canvas and SVG. The transformations that worked for the canvas didn’t always translate perfectly to the SVG format, causing elements to shift out of place or scale incorrectly.

Additionally, I needed to ensure that the tree was positioned correctly in the SVG file, especially since the translate() function works differently in SVG. Ensuring that all elements appeared in their proper positions while maintaining the overall aesthetic of the canvas version was a delicate process.

4. Switching Between SVG Rendering and Canvas with the full explanation

In the project, switching between SVG rendering and canvas rendering is essential to ensure the artwork can be viewed in real-time on the canvas and saved as a high-quality SVG file. These two rendering contexts behave differently, so specific functions must handle the drawing process correctly in each mode.

Overview of the Switch

  • Canvas Rendering: This is the default rendering context where everything is drawn in real-time on the web page. The user interacts with the canvas, and all elements (like the tree, sky, and shadows) are displayed dynamically.
  • SVG Rendering: This mode is activated when the user wants to save the artwork as a vector file (SVG). Unlike the canvas, SVG is a scalable format, so certain features (such as shadows) need to be omitted to maintain a clean output. SVG rendering requires switching to a special rendering context using createGraphics(W, H, SVG).

Code Implementation for the Switch

The following code shows how the switch between canvas rendering and SVG rendering is handled:

// Function to save the canvas as an SVG without shadow
function saveCanvasAsSVG() {
  let svgCanvas = createGraphics(W, H, SVG);  // Use createGraphics for SVG rendering
  
  redrawCanvas(svgCanvas);  // Redraw everything onto the SVG canvas
  
  save(svgCanvas, "myLandscape.svg");  // Save the rendered SVG

  svgCanvas.remove();  // Remove the SVG renderer to free memory
}

Here’s how the switching process works

  1. Creates an SVG Graphics Context: When saving the artwork as an SVG, we create a separate graphics context using createGraphics(W, H, SVG). This context behaves like a normal p5.js canvas, but it renders everything as an SVG instead of raster graphics. The dimensions of the SVG are the same as the canvas (W and H)
  1. Redraws Everything on the SVG: After creating the SVG context, we call the redrawCanvas(svgCanvas)  function to redraw the entire scene but on the SVG renderer. This ensures that everything (like the tree and background) is rendered as part of the vector file, but without including elements like shadows, which may not look good in an SVG.
  2. Save the SVG: Once everything has been drawn on the svgCanvas, the save() This function saves the SVG file locally on the user’s device. This ensures that the entire artwork is captured as a scalable vector file, preserving all the details for further use.
  3. Remove the SVG Renderer: After saving the SVG, we call svgCanvas.remove() to clean up the memory and remove the SVG renderer. This is essential to avoid keeping the unused graphics context in memory once the file has been saved.

Redrawing the Canvas and SVG Separately

The key part of this process is in the redrawCanvas() function, which determines whether the elements are drawn on the canvas or the SVG renderer:

function redrawCanvas(renderer = this) {
  if (renderer === this) {
    background(135, 206, 235);  // For the normal canvas
  } else {
    renderer.background(135, 206, 235);  // For the SVG canvas
  }

  let timeValue = timeSlider.value();  // Get the slider value for background time changes
  updateBackground(timeValue, renderer);
  updateSunAndMoon(timeValue, renderer);

  // Draw tree and other elements
  if (renderer === this) {
    // Draw the main tree on the canvas with shadow
    push();
    translate(W / 2, H - 50);
    randomSeed(treeShapeSeed);
    drawTree(0, renderer);
    pop();

    // Draw shadow only on the canvas
    let shadowDirection = sunX ? sunX : moonX;
    let shadowAngle = map(shadowDirection, 0, width, -PI / 4, PI / 4);
    push();
    translate(W / 2, H - 50);
    rotate(shadowAngle);
    scale(0.5, -1.5);  // Flip and adjust shadow scale
    drawTreeShadow(0, renderer);
    pop();
  } else {
    // Draw the main tree in SVG without shadow
    renderer.push();
    renderer.translate(W / 2, H - 50);  // Translate for SVG
    randomSeed(treeShapeSeed);
    drawTree(0, renderer);
    renderer.pop();
  }
}
  1. Check the Renderer: The redrawCanvas(renderer = this) function takes in a renderer argument, which defaults to this (the main canvas). However, when the function is called for SVG rendering, the renderer becomes the svgCanvas.
  1. Background Handling: The background is drawn differently depending on the renderer. For the canvas, the background is rendered as a normal raster graphic (background(135, 206, 235), but for SVG rendering, it uses renderer.background(), which applies the background color to the vector graphic.
  2. Tree Rendering: The drawTree() function is called for both canvas and SVG rendering. However, in the SVG mode, the shadow is omitted to produce a cleaner vector output. This is handled by using conditional checks (if (renderer === this)  to ensure that the shadow is only drawn when rendering on the canvas.
  3. Shadow Omission in SVG: To maintain a clean SVG output, shadows are only drawn in the canvas rendering mode. The drawTreeShadow() function is conditionally skipped in the SVG renderer to prevent unnecessary visual clutter in the vector file.
Why the Switch is Necessary

Switching between canvas rendering and SVG rendering is crucial for several reasons:

  • Canvas: Provides real-time, interactive feedback as the user adjusts the scene (e.g., changing the time of day via a slider). Shadows and other elements are rendered in real-time to enhance the user experience.
  • SVG: This is a high-quality, scalable vector output. SVGs are resolution-independent, so they retain detail regardless of size. However, certain elements like shadows might not translate well to the SVG format, so these are omitted during the SVG rendering process.

This approach allows the project to function interactively on the canvas while still allowing users to export their creations in a high-quality format constantly.

Full Code

let W = 650;
let H = 450;

let timeSlider; 
let saveButton; 
let showMountains = false; 
let showTrees = false; 
let treeShapeSeed = 0;
let mountainShapeSeed = 0;
let sunX; 
let sunY; 
let moonX;
let moonY; 
let mountainLayers = 2;
let treeCount = 8;

const Y_AXIS = 1;
let groundLevel = H - 50;

function setup() {
  createCanvas(W, H); 
  background(135, 206, 235);

  timeSlider = createSlider(0, 100, 50);
  timeSlider.position(200, 460);
  timeSlider.size(250);
  timeSlider.input(updateCanvasWithSlider);  // Trigger update when the slider moves
  saveButton = createButton('Save as SVG');
  saveButton.position(550, 460);
  saveButton.mousePressed(saveCanvasAsSVG);

  noLoop();  // Only redraw on interaction
  redrawCanvas();  // Initial drawing
}

// Update canvas when the slider changes
function updateCanvasWithSlider() {
  redrawCanvas();  // Call redrawCanvas to apply slider changes
}

// Function to save the canvas as an SVG without shadow
function saveCanvasAsSVG() {
  let svgCanvas = createGraphics(W, H, SVG);  // Use createGraphics for SVG rendering

  redrawCanvas(svgCanvas);  // Redraw everything onto the SVG canvas

  save(svgCanvas, "myLandscape.svg");

  svgCanvas.remove();
}

// Function to redraw the canvas content on a specific renderer (SVG or regular canvas)
function redrawCanvas(renderer = this) {
  if (renderer === this) {
    background(135, 206, 235);  // For the normal canvas
  } else {
    renderer.background(135, 206, 235);  // For the SVG canvas
  }
  
  let timeValue = timeSlider.value();  // Get the slider value for background time changes
  updateBackground(timeValue, renderer);
  updateSunAndMoon(timeValue, renderer);

  drawSimpleGreenGround(renderer);
  // Handle the main tree drawing separately for canvas and SVG
  if (renderer === this) {
    // Draw the main tree on the canvas
    push();
    translate(W / 2, H - 50);  // Translate for canvas
    randomSeed(treeShapeSeed);
    drawTree(0, renderer);
    pop();

    // Draw shadow on the main canvas
    let shadowDirection = sunX ? sunX : moonX;
    let shadowAngle = map(shadowDirection, 0, width, -PI / 4, PI / 4);

    push();
    translate(W / 2, H - 50);  // Same translation as the tree
    rotate(shadowAngle);       // Rotate based on light direction
    scale(0.5, -1.5);          // Scale and flip for shadow effect
    drawTreeShadow(0, renderer);
    pop();
  } else {
    // Draw the main tree in SVG without shadow
    renderer.push();
    renderer.translate(W / 2, H - 50);  // Translate for SVG
    randomSeed(treeShapeSeed);
    drawTree(0, renderer);
    renderer.pop();
  }
}


// Commented out the tree shadow (kept for the main canvas)
function drawTreeShadow(depth, renderer = this) {
  renderer.stroke(0, 0, 0, 80);  // Semi-transparent shadow
  renderer.strokeWeight(5 - depth);  // Adjust shadow thickness
  branch(depth, renderer);  // Use the branch function to draw the shadow
}

// Update background colors based on time
function updateBackground(timeValue, renderer = this) {
  let sunriseColor = color(255, 102, 51);
  let sunsetColor = color(30, 144, 255);
  let nightColor = color(25, 25, 112);

  let transitionColor = lerpColor(sunriseColor, sunsetColor, timeValue / 100);
  
  if (timeValue > 50) {
    transitionColor = lerpColor(sunsetColor, nightColor, (timeValue - 50) / 50);
    c2 = lerpColor(color(255, 127, 80), nightColor, (timeValue - 50) / 50);
  } else {
    c2 = color(255, 127, 80);
  }

  setGradient(0, 0, W, H, transitionColor, c2, Y_AXIS, renderer);
}

// Update sun and moon positions
function updateSunAndMoon(timeValue, renderer = this) {
  if (timeValue <= 50) {
    sunX = map(timeValue, 0, 50, -50, width + 50);
    sunY = height * 0.8 - sin(map(sunX, -50, width + 50, 0, PI)) * height * 0.5;
    
    renderer.noStroke();
    renderer.fill(255, 200, 0);
    renderer.ellipse(sunX, sunY, 70, 70); 
  }
  
  if (timeValue > 50) {
    moonX = map(timeValue, 50, 100, -50, width + 50);
    moonY = height * 0.8 - sin(map(moonX, -50, width + 50, 0, PI)) * height * 0.5;
    
    renderer.noStroke();
    renderer.fill(200);
    renderer.ellipse(moonX, moonY, 60, 60);
  }
}

// Create a gradient effect for background
function setGradient(x, y, w, h, c1, c2, axis, renderer = this) {
  renderer.noFill();

  if (axis === Y_AXIS) {
    for (let i = y; i <= y + h; i++) {
      let inter = map(i, y, y + h, 0, 1);
      let c = lerpColor(c1, c2, inter);
      renderer.stroke(c);
      renderer.line(x, i, x + w, i);
    }
  }
}

// Draw the green ground at the bottom
function drawSimpleGreenGround(renderer = this) {
  renderer.fill(34, 139, 34);
  renderer.rect(0, H - 50, W, 50);
}

// Draw the main tree
function drawTree(depth, renderer = this) {
  renderer.stroke(139, 69, 19);
  renderer.strokeWeight(3 - depth);  // Adjust stroke weight for consistency
  branch(depth, renderer);
}

// Draw tree branches
function branch(depth, renderer = this) {
  if (depth < 10) {
    renderer.line(0, 0, 0, -H / 15);
    renderer.translate(0, -H / 15);

    renderer.rotate(random(-0.05, 0.05));

    if (random(1.0) < 0.7) {
      renderer.rotate(0.3);
      renderer.scale(0.8);
      renderer.push();
      branch(depth + 1, renderer);
      renderer.pop();
      
      renderer.rotate(-0.6);
      renderer.push();
      branch(depth + 1, renderer);
      renderer.pop();
    } else {
      branch(depth, renderer);
    }
  } else {
    drawLeaf(renderer);
  }
}

// Draw leaves on branches
function drawLeaf(renderer = this) {
  renderer.fill(34, 139, 34);
  renderer.noStroke();
  for (let i = 0; i < random(3, 6); i++) {
    renderer.ellipse(random(-10, 10), random(-10, 10), 12, 24);  // Increase leaf size
  }
}

Sketch

Future Improvements

As the project continues to evolve, several exciting features are planned that will enhance the visual complexity and interactivity of the landscape. These improvements aim to add depth, variety, and richer user engagement, building upon the current foundation.

1. Mountain Layers

A future goal is to introduce mountain layers into the landscape’s background. These mountains will be procedurally generated and layered to create a sense of depth and distance. Users will be able to toggle different layers, making the landscape more immersive. By adding this feature, the project will feel more dynamic, with natural textures and elevation changes in the backdrop.

The challenge will be to ensure these mountain layers integrate smoothly with the existing elements while maintaining a clean, balanced visual aesthetic.

2. Adding Background Trees

In future versions, I plan to implement background trees scattered across the canvas. These trees will vary in size and shape, adding diversity to the forest scene. By incorporating multiple trees of different types, the landscape will feel fuller and more like a natural environment.

The goal is to introduce more organic elements while ensuring that the visual focus remains on the main tree in the center of the canvas.

3. Shifting Tree Shape

Another key feature in development is the tree’s ability to shift shape and direction dynamically in a random pattern. In the future, the tree’s branches will grow differently each time the canvas is refreshed, making each render unique. This will add a level of unpredictability and realism to the scene, allowing the tree to behave more like its real-life counterpart, which never grows the same way twice.

Careful tuning will be required to ensure the tree maintains its natural appearance while introducing variations that feel organic.

4. Enhanced Interactivity

I also aim to expand the project’s interactive elements. Beyond the current time slider, future improvements will allow users to manipulate other aspects of the landscape, such as the number of trees, the height of the mountains, or even the size and shape of the main tree. This will allow users to have a greater impact on the generative art they create, deepening their connection with the landscape.

Sources:

https://p5js.org/reference/p5/createGraphics/

https://github.com/zenozeng/p5.js-svg

https://www.w3.org/Graphics/SVG/

https://github.com/processing/p5.js/wiki/

Midterm Progress – Khalifa Alshamsi

Concept and Design of Generative Art

The concept for “Evolving Horizons” revolves around the interplay of natural elements in a living landscape. The goal is to create a serene visual experience that captures the passage of time, from dawn to dusk, through smooth transitions of light and shadow. I was inspired by how light can transform landscapes, especially during sunrise and sunset when shadows grow longer, and the colors in the sky shift dramatically.

Key elements in the landscape:

  • Sun: Moves across the sky and influences light and shadows.
  • Hills: Roll across the landscape, with their shadows changing based on the sun’s position.
  • Trees: Stand tall on the hills, casting shadows and swaying gently.
  • Sky: Changes color throughout the day, creating a peaceful and immersive environment.

Sketch

Code

let sun;
let hills = [];
let trees = [];
let numHills = 5;
let numTrees = 30;

function setup() {
  createCanvas(800, 600);
  
  // Create the sun starting at the morning position
  sun = new Sun(100, 100);
  
  // Generate random hills
  for (let i = 0; i < numHills; i++) {
    hills.push(new Hill(random(0, width), random(200, 400), random(100, 200)));
  }
  
  // Generate random trees on the hills
  for (let i = 0; i < numTrees; i++) {
    let hillIndex = floor(random(hills.length));
    trees.push(new Tree(hills[hillIndex].x + random(-50, 50), hills[hillIndex].y - hills[hillIndex].height));
  }
}

function draw() {
  background(135, 206, 235); // Sky blue
  
  // Change the sky color based on sun position
  changeSkyColor(sun.y);
  
  // Move and draw the sun
  sun.moveSun();
  sun.display();
  
  // Draw hills with shadows
  for (let hill of hills) {
    hill.display();
    hill.castShadow(sun);
  }
  
  // Draw trees with shadows
  for (let tree of trees) {
    tree.display();
    tree.castShadow(sun);
  }
}

// Sun class
class Sun {
  constructor(x, y) {
    this.x = x;
    this.y = y;
    this.diameter = 80;
  }
  
  moveSun() {
    // Sun moves in a circular path from morning to night
    this.x = width / 2 + cos(frameCount * 0.01) * 400;
    this.y = height / 2 + sin(frameCount * 0.01) * 200;
  }
  
  display() {
    fill(255, 204, 0); // Yellow sun
    noStroke();
    ellipse(this.x, this.y, this.diameter);
  }
}

// Hill class
class Hill {
  constructor(x, y, height) {
    this.x = x;
    this.y = y;
    this.height = height;
  }
  
  display() {
    fill(34, 139, 34); // Green hills
    noStroke();
    beginShape();
    vertex(this.x - 100, this.y);
    bezierVertex(this.x, this.y - this.height, this.x + 100, this.y - this.height / 2, this.x + 200, this.y);
    vertex(this.x + 200, this.y);
    endShape(CLOSE);
  }
  
  castShadow(sun) {
    let shadowLength = map(sun.y, 0, height, 100, 400);
    fill(0, 0, 0, 50); // Transparent shadow
    noStroke();
    beginShape();
    vertex(this.x - 100, this.y);
    vertex(this.x - 100 + shadowLength, this.y + shadowLength);
    vertex(this.x + 200 + shadowLength, this.y + shadowLength);
    vertex(this.x + 200, this.y);
    endShape(CLOSE);
  }
}

// Tree class
class Tree {
  constructor(x, y) {
    this.x = x;
    this.y = y;
    this.trunkHeight = random(40, 80);
    this.trunkWidth = 10;
    this.leafSize = random(30, 50);
  }
  
  display() {
    // Draw tree trunk
    fill(139, 69, 19); // Brown trunk
    noStroke();
    rect(this.x, this.y, this.trunkWidth, -this.trunkHeight);
    
    // Draw leaves
    fill(34, 139, 34); // Green leaves
    ellipse(this.x + this.trunkWidth / 2, this.y - this.trunkHeight, this.leafSize);
  }
  
  castShadow(sun) {
    let shadowLength = map(sun.y, 0, height, 50, 200);
    fill(0, 0, 0, 50); // Transparent shadow
    noStroke();
    beginShape();
    vertex(this.x, this.y);
    vertex(this.x + shadowLength, this.y + shadowLength);
    vertex(this.x + shadowLength + this.trunkWidth, this.y + shadowLength);
    vertex(this.x + this.trunkWidth, this.y);
    endShape(CLOSE);
  }
}

// Change sky color based on sun's height
function changeSkyColor(sunY) {
  let morning = color(135, 206, 235); // Morning sky
  let dusk = color(255, 99, 71);      // Dusk sky
  let t = map(sunY, 0, height, 0, 1);
  let skyColor = lerpColor(morning, dusk, t);
  background(skyColor);
}

Designing the Code: Functions, Classes, and Interactivity

To break the project into manageable parts, I designed the following core components:

Classes:

  • Sun: The sun manages its position and movement across the sky. The sun also affects the length of shadows.
  • Hill: Represents rolling hills with a bezier curve that gives each hill a natural shape. The hill class also handles the casting of shadows.
  • Tree: Trees are placed on the hills, swaying slightly to simulate a breeze, and casting their own shadows based on the sun’s position.

Functions:

  • movesun(): Moves the sun in a circular motion across the sky. The position of the sun changes dynamically with each frame, mimicking the progression of time.
  • castShadow(): Calculates the length of shadows based on the sun’s position in the sky. This adds realism by changing the shape and size of shadows as the sun moves.
  • changeSkyColor(): Shifts the sky color gradually throughout the day, using the lerpColor() function to transition smoothly from morning to dusk.

Interactivity:

  • Time of Day: I’m considering adding controls where users can manually change the time of day by dragging the sun or pressing a key to speed up the passage of time. This would allow users to explore the landscape at different times of the day and see how light and shadows behave.

The combination of these functions creates a seamless, flowing environment where every aspect of the landscape interacts with the light in real-time.

Identifying Complexities and Minimizing Risks

The most complex part of this project was implementing the shadow-casting algorithm. Calculating shadows based on the sun’s position required careful mapping of angles and distances. I needed to ensure that the shadows grew longer as the sun lowered in the sky and became shorter when the sun was overhead.

Steps to Reduce Risk:

To tackle this complexity, I isolated the problem by writing a simple test sketch that calculated shadow lengths based on different sun positions. I used the map() function in p5.js to dynamically adjust shadow length relative to the sun’s y position. By experimenting with this small feature, I was able to fine-tune the shadow casting before incorporating it into the full project.

Additionally, the sky color transitions were another challenge. I experimented with lerpColor() to create smooth transitions from morning to dusk, ensuring the visual experience was gradual and not abrupt.

Next Steps:

Now that the core features are working, I plan to:

  • Fix the positioning of the trees that are randomly generated.
  • Implement wind simulation for the trees, making them sway in response to virtual wind.
  • Enhance user interactivity by allowing users to manipulate the sun’s position, controlling the time of day directly.
  • To make the scene feel more immersive, add finer details to the landscape, such as moving clouds and birds.

Week 4 – Harmony in the Cosmos

Inspiration

Memo Akten’s work on Simple Harmonic Motion made me drawn to the rhythmic, cyclical patterns that form the foundation of so much of our world. Akten’s focus on symmetry and motion led me to think about the natural world—and nothing reflects cosmic symmetry and harmonic motion quite like a galaxy. I drew inspiration from Akten to code a visual representation of a spiral galaxy, exploring the underlying harmony that often governs the universe itself.

The Concept

A galaxy, particularly a spiral galaxy, is a perfect example of natural harmony. Galaxies are bound by gravity, with billions of stars moving in circular or elliptical orbits around a central massive core, often a black hole. While galaxies appear chaotic at first glance, they actually follow harmonious patterns of motion. The stars within them move predictably, the spiral arms wind in beautiful formations, and the entire system evolves slowly over time.

What fascinated me about Akten’s work was his ability to capture movement that is predictable yet fluid, a concept that parallels the dynamics of galaxies. Inspired by his approach to harmonic motion, I wanted to create my own representation of a galaxy, shifting and evolving while remaining within the boundaries of harmonic symmetry.

Sketch

The Core Code Idea

  1. Condensed Spiral Galaxy: I focused on creating a galaxy that’s small enough to fit within the canvas while still representing the vastness and depth of space. A maximum radius of 150 pixels keeps the stars tight and visually coherent.
  2. Stars on Spiral Arms: The stars are distributed along several spiral arms (in this case, five) and move in circular orbits around the center. Their speed is dependent on how far they are from the center, mimicking how stars in real galaxies behave.
  3. Slow Shape Shifting: Inspired by Akten’s harmonic motion, I added a subtle shifting mechanism where the spiral arms slowly evolve over time, creating a dynamic and living representation of a galaxy.

Full Code

let stars = [];
let numStars = 400; // Number of stars
let spiralArms = 5; // Number of spiral arms
let galaxyRadius = 150; // Maximum radius of the galaxy (more condensed)
let timeFactor = 0.001; // Factor for the shape-shifting over time

function setup() {
  createCanvas(600, 500); 
  noStroke();

  // Create stars
  for (let i = 0; i < numStars; i++) {
    let angle = random(TWO_PI); // Random starting angle
    let radius = sqrt(random()) * galaxyRadius; // Random radius within the galaxy radius
    let star = {
      angle: angle, // Initial angle
      radius: radius, // Distance from the center
      speed: map(radius, 0, galaxyRadius, 0.002, 0.015), // Stars closer to the center move faster
      size: map(radius, 0, galaxyRadius, 2, 4), // Smaller stars are further out
      twinkleOffset: random(TWO_PI) // Random phase for twinkle effect
    };
    stars.push(star);
  }
}

function draw() {
  background(10, 10, 30, 80); 
  translate(width / 2, height / 2); // Moves origin to the center of the canvas

  // Slowly shift the shape of the spiral galaxy over time
  let spiralShift = sin(frameCount * timeFactor) * 0.5;

  for (let i = 0; i < stars.length; i++) {
    let star = stars[i];
    
    // Calculates star position with spiral shifting
    let armOffset = (i % spiralArms) * TWO_PI / spiralArms + spiralShift; // Spiral arm offset with time-based shift
    let x = star.radius * cos(star.angle + armOffset);
    let y = star.radius * sin(star.angle + armOffset);
    
    // Updates star's angle to make it rotate around the center
    star.angle += star.speed;
    
    // Twinkle effect: stars slowly change brightness
    let twinkle = map(sin(star.twinkleOffset + frameCount * 0.05), -1, 1, 180, 255);
    fill(twinkle, twinkle, 255); // Soft white-blue color for stars
    
    // Draws the star
    ellipse(x, y, star.size, star.size);
  }

    // Draws the central black hole 
  fill(0);
  ellipse(0, 0, 20, 20); // Central black hole at the center
}

Explanation: 

  • Cos() and Sin() Functions calculate the stars’ X and Y positions based on their angle around the galaxy’s center.
  • The formula x = radius * cos(angle) calculates the horizontal (X) position of the star.
  • Similarly, y = radius * sin(angle) calculates the vertical (Y) position.
  • Angle Update: Each star’s angle property increases slightly in every frame, causing them to move in circular orbits. This simulates the motion of stars around the galaxy’s core.
  • Spiral Shift: The spiralShift variable gradually changes over time, slowly altering the spiral arms’ positions, mimicking a galaxy’s slow evolution.

This code allows us to simulate stars moving in elliptical paths around the galaxy’s center, which is key to creating the harmonic motion of a spiral galaxy.

What Can Be Improved

  • Interactive Zoom and Pan: Allow users to zoom in and out of the galaxy to simulate a sense of scale, as galaxies are vast and complex. Panning around the galaxy would also help users explore different parts of it.
  • Nebulae and Star Clusters: Adding glowing clouds or star clusters would enhance the visual complexity.