Week 4- DNA

Concept:

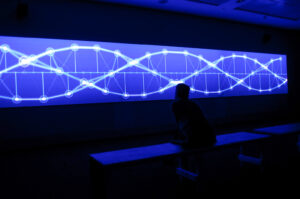
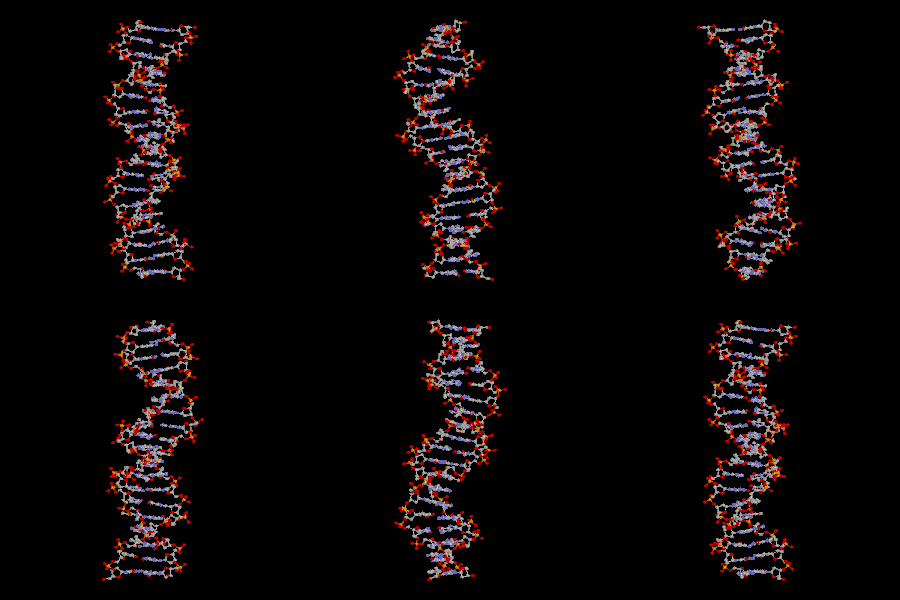
This week, we were tasked with gathering inspiration from Memo Akten’s work, focusing on visualizing simple harmonic motion (SHM). When I looked through his work I was reminded of the structure of DNA, with its two intertwining sine waves resembling the periodic motion characteristic of SHM. So, for my assignment I wanted to replicate that and try to mimic the movement and design of a DNA structure.
Key Features:

  • Sine Waves as DNA Backbones: Two sinusoidal waves form the backbone of the DNA structure. These waves oscillate vertically and reflect the nature of simple harmonic motion.
  • Bunched Particles: Along both sine waves, I added clusters of red particles to mimic the molecular bonds on a DNA strand, creating a more organic and dynamic feel.
  • Colorful Connecting Rungs: The colorful “rungs” between the two sine waves change color as they move along the structure, representing the diversity and vibrancy found in DNA.
  • 3D Rotation: The entire DNA strand rotates around the y-axis, adding a three-dimensional element to the animation.

embedded sketch:

Code I’m Most Proud Of:

I’m particularly proud of the code that generates the particles along the sine waves and the rungs. By combining randomness and structured positions, I was able to create visually interesting clusters that closely mimic the complexity of a DNA strand. Additionally, the color transitions in the connecting rungs add an appealing vibrancy to the piece, making it more engaging to look at.

// Function to draw bunched-up red particles along the sine waves
function drawParticles(x, y) {
  noStroke();
  fill(255, 0, 0);  // Red particles
  let numParticles = 5;  // Number of particles in each bunch
  let particleSize = 4;  // Size of each particle
  let spread = 5;  // Spread between particles in a bunch

  for (let i = 0; i < numParticles; i++) {
    // Create small offsets for the particles to make them appear bunched
    let offsetX = random(-spread, spread);
    let offsetY = random(-spread, spread);

    // Draw particle at each offset position
    ellipse(x + offsetX, y + offsetY, particleSize, particleSize);
  }
}

// Function to draw particles along the connecting strands (rungs)
function drawRungParticles(x1, x2, y) {
  noStroke();
  fill(0, 255, 0);  // Green particles for the connecting rungs
  let numRungParticles = 4;  // Number of particles along each rung
  let particleSize = 4;  // Size of each particle

  for (let i = 0; i < numRungParticles; i++) {
    // Calculate positions along the line between x1 and x2
    let t = i / (numRungParticles - 1);  // Normalize t to range [0, 1]
    let x = lerp(x1, x2, t);  // Linear interpolation between x1 and x2

    // Draw particle along the line connecting x1 and x2 (rung)
    ellipse(x, y, particleSize, particleSize);
  }
}

main functions:

  1. drawParticles():
    • Red Particles: Randomly places red particles along each sine wave.
    • Bunching: The function creates clusters of particles by adding random offsets (offsetX, offsetY) to the position. This simulates the bunched look of molecules along DNA strands.
  2. drawRungParticles():
    • Green Particles: Particles along the rungs (the connections between the two sine waves).
    • Structured Positions: The function calculates positions between the two sine waves using linear interpolation (lerp()), ensuring that the particles are evenly distributed along the connecting lines.

Reflections for Future Work:

In the future, I’d like to explore further how I can simulate more biological properties in this visualization. One idea is to add more complexity to the particles, making them behave like molecules interacting with one another. I also think it would be interesting to explore interactivity, where users can manipulate the DNA strand’s rotation, zoom, or even the particle behavior, allowing for a more immersive experience.

Week 3: Long Distance

Concept:

The idea behind my code is very personal and meaningful to me. This week’s task was about exploring attraction, repulsion, and movement, but as I worked through it, these concepts began to reflect something much deeper. I wanted to use this project to represent the experience of being far away from my loved ones back home. It’s not just the physical distance or the different time zones that can sometimes make things feel disconnected—it’s also that constant push and pull of being apart but still feeling so closely tied together.

To express this, I created clusters of moving particles. They act as symbols for the intangible but powerful connection I have with the people I care about. Even though we may be separated by distance, the bond we share remains strong and evident, just like the attraction forces at play in the code.

How it Works:

The code features two clusters of 500 particles each, influenced by invisible attractors to mimic gravitational effects. The clusters each represent a person, while the moving particles aim to give them the essence of human beings. The particles move smoothly and realistically, reflecting the attraction forces at play, like love, sadness, and sometimes anger. A connecting line between the clusters adds a sense of unity, and provides an extra touch of visual interest, but it also represents the otherwise invisible attraction and connection between the two people.

Embedded Sketch:

Code I’m Proud Of:

One aspect of the code I’m particularly proud of is the attracted function. This function employs vector math to simulate attraction between particles and attractors. It calculates the force vector, adjusts it based on distance, and applies it as acceleration. This function not only demonstrates a solid understanding of forces but also showcases my ability to translate these principles into code effectively.

class Particle {
  constructor(x, y) {
    this.pos = createVector(x, y);
    this.vel = createVector(0, 0);
    this.acc = createVector(0, 0);
    this.mass = 1; // Added mass to simulate the same behavior as the "Mover"
  }

  // Function to apply attraction toward an invisible attractor
  attracted(target) {
    let force = p5.Vector.sub(target, this.pos);
    let distance = constrain(force.mag(), 5, 25); // Limit the distance just like in the original Mover code
    let strength = (1 * this.mass) / (distance * distance);
    force.setMag(strength);
    this.acc.add(force);
  }

  // Update position and velocity
  update() {
    this.vel.add(this.acc);
    this.vel.limit(2); // Limit the speed just like in the original Mover code
    this.pos.add(this.vel);
    this.acc.mult(0); // Reset acceleration after each frame
  }

  // Display the particle as a point
  display() {
    point(this.pos.x, this.pos.y);
  }
}

Reflections and Future Work:

Looking back, I’m proud of how the attraction forces in my project brought the particle clusters to life, creating a dynamic and personal representation of connection despite distance. The way the clusters interact feels meaningful, and the organized code made refining the project easier. For future improvements, I want to explore adding forces like friction, make the experience more interactive with user controls, and experiment with different visual elements.

Week 2- Maracas Beach

Concept:

As a true island girl, the beach has always held a special place in my heart. It’s not just one of my favourite places in the world; it’s where I find peace and calm. There’s something really magical about being at the beach at night—when the darkness hides your view, but you can still feel the water, hear the rhythm of the waves, and see the moon reflected on the surface. This inspired me to create an ocean scene for this project, with waves at the height of their movement, each with its own unique personality through acceleration.

https://www.youtube.com/watch?v=kT-f2mfNL7s

Embedded Sketch:

Key Features:

In my code, acceleration controls how fast the waves move. You can increase or decrease the speed by pressing the right or left arrow keys:

Pressing the right arrow increases acceleration, making the waves move faster.

Pressing the left arrow decreases acceleration, slowing the waves down.

The movement is smooth because acceleration gradually adjusts the wave speed rather than changing it instantly, making the effect feel more natural. This simulates a build-up or reduction in wave intensity, similar to real ocean waves building up momentum.

Highlight of Code:

One of the most rewarding aspects of this project was simulating the moon’s gravitational pull on the waves. I’m particularly proud of how I captured the subtle way the waves respond to the moon’s slow journey across the sky. The moon’s movement mimics the natural pull of gravity, affecting the height and behaviour of the waves as they interact.

// Slow down the moon's movement, simulating gravitational influence
moonX = map(noise(frameCount * 0.005), 0, 1, 0, width);  // Slow, subtle horizontal movement

// Slightly adjust wave height based on moon's horizontal position (gravity effect)
let gravitationalEffect = map(moonX, 0, width, -20, 20);  // Subtle effect
let y = noise(frameCount * noiseSpeed + i + j) * noiseHeight + noiseY + offsetY + gravitationalEffect;

Reflection and Future Work:

Though the project didn’t quite reach the full vision I had in mind, I’m proud of how it turned out. I originally hoped to simulate waves crashing onto the shore and to add more elements like sound and depth to the sketch. These are definitely areas I plan to improve on in future iterations, but I feel this piece captures the essence of the ocean that I love so much.


Week 1- Independence Day

Concept:

Yesterday, my home country, Trinidad and Tobago, celebrated its 62nd Independence Day, marking our freedom from British colonialism. This is a deeply cherished event back home, filled with parades showcasing our military, fire service, and vibrant cultural bands. As the day winds down, the celebrations culminate in a spectacular fireworks display in our capital, Port of Spain. While I couldn’t be there to celebrate in person this year, I wanted to honour my country by drawing inspiration from this beloved tradition. That’s why I chose fireworks as the concept for this project, allowing me to connect with home even from afar.

Embedded Sketch:

Code I’m Particularly proud of:

// Firework class definition
class Firework {
  constructor(x, y) {
    this.firework = new Particle(x, y, true);
    this.exploded = false;
    this.particles = [];
  }
  
  // Update the firework's state
  update() {
    if (!this.exploded) {
      // Apply gravity to the firework
      this.firework.applyForce(gravity);
      
      // Update the firework's position
      this.firework.update();
      
      // If the firework reaches the peak and starts falling, it explodes
      if (this.firework.vel.y >= 0) {
        this.exploded = true;
        this.explode();
      }
    }
    
    // Update the particles from the explosion
    for (let i = this.particles.length - 1; i >= 0; i--) {
      this.particles[i].applyForce(gravity);
      this.particles[i].update();
      
      // Remove particle if its lifespan is over
      if (this.particles[i].done()) {
        this.particles.splice(i, 1);
      }
    }
  }
  
  // Handle the explosion of the firework
  explode() {
    // Create multiple particles at the firework's current position
    for (let i = 0; i < 100; i++) {
      let p = new Particle(this.firework.pos.x, this.firework.pos.y);
      this.particles.push(p);
    }
  }
  
  // Display the firework and its particles
  show() {
    if (!this.exploded) {
      this.firework.show();
    }
    
    // Show all particles from the explosion
    for (let i = 0; i < this.particles.length; i++) {
      this.particles[i].show();
    }
  }
  
  // Determine if the firework is done (all particles are gone)
  done() {
    return this.exploded && this.particles.length === 0;
  }
}

I’m very proud of my firework class, specifically the explode method that handles the creation of the explosion when the firework reaches its peak. By generating 100 particles at the exact position where the firework explodes, I effectively simulate the burst of a firework. The fact that these particles are given random directions and speeds makes each explosion unique and unpredictable, which greatly enhances the realism and excitement of the simulation.

Key Features:

The main feature of this code is to simulate fireworks that shoot up from the mouse click position and then explode into multiple smaller particles. The visual effect is designed to mimic a real-life fireworks show, complete with motion, colour changes, and fading effects.

Each time you click the mouse, a new firework is created at the position where you clicked. The firework then moves upward on the screen, just like a rocket being launched. This adds a layer of interactivity, allowing you to control where and when fireworks appear.

The code uses a special colour mode (HSB—Hue, Saturation, Brightness) to create vibrant, colourful particles. Each firework and its particles are assigned random colours, which makes the display visually exciting.

The entire visual process is controlled by a loop that continuously updates the position, appearance, and behaviour of each firework and its particles. This loop allows for smooth and continuous animation, ensuring that the fireworks display looks natural and fluid.

Reflection and Future Work:

I’m really proud of my fireworks simulation. To take it even further, I’m thinking about adding explosion sounds that vary based on the size and type of firework, which would make the experience even more immersive. I’d also love to introduce different types of fireworks, like starbursts or spirals with unique explosion patterns, to add more variety and depth to the display. These improvements would not only elevate the overall experience but also make the simulation richer and more dynamic, allowing me to create something truly special.

References:

Coding Challenge #27: Fireworks! (youtube.com)

mousePressed (p5js.org)

Week 1- Reading Response

Reductionism and holism offer two different ways to understand complex things, whether it’s in science or something as simple as making lasagna. With reductionism, you break down the process—like learning to cook pasta perfectly, making a sauce, and picking the right cheese. You focus on each part separately, mastering them one at a time. Once you’ve got each piece down, you bring it all together step by step to create the final dish. This approach helps you understand every part deeply before putting it all together.

Holism, on the other hand, is about seeing the dish as a whole, thinking about how the ingredients and flavors interact to create something greater than just the sum of its parts. Instead of focusing only on individual components, you consider how they work together—like adjusting the seasoning based on the cheese or layering ingredients to balance flavors and textures. Holism encourages you to think about the overall harmony of the dish, resulting in a richer, more complex lasagna.

Using food to explain my thought process is easy because of my love for it, but on a more serious note, I believe that both reductionism and holism are valuable approaches. Depending on the situation, one might be more useful than the other. Sometimes it’s better to focus on the details, while other times it’s best to look at the big picture. Understanding when to use each approach can help you navigate and understand complex systems more effectively.