Emotion Filters

Inspiration

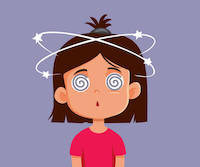
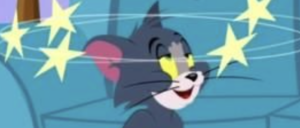
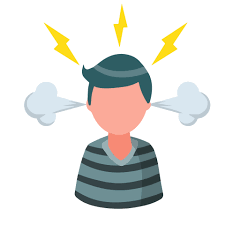
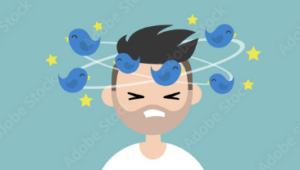
I have decided to change my final idea so I decided to go with something we have all seen in cartoons or even selfie filters such and that is the animation of dizziness, love, anger etc over our head. In cartoons, we tend to see these kind of humorous animations when a character gets hurt and I have listed a few examples of what kind of animation I am thinking off.
User Interactivity

From my old idea, I want to still incorporate the use of the camera and user and have the program be able to identify the head shape. From there on, the animation of the head spinning would be in a neutral state. But as soon as another user enters the screen, both their head spaces would ‘interact’ and end up with an emotion, whether it is love, anger, or confusion.

  • Neutral state – I am thinking the neutral state would be like stars or fireflies which I have loved the animation of from this semesters work
  • Love – the neutral shape or state would end up having the user’s head spaces be sped up and have the
  • Anger  – the neutral state would end up have the user’s head space become steam images and red to show anger and both user’s headspace will try to speed up.
  • sad – the neutral state would have clouds and plasters and bleu heartbreak to resemble sadness.

I think a very cute minute interaction of my idea would be that people can take selfies of my laptop or take a picture of themself with their friend.

Decoding Nature

From the class content we have gone through, I want to use particle systems, to create the head spaces as foundations.

I am also wanting to include the cellular automata movemnts around the ellipse of the headspace to give the ‘pop’ effect.

Foundation

For this project, I am going to be using ml5.js and face face-api.js for the detection of emotions. face-api is an accurate and appropriate library to use as it uses certain points on the face tot detect these emotions and these movements and facial positions have proven to be the same for every human so this library will work well with all my users.

I first needed the camera set up so I used the following basic code to just have my camera initialised.
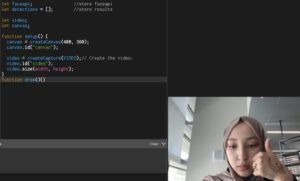
From the library of emotions, the 7 choices are: neutral, happy, angry, sad, disgusted, surprised, fearful. I only want to make use of neutral, happy, angry and sad so I can adjust the filters accordingly.

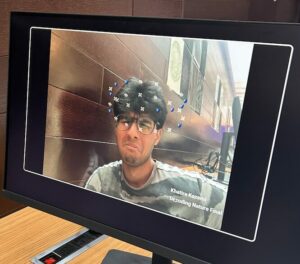
The following is my first prototype which simply reads one users face and has the emotions displayed nicely on the screen. This is also my first time using the camera in my code and originally the video was inverted and so I adjusted that with the following code. I wanted to highlight the camera and video set up.

function setup() {
  canvas = createCanvas(480, 360);
  canvas.id("canvas");

  video = createCapture(VIDEO);// Create the video: 
  video.id("video");
  video.size(width, height); 
  video

(please open on website to see actual prototype)

Two User implementation

I now want to see what it would be like if more than one person was on the screen because ideally, I want the code to be used by 2 people. There were errors with my code when there was more than one person so I changed the code accordingly added some extra if-conditions.

function drawExpressions(detections, x, y, textYSpace){
  if(detections.length >1){//If at least 2 face is detected
    let {neutral, happy, sad, angry } = detections[0].expressions;
    let {neutral_one, happy_one, sad_one, angry_one} = detections[1].expressions;
    // console.log(detections[0].expressions);

    // console.log(detections[1].expressions);
  
    textFont('Helvetica Neue');
    textSize(14);
    noStroke();
    fill(255);

    text("neutral:       " + nf(neutral*100, 2, 2)+"%", x, y);
    text("happiness: " + nf(happy*100, 2, 2)+"%", x, y+textYSpace);
    text("sad:        " + nf(angry*100, 2, 2)+"%", x, y+textYSpace*2);
    text("angry:            "+ nf(sad*100, 2, 2)+"%", x, y+textYSpace*3);

    console.log(neutral_one*100);
    text("neutral:       " + nf(neutral_one*100, 2, 2)+"%", 300, y);
    text("happiness: " + nf(happy_one*100, 2, 2)+"%", 300, y+textYSpace);
    text("sad:        " + nf(angry_one*100, 2, 2)+"%", 300, y+textYSpace*2);
    text("angry:            "+ nf(sad_one*100, 2, 2)+"%", 300, y+textYSpace*3);


  }
  else if(detections.length ===1){//If at least 1 face is detected
    let {neutral, happy, angry, sad, } = detections[0].expressions;

    // console.log(detections[0].expressions);
    textFont('Helvetica Neue');
    textSize(14);
    noStroke();
    fill(255);

    text("neutral:       " + nf(neutral*100, 2, 2)+"%", x, y);
    text("happiness: " + nf(happy*100, 2, 2)+"%", x, y+textYSpace);
    text("anger:        " + nf(angry*100, 2, 2)+"%", x, y+textYSpace*2);
    text("sad:            "+ nf(sad*100, 2, 2)+"%", x, y+textYSpace*3);


  }
  else{//If no faces is detected: 
    text("neutral: ", x, y);
    text("happiness: ", x, y + textYSpace);
    text("anger: ", x, y + textYSpace*2);
    text("sad: ", x, y + textYSpace*3);
   
  }
}

I added some quick console.log statements to test some if conditions, in the following example, I checked for neutral face to be detected and to output the word ‘neutral’.
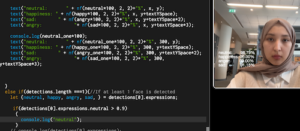
For the filters and effects above the users heads, I want it have a 3D effect and recreate something similar to a solar system which has the sun as the ‘head’.

Particle / solar system

The following code makes use of 3D vectors and WEBGL which I had not use yet. After playing with some parameters, I tried to make the solar system look like 3D from the users direct point of view. In 2D, we see the solar system similar to rings around a centre piece but for my version, I want to see it from the side so it looks like a headspace on the users head.

Head detection

In this part of my code, I want to track the middle of the head, and the top part. In this following code, I have a box drawn around the head and I want to have a point for the middle top part of the box as that will be my ‘sun’ to my particle system.
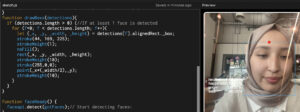
Using this point, I am able to have my particle system based around this point even when the user is moving.

Combining the camera and solar system

So now it was time to combine my two main components of the final project. After MANY attempts,  I decided to not have the WEBGL 3D motion included as my text on screen, face detection was all changing to work in 3D and therefore would not stay still and it caused many errors when I could have just had the headspace in 2D.

I altered my code as following so that the headspace rotation is elliptic and have it based of the centre top part of the users face. I tried many times and also realised I wanted my elliptic offset on the X-axis to be proportional to the width of the rectangle that recognises the users face.

class Particle {
  constructor(x, y, radius, isSun = false, orbitSpeed = 0, orbitRadius = 0) {
    this.x = x;
    this.y = y;
    this.position = createVector(x, y);
    this.radius = radius;
    this.isSun = isSun;
    this.angle = random(TWO_PI);
    this.orbitSpeed = orbitSpeed;
    this.orbitRadius = orbitRadius;
    this.velocity = createVector(0, 0);
  }

  update() {
    if (this.isSun) {
      this.position.x = returnFaceX(detections);
      this.position.y = returnFaceY(detections);
    }
    if (!this.isSun) {
      this.angle += this.orbitSpeed;
      this.x =
        width -
        (returnFaceX(detections) +
          0.75 * rect_width(detections) * cos(this.angle));
      this.y = returnFaceY(detections) + 25 * sin(this.angle);
    }
  }

  display() {
    noStroke();
    if (this.isSun) {
      fill(255, 200, 0);
    } else {
      fill(255, 105, 180);
      circle(this.x, this.y, 10);
    }
  }
}

The function has the sun always move accordingly to the midpoint in this code as well.

Altering the aesthetic of the filter

I have added the following function to the code to test out the happiness emotion and have the colour of the filter change in correspondence.

function emotion(detections, feeling){

  if (detections.length > 0) {
    //If at least 2 face is detected
    let { neutral, happy, sad, angry } = detections[0].expressions;
    if(feeling==='happy' && happy > 0.9){
      return true
    }
    else return false;
  
}}
/////////////////////// calling the function
display() {
    noStroke();
    if (this.isSun) {
      fill(255, 200, 0);
    } else {
      if (emotion(detections, "happy")){
      fill(255, 105, 180);}
      
      else{
        fill(255, 0, 0);
      }
      circle(this.x, this.y, 10);
    }
  }

After testing out my code and seeing how the colours alter depending on the emotion, I know it works correctly and so I can now focus on the aesthetic of the filter themself.

Happy or Love <3

For this filter, I want to have hearts instead of the circles and so I just quickly coded the following for a rough sketch, I would of course have multiple of these hearts.

function drawHeart(x, y, size) {
  // noStroke();
  
  fill(255, 0, 0);
  stroke(0); // Black stroke
  strokeWeight(0.5); // Stroke thickness
  beginShape();
  vertex(x, y);
  bezierVertex(x - size / 2, y - size / 2, x - size, y + size / 3, x, y + size);
  bezierVertex(x + size, y + size / 3, x + size / 2, y - size / 2, x, y);
  endShape(CLOSE);
}

/// coding it into the program

else if (emotion(detections, "happy")) {
        drawHeart(this.x, this.y,10);


These are some inspirations of what I want my filters to look like.I adjusted the happy filter and this is what it finally looks like.
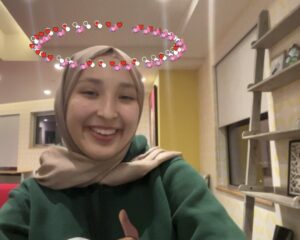
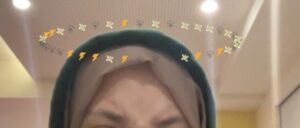
Cellular Automata around the filter

I wanted to have come cellular automata movement around my headspace to focus on more aspects of the class. The code below shows it with a blue colour and transparency value so the background images of my headspaces are not covered.

if (random() < 0.025) { //  chance to restart the life of a cell
        next[i][j] = floor(random(2)); // Randomly set to 0 or 1
        continue;
      }

By adjusting this value, the effect restarts and it should also work with the filter when the head is moved around with the functions and dynamic code.

//insert image of green rect

The image above was just for me to roughly see where the filter would be so I can have the cellular automata there. I applied the same logic on my code and had the parameters be for the rectangular area of my filter, it took a lot of calculations and flooring function but it worked nicely after. My only problem was after the head moved, the coloured cells would not be removed and just stay there so I had to add some extra code that goes over that.

let x =  (rect_width(detections) *(1.25/2))
      let y = (rect_height(detections) / 3)
      //=====================================================
      rect(this.x-x, this.y, 2*x,y);
      
      for (let i = 0; i < col; i++) {
    for (let j = 0; j < row; j++) {
      if (i < floor((this.x - x)/w) || i >= floor((this.x - x)/w) +( floor((2*x)/w))|| j < floor(this.y/w) || j >= floor(this.y/w)+ floor(y/w)) {
        board[i][j] = 0;
      }
    }
  }

I decreased the probability by a large amount just to make sure it didn’t clump up the cells too much. I also added a 3rd colour just for aesthetic purposes.

//insert image

I made the calculations of the pixel be when the object is the sun as its much easier to calculate the region from the suns position, but I will have it displayed on the !isSun code to change the colour depending on the emotion.

This was the following code:

else {
      
      for (let i = 0; i < col; i++) {
        for (let j = 0; j < row; j++) {
          

          if (emotion(detections, "neutral")) {
            // noFill();
            // stroke(0, 255, 0);
            // strokeWeight(1);
            // circle(this.x, this.y, 10);
            if (board[i][j] === 0) {
              noFill(); // White for dead cells
            } else if (board[i][j] === 1) {
              fill(255,255,153, 5); // yellow
            } else {
              fill(205, 5); //white
            }
            noStroke();
          square(i * w, j * w, w);
          } else if (emotion(detections, "happy")) {
            if (board[i][j] === 0) {
              noFill(); // White for dead cells
            } else if (board[i][j] === 1) {
              fill(255, 192, 203, 5); // pink
            } else {
              fill(255, 255, 255, 5); //white
            }
            noStroke();
          square(i * w, j * w, w);

            if (temp > 0.66) {
              drawHeart(this.x, this.y, 10);
            } else if (temp > 0.33) {
              // image(bubble_img, this.x, this.y, 15, 15);
              noFill();
              stroke(255);
              strokeWeight(1);
              circle(this.x, this.y, 10);
            } else {
              image(butterfly_img, this.x, this.y, 15, 15);
            }
          } else if (emotion(detections, "angry")) {
            if (board[i][j] === 0) {
              noFill(); // White for dead cells
            } else if (board[i][j] === 1) {
              fill(122, 22, 25, 5); // red
            } else {
              fill(127, 5); //grey
            }
            noStroke();
          square(i * w, j * w, w);

            if (temp > 0.66) {
              // fill(255, 0, 0);
              // circle(this.x, this.y, 10);
              image(bolt_img, this.x, this.y, 15, 15);
            } else if (temp > 0.33) {
              image(puff_img, this.x, this.y, 15, 15);
            } else {
              image(explode_img, this.x, this.y, 15, 15);
            }
          }
          else if (emotion(detections, "sad")) {
            if (board[i][j] === 0) {
              noFill(); // White for dead cells
            } else if (board[i][j] === 1) {
              fill(116, 144, 153, 5); // blue grey
            } else {
              fill(127, 5); //grey
            }
            noStroke();
          square(i * w, j * w, w);
            if (temp > 0.66) {
              image(plaster_img, this.x, this.y, 25, 25);
            } else if (temp > 0.33) {
              image(cloud_img, this.x, this.y, 25, 25);
            }

            image(blue_img, this.x, this.y, 15, 15); //blue heart image
          }

        }
      }
          board = next;
    }

Revisions

With the progress made, I decided to change some parts of my code. With the cellular automata, the code is a lot heavier as I need to calculate and go through two large 2D arrays which requires a lot of time. Therefore, this code will be for one user only.

I also want to add a screenshot feature for people to have a picture with the filters. I also want to have some personal text to highlight this final project and a signature at the bottom corner.

I also cleaned up the code like summing up my four functions that return dimensions, into one with an extra parameter. I also plan to have my Particle class in a separate file.

My main concern is that the CA is incredibly heavy and making me code work very slowly so I need to find a way to fix that. So I recreated the grid on another program and figured the dimensions of where the headspace is likely to be and limited to that region which helped the code be a LOT smoother.

function draw() {
  let currentTime = millis();

  if (currentTime - lastUpdateTime > updateInterval) {
    lastUpdateTime = currentTime;

    // Update and display sun and particles
    sun.update();
    particles.forEach(particle => {
      particle.update();
    });
  }

  // Always display the particles, but only update them based on the interval
  sun.display();
  particles.forEach(particle => {
    particle.display();
  });
}

I added this time delay in the draw function to have the user can see the filter for a few seconds before it changes.

IM showcase

The following are some images that I got from user testing. I was happy to see people enjoy it and actually take pictures or screenshots so they can share.
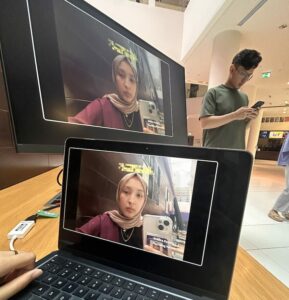
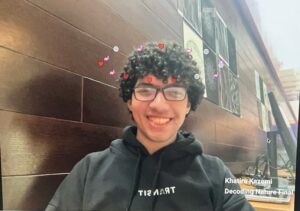
Reflections

Next time I would love to incorporate some of my original ideas such as the 2 people interaction. My only problem with this is that there are multiple double nested for loops so with two users, that complexity will get worse.
I want to try and simplify some parts and have the timing work better so it performs smoothly. I would love more emotions to be included from the ml library.

Final product

https://editor.p5js.org/kk4827/full/ypZHWvVOb

please click on the link to access it.


week 11 assignment

Inspiration

For this weeks assignment, I want to replicate shooting stars because with cellular automata, we can see them be born/ die and spread. Also the sporadic movement of the cells replicates the stars glowing. I want to use the following basic program to show it simplified with just black and white.

I wanted to adapt from this and add a 3rd state as a dying state and to adapt the colours. After making these adjustments, I got an effect that is much more natural and here are the following adjustments. ‘

show() {
    // stroke(0);
    if (this.previous === 0 && this.state == 1) {
      stroke(255,255,0);  //yellow
      fill(255, 255, 0);
    } else if (this.state == 1) {
      stroke(255);    //black
      fill(255);
    } else if (this.previous == 1 && this.state === 0) {
      stroke(218,165,32)    //gold
      fill(218,165,32);
    } else {
      stroke(0);      //white
      fill(0);
    }
    square(this.x, this.y, this.w);
  }

I really wanted to add another level of user interactivity and have the mouse be able to add more life into the program and this is the following code I used. Where the mouse goes, more cells are added and that state is changed, when close to other live cells, the cell catches ‘fire’ and have it expand. The shooting stars effect started and would carry on once the cells die.

function mouseDragged() {
  // Update cell state when the mouse is dragged
  for (let i = 0; i < columns; i++) {
    for (let j = 0; j < rows; j++) {
      // Check if  mouse is within the  boundaries
      if (
        mouseX > board[i][j].x &&
        mouseX < board[i][j].x + w &&
        mouseY > board[i][j].y &&
        mouseY < board[i][j].y + w
      ) {
        // Update the cell state to 1 (alive)
        board[i][j].state = 1;
        board[i][j].previous = board[i][j].state;
      }
    }
  }
}

And this is my following code and my final product.


Final project proposal – KK

Inspiration

I wanted to do something based off the climate change crisis. I want to simulate an environment that has many natural movements, weather its the ocean, birds moving together, rainfall, or fires.

I want the user’s body and movements to be detectable and have certain actions be correlated with a certain natural movement. I can use ml5.js and Posenet to track body movements.

The following links show the videos or references I am going to use for my final.

https://editor.p5js.org/jgl/sketches/XMy0GHKDIS


Collision handling – week 10

To be very honest, I missed a lecture and was just trying to figure out how to use the basics of matter.js. I know for my final, I probably want something to be detected like a collision so I just played around with the different features such as gravity, collisions, ground or body.

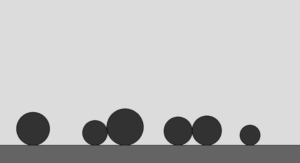
I started off with a very basic program that just had the ground and the circles wherever the user clicked the screen.

I then added some code to identify whenever there was a collision or when they are collided.

if (circle.collided) {
      fill(255, 0, 0); // Red if collided
    } else {
      fill(0, 150,0); // Green if not collided
    }
function collisionEvent(event) {
  let pairs = event.pairs;
  for (let i = 0; i < pairs.length; i++) {
    let bodyA = pairs[i].bodyA;
    let bodyB = pairs[i].bodyB;

    // Check for collisions involving circles
    if ((circles.includes(bodyA) || circles.includes(bodyB)) && !isGroundCollision(bodyA, bodyB)) {
      circles.forEach(circle => {
        if ((circle === bodyA || circle === bodyB) && circle.collided !== true) {
          circle.collided = true; // true for collisions 
        }
      });
    }
  }
}

function isGroundCollision(bodyA, bodyB) {
  return (bodyA === ground || bodyB === ground);
}


function collisionEndEvent(event) {
  let pairs = event.pairs;
  for (let i = 0; i < pairs.length; i++) {
    let bodyA = pairs[i].bodyA;
    let bodyB = pairs[i].bodyB;

    // Find collided bodies and reset their state
    circles.forEach(circle => {
      if (circle === bodyA || circle === bodyB) {
        circle.collided = false; // Reset collided state to false
      }
    });
  }
}

The code above is to show if the circles are touching as before, the ball touching the ground would be considered a collision which I did not want. I needed the code to also traceback and see if the circles don’t touch anymore, and if they do not touch anymore, the ball should be green again.

This was my final code.


Lecture Reflection

The talk made me think about how AI is not inherently good or bad. The dark side of AI only comes from its capabilities and probably doesn’t realise what bad it is doing. It also makes me think about the way AI thinks, whether AI is conscious or if it does think for itself the way we do or metaphorically.

AI is always seen as more to do with actual knowledge but we can also apply AI capabilities towards design and our future cities. A lot of AI is already in use even before ChatGPT but it’s just ‘invisible’ and I think more people need to understand the spectrum of AI.

Neil also talks about how with current AI such as self driving cars, humans won’t care about driving and I think that links with the idea that humans are inherently lazy and selfish. 

I think this lecture just made me realise that more than ever before, professionals across multiple disciplines need to start working together to learn how to live with this new intelligence.  

Scurrying Ants – Week 9

Inspiration

For my inspiration this week, I wanted to replicate the ants that always scurry around with each other and sometimes if they find food or something they want, they tend to move in a herd.

I first had the images on the background to represent dirt in some way and to have the ant image.

After the graphics aspect was done, I wanted to implement the actual motion and have the ants be represented as circles for now. I needed to work on two particular functions, separate and align.

For the separate function, I needed to create a vector and have the separation movement be coded within that vector.

separate(ants) {
    let steer = createVector();
    let count = 0;
    for (let other of ants) {
      let d = dist(
        this.pos.x,
        this.pos.y,
        other.pos.x,
        other.pos.y
      );
      if (other != this && d < this.desiredSeparation) //make sure the ant is not comparing with isteld and within certain distance
      {
        let diff = p5.Vector.sub(this.pos, other.pos);
        diff.normalize();
        diff.div(d);
        steer.add(diff);
        count++;
      }
    }
    if (count > 0) {
      steer.div(count);
    }
    if (steer.mag() > 0) {
      steer.setMag(this.maxSpeed);
      steer.sub(this.vel);
      steer.limit(this.maxForce);
    }
    return steer;
  }

For the align function, it is the same structure as the separate function ,but we use addition instead of subtraction.

align(ants) {
    let sum = createVector();
    let count = 0;
    let perceptionRadius = 50;

    for (let other of ants) {
      let d = dist(
        this.pos.x,
        this.pos.y,
        other.pos.x,
        other.pos.y
      );

      if (other !== this && d < perceptionRadius) {
        sum.add(other.vel);
        count++;
      }
    }

    if (count > 0) {
      sum.div(count);
      sum.setMag(this.maxSpeed);
      let steer = p5.Vector.sub(sum, this.vel);
      steer.limit(this.maxForce);
      return steer;
    } else {
      return createVector();
    }
  }

This was the output with circles and I wanted the head of my ant to always point the way in the direction it was going.

display() {
   push();
   translate(this.pos.x, this.pos.y);
   rotate(this.vel.heading());
   image(this.img, 0, 0, 15, 15);
   pop();
   // circle(this.pos.x, this.pos.y, 10);
 }

This is my final output and I would want to add more interactivity next time by making the user have something ‘sweet’ as the mouse movement, so the ants move towards the mouse.

Week 8 – Buzzing

For my assignment this week, I wanted to recreate something that follows an attractor with high speeds and natural orbiting movement. I wanted this attractor to buzz around more than flow.  I thought of bees around honey or something similar.

class Attractor {
  constructor(x, y) {
    this.pos = createVector(x, y);
    this.mass = 50;
  }

  attract(star) {
    let force = p5.Vector.sub(this.pos, star.pos);
    let distance = force.mag();
    distance = constrain(distance, 100, 500);
    force.normalize();

    let strength = (1 * this.mass * star.mass) / (distance * distance);
    force.mult(strength);

    return force;
  }

  update() {
    this.pos.add(p5.Vector.random2D().mult(5));
  }

  display() {
    // noFill();
    noStroke();
    fill(237, 208, 92);
    ellipse(this.pos.x, this.pos.y, 20, 20);
  }
}

I want the attractor to move at certain distances and have a certain strength, so the update function is what controls the movement of the attractor so that it buzzes around. I set the multiplying as a number of 5 and it was the perfect value for the attractor to buzz around.

class Bee {
  constructor(x, y) {
    this.pos = createVector(x, y);
    this.vel = p5.Vector.random2D();
    this.acc = createVector();
    this.maxSpeed = 100;          //speed of the particles 
  }

For my bee class, the most important attribute in this class would be speed as it gives that high speed buzzing effect of the bees and makes the final code look much more realistic.

let choice = random();
    if (choice > 0 && choice < 1/3) {
      fill(255, 215, 0, alphaValue);
    } else if(choice > 1/3 && choice < 2/3){
      fill(255, alphaValue);
    }
    else{
    fill(0,alphaValue)}
    noStroke();
    ellipse(this.pos.x, this.pos.y, 5, 5);

This code gives an even chance of the colours I wanted to present on the canvas and the opacity is dependent on how far away the bees are from the attractor. The further away, the less opaque.

Next time

I think next time, I want to try an idea of the attractor moving in a natural curve like a shooting star collecting more stars on the way.

Midterm – Weather Forecast

Proposal

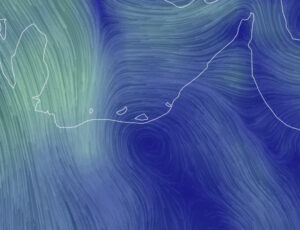
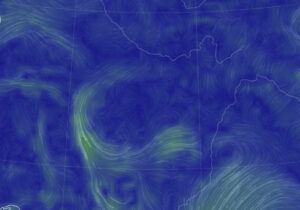
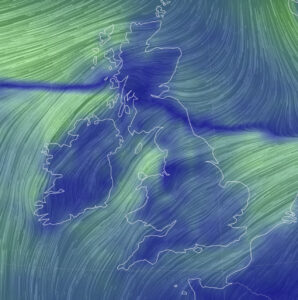
For my midterm project, I want to try and imitate the weather forecast patterns that I would see as a child whenever I watched the news. I was raised in the UK so I primarily saw the weather in the UK but for my midterm, I want to include the countries that mean a lot to me and are different geographically compared to the UK which is an Island. I want to include the UAE as I study there and it is a coastal country, and Afghanistan as it is my home country but also a landlocked country. I think it would be nice to see how different environmental factors looks in these 3 countries as they are geographically different.

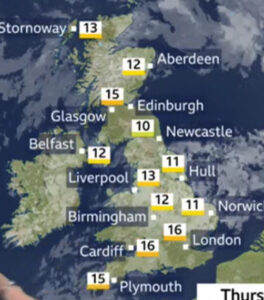
Underneath are some images of the news I would see for the UK and I have included some videos to show the kind of image I want to imitate.

Examples:


UAE  / Gulf Afghanistan / Central Asia UK

https://earth.nullschool.net/#2023/10/07/0500Z/wind/surface/level/orthographic=52.96,24.02,4583/loc=8.186,48.160

Concerns

Some aspects of this code that I am worried about it working with real life data and having the code perform for a certain amount of time to show the real-time wind. I think it will also be hard to locate my invisible attractors and with the outline of the countries, know where to locate these invisible attractors.

Line animation

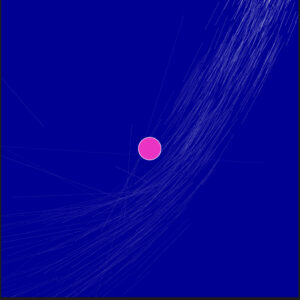
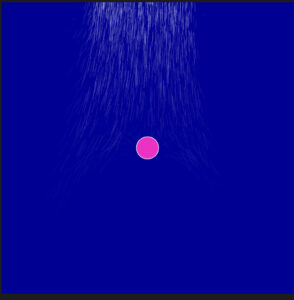
I want to work on having the lines go towards invisible attractors or repel against them. I started off with having a blue background and the lines to imitate the wind to come out of the origin and have the lines be longer. This was just my starting point and I want to add a lifespan for these lines and have them concentrated next to each other. I also wanted to make sure the lines were using the Vector subclass from p5 so I used inheritance.

Now I want to add another attribute that will count as the lines lifetime so that they disappear over time and get popped from the array using splice. I have temporarily made the background black so I can see the white line disappear into the background.

I was looking at different ways to have the white lines be blended into the blue background and found the lerpColour function that did the job for me. I now want to add a single attractor so that my lines can move towards the attractor. Note: I am temporarily having all the code in the sketch.js file to makes it easier for me to create multiple copies of my code for documentation purposes.

I also wanted to add a single attractor for now just so that I can see what the repel/ attraction would look like. I used the class Attractor from class and modified my Particle class for them to work well together whilst also extending on the p5.js folder. After playing around with the coordinates of the attractor, I ended up with the following effect which I really liked. I also made my canvas size 600 by 600 to see the effect better.

Screen Recording 2023-10-07 at 15.51.39

I moved the attractor around and played with the G values and positioning of the lines to be off the canvas so it seems more naturual when it comes and I got this effect.

I also need repelling points so I will create an identical class but with a negative G value and I tried to see what it would look like and I really liked the look.  I am likely to put these around the borders of the countries.

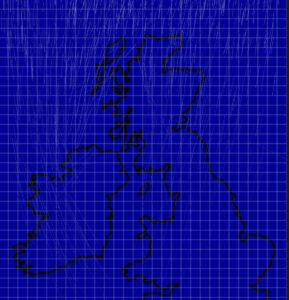
I will now try to find an image of the UK which is just the outline and have the waves be repelled against the borders. I found an image and tried to have some grids placed 20 pixels away from each other to try and see where I would want these attractors and repellers.

let spacing = 20;

  // Draw vertical grid lines
  for (let x = 0; x <= width; x += spacing) {
    line(x, 0, x, height);
  }

  // Draw horizontal grid lines
  for (let y = 0; y <= height; y += spacing) {
    line(0, y, width, y);}

I get the following image so now it is easier for me to see where I need to place my attractors and repellers. I am also going to duplicate my attractor class to create my repeller class. I also need to change the back ground colour or the ocean parts to be green to show a smooth distinction between the mainland and sea – this also includes any major lakes or bodies of water on the mainland.

To do list

  • have the colour of the water be green/blue – different
  • figure out the location of the attractors/ repellers
  • have the wind waves be generated throughout the screen
  • have the waves through the land go slower

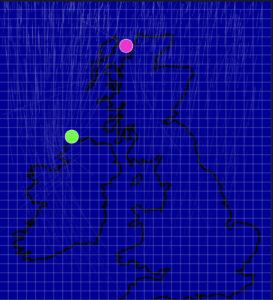
With one attractor and repeller, this is what it currently looks like.

The pink is for the repeller and the green for the attractor.

Some sketches


Second Major Update

So after discussing other methods that I could use to try and create the effect I want,  a classmate Xiaozao recommended at looking a force field approach to show a slower, curved and more natural effect. The video underneath is the video that helped me understand how vector fields worked in p5.js and how I can use them effectively to give the effect I wanted.

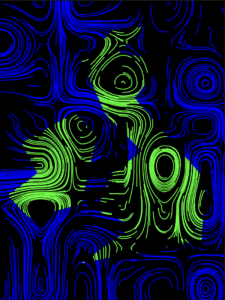
I firstly needed to find a way to create the vector field and luckily the video Xiaozao recommended was a great place to start.  From what I had learnt, I know that I needed to have a second ‘background’ and have my centres of attraction generated randomly. We can use Perlin noise to have these randomly generated and also the curl value can really make a difference.

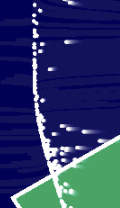
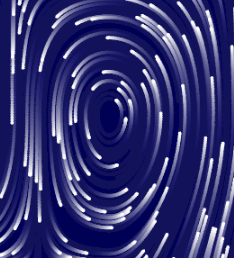
If this value is 1 or above, we will get the following images.

And of its less than 1 and significantly small, we get the following which is a strong attraction and the effect I wanted.

function curl(x, y) {
  const EPSILON = 0.0000001;
  let n1 = noise(x + EPSILON, y);
  let n2 = noise(x - EPSILON, y);
  let cx = (n1 - n2) / (0.9 * EPSILON);

  n1 = noise(x, y + EPSILON);
  n2 = noise(x, y - EPSILON);
  let cy = (n1 - n2) / (0.9 * EPSILON);

  return { x: cy, y: -cx };
}

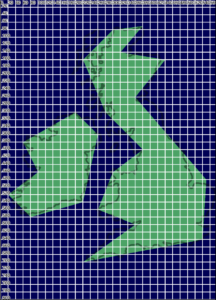
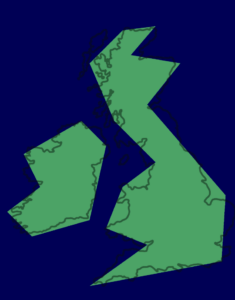
Next thing I decided was to have some image or outline of the UK but trying to get these particular pixels was far too much of a hassle and would end up overcomplicating my code. Instead I decided to have the UK outline drawn out myself into 2 regions and used an image of the UK outline and a grid system to navigate myself to have these points placed.

I also made sure these 2 shapes were saved so I can reference to thew pixels inside those regions.

let region1 = [];
let region2 = [];
function createShape1() {
  // Define the first region shape using curveVertex points
  region1.push({ x: 60, y: 380 });
  region1.push({ x: 200, y: 300 });
  region1.push({ x: 260, y: 360 });
  region1.push({ x: 220, y: 540 });
  region1.push({ x: 80, y: 580 });
  region1.push({ x: 40, y: 540 });
  region1.push({ x: 20, y: 520 });
  region1.push({ x: 100, y: 460 });
}

function createShape2() {
  // Define the second region shape using curveVertex points
  region2.push({ x: 300, y: 80 });
  region2.push({ x: 380, y: 70 });
  region2.push({ x: 320, y: 140 });
  region2.push({ x: 440, y: 160 });
  region2.push({ x: 360, y: 260 });
  region2.push({ x: 550, y: 480 });
  region2.push({ x: 540, y: 640 });
  region2.push({ x: 220, y: 700 });
  region2.push({ x: 360, y: 600 });
  region2.push({ x: 260, y: 560 });
  region2.push({ x: 300, y: 460 });
  region2.push({ x: 380, y: 400 });
  region2.push({ x: 280, y: 300 });
  region2.push({ x: 220, y: 160 });
}

I wanted to find a way to locate the pixels in these regions as I know I will need to make use of them in the future but as of now, this was my sketch.

INSERT

Plotting

So the next step I took was the plotting and I know I needed to simplify my code to make sure a plot was possible so I implemented a transparent background so that the particles paths were opaque and visible. I also made the background white and had the particles change colour instead, blue if in water and green for land.

I firstly used the following function to check whetehr to not the particle was in the land regions.

function pointInShape(point, shape) {
  // Check if a point is inside a shape defined by an array of vertices
  let oddNodes = false;
  let x = point.x;
  let y = point.y;

  for (let i = 0, j = shape.length - 1; i < shape.length; j = i++) {
    let xi = shape[i].x;
    let yi = shape[i].y;
    let xj = shape[j].x;
    let yj = shape[j].y;

    if ((yi < y && yj >= y) || (yj < y && yi >= y)) {
      if (xi + ((y - yi) / (yj - yi)) * (xj - xi) < x) {
        oddNodes = !oddNodes;
      }
    }
  }

  return oddNodes;
}

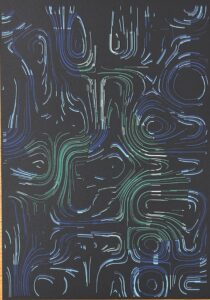
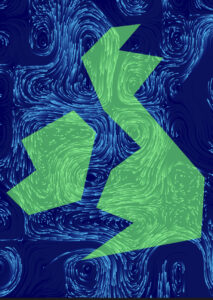
This way each individual pixel is checked and can change colour depending on the region. This is what my sketck ended up looking like for my SGV.

While plotting, I realised how much more dimension I wanted and I was able to edit by my SGV on Inkspace and have certain particles removed and have the colour changed. For example, some particles on the green region, I wanted white strokes to represent wind and on the ocean, pastel blue strokes to represent wind and waves.

These are some images and videos of my final plot.

GH010650

Aftermath of Plotting

After seeing the additional dimension given in my plot, I wanted to add the same into my final sketch and I made use of the check in region function again and altered the sketch colour accordingly.

// Check if the particle is inside either of the regions
    let inRegion1 = pointInShape(p.pos, region1);
    let inRegion2 = pointInShape(p.pos, region2);
    
    if (inRegion1 || inRegion2) {
      // stroke(255); // White line
      stroke(110, 245, 137);
    } else {
      stroke(8, 196, 252);
      // stroke(139, 222, 247); // Pastel blue color
    }
    
    point(p.pos.x, p.pos.y);
  }

A final touch I added was some sound representing the wind and I though it went nicely with the movement of the particles and gave it that final missing touch.

Future Changes

Next time, I would like to have my other countries included. I realised through my project that I would not be able to show the other countries as well as they are not islands. I would also like to make this model in 3D so it is like the website example I was provided with. I also realised after time, the particles would almost disappear, I liked it initially but I wish they would regain speed after some time.

Coding Assignment – Week #4 – Mexican wave/ Newton cradle

So for my assignment this week, I really wanted to recreate either a Mexican wave or newton cradle but ended up kind of mixing the two together.

Trying to perfect the Newton Cradle was much harder than I thought so I started off with the following. It was a simple repetitive Mexican wave kind of motion that did not slow down.

After that example, I wanted there to be some periods so I added the following code so that the i variable would be a dependable factor and I achieved the following. I particularly like the look of when it regroups again and looks like it is starting fresh.

let period = 0.01 + i / 100;

I then wanted it to slow down after some time and add some colour, I liked the look of the HSB colour grid I used in my first assignment so I decided to add that again to achieve the following.

The slowing down effect took a lot more time then expected and I had to add a few Boolean variables and a few conditional statements.


if (
      this.period.x < 0.005 &&
      this.period.y < 0.005 &&
      this.pos.x === this.origin.x &&
      this.pos.y === this.origin.y
    ) {
      this.period.set(0, 0); // Reset the period to its original value
      this.ampl_x = 0;
      this.ampl_y = 0;
      slowingDown = true; // Set the flag to stop updating particles
    } else {
      this.pos.x = x + this.origin.x;
      this.angle.add(this.period); // Update the movement
    }
  }


https://editor.p5js.org/kk4827/full/llEuwJDBz

Improvements

I would love to try to implement the Newton cradle, maybe for my midterm and have the visuals look very compelling to real life and possible have some music or notes associated as each ball is hit upon.


Coding assignment – week #3 – the random rainbow

My inspiration was also from my last assignment. I mentioned how I really wanted to implement something in the future for that code to have the bee be attracted to something but in this example, I wanted it to repel strongly this time. I wanted the repel force to be really strong in this case and still have the flow look natural – I hope to include these concepts in my final project.

Here are some images from me playing around with the number of movers and the multiplier force.

In this image, I made the movers towards the South East.
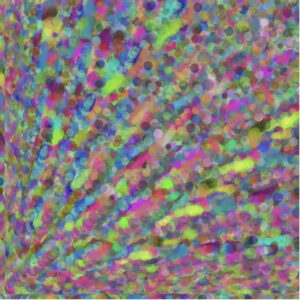
In this image, I made it go up to the North East but because all areas of the canvas are covered, it looks more natural but the repelent force from the mouse coordinates is not visible enough.
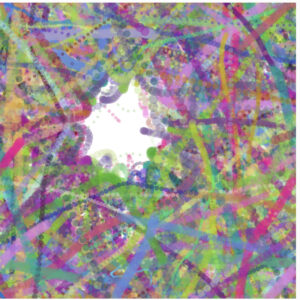
In this image, I made the repel force stronger and we can visibly see that in this image.

I was proud of the following code because these parts of code are what made the randomness yes repel force visible. It took me a while to understand why the repel force was not that visible so when I figured out why, it made a lot more sense.

if (dMouse < 100) {
        let force = p5.Vector.sub(mover.position, mouseAttractor);
        force.normalize();
        force.div(dMouse);
        force.mult(120);       //repel force multiplier
        repulsion.add(force);
      }

I also wanted to learn more about time management within p5.js so I made the screen stop after 8 seconds resulting in a still image that looks completely natural.

// time calculation
  let elapsedTime = millis() - startTime;

  // check 15 secs
  if (elapsedTime < 8000) ...

How can I improve

I want to apply it to a real life situation such as a solar system or the movements of electrons in atoms. I also want the movers to come back naturally instead of having to wrap around the screen.

Final code

<

https://editor.p5js.org/kk4827/sketches/DOZfEQyaP