Concept
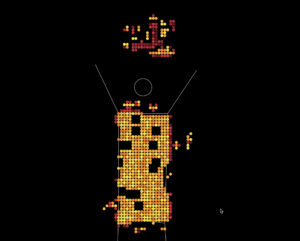
My project serves as a metaphor for the ever-changing nature of human identity and the many facets that constitute an individual. Inspired by the dynamic principles of cellular automata, the project visualizes a grid of cells that continuously transition between phases of life and dormancy, mirroring the fluidity of human existence. Each cell represents a different element of one’s personality, similar to the various roles, hobbies, and experiences that define a person at a certain point in time. The periodic interplay of dying and born cells encapsulates the core of personal development and adaptability over time.
Video Demonstration
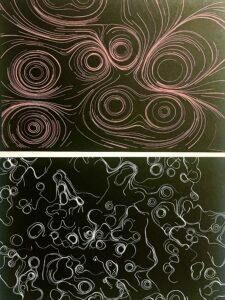
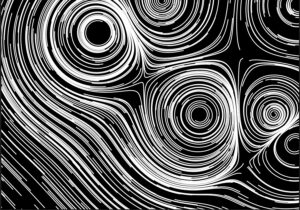
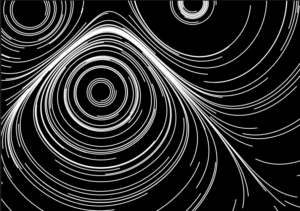
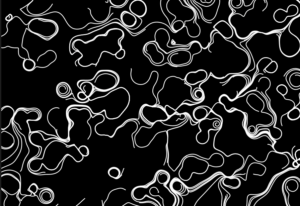
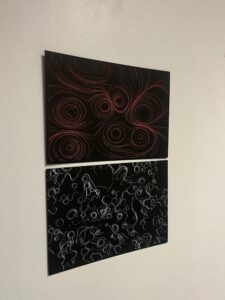
Images
Interaction Design
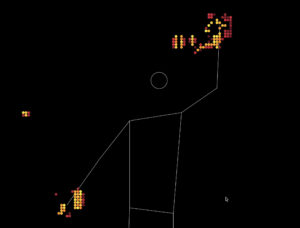
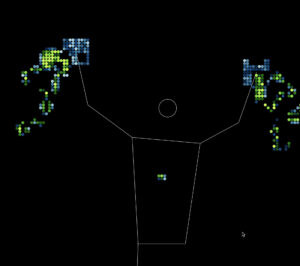
I crafted the interaction design to be both intuitive and playful, encouraging whole-body engagement. A key goal was to instill an element of discoverability and surprise within the user experience. For instance, the skeleton dynamically lights up when wrists are drawn near, while the color palette transforms as the wrists move apart. This intentional design seeks to not only captivate users but also symbolize a broader narrative—the idea that individuals possess the inherent power to shape and sculpt their own personalities, paralleling the dynamic changes observed in the visual representation. More about the interaction design was discovered during the user testing, described below.
User Testing
User Testing was a crucial stage in the development of my project. Observing and hearing people’s expectations and frustrations while using my project helped to see the goals of my project more clearly.
For instance, at first I was thinking not to include a human skeleton figure mimicking the participant, and I was considering the option of a black and white video display. Participants were more fond of the video as it allowed them to get visual feedback of their pose and how their actions are perceived by the camera. Since video display was a little too distracting for the eye, but visual feedback of participant’s pose was desired, my solution was including an abstract skeleton figure by taking advantage of the ml5.js library.
An additional valuable observation emerged in relation to event design. Initially, I had one event set the event trigger to activate cells within the skeleton when wrists came close. While contemplating potential actions for triggering another event, a participant proposed that an intuitive approachwould be activating the second event when hands were stretched apart. Taking this insightful suggestion into account, I subsequently integrated the color change mechanism to occur when the distance between wrists was wide.
Here is a video of the final user testing:
Code Design
The code utilizes of the p5.js and ml5.js libraries to create a cellular automata simulation that reacts to a user’s body movements filmed via a webcam. The ml5 PoseNet model gathers skeletal data from the video feed of the user and identifies major body parts. The activation of cells in a grid is influenced by the positions of the wrists. The grid symbolizes a cellular automata, in which cells evolve according to predefined rules. The user’s wrist movements activate and deactivate cells, resulting in complicated patterns. The project entails real-time translation, scaling, and updating of the cellular automata state, resulting in an interactive and visually pleasant experience that combines cellular automata, body movement, and visual aesthetics.
One of the key parts regarding code was correctly calculating the indices of the cells that need to be activated based on the video ratio. I decided that a 9×9 grid gave the best visual result, here is my code for the activation of cells on the left wrist:
let leftWristGridX = floor(
      ((pose.leftWrist.x / video.width) * videoWidth) / w
    );
    let leftWristGridY = floor(
      ((pose.leftWrist.y / video.height) * videoHeight) / w
    );

    // Activate cells in a 9x9 grid around the left wrist
    for (let i = -4; i <= 4; i++) {
      for (let j = -4; j <= 4; j++) {
        let xIndex = leftWristGridX + i;
        let yIndex = leftWristGridY + j;

        // Check if the indices are within bounds
        if (xIndex >= 0 && xIndex < columns && yIndex >= 0 && yIndex < rows) {
          // Set the state of the cell to 1 (activated)
          board[xIndex][yIndex].state = 1;
        }
      }
    }
Another key part was the events. Here is the code for the color switch event:
// Creating an event to change colors
    let wristsOpen =
      dist(leftWristGridX, leftWristGridY, rightWristGridX, rightWristGridY) >
        60 &&
      dist(leftWristGridX, leftWristGridY, rightWristGridX, rightWristGridY) <
        80;

    if (wristsOpen) {
      // Activate the event for all existing cells
      for (let i = 0; i < columns; i++) {
        for (let j = 0; j < rows; j++) {
          board[i][j].event = true; // responsible for coloir change in Cell class
        }
      }
    } else {
      // Deactivate the event for all existing cells
      for (let i = 0; i < columns; i++) {
        for (let j = 0; j < rows; j++) {
          board[i][j].event = false;
        }
      }
    }
Nevertheless, probably the biggest challenge was the accurate full-screen display. I utilized additional functions to handle that, which required to re-initialize the board once the dimensions of the screen changed.
Another important function was deactivateEdgeCells() functions. For some reason (probably because of a different number of neighbors), the edge cells would not deactivate as the rest of the cells once a wrist crossed them. Therefore, I used an additional function to handle the issue that loops through the edge cells and sets their state to 0 if they were activated:
function deactivateEdgeCells() {
  for (let i = 0; i < columns; i++) {
    for (let j = 0; j < rows; j++) {
      // Check if the cell is at the edge and active
      if (
        (i === 0 || i === columns - 1 || j === 0 || j === rows - 1) &&
        board[i][j].state === 1
      ) {
        board[i][j].state = 0; // Deactivate the edge cell
      }
    }
  }
}
Sketch
Future Improvements
Here is a list of possible further implementations:
- Music Integration: The addition of music could enhance the overall experience, encouraging more movement and adding a playful dimension to the interaction.
- Dance: Exploring the combination of the sketch with a live dance performance could result in a unique and captivating synergy of visual and kinesthetic arts.
- Multi-User Collaboration: Sketch is currently supporting interaction for one person. Expanding the sketch to accommodate multiple users simultaneously would amplify the playfulness and enrich the collaborative aspect of the experience.
- Additional Events: one event that I would have loved to explore further was the change in CA rules that generated a beautiful pattern expanding through the whole canvas. I believe it would make the sketch more dynamic.
- Events on more advanced poses: Involving the legs or the head movements could make the project more intricate and add to the discoverability and surprise aspects.
Resources
A key element was the use of the ml5.js library, for the implementation of which I was relying on Daniel Shiffman’s tutorials.
The CA rules were a happy accident which I discovered when I was experimenting in my CA weekly assignment.

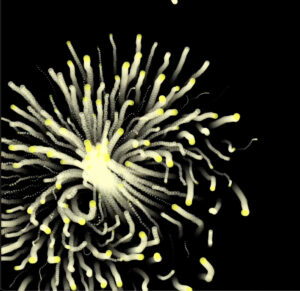


 challenging part was dealing with the SVG files, as for some reason particles would extend outside the canvas in the exported SVG file, which did not show up in the P5.js sketch. This became complicated as there were no borders and the Pen Plotter would catch the edge of the paper and thus it took a couple of tries to plot the sketch right. I used the version of my sketch that only had the white lines to export the SVG files. That version of code also had an altered Particle class that saved the previous position and would draw a line between previous and current positions rather than an ellipse at a current position. (I removed the SVG code from the sketch so that the code runs faster, but apart from that and the canvas size, nothing else was altered).