IM Showcase + Updated Final

Project Used in the IM Showcase 

Updated Official Final 

Link to Sketch

As seen above, I had to use a slightly modified code for the IM showcase, where I modified the placement of the trees, the size of the birds, and the speed of the birds. Some of the modifications were due to poor planning on my end, and the modification of the speed was to compensate for my code running much slower on the iMacs. I needed to modify the other elements because I forgot to make them dynamic to the window width and window height of the screen, so I needed to modify them so they would visually translate on the big iMacs correctly. This is something I will keep in mind next time I code.

For the updates on my final code (shown and linked above), I was able to make the birds interact with the tree by stopping on the tree when the slider was at it’s lowest point (0.5) and the tree is still, and flying off the tree when the slider is adjusted past its lowest point, as the “wind” picks up and the tree moves, making the birds “fly away”. I used many if statements and Boolean values to achieve this effect. I also created two fractal trees and overlapped them to make the tree look more full; this way, the birds looked more convincing when they “landed” on the tree. Lastly, I made slight adjustments to the bird’s flocking algorithm. I wanted to have slight cohesion among the birds so that when new birds are introduced, all of the birds naturally gravitate towards a flock and form a “V” formation.

User Testing and Interactions

Link to User Testing Video

The user testing was very informative both times I did it. The first time, my project was in its very early stages, and I received feedback that my project was too simple and needed more interaction. From there, I added more ways for the user to interact. When I watched users navigate my project at the IM showcase, I realized that one interactive element that I added was not clearly defined, but the users were able to figure it out eventually. This element was the trigger that makes the birds “fly away” from the tree. The users were quick to notice the condition for the birds to land on the tree, but much slower to figure out how the birds leave the tree. Some users tried clicking the screen or the tree, and some users wondered out loud what the slider is representing. To make this more clear, I’m considering adding text that says “wind” above the slider. All the other elements were navigated easily, and I was told the project looked aesthetic and peaceful, emulating the experience of bird watching.

Reflections

I am proud of the work I did, as well as being able to incorporate so many of the new things I learned from class. With more time, I would add more elements to the sketch, such as more trees, other types of birds, and different weather conditions. I would also add nature sounds, and an end button for the user to stop the simulation. I greatly enjoyed this class and its teachings!

Final Project

Concept and Artistic Vision

For my final assignment, I knew I wanted to incorporate many of the concepts we learned in class. I decided to use Perlin noise for the background to create realistic moving clouds, and use a class to create birds and control their movement using flocking methods such as alignment and cohesion. Additionally, I used fractals to create a tree.
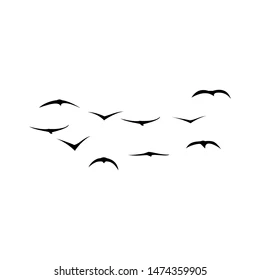
To create the birds, I was greatly inspired by the image above. I used quadraticVertex to create a simple, but effective, silhouette. From here, I created a changing sky to make the sketch more dynamic and interactive. For the tree, I changed the radians value to make it more asymmetrical and realistic. Next, I applied a wind force to the birds, sky, and tree. When the user moves the slider towards the right, the clouds move faster, the birds flap more and fly slower, showing that they are struggling against the wind. Additionally, the tree sways slightly. there is a gradual change in all three elements when the slider is moved to the left, and when it is all the way left, the tree is completely still, the clouds move slowly, and the birds “soar” through the air. Finally, I figured out a way to make the birds interact with the tree. When the birds flying into the tree they “land” and “sit” on the tree. I added a “Birds” button for the user to introduce new birds into the environment.

Here is the inspiration, taken from a previous sketch I did for this class, for the background.

Embedded Sketches

Draft 1

Draft 2

Final Result 

User Testing

I asked a friend to test the second draft I linked in this post, and they found it to be a bit simple. When they were testing, they thought the birds would interact with the tree. From their feedback, I implemented the interaction with the tree. Other than that, I was told the buttons and the slider were very straightforward. However, since making the final version, I think the slider may be less accessible because the user has to click to generate more birds and also use the slider to modify the birds. I think a fix for this could be making a key-bind for the bird generation.

C0ding Translation and Logic

class Bird {
  constructor(x, y, birdSize, birdSpeed) {
    this.x = x;
    this.y = y;
    this.birdSize = birdSize;
    this.baseSpeed = birdSpeed;
    this.flapAngle = 0;
    this.flapSpeed = random(0.16, 0.18);
    this.stopped = false;
    this.flockingRadius = 100; // Radius within which birds influence each other
    this.wingOffset = random(0, TWO_PI); // Add an offset to stagger the wing flap
  }

  update(windFactor) {
    if (!this.stopped) {
      this.x -= this.baseSpeed / windFactor; // Birds move left
      if (this.x <= 100) {
        this.stopped = true; // Stop the bird when it reaches the tree
        // Add a small random offset to the x position to make birds stop at varied locations
        this.x = 100 + random(0, 70);
      }
      this.flapAngle += this.flapSpeed * windFactor;

      // Apply subtle flocking behavior if there are multiple birds
      if (birds.length > 1) {
        let cohesionForce = createVector(0, 0);
        let count = 0;

        for (let otherBird of birds) {
          if (otherBird !== this) {
            let d = dist(this.x, this.y, otherBird.x, otherBird.y);
            if (d < this.flockingRadius) {
              cohesionForce.add(createVector(otherBird.x - this.x, otherBird.y - this.y));
              count++;
            }
          }
        }

        if (count > 0) {
          cohesionForce.div(count); // Average position of nearby birds
          cohesionForce.setMag(0.3); // Increase the magnitude for more noticeable movement
          this.x += cohesionForce.x;
          this.y += cohesionForce.y;
        }
      }
    }
  }

  show() {
    push();
    translate(this.x, this.y);
    scale(this.birdSize);
    fill(0, 0, 0, 220);
    if (this.stopped) {
      this.drawSittingBird();
    } else {
      this.drawFlyingBird(sin(this.flapAngle + this.wingOffset));
    }
    pop();
  }

  drawFlyingBird(curveFactor) {
    let wingY = map(curveFactor, -1, 1, 0, -35);
    let wingCurve = map(curveFactor, -1, 1, -25, -50);

    // Left wing
    beginShape();
    vertex(0, 0);
    quadraticVertex(-25, -10, -35, wingY);
    quadraticVertex(-25, wingCurve, 0, 0);
    endShape(CLOSE);

    // Right wing
    beginShape();
    vertex(0, 0);
    quadraticVertex(40, -15, 70, wingY);
    quadraticVertex(40, wingCurve, 0, 0);
    endShape(CLOSE);
  }

  drawSittingBird() {
    // Only draw the right wing in the sitting position
    let wingY = 35; // Downward position (mirroring the wings up)
    let wingCurve = 50; // Gentle downward curve (mirroring wings up)

    // Right wing
    beginShape();
    vertex(0, 0);
    quadraticVertex(40, 15, 70, wingY);
    quadraticVertex(40, wingCurve, 0, 0);
    endShape(CLOSE);
  }
}

The Bird class initializes the bird’s properties, such as its position, size , and base movement speed . The bird’s wings are animated through the flapAngle, which starts at 0, and flapSpeed, which is randomly set between 0.16 and 0.18, simulating the rate of wing flapping. The flockingRadius defines how close other birds need to be for the bird to be influenced by their positions, and wingOffset staggers the wing flapping of different birds, creating a more natural look in a group of birds. The update method updates the birds position as it moves depending on the windFactor, which is calculated through the slider. I added cohesionForce so if the birds are in a certain radius of one another, the birds begin to group. In the show method, I used quadratic Bezier curves, giving the wings a smooth, realistic shape. For when the birds reach the tree, only their right wing is rendered to create a sitting position.

Challenges

I struggled with handling all the different elements of my code, and with certain elements clashing/interfering with each other. This meant I had to debug very slowly with the console log. The biggest challenge was creating the birds and their movements, as I wanted them to look as realistic as possible.

Future Improvements 

In the future, I would have perfected parts of the code more. The birds just stop when they reach the tree, so when the tree is moving, the birds do not move with it. I wasn’t sure how to approach troubleshooting this, but I think I would have to do much more complicated boundary definitions for the tree. Additionally, I tried to create a “stop watching” button to stop the simulation and go back to the start screen, but this was interfering with different elements of my code, so I deleted it. I also tried really hard for one of the buttons, such as the “day” or “night” button to cause the birds in the tree to resume flying. Nothing I tried worked. I feel like as the simulation goes on, the birds are too clustered on the tree. Another improvement I would make is add music or nature sounds to the background.

Final Project Draft 2

Updates

I added a start button to the sketch to better organize it. I also added a tree, using fractals, and I intend to have the birds interact with the tree.

Embedded Sketch

Final Project Draft 1

Concept

For my final project, I want to use various techniques we learned in class to create different natural elements.

I was inspired by this image of bird silhouettes and tried to mimic it on p5.js. So far, I created a flock of birds. From here, I want to experiment with different behavioural changes and natural elements (such as win) affects the flock. For example, I may try to implement a button called “wind”, and when pressed, the flock will act as though imposed by a strong gust of wind and disband. Another idea I have is using attractors and having the first bird in the flock be the attractor.

Additionally, I want the sketch to look scenic. I plan to use fractals to create trees, and Perlin noise to create the sky and other background elements. The user interaction will be through the different buttons on the screen that change the behaviour of the birds and other elements (such as the clouds and the trees).

Base Sketch 

Sketch – Week 11

Concept

For this week, I was inspired by Conway’s Game of Life. I used the same rules as the Game of Life’s cellular automaton; the rules are as follows:

  • Alive cells with 2 or 3 neighbours stay alive
  • Dead cells with exactly 3 neighbours become alive
  • All other cells become dead

When I applied these rules to my sketch, I found it made an intricate design. I added to the generative effect by adding transparency to both the background and the hues of each cell. I handled the colours of the cell through the HSB colour model, which set the colour mode by determining the base colour, vividness, and brightness. All together, this makes the colour of the cells subtlety change, and have a glowing effect. When “c” is pressed on the keyboard, the cells change from having a colour changing effect to a rainbow effect

Code Snippet

class Cell {
  constructor(state, x, y, w) {
    this.state = this.previous = state; // Current and previous states
    this.x = x; // X-coordinate
    this.y = y; // Y-coordinate
    this.w = w; // Size (width and height)
    this.hue1 = random(300, 360); // Random hue for color scheme 1
    this.hue2 = random(360); // Random hue for color scheme 2
    this.alpha = 100; // Initial transparency
  }

Embedded Sketch

Reflections

I am very proud of this week’s sketch. One thing I need to trouble shoot is the first hue (hue1) being different than what I set it to. I intended it to only range in pink/red/purple tones, but right now it’s ranging in every colour. I also would add instruction on pressing “c” for the colour change.

Sketch – Week 10

Concept

For this week’s assignment, I want to use the Air Friction code from matter.js. In the code, there are three shares that move down at different rates, simulating how different air friction affects different objects. From here, I wanted to create beach ball objects in different sizes, with the biggest beach ball falling at the slowest rate due to it’s larger surface area creating increased air friction, and with the same logic, the smallest ball falling the fastest.

Link to the matter.js code: https://brm.io/matter-js/demo/#airFriction

Code Snippet

function spawnBeachBalls() {
  let ballSizes = [20, 30, 40];
  let airFrictions = [0.001, 0.02, 0.05];

  for (let i = 0; i < ballSizes.length; i++) {
    let ball = Bodies.circle(random(50, width - 50), -30, ballSizes[i], { frictionAir: airFrictions[i] });
    beachBalls.push(ball);
    Composite.add(engine.world, ball);
  }

Embedded Sketch

Reflections

Visually, I like how my code turned out. However, I wanted the beach balls to interact with the person (the mouse) differently. When the person touches the beach ball, the beach ball should float upwards with the same velocity it is moving downwards. I tried to reverse the velocity in the code, but it did not work. As I am working with matter.js, I will have to spend more time figuring out how to get the beach balls to behave the way I want.

Sketch – Week 9

Concept

For this week’s assignment, I was inspired by Ryoichi Kurokawa’s “syn_mod.n” artwork. I liked how fluid the artwork looked, and the intricacy of the webs. I intended to create similar visual shapes and manipulate them through separation and alignment.

Code Snippet 

class Boid {
  constructor(x, y) {
    this.position = createVector(x, y);
    this.velocity = p5.Vector.random2D(); 
    this.acceleration = createVector(0, 0);

    // Define maximum speed and steering force for the boid
    this.maxSpeed = 3;
    this.maxForce = 0.05;

    // Set initial weights for flocking behaviors
    this.setBehaviorWeights(20, 1, 1);
  }

  run(boids) {
    // Control boid's behavior, movement, and visual display
    this.flock(boids);      
    this.update();         
    this.wrapAround();     
    this.showConnections(boids); // Draw connecting lines between boids
  }

  setBehaviorWeights(sepWeight, aliWeight, cohWeight) {
    // Set weights for separation, alignment, and cohesion behaviors
    this.sepWeight = sepWeight;
    this.aliWeight = aliWeight;
    this.cohWeight = cohWeight;
  }

  flock(boids) {
    // Calculate the three main flocking behaviors
    let sep = this.separate(boids).mult(this.sepWeight); // Separation: avoid crowding
    let ali = this.align(boids).mult(this.aliWeight);    // Alignment: steer towards average heading
    let coh = this.cohere(boids).mult(this.cohWeight);   // Cohesion: move towards group center

    // Apply the combined steering forces to the boid
    this.applyForce(sep.add(ali).add(coh));
  }

Embedded Sketch 

Reflections 

I enjoyed learning the flocking behaviours. To improve my code, I would add interaction to it. I wanted to add a mousePressed interaction but I was struggling to get the visual effect I wanted. I also wanted the web to look more organic, and I would change the code using perlin noise to achieve this effect.

Sketch – Week 8

Concept

For this week’s assignment, I wanted to investigate the code for the wandering behaviour that we covered in class. I found it interesting how the direction of wander isn’t completely random, rather guided in one direction for a bit and then another. When I thought of what in nature wanders, I thought of tadpoles. I wanted to create a realistic tadpole, with its realism enhanced by the wandering behaviour. Working of the code from class, I tweaked some of the numbers and added edges, so that the tadpole can’t escape the bounds of the canvas.

Code Snippet

edges() {
  let pushed = false;

  // Check each boundary, reverse direction, and add a force toward the center if needed
  if (this.pos.x > width - this.r) {
    this.pos.x = width - this.r;
    this.vel.x *= -1;
    pushed = true;
  } else if (this.pos.x < this.r) {
    this.pos.x = this.r;
    this.vel.x *= -1;
    pushed = true;
  }

  if (this.pos.y > height - this.r) {
    this.pos.y = height - this.r;
    this.vel.y *= -1;
    pushed = true;
  } else if (this.pos.y < this.r) {
    this.pos.y = this.r;
    this.vel.y *= -1;
    pushed = true;
  }

  // If a boundary was hit, apply a slight push toward the canvas center
  if (pushed) {
    let center = createVector(width / 2, height / 2);
    let directionToCenter = p5.Vector.sub(center, this.pos);
    directionToCenter.setMag(0.5); // Set the magnitude of the push
    this.applyForce(directionToCenter);
  }
}

Embedded Sketch

Reflections

I like the visual effect of my code and I enjoyed learning more about how to modify the wandering behaviour. I struggled the most with creating the boundary for the canvas, and making sure the tadpole didn’t get stuck and keep bouncing on the boundary. With more time, I would incorporate more into the code, such as mousePressed(), to make the project more interactive and experiment more with wander.

Midterm Project – Spring Rain

Embedded Sketch and Link


https://editor.p5js.org/ss14740/sketches/HiD0F6V9R

Exported Images 

Concept and Artistic Vision

At first, I was inspired by the concept of identity and was attempting to create fingerprint patterns. However, I couldn’t get the shape to look the way I wanted to. Here is my sketch.

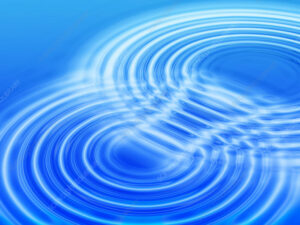
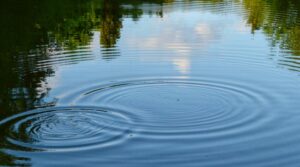
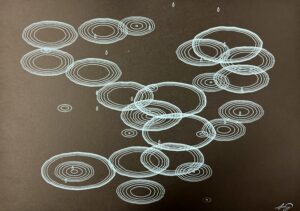
Although I am proud of the work I put into the fingerprints, but they did not have the organic shape I wanted, and I couldn’t figure out how to generative movement while still making the sketch feel natural and organic. In brainstorming other ideas, I revisited my other sketches for this class. Many of my sketches were of natural elements. I think it’s interesting to use computation to create more fluid, nature-related objects. So, I re-imagined my midterm to show rain falling on a lake, and the creation of the ripples to be the main artistic element of my sketch. Here are some of the images I was inspired by.

Luckily, I was able to draw from my previous draft in creating the new sketch, as both shared the same logic in creating the circular shapes and in modifying these shapes with Perlin noise.

Coding Translation and Logic 

I planned the sketch by first modifying my fingerprint sketch to create the ripples. I created a class for the ripples and a class for the raindrops, as these were my main two elements

class Raindrop {
  constructor(x, y) {
    this.pos = createVector(x, y); // Initial position
    this.size = 15; // Size of the raindrop
    this.speed = random(initialRaindropSpeedRange[0], initialRaindropSpeedRange[1]); // Random speed
    this.acceleration = 1.2; // Acceleration (gravity)
    this.targetY = random(height / 6, height); // Random point at which raindrop will stop
  }

  update() {
    this.speed += this.acceleration; // Increase speed due to acceleration (gravity)
    this.pos.y += this.speed; // Move the raindrop down by updating its y-coordinate

    // If mouse is pressed, make the raindrop fall faster
    if (mouseIsPressed) {
      this.speed = random(10, 15);
    } else {
      this.speed = constrain(this.speed, initialRaindropSpeedRange[0], initialRaindropSpeedRange[1]);
    }
  }

  display() {
    fill(201, 243, 255, 100); // Light blue, semi-transparent fill
    stroke(255); // White stroke
    strokeWeight(0.2); // Thin stroke weight

    // Draw a bezier curve to represent the raindrop's shape
    beginShape();
    vertex(this.pos.x, this.pos.y);
    bezierVertex(this.pos.x - this.size / 2, this.pos.y + this.size, this.pos.x + this.size / 2, this.pos.y + this.size, this.pos.x, this.pos.y);
    endShape(CLOSE);
  }

  hitsBottom() {
    return this.pos.y >= this.targetY; // Checks if the raindrop has reached the target Y position
  }
}

In the Raindrop class, I initialized all the elements to the raindrop. I made the speed random and added acceleration as each raindrop falls so it creates a more natural effect. When the mouse is pressed, the raindrops fall faster, creating a rainstorm-like effect. The shape of the raindrops are created with bezierVertex so that they look fluid. If the raindrop returns true that it hit the ‘ground’, then a ripple is created.

class Ripple {
  constructor(x, y) {
    this.pos = createVector(x, y);
    this.size = 0;
    this.alpha = 230; // Initial transparency
    this.growthRate = 2; // How fast the ripple grows
    this.fadeRate = 4; // How fast the ripple fades
    this.layers = 6; // Number of ripple layers
    this.wideningFactor = 1.1; // Factor to widen the ripple's oval shape
  }

  update() {
    // Increase ripple size
    this.size += this.growthRate;
    // Decrease transparency so ripple fades out
    this.alpha -= this.fadeRate;
  }

  display() {
    noFill();
    stroke(201, 243, 255, this.alpha);
    strokeWeight(2);

    // Draw multiple layers of ripples
    for (let i = 0; i < this.layers; i++) {
      let layerSize = this.size - i * 10;
      let widening = pow(this.wideningFactor, i); // Widen each subsequent ripple
      if (layerSize > 0) {
        this.drawOvalRipple(layerSize * 2 * widening, layerSize * widening); // Draw each ripple layer
      }
    }
  }

  // Draw ripples with distortion using Perlin noise
  drawOvalRipple(ovalWidth, ovalHeight) {
    beginShape();
    for (let angle = 0; angle < TWO_PI; angle += 0.1) {
      let xoff = cos(angle) * 5; // X offset for Perlin noise
      let yoff = sin(angle) * 5; // Y offset for Perlin noise

      // Apply Perlin noise to distort the ripple shape
      let distortion = map(noise(xoff + this.size * noiseScale, yoff + this.size * noiseScale), 0, 1, 0.95, 1.05);
      
      // Calculate the X and Y coordinates for the ripple based on the oval's size and the distortion
      let x = this.pos.x + (ovalWidth / 2 * cos(angle)) * distortion;
      let y = this.pos.y + (ovalHeight / 2 * sin(angle)) * distortion;

      vertex(x, y); // Add vertex to the shape
    }
    endShape(CLOSE);
  }

  // Check if the ripple is fully faded
  isDone() {
    return this.alpha <= 0;
  }
}

In the Ripple class, I initialized all the elements to the ripple. I updated the ripple’s size and level of opacity. I drew multiple layers of ripples, with each growing larger. Each ripple has Perlin noise applied to it to distort the shape and make it look more organic. If the ripple is fully faded, it is removed from the simulation. In the draw function, I used ‘splice’ to remove each ripple and raindrop from their respective arrays.

Challenges

I wanted to make the background more interesting and fluid. Instead of just having a one colour background, I want to make a gradient background of two colours. Although this is usually a simple process that I have worked with in the past, I found it hard to implement into my code as my code worked with objects that changed and moved. This meant I needed to find a way to the gradient to be drawn as the background without affecting the raindrop or ripple objects (both objects have transparency to them and thus are visually effected) To do this, I drew the gradient on PGraphics (gradientBG) rather than directly onto the canvas. This way, the gradient is stored and I don’t need to redraw it every frame. In the draw function the gradient is applied using “image(gradientBG, 0, 0)”.

Pen Plotting

I did not have to change my sketch for the pen plotting. The process was enjoyable and informative, as it was my first time using a pen plotter. One improvement that I think could have been made is drawing different layers, and using a light colour for some of the individual ripples, as in the code the ripples become lighter in colour as they fade out. Here is my pen plot and the video of the process.

Future Improvements

To improve this project, I would add rainfall sounds and music in the back to create a calming ambiance. I would create other objects to add to the ambiance, such as lily pads or lake animals. I would also create a boundary for each ripple, and modify the ripples when they collide with each other, such as increasing the Perlin noise. I was attempting to do this, but kept running into errors/having glitches.

Sketch – Week 5

Concept 

For my midterm, I wanted to work with the concept of identity. Using techniques we learned in class, I want to create intricate, morphing shapes. Identities are defined in numerous ways, such as fingerprints, phenotypes, and personality. I want to create shapes that morph and change when mouse is pressed.

So far, I have made a pattern on p5.js. It changes when mouse is pressed, but I haven’t made the transition seamless yet. I think the hardest part of my project will be creating the shapes for the different identities that I have in mind, and well as successfully making the transitions.

Sketch in Progress