Xiaozao Assignment #9

Project title: Dark Side of the Moon

https://editor.p5js.org/Xiaozao/sketches/eqtX3a2Cv

This week’s assignment is inspired by the surface of the moon. It is covered with craters large and small, and the sand is being blown among the surface.

I wanted to create a more dynamic movement of the boids, that’s why I applied a sine value to the separate, align, and cohere functions and made the distance limitation change over time.

flock(boids) {
    time_off += 0.01;
    let sin_value = sin(time_off);
    let separate_control = map(sin_value, -1, 1, 1, 50);
    let align_control = map(sin_value, -1, 1, 30, 0);
    let cohere_control = map(sin_value, -1, 1, 50, 500);
    
    let sep = this.separate(boids, separate_control); // Separation
    let ali = this.align(boids, align_control); // Alignment
    let coh = this.cohere(boids, cohere_control); // Cohesion

To create the craters on the moon’s surface, I placed several “obstacles” around the canvas, and made the boids near the obstacles flee from them. I adjusted the parameters to make some of the boids go across the obstacles while the others bounce back. This creates a more natural feeling.

// main
for (let i = 0; i < obstacles.length; i ++) {
    let obstacle = obstacles[i];
    // circle(obstacle.x, obstacle.y, 10);
    flock.avoid(obstacle);
  }


// flock class
avoid(obstacle) {
    for (let boid of this.boids) {
      let d = p5.Vector.dist(boid.position, obstacle);
      if (d > 0 && d < 100) {
        boid.avoid(obstacle); 
      }
    }
  }


// boid class
avoid(obstacle) {
    let desired = p5.Vector.sub(this.position, obstacle);
    desired.setMag(this.maxspeed);
    
    
    // Steering = Desired minus velocity
    let steer = p5.Vector.sub(desired, this.velocity);
    steer.mult(0.02); // Limit to maximum steering force
  this.applyForce(steer);
    
  }

Finally, I set the blend mode to “add” which makes the patterns more aesthetic.

Possible improvements:

Maybe I can draw lines between each pair of boids that are close enough to each other, or try other kinds of blend modes.

Week 9 Assignment – Flocking Behavior

Concept:

I was listening to one of my favorite songs called “Good-bye days” by a Japanese singer called YUI when I got the inspiration for this sketch. This song always reminded me of a summer night when the sun is starting to set and people chilling in an endless green field while trying to catch fireflies, and I thought this might be a fun idea to try to recreate using flocking.

Process/Highlight:

I used all three of the main skills that we learned in class by referring to our class slides as well as the Coding Train’s tutorial, which are:

  1. Alignment — I used this to align boids to their neighboring boids, so that they will all match velocities and also the direction of their movement instead of dispersing.
  2. Cohesion — this feature was what held the boids somewhat loosely together in a group so that they won’t be too spread out and will still somehow manage to stay close to each other.
  3. Separation — this was necessary because while I still wanted my boids to stay close to each other and move in a cohesive way towards a certain direction, I also didn’t want them to clash into each other because in real life, fireflies keep their distances from each other. This added a sort of “repelling” behavior amongst the boids.

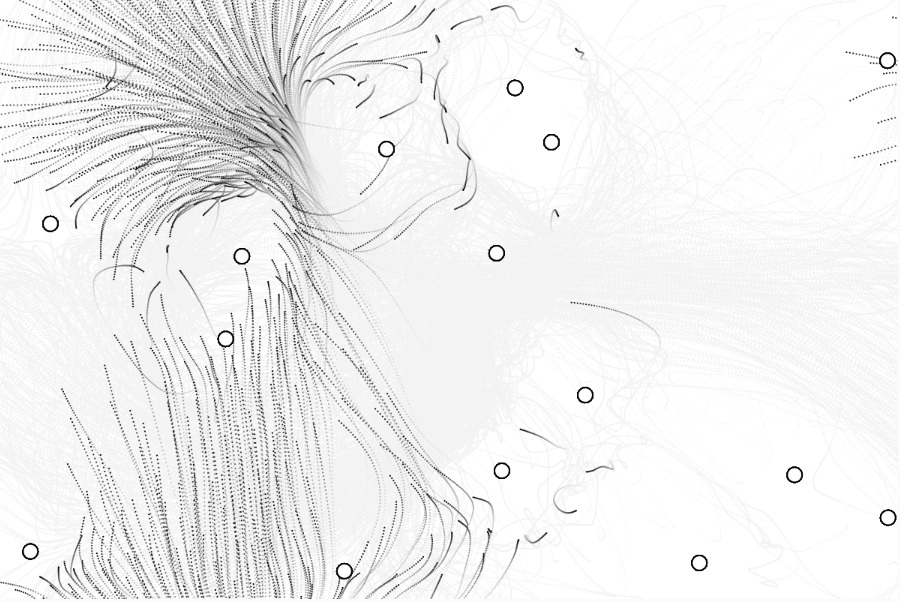
A special feature I added was limiting the space of where the boids can travel to, which I did so by adding the “constrainToArea” function within the “Boid” class. At first, I made the area so that boids will only be able to travel in the upper half of the canvas, but this seemed too rectangular because the boid particles were very specifically outlining the rectangular area, so I modified it so that they’ll be active in 2/3 of the canvas area.

constrainToArea(x1, y1, x2, y2) {
  this.position.x = constrain(this.position.x, x1, x2);
  this.position.y = constrain(this.position.y, y1, y2);
}
...

Then I adjusted the following code elements in class Boid so that the boids were behaving in a way I wanted them to:

class Boid {
  constructor() {
    this.position = createVector(random(width), random(height));
    this.velocity = p5.Vector.random2D();
    this.velocity.setMag(random(2, 4));
    this.acceleration = createVector();
    this.maxForce = 0.6;
    this.maxSpeed = 10;
    this.repulsionRange = 70; // Distance to start separation
    this.alignmentRange = 90; // Distance for alignment
    this.cohesionStrength = 0.8; // Strength of cohesion behavior
    this.separationStrength = 1; // Strength of separation behavior
  }

For example, adjusting the this.maxForce and this.maxSpeed by increasing their values helped the particles to show their repulsion from the mouse cursor much clearer, as well as increasing the this.repulsionRange and this.alignementRange.

I was happy with the above values because they showed my desired picture when I simulated it, so I decided to stick with them. Then I simply added a background image that I got from this link to show that blue sky, summer night background, and changed the color of my boids to yellow so that they will be like fireflies.
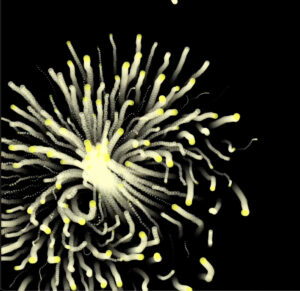
Final Sketch:

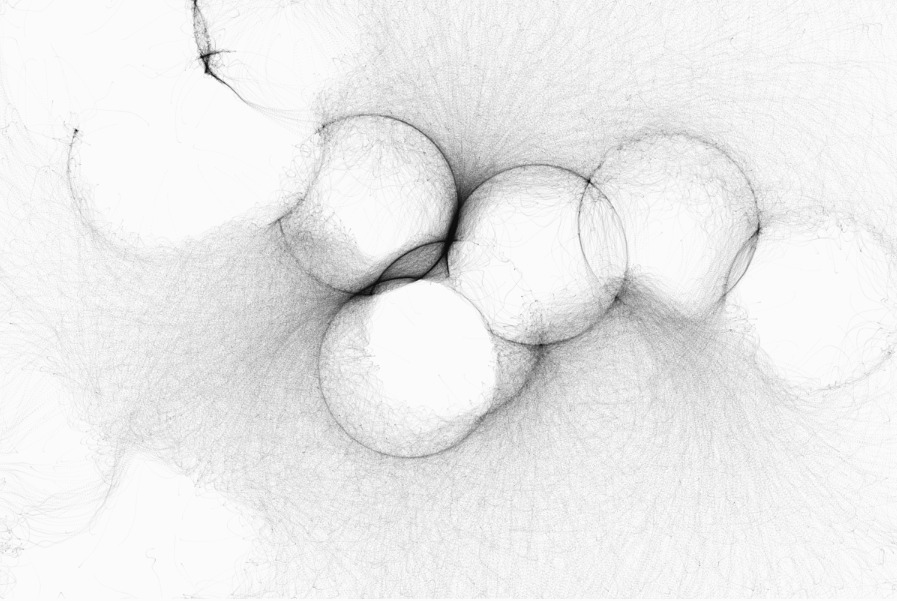
And here’s the final sketch. Click on the sketch screen once and then feel free to move your mouse cursor around to observe how the boids repel from it!

Reflection: 

Next time I’d like to add a character to the mouse cursor so that it’ll be like a character chasing down the fireflies but the fireflies just flying away from her, just like a scene that could be in a Ghibli movie!

Additional Change:

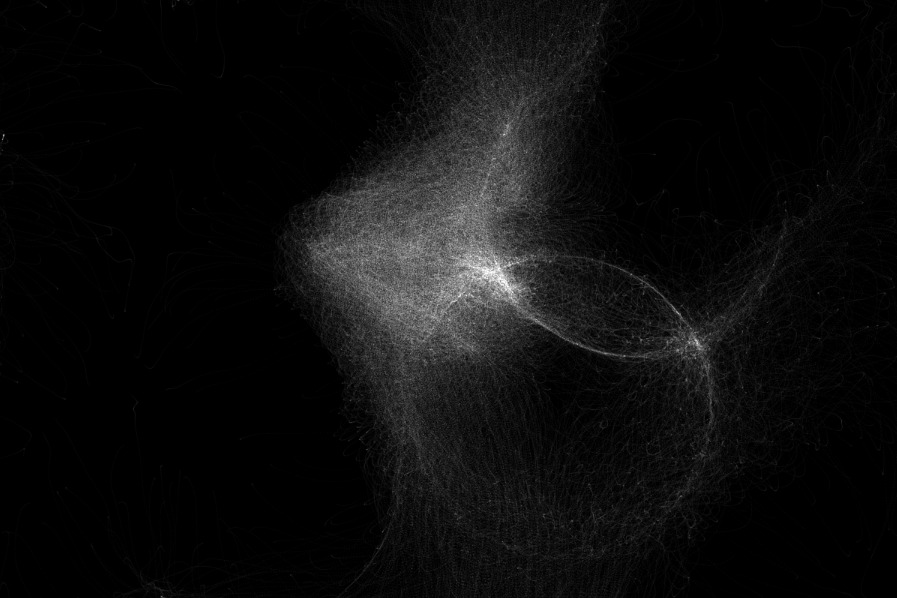
After hearing professor’s feedback in class about adding trails to show the “glow” of the fireflies better, I added the below snippet of code:

class Boid {
...
    this.history = []; // New property to store position history

...

    // Store the current position in history
    this.history.push(createVector(this.position.x, this.position.y));

    // Limit the history length to control the trail length
    if (this.history.length > 50) {
      this.history.shift();
    }

...

  show() {
    noStroke();
    fill(255, 255, 102, 24); // Adjust the alpha value for transparency

    for (let pos of this.history) {
      ellipse(pos.x, pos.y, 6, 6); // Adjust the size of the ellipse
    }
  }

...

}

I adjusted the size and the transparency of the ellipse trail as I saw fit, and I’m really pleased with the outcome!

Coding Assignment – Week #9

Concept

For this week’s assignment, I did not specifically want to simulate a real-life system but rather focus on creating an interesting visual piece. As instructed, I started from the dynamic flocking system as the base. I experimented with different values of distances for separation, cohesion, and alignment. I wanted to create something more chaotic than the base: I wanted the cohesion to be stronger, and alignment to be less prominent. In general, I wanted the flocking to be more aggressive if that makes sense. Although I experimented without a goal to mimic a particular system, the end result sort of reminds me of fireworks at certain stages. Here is the sketch:

Implementation:

The most altered part from the base was the show function. In the show() method, the visual effect is achieved by manipulating the ‘pulsation’ variable, creating a dynamic look for each element. The dynamic size of the circles is based on a sine function. Additionally, I added a fading trail effect by initializing a trail list for every boid, and storing the last 15 previous positions as vectors and constantly updating them (I created an extended class so that I would not mess up the base too much, and at some point the boids reminded me of fireflies so that’s where the naming comes from).

show() {
    // manipulating pulsation and alpha value
    let glow_size = 1 + 10 * sin(this.pulsation / 1.2);
    let alpha_value = map(glow_size, 1, 10, 100, 200);

    // drawing the trail
    for (let i = 0; i < this.trail.length; i++) {
      let trail_alpha = map(i, 0, this.trail.length, 0, 180); // Fade out the trail
      fill(255, 255, 200, trail_alpha);
      ellipse(this.trail[i].x, this.trail[i].y, glow_size, glow_size);
    }

    // Draw the current firefly
    noStroke();
    fill(255, 255, 25, alpha_value);
    ellipse(this.position.x, this.position.y, glow_size, glow_size);

    // Update pulsation for the next frame
    this.pulsation += this.pulsation_speed;

    // updating the trail array
    this.trail.push(createVector(this.position.x, this.position.y));
    if (this.trail.length > 15) {
      this.trail.shift(); // keeping the trail length limited
    }
  }
Improvements

If I were to follow the fireworks theme as my inspiration, I think switches in colors would be an interesting field of exploration. Perhaps it would even be possible to make the flocking orientated more toward the vertical path and create a firing-like effect . Additionally, I believe another direction could be taking inspiration from specific microorganisms and creating a more defined system that stabilizes a little more over time.

what I meant when I said that I was reminded of fireworks:

Assignment 9: Immune cells vs. Disease cells

Inspiration:

The inspiration for this project stems from the incredible complexity and beauty of the human immune system. Observing the intricate dance of immune cells as they work together to defend the body against invading pathogens is a mesmerizing spectacle. Additionally, the field of artificial life and emergent behavior in simulations served as a key inspiration. The idea of applying the principles of flocking behavior to simulate the coordinated movement of immune cells creates a visually compelling representation of their protective role in the body.

Concept:

The main concept behind this project is to use the principles of flocking behavior to simulate the movement and interactions of immune cells in response to the presence of disease cells. The flocking algorithm is based on three key principles:

  1. Separation: Each cell maintains a certain distance from its neighbors, representing the need for immune cells to avoid crowding, ensuring efficient patrolling of the body.
  2. Cohesion: Cells are drawn towards the average position of their neighbors, promoting a sense of unity and collaboration in the immune response.
  3. Alignment: Cells align their direction with that of their neighbors, mimicking the cooperative movement of immune cells as they collectively respond to threats.

The disease cells, represented as potential pathogens, introduce a dynamic element to the simulation. They act as attractors, causing nearby immune cells to adjust their movement to intercept and neutralize the threat.

Demo:

Reflection:

This project serves as a visual exploration of the principles of flocking behavior applied to the context of the immune system. Through this simulation, the intricate choreography of immune cells is brought to life, providing a dynamic and engaging representation of their vital role in protecting the body.

The use of P5.js as the framework for this project allowed for a seamless integration of visual elements and behavioral logic. Experimentation with parameters such as separation distance, cohesion strength, and alignment influence provides an opportunity to fine-tune the simulation and observe the emergent patterns that arise.

Additionally, the project opens up possibilities for educational purposes, as it provides a tangible and interactive way for individuals to grasp the collective behavior of immune cells. By observing the simulation, users can gain a deeper understanding of the coordinated efforts employed by the immune system to maintain health and combat potential threats.

In conclusion, this project not only explores the artistic potential of simulating immune cell behavior but also serves as a tool for educational outreach, bridging the gap between art and science to enhance our appreciation for the complexity of the human body’s defense mechanisms.

Coding Assignment Week #9 – Confetti System

Inspiration:

When I think of confetti I think of celebrations, and birthdays and the joy and laughter that comes with it! Interestingly, the way confetti moves in air when it is first released from its container is a very sudden and quick movement, which if you arent paying close attention to, you could easily miss. Which is why I began to think of how I can better visualize such confetti, and what would make this movement slow down, so we can visualize this motion and its changes more clearly.

Bright colourful party sparkling party confetti background canvas prints for the wall • canvas prints explode, entertainment, luxury | myloview.com

Concept:

The concept of this program mainly revolves around a simulation of a flock of confetti, which are simple agents that move similarly to confetti with a more limited speed. The main classes are Flock and Boid(confetti). The Flock class manages a list of confetti instances and has methods to simulate the collective behavior of the collection and add more confetti. 

The behavior of the flocking  revolves arounf three main principles/rules: separation, alignment, and cohesion. The flock method in the Boid class calculates forces for each of these principles based on the positions and velocities of neighboring boids/confetti particles. These forces are then applied to the boid’s acceleration, influencing its movement. The update method handles the adding of acceleration to update the boid’s position and velocity. The display method visually represents each boid as a neon-colored dot with a line trace, creating a dynamic simulation.

Bird Brain Maps: Study Explores the Neuroecology of Flocking in Birds | College of Biological Sciences

How to create a boids system (flocking algorithm) - Scripting Support - Developer Forum | Roblox

Program With Comments:
Reflection:

As I concluded this program I began to wonder how I could further advance this program visually, which is when I thought of the methods we learnt about last week and how they can really push this program. For instance, a more dramatic separation steering behavior is particularly suitable for this program, because it serves to keep the confetti from clumping together.

Local separation, alignment and cohesion on the motion of flocking... |  Download Scientific Diagram


Week #8 Assignment: Flower Heliotropism by Abdelrahman Mallasi

Concept

The concept of this project revolves around simulating heliotropism, which is the ability of certain plants to grow and orient themselves in response to the direction of sunlight. , which regulates cell elongation and growth.
This phenomenon is primarily controlled by the plant hormone auxin, which stimulates growth. When light shines on one side of a plant, it triggers the redistribution of auxin, causing the plant to grow more on the shaded side. This growth pattern leads to the plant bending or turning towards the light source. Sunflowers are an example of plants that exhibit heliotropism, as they follow the sun’s path across the sky during the day.

In this project, I aim to represent heliotropism through an interactive simulation. I created a visual display where a flowers grow towards the sun, which is controlled by the mouse cursor. As the flowers reach a specific height, it blooms, showcasing the transition from growth to flowering. Each flower has its own maximum height and growth rate that are randomly generated each time the sketch. The project exhibits properties of autonomous objects by illustrating seeking behavior, with the sun acting as the target and the plants as the vehicle.

Highlight of Code

grow() {
   if (this.height < this.maxHeightForBlossom) {
     this.height += this.growthRate;
   }
 }

 blossom() {
   if (this.height >= this.maxHeightForBlossom) {
     fill(255, 0, 255);
     stroke(255, 0, 255);
     ellipse(this.root.x, this.root.y - this.height - 20, 20, 20);
   }
 }

These two methods are under the Plant class

grow() represents the process of the plant growing over time. The if statement checks whether the current height of the plant (this.height) is less than the maximum height for blossoming (this.maxHeightForBlossom). If so, the plant’s height is increased by the growth rate (this.height += this.growthRate). This means that the plant grows a certain amount with each frame of the animation until it reaches the maximum height.

blossom() is responsible for checking whether the plant has reached the height for blossoming and displaying a flower if it has. Similar to before, it checks whether this.height is greater than or equal to this.maxHeightForBlossom. If so, it draws a flower at the root adjusted for its height (this.root.y – this.height – 20). The 20 is used to position the flower slightly above the top of the plant stem.

Embedded sketch

Link to Sketch

Future Ideas

  • The initial idea for this project was to depict realistic plant growth with the root firmly anchored at the bottom of the canvas, creating a curving stem as the plant grows towards the sun. However, this proved to be a challenge to implement

Coding Assignment – Week #8

Concept:

For this week’s assignment, I wanted to focus on developing a concept and creating a fun adaptation for the new simulations of movements that we learned in class. As I was revising the different behaviors of agents that we simulated in code, the pursue and evade example caught my eye the most, mostly because of the endless opportunities it opens to tell simple stories. The three agents are like characters in a tale: the main character pursues something while trying to evade the bad guy. Many many possibilities to give this plot a more detailed and interesting scenario.

The scenario that I decided to with is the one of a Fisherman. The movement of the initial agent reminded me of that of a canoe in the sea. Here was my first experiment (I see a boat lost in the sea at night, but that might as well just be me haha!):

Nevertheless, I wanted to come back to the pursue and evade story plot. I created three characters: a fisherman in a canoe, a fish, and a shark. The story: the fisherman pursues the fish while avoiding the shark. Here is my final sketch:

 Implementation:

For the sketch to come together, I decided to roughly sketch my own PNGs. Here they are:

Regarding the code, the difficult part was to correctly display the images, mostly the rotation so that the canoe moves with its tip facing the fish, and so does the fish and the shark. Here is how I modified the show() function for the Vehicle class:

show() {
  let angle = this.velocity.heading();
  fill(127);
  stroke(0);
  push();
  translate(this.position.x, this.position.y);
  rotate(angle + HALF_PI); 
  image(boat, -50, -50, 100, 100); 
  pop();
}

For further improvements, it would be interesting to make the shark to also pursue the fish. Additionally, for more details, I would add an event that occurs when either the fisherman or the shark gets to the fish first and a collision occurs. Now, when the images intersect, one just flows on top of the other, which is not the most smooth visual result.

Xiaozao Assignment #8 – Ant’s Death Spiral

Ant’s Death Spiral

Code: https://editor.p5js.org/Xiaozao/sketches/e8ilAu4Ew

This week’s assignment is inspired by a well-known phenomenon in animals’ behavior called “the ant’s death spiral”. When ants are navigating in a dense forest, each ant always maintains a close distance from the ant ahead of them by following the pheromone trail it leaves. However, when the leading ant loses its track and accidentally runs into one of the other ants, it will form a closed circle among the ants, and make them fall into the endless loop of circular motion that leads to their death.

Therefore, I wanted to create this autonomous agent system where at first, the leading ant is wandering to find food, and every ant in the line follows the ant in front of it. But when the leading ant runs into another ant, it will stop wandering and instead decide to follow that ant’s track. Therefore, all the ants are following the ant ahead of them, meaning that no one is leading, or you can say everyone is leading. They will continue this pattern forever.

Code-wise, I mainly used two classes: the normal ant (vehicle) and the leading ant (target). All the ants can seek but the leading ant has the extra ability to wander.

I used this loop to make any ant follow the ant ahead of it:

let second_ant = ants[num-1];
  let second_seek = second_ant.seek(leading_ant);
  second_ant.applyForce(second_seek);
  second_ant.update();
  second_ant.show();
  
  for (let i = 0; i < num-1; i++) {
    let front_ant = ants[i+1];
    let back_ant = ants[i];
    let steering = back_ant.seek(front_ant);
    back_ant.applyForce(steering);
    back_ant.update();
    back_ant.show();
  }
  
  leading_ant.update();
  leading_ant.show();

And I check if the leading ant is running into any of the ants, and change its behavior if so:

if (trapped == false) {
    let steering_wander = leading_ant.wander();
    leading_ant.applyForce(steering_wander);
      
    // checking leading ant collision
    for (let i = 0; i < num; i ++) {
      let ant = ants[i];
      if (leading_ant.position.dist(ant.position) < 1) {
        let new_steering = leading_ant.seek(ant);
        leading_ant.applyForce(new_steering);
        followed_ant = ant;
        trapped = true;
        break;
      }
    }  
  } else {
    let steering = leading_ant.seek(followed_ant);
    leading_ant.applyForce(steering);
  }

What to improve:

In this sketch, I think that the ants are over-ordered. In reality, the ants are not in a perfect line and they are slightly affected by other ants and their surroundings. Maybe I can add other factors that can affect the ants’ movement in the future.


Coding Assignment #7 – Week 9

Concepts:

For this week’s assignment, I tried to implement a cloud of particles, each inspired by Craig Reynolds’s autonomous agents, that seek invisible and randomly generated vertices. I wanted to see how these agents work together, figure out the best path, and adapt to the changing environment. In terms of technicalities, I’m using a seek function and acceleration to drift toward the vertices one by one, and the HSB color mode for aesthetics.

Sketch:

Process:

View post on imgur.com

View post on imgur.com

View post on imgur.com

Code Walkthrough:

Vehicle Class:

The vehicle class represents the autonomous agents (cloud of particles), and has one movement function alongside the constructor. It uses position, velocity, acceleration, direction, and color properties.

Move():

The move() function combines the seeking force and other helper functions (finding the next vertex index, checking if the particle reaches the vertex, changing direction)

move() {
  // Go to the next vertex
  let target = this.vertices[this.idx];
  let distance = dist(this.position.x, this.position.y, target.x, target.y);
        
  if (distance < 45) {
    if ((this.direction==1 && this.idx==this.vertices.length-1) || (this.direction==-1 && this.idx==0)) {
    this.direction*= -1;
    }
    this.idx+=this.direction;
  }

  // Seek the next vertex
  if (distance >1) {
    let steer = new p5.Vector(target.x, target.y);
    steer.sub(this.position);
    steer.normalize();
    steer.mult(0.045);
    this.acceleration.add(steer);
  }
        
  // Add movement
  this.velocity.mult(0.99);
  this.velocity.add(this.acceleration);
  this.velocity.limit(6);
  this.position.add(this.velocity);
  this.acceleration.mult(0);
}

Upon every mouseclick, 1000 new particles are generated and the vertices change as well.

Vertices:

To generate the vertices, I’m using a random function:

vertices=[];
for (let i = 0; i < 6; i++) {
      let x = map(i, 0, 6, width/4, width - width/4);
      let y = random(120, height - 120);
      vertices.push(new p5.Vector(x, y))
}

HSB Color Mode:

I’m using the Hue specifically and brightness to add an aesthetic look to the particles.

Next Steps:

Future steps would be to add other forces i.e. avoiding obstacles.

Week 8 – Buzzing

For my assignment this week, I wanted to recreate something that follows an attractor with high speeds and natural orbiting movement. I wanted this attractor to buzz around more than flow.  I thought of bees around honey or something similar.

class Attractor {
  constructor(x, y) {
    this.pos = createVector(x, y);
    this.mass = 50;
  }

  attract(star) {
    let force = p5.Vector.sub(this.pos, star.pos);
    let distance = force.mag();
    distance = constrain(distance, 100, 500);
    force.normalize();

    let strength = (1 * this.mass * star.mass) / (distance * distance);
    force.mult(strength);

    return force;
  }

  update() {
    this.pos.add(p5.Vector.random2D().mult(5));
  }

  display() {
    // noFill();
    noStroke();
    fill(237, 208, 92);
    ellipse(this.pos.x, this.pos.y, 20, 20);
  }
}

I want the attractor to move at certain distances and have a certain strength, so the update function is what controls the movement of the attractor so that it buzzes around. I set the multiplying as a number of 5 and it was the perfect value for the attractor to buzz around.

class Bee {
  constructor(x, y) {
    this.pos = createVector(x, y);
    this.vel = p5.Vector.random2D();
    this.acc = createVector();
    this.maxSpeed = 100;          //speed of the particles 
  }

For my bee class, the most important attribute in this class would be speed as it gives that high speed buzzing effect of the bees and makes the final code look much more realistic.

let choice = random();
    if (choice > 0 && choice < 1/3) {
      fill(255, 215, 0, alphaValue);
    } else if(choice > 1/3 && choice < 2/3){
      fill(255, alphaValue);
    }
    else{
    fill(0,alphaValue)}
    noStroke();
    ellipse(this.pos.x, this.pos.y, 5, 5);

This code gives an even chance of the colours I wanted to present on the canvas and the opacity is dependent on how far away the bees are from the attractor. The further away, the less opaque.

Next time

I think next time, I want to try an idea of the attractor moving in a natural curve like a shooting star collecting more stars on the way.