Coding Assignment – Week 8

Concept and Approach:

My approach for this assignment was quite simple, I thought of things I could create with the seek and flee dynamic involved between them. The first thing that came to mind was mice and cheese, which was completely inspired by the cartoon Tom and Jerry, and Jerry’s love for cheese. I read a bit around the topic and found that in fact mice’s love for food, and cheese in specific, is over exaggerated, they just tend to be attracted to foods that are high in carbohydrates in general. Hence, I decided to create a sketch that shows their attraction to cheese in a way that also demonstrates the idea that they are not extremely fond of it.

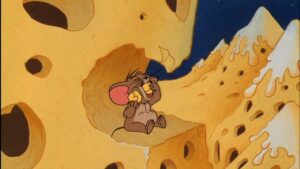
The method I followed was very similar to what we had done in class. I created a class of mice that have different functions including seeking and fleeing and I had an image of cheese be their target. In my Draw function I called a number of mice, all seeking the cheese. Once one of them had arrived to the cheese, it ‘eats’ it and all the other mice flee away rather than gathering around it and ‘eating’ it all together.

The way I separated their actions was through incorporating boolean values that are set as false in the beginning of the code. Once the distance between the position of the closest mouse and the cheese is less than 10, the boolean value changes to true, leading that specific mouse and the cheese to disappear. The other if function checks that this happened (one mouse arrived at the cheese and basically left the array of mice), and accordingly calls the flee function on all the other mice.

if (!targetReached) 
  {
    // First loop through all the mice array and call the Mouse class functions
    for (let i = 0; i < mice.length; i++) 
    {
      mice[i].seek(cheese);
      mice[i].update();
      mice[i].display();
      image(cheesePic, cheese.x, cheese.y, 20, 20);

      // Check if the mouse has reached the cheese by measuring distance between mouse and cheese
      if (mice[i].position.dist(cheese) < 10) 
      {
        // set the boolean to true
        targetReached = true;
        mice[i].arrived = true;
      }
    }
  } 
  //now for the other mice
  else 
  {
    // Loop through all the array. The mouse that reached the cheese would have disappeared by now
    for (let i = 0; i < mice.length; i++) 
    {
      // If there was a mouse that arrived
      if (!mice[i].arrived) 
      {
        // Then have all the other mice flee and call the other functions of the class
        mice[i].flee(cheese);
        mice[i].update();
        mice[i].display();
      }
    }
  }
}

Reflection and Ideas:

I think the only challenging part was coordinating the boolean values and knowing when to set them to true/ false and how to have everything follow based on them. But overall, this wasn’t that difficult, with a few trials and errors I was able to get the code to work in the way I needed.

An improvement that I tried to actually apply but was not successful in doing so, was having the mice be images rather than just triangles. My issue with that was being unable to rotate the images based on the velocity’s angle. In my attempt, they did rotate, however, they weren’t all pointed towards the cheese which made the sketch look unrealistic. Moving forward I’d like to learn if it possible to implement that, because I think images would definitely make the sketch more interesting.

Coding Assignment Week #8

CONCEPT

For this week’s sketch, I wanted to explore the different autonomous behaviours we have covered in class and how they interact and respond to each other. In other words, what if instead of studying each steering method separately, we create a system where every object has its own steering behaviour and we how it affects and influences other vehicles having a different behaviour. With this idea, I started to experiment!

PROCESS

    1. Multiple wandering objects:
    2. Then I decided to have smaller objects to either pursue, evade, or arrive at one of these big wandering (blue) objects.
    3. Currently, in the above sketch, each smaller target is currently pursuing or evading a fixed predefined wanderer. I wanted to try to randomize that based on whichever wanderer is closest. I modified the code to calculate the minimum distance and store it and use that to assign the target. I made a line between the wanderer and pursuer / evader for increased visibility.
      Here is the code for it:

      let steering = [];
      
      // to calculate and find min distance between current seeker 0 and all wanders
      let d = p5.Vector.dist(vehicle_seekers[0].position, vehicle_wanderers[0].position); // to store the min distance - initially start with first available dist
      let index = 0; // to store which wanderer is closest
      for (j = 1; j < N1; j++) {
        let d2 = p5.Vector.dist(vehicle_seekers[0].position, vehicle_wanderers[j].position);
        if (d2 < d) {
          d = d2;
        }
      }
      
      steering[0] = vehicle_seekers[0].pursue(vehicle_wanderers[index]);
      
      // making a line between them for more visibility
      push();
      stroke(2,255,2);
      line(vehicle_seekers[0].position.x, vehicle_seekers[0].position.y, vehicle_wanderers[index].position.x, vehicle_wanderers[index].position.y);
      pop();
    4. Some improvisation. Firstly, I added more wanderers for the system to be more dynamic. Secondly, the pursuer gets suck to the target once it seeks it (i.e. reaches it). So, I tried the opposite. Instead of pursuing the closest target, pursue the farthest. So, it keeps changing its direction and does not get stuck.

      The code for it changed as described below:

      let steering = [];
      
      // to calculate and find max distance between current seeker 0 and all wanders
      let d = p5.Vector.dist(vehicle_seekers[0].position, vehicle_wanderers[0].position); // to store the max distance - initially start with first available dist
      let index = 0; // to store which wanderer is closest
      for (j = 1; j < N1; j++) {
        let d2 = p5.Vector.dist(vehicle_seekers[0].position, vehicle_wanderers[j].position);
        if (d2 > d) {
          d = d2;
        }
      }
      
      steering[0] = vehicle_seekers[0].pursue(vehicle_wanderers[index]);
      
      // making a line between them for more visibility
      push();
      stroke(2,255,2);
      line(vehicle_seekers[0].position.x, vehicle_seekers[0].position.y, vehicle_wanderers[index].position.x, vehicle_wanderers[index].position.y);
      pop();
    5. Lastly, I created my own trailing path with these new set of rules for steering behaviour to create the below output!

Pretty Mishap?

So, while on my way to figuring out the code for trailing paths, I kind of ran into this happy accident. The trails clearly do not appear as they should but it was interesting enough to document. I believe this is because I am not correctly popping from the list of paths and rotating indefinitely.

I then fixed the rotating problem but ran into something the professor warned us about – edge to edge lines!! (when the object wraps around, it draws a line across the page). I do like this effect too – seems like a women quilt / blanket.

It was easy to fix this as I did this modification for the pen plotter too in my midterm. Plotting dots was easy, but for plotting lines, I had to reset the line every time it made a huge jump so as to not have lines all across the page. This one was not exactly the same, but similar in terms of the concept.

FURTHER DEVELOPMENT

Currently my design is based on wanderers being the main targets. One way to improve this is by having different agents (objects) each having their own property of wandering, pursuing, evading etc., and calculating the minimum distance from each of those, not just the wanderers. This way, an evader could flee a pursuer closest to them, or a pursuer could seek a target farthest to them (not closest). That would be interesting to see.

Week 7 Assignment

Concept: 

I came across “The Snow Queen” fairy tale a few days ago when I was browsing through the books in my Kindle, and this randomly crossed my mind when I was brainstorming for this assignment. Using the arrival, wander, etc. codes that we learned in class, I thought it’d be fun to show the scene of Kay’s heart being pierced and frozen from the Snow Queen’s snowflake pieces.

Process/Highlight:

I used this image for the heart, and I basically used similar structure of wander and arrival from class except I had the diamonds (“vehicles”) continuously moving even after arriving at the heart (“target’). A particular highlight would be the “separation” function I used so that the diamonds won’t be colliding into each other, which took some time for me to figure out how to use.

Here’s the code snippet:

// separation
separate(vehicles) {
  let desiredSeparation = 25; // Adjust as needed
  let steer = createVector(0, 0);
  let count = 0;

  for (let other of vehicles) {
    let d = p5.Vector.dist(this.position, other.position);
    if (other !== this && d < desiredSeparation) {
      let diff = p5.Vector.sub(this.position, other.position);
      diff.normalize();
      diff.div(d); // Weight by distance
      steer.add(diff);
      count++;
    }
  }

  if (count > 0) {
    steer.div(count);
  }

  if (steer.mag() > 0) {
    steer.setMag(this.maxSpeed);
    steer.sub(this.velocity);
    steer.limit(this.maxForce);
  }
  return steer;
}

And here’s the final sketch:

Reflection:

For some reason I couldn’t move the diamonds to be drawn at the front of the heart image for this sketch despite trying to rearrange the order of them, so that’s something I’d like to figure out and improve on next time!

Week 8: Flock System

Inspiration:
This project aims to simulate a dynamic flocking system where agents (boids) exhibit cohesive, aligning, and separating behaviors within a visual environment. Inspired by nature and emergent patterns found in flocks of birds or schools of fish, this project integrates code with artistic composition to create an evolving narrative through visual and behavioral changes.

Description:
The project utilizes the p5.js library in JavaScript to implement a flocking simulation. Boids, represented as small circular shapes, demonstrate collective behavior influenced by separation, alignment, and cohesion. These behaviors are controlled by specific rules that affect how boids interact with their neighbors within a defined radius.

The code initializes a canvas and generates a flock consisting of individual boids. Each boid possesses properties such as position, velocity, and acceleration. Through the flock() function, boids respond to nearby neighbors within certain radii (separation, alignment, and cohesion) and adjust their behavior accordingly.

The separate(), align(), and cohere() functions within the Boid class determine how each boid interacts with others. Separation ensures that boids maintain a minimum distance from neighbors, alignment aims to match velocities with nearby boids, and cohesion encourages boids to move towards the average position of neighboring boids.

The update() function governs the boid’s movement, calculating its new position based on velocity and acceleration. The display() function visually represents each boid as a small white circle on the canvas.

The project also allows for potential narrative development or visual changes over time. For instance, altering the background or introducing new behaviors at specific frame counts could represent the evolving story or tension and release dynamics within the simulation.

// Flocking behaviors (separation, alignment, cohesion)
flock(others) {
let separationForce = this.separate(others);
let alignmentForce = this.align(others);
let cohesionForce = this.cohere(others);

separationForce.mult(1.5);
alignmentForce.mult(1.0);
cohesionForce.mult(1.0);

this.acceleration.add(separationForce);
this.acceleration.add(alignmentForce);
this.acceleration.add(cohesionForce);
}

Assignment Week #8 – Predator Prey Simulation

Predator-Prey simulation

For this assignment, I wanted to recreate an underwater chase scene. My goal was to show simulation through autonomous agents, like a single predatory shark chasing a school of fish. The fish reacts to the shark’s actions by fleeing. Each agent has its own set of rules and behaviors that it follows in their 2D ocean.

Implementation:

  • The Shark’s Path: To control the shark’s movement, I used a Perlin noise algorithm. This created a smooth, random path that mimics how unpredictable a real shark’s patrol through the water is.
  • Fish Fleeing:  In this state, their behavior changes dramatically. They prioritize moving away from the shark over any other actions they might be taking, such as wandering 
  • Boundary Constraints: I coded the fish to wrap around the edges of the canvas so they stay in the canvas
  • Shark Movement: Instead of being directly controlled, the shark follows a path made by perlin noise. I’ve tuned this function to keep the shark from moving randomly and give its hunt a bit of randomness. Also, the shark slows down when it gets closer to its target.

Sketch:

Code: 

The following is the function for sharks seeking their target which is calculated by Perlin noise.

class Shark {
  
  seek(target) {
    let desired = p5.Vector.sub(target, this.position);
    let distance = desired.mag();
    desired.normalize();
    if (distance < 100) {
      let m = map(distance, 0, 100, 0, this.maxSpeed);
      desired.mult(m); // Slow down as it gets closer to the target
    } else {
      desired.mult(this.maxSpeed);
    }
    let steer = p5.Vector.sub(desired, this.velocity);
    steer.limit(this.maxForce);
    this.applyForce(steer);
  }
  
}
  • The seek method in the Shark class steers the shark towards a target.
  • It calculates the direction to the target and if the shark is within 100 pixels, it slows down proportionally to the distance to avoid overshooting.
  • The map function adjusts the shark’s speed dynamically, allowing for a gradual stop as it reaches the target.
  • This prevents the shark from ‘spazzing’ or jittering when it gets close to where it wants to go.

The following is the function for fish fleeing the shark

class Fish {  
  flee(predator) {
    let desired = p5.Vector.sub(this.position, predator.position);
    let d = desired.mag();
    if (d < 100) { // If the shark is within 100 pixels
      desired.setMag(this.maxSpeed); // Set maximum speed
      let steer = p5.Vector.sub(desired, this.velocity);
      steer.limit(this.maxForce); // Limit the force to be applied
      this.applyForce(steer);
    }
  }
  
}
  • The flee function in the Fish class calculates the escape direction from the shark.
  • If the shark is within a certain range, the fish accelerates to its top speed away from the shark.
  • This quick response mimics a fish’s instinct to escape predators.

Challenges: 

  • Precision in Shark Movement: Improving the shark’s movement to stop it from “spazzing” as it gets to its target was a difficult job that required slowing the velocity as it got closer to the target.
  • Fish Behavior Realism: Making flocking behavior was hard to implement because you had to find a fine balance between random movement and organized group dynamics. After a shark chase, there were difficulties getting the fish to gather back into a proper formation. I think this aspect still needs some work to make it more realistic.

Future Improvements: 

  • User Interaction Features: I want to look into ways for users to connect more directly with the simulation, such as using different inputs to change the path of the shark or the fish.
  • Ecosystem Development: I like the idea of adding more species and environmental features, like currents or obstacles, to make the experience more interesting.
  • Develop Flocking Behavior: To make the fish’s reaction seem real, the flocking and evasion algorithms have to be tweaked to match how fish move naturally.

Assignment 8: Snickers and Mouths

Inspiration:

Inspired by the playful movements of animals in nature and classic video games, this project aims to bring a sense of whimsy and curiosity to the canvas. It draws from the idea of contrasting behaviors in a dynamic and visually engaging way.

Concept:

The project features a canvas where Snickers and Mouths, represented as animated elements, interact with distinct steering behaviors.

  • Snickers: These elements wander aimlessly around the canvas, moving in a random and carefree manner, much like the unpredictable paths of creatures in the natural world.
  • Mouths: Mouths, on the other hand, are purposeful seekers. They are drawn to the Snickers and move strategically to follow them, akin to the way predators seek their prey.

This simple concept focuses on the contrast between wandering and seeking behaviors, creating a visually captivating and contemplative experience for viewers.

Program


Code assignment – week 8 – Bug Spray

In this sketch, I created an interactive simulation where a bug spray chases a cockroach on the screen. The bug spray employs steering behaviors to follow the cockroach, and when the cockroach is within a close proximity, the bug spray visually simulates spraying.

Challenge

One challenge encountered was ensuring smooth steering behavior for the bug spray. Tweaking parameters such as maximum speed, maximum force, and the radius for arrival behavior required careful adjustment to achieve a natural-looking pursuit.

Code Snippet

push();
    translate(this.pos.x, this.pos.y);
    rotate(this.vel.heading());
    noStroke();
    fill(0, 200, 0); // Color for bug spray
    rect(-8, -25, 16, 50); // Bug spray shape
    fill('yellow'); // Color for bug spray nozzle
    ellipse(0, -25, 16, 16); // Bug spray nozzle
    pop();

As seen in the above code, I used push and pop to make it simpler in creating the shapes for the code. I also used the rotate function to make the orientation of the bug spray to correspond to to the cockroach position.

Future Improvements

  1. Particle System: Enhance the spraying effect by adding a particle system to visually represent the spray dispersing.
  2. Obstacle Avoidance: Implement obstacle avoidance behaviors to make the bug spray navigate around obstacles on the canvas.

Coding Assignment Week #8 – Fleeing Butterflies

Inspiration :

In nature, there are several organisms and species that naturally are attracted to certain scents or colors in other organisms such as plants and animals. And on the contrary, they also flee from certain things. In more scientific terms, this process is also called, escape response.  It is a mechanism by which animals avoid potential predation.

Birds of a feather flock together to confuse potential predators


Concept: 

This program works with a butterfly class, that we instantiate several of and add a fleeing method to it. The class has properties such as position, velocity, acceleration, maximum speed, maximum force, radius, and wing color. The class includes methods for updating the butterfly’s position based on its velocity and acceleration, applying external forces to the butterfly, making the butterfly flee from a specified target (the ellipse in position mouseX MouseY)  if it is within a certain distance, and displaying the butterfly on a canvas using a shape resembling butterfly wings. The butterfly’s appearance is determined by random colors and the shape of its wings is drawn using ellipses.

33 Butterflies aesthetic ideas | butterfly, aesthetic, beautiful butterflies

Program:


https://editor.p5js.org/ea2749/sketches/d3LJADOUE

Body Soup – Midterm Assignment

Concept / Idea:

For this assignment, I was inspired by the human body, which I think is one of nature’s greatest wonders. More specifically not by its physical ability, but by its visual potential. What I mean by its visual potential is the ability of the body to grab & maintain attention, visually communicate thought & emotion, and finally visually evoke feelings in others.

With the body there’s this dichotomy, on one side there is this element of commonality or basic core structure, a “skeleton, but on the other side, there’s nuance, subtleties, and little differences that produce individual uniqueness out of extreme diversity. This reminds me a lot of generative art & object-oriented programming & I really wanted to bring both together.

The human body has always been a popular subject in art throughout history, religious, official, and personal & I thought I’d extend that tradition by tackling it in this new medium I’m learning (p5.js)

Logic:

I started out looking at the skeleton of things, trying to come up with what the cookie cutter of a body or face would be like. I divided the body into two different categories, “the headless body” and “the face” because I think each of these has a unique separate visual quality that I wanted to tackle.

The headless body:


This sketch is running in WEBGL, and uses multiple planes placed in the same x & y coordinates but different z coordinates. Initially, the logic behind this was to have planes at different opacities and sizes overlayed / stacked to look like a body.

Scaling up:

Some code I want to highlight:

class Cluster {
  constructor(size,leader) {
    this.mouse = leader;
    this.pos = createVector();
    this.humansList = [new Human(this.mouse)];
    this.size = 10;
    this.type = random(5);
    if (this.type < 1) {
      for (let i = 0; i < this.size; i++) {
        this.humansList.push(new Human(this.humansList[i].handRight));
        this.humansList.push(new Human(this.humansList[i].footRight));
      }
    } else if (this.type < 2) {
      for (let i = 0; i < this.size; i++) {
        this.humansList.push(new Human(this.humansList[i].handRight));
      }
    } else if (this.type < 3) {
      for (let i = 0; i < this.size; i++) {
        this.humansList.push(new Human(this.humansList[i].handRight));
        this.humansList.push(new Human(this.humansList[i].footRight));
        this.humansList.push(new Human(this.humansList[i].hipLeft));
      }
    } else if (this.type < 4) {
      for (let i = 0; i < this.size; i++) {
        this.humansList.push(new Human(this.mouse));
      }
    } else if (this.type < 5) {
      for (let i = 0; i < this.size; i++) {
        if (i < this.size / 2) {
          this.humansList.push(new Human(this.humansList[i].handRight));
          this.humansList.push(new Human(this.humansList[i].handLeft));
        } else {
          this.humansList.push(new Human(this.humansList[i].waist));
          this.humansList.push(new Human(this.humansList[i].shoulderRight));
        }
      }
    }
  }

  render() {
    for (let i = 0; i < this.size; i++) {
      this.humansList[i].render();
    }
  }
}

This code changes how different skeletons are connected to each other based on a random number to create variations that add up and can be seen in a cluster’s shape/movement.

XY Plotter result:

https://drive.google.com/file/d/1gGS_PLDxK66WoZ4x9QCe_aWjSFaERHGQ/view

https://drive.google.com/file/d/14HSQoOd8wGrcDyLQdTE86XtFZQxG5-bO/view

The Face:

Some code I want to highlight:

class Eye {
  constructor() {
    this.pos = createVector(0, 0);
    this.eyeheight = 2 * random(0.6, 1.4);
    this.eyewidth = 10 * random(0.6, 1.2);
    this.r = this.eyeheight;
    this.eyetilt = createVector(random(-0.3, 0.4), random(-0.3, 0.4));
    this.eyeslope = random(1, 1.5);
  }
  render() {
    let multiplier = 10;
    push();
    translate(this.pos.x, this.pos.y);

    fill(255);
    beginShape();

    for (let i = 0; i <= 10; i++) {
      let w = map(i, 0, 10, PI, 0);
      let x = map(i, 0, 10, this.eyewidth / 2, -this.eyewidth / 2);
      let y = this.eyeheight * -sin(w);
      y -= this.eyeheight * sin(w * this.eyeslope) * this.eyetilt.x;

      vertex(x * multiplier, y * multiplier);
    }
    for (let i = 0; i <= 10; i++) {
      let w = map(i, 0, 10, 0, PI);
      let x = map(i, 0, 10, -this.eyewidth / 2, this.eyewidth / 2);
      let y = this.eyeheight * sin(w);
      y -= this.eyeheight * sin(w * this.eyeslope) * this.eyetilt.y;

      vertex(x * multiplier, y * multiplier);
    }

    for (let i = 0; i <= 1; i++) {
      let w = map(i, 0, 10, PI, 0);
      let x = map(i, 0, 10, this.eyewidth / 2, -this.eyewidth / 2);
      let y = this.eyeheight * -sin(w);
      y -= this.eyeheight * sin(w * this.eyeslope) * this.eyetilt.x;

      vertex(x * multiplier, y * multiplier);
    }

    endShape();
    fill(0);
    ellipse(0, 0, this.eyeheight * 15);
    pop();
  }
}

I used different sine waves with phases & amplitudes that change at random and added them together to get different shapes of eyelids.

Scaling up:


Putting them together:

https://youtu.be/Q_Og8rGYwWs

Xiaozao Midterm Project – Flowing Painting

Project Name: Starry Night: A Flowing Painting

Final Sketches:
Version 1 (Starry Night original): https://editor.p5js.org/Xiaozao/sketches/ywn4IB8US
Version 2 (Allow user modify):
Version 3 (Blinking effect):
Trail video:

A. Concept

I was attracted by this image when reading the article “Particle animation and rendering using data parallel computation” by Karl Sims:
This vortex field (or swirling pattern) reminds me of Starry Night by Vincent van Gogh. He created a strong sense of motion, energy, and flux through the use of brushwork and colors.
There are many other examples that the static 2D paintings are trying to convey a sense of movement. I think it would be great if I could enhance this message to the audience by animating these drawings. Therefore, I decided to create a “moving” version of Starry Night for my midterm project using the flow field and the particle system.

B. Implementation

Here are the questions to solve to achieve my goal of creating a flowing painting.

    1. Swirling movement of the particles
    2. Location of the center
    3. Aesthetics of the strokes

1. Swirling movement of the particles

Firstly, I need to know how to make the particles move in a circular pattern. The particles need to be placed in a flow field that they will be given the velocity according to their position in the field. However, there are different kinds of flow fields: Perlin noise flow fields, vortex flow fields, magnetic flow fields, and so on. I searched the Internet and found a simple way of creating this swirling effect.

Basically, you create a background image showing the distribution of the centers of vortices based on a 2D Perlin noise space. And then you calculate the “pressure differential” around every cell in the grid. That differential vector will point to the center of the vortex, creating an attraction effect to the particles. However, if you rotate every vector by 90 degrees, they will suddenly be turned to some force similar to the “tangential force”. This will magically turn the movement of the particles into a swirling pattern.

Generating a flow field with Perlin noise is a good starting point.

p.s. Here’s a good way of modifying the noise field to make it cleaner and less “noisy”. You can change the parameters in this function called noiseDetail(octave count, falloff).

I also make a 3D noise field that changes through time.

Here are some generative patterns I created from the swirling field:

Here’s my pen plotting:
Plotting video:
I also made this blinking effect. The explanation is in the image.

2. Location of the center

Then, we need to know the rotation center of the stars.

In the previous sketches, I used the Perlin noise field to determine the rotation centers. Every time, the resulting image is different because of the difference in random Perlin noise.

However, the Perlin noise is too random and you can’t really decide where your centers are. Therefore, I came up with the idea of allowing the users to paint on a buffer canvas and have control over their center locations.

The method is to use pixel manipulation.

I wrote a function called renderImg() that modifies an initially pure black buffer canvas. Whenever the users press their mouse, the pixels around the mouse position will gradually turn brighter according to their distance from the mouse position.

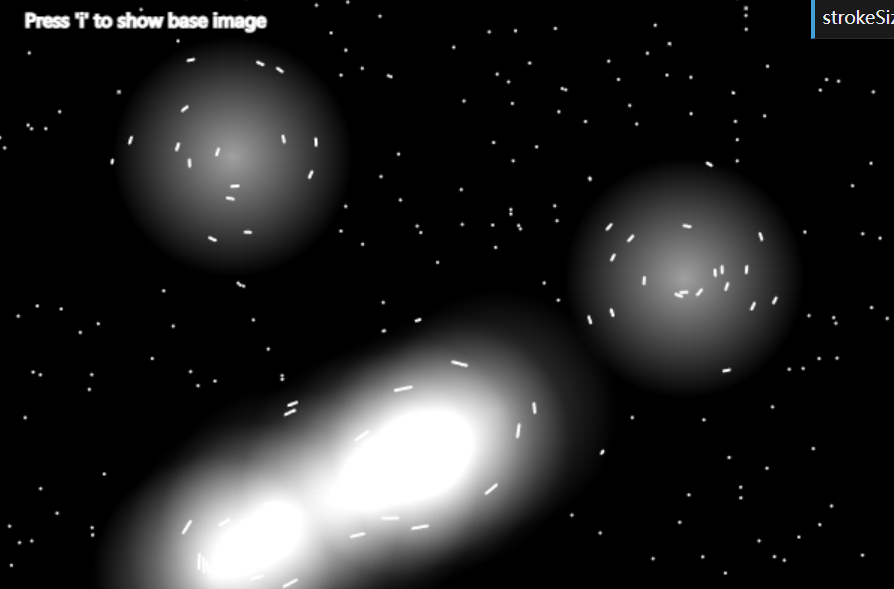
  (A clearer demonstration)

Then, the users will be able to draw their own “base image” in the field and affect the movement of the particles.

Do you want to have a try? ( press i to show your base image)

i

Some result:

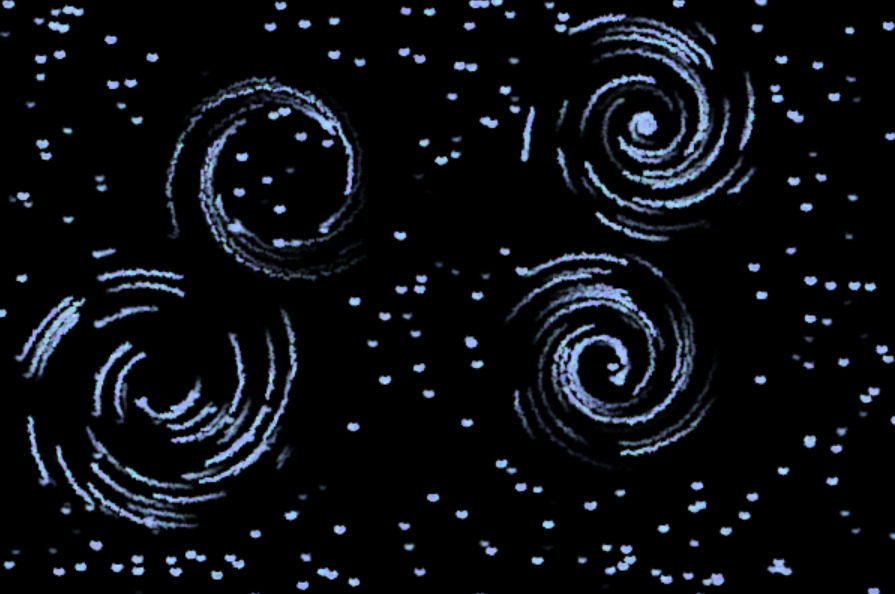
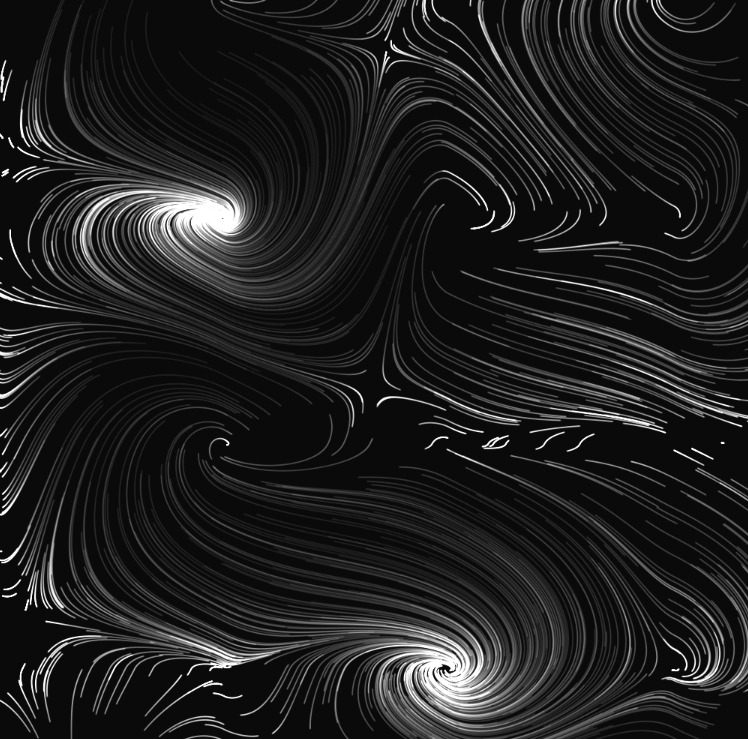
(Stroke-like effect)
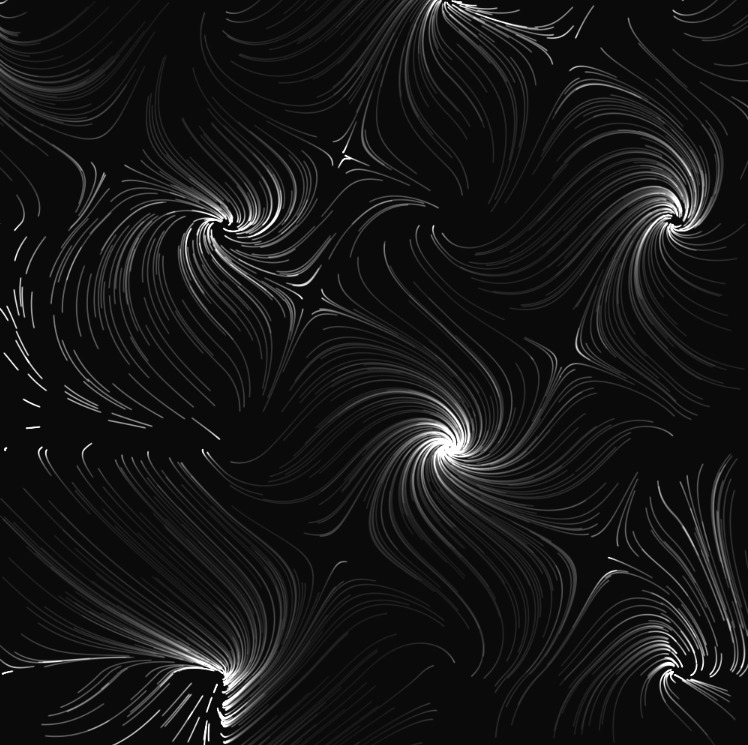
Lastly, apart from user modification, I also want to “animate” the original painting by Van Gogh. This requires us to take the original painting as the source image.

But how can the computer know the locations of rotation centers of the stars from the painting?

At first, I tried to detect the pixels that have a higher grey scale (brighter). But as you can see, there is only one star that is statistically much brighter than others. This method didn’t work well.

Then I noticed that all the stars are kind of yellow. Therefore, I thought of calculating the Euclidean distance of the RGB value of the pixel with the RGB value of a “standard yellow color”. After some tests, I found that this rule works the best (but still not perfect) anyways I tried…

abs(r-g)<=20;
r: 180 += 20;
g: 165 += 20;
b: 60 += 30;

And then I used the previous renderImg() function to render the base image based on the original painting. You can see that nearly half of the stars have been detected.

Finally, I combined the Perlin noise flow field with this swirling field. Adding some dynamics to the sketch. I also grabbed the original color from the painting and modified the color of the pixels.

Here is the final sketch:

C. Reflection

Program thinking that I gained from this project:
  • Combination of forces
    • I combined three kinds of force to affect the velocity (change of position) of my particles: Centripetal force, tangential force, and force due to Perlin noise). The combination adds a lot to the dynamic and aesthetic of the project.
  • View buffer canvas as a data source
    • A generative art must have a generative rule. And I think my “generative rule” is the base image placed on a buffer canvas that contains information in every single pixel and tells the particles which direction to go. At first, I placed 2D or 3D Perlin noise images on the buffer canvas, then I allowed the users to add their own stars to this canvas through pixel manipulation, and at last, I extracted information from the original Starry Night painting and used it as a data source.
  • Computer vision
    • Of course, I only scratched the surface of “computer vision”. But I believe that my attempt to identify the positions of the stars in the painting through different methods is kind of asking the computer to see and interpret the visual information that humans can easily capture. Through setting rules such as “find pixels with higher greyscale” or “find pixels with smaller RGB distance to the standard yellow”, the computer tries to better detect the positions of the stars with optimized logic.
Unsolved problem:

The biggest challenge I encountered in this project is the pixelDensity() and scaling down and up the image. Since the source image was too large, it needs to be scaled down. Plus I had some buffer canvases, and I often needed to check the index and location of certain pixels and modify them. I used a lot of pixelDensity() function, but it led to some weird results that I couldn’t understand. Therefore I had to change all the pixel densities to 1 to avoid those problems, but it made the resolution of my project less ideal.

Future Improvements:

I’m excited to make the project run in a 3D space where the particles rotate around a sphere. Also, due to the limited capacity of p5js running in a browser, I couldn’t add more particles to make a more appealing effect. So if possible, I will run it in Processing or other faster tools.