Week 11- Infrared

Concept:

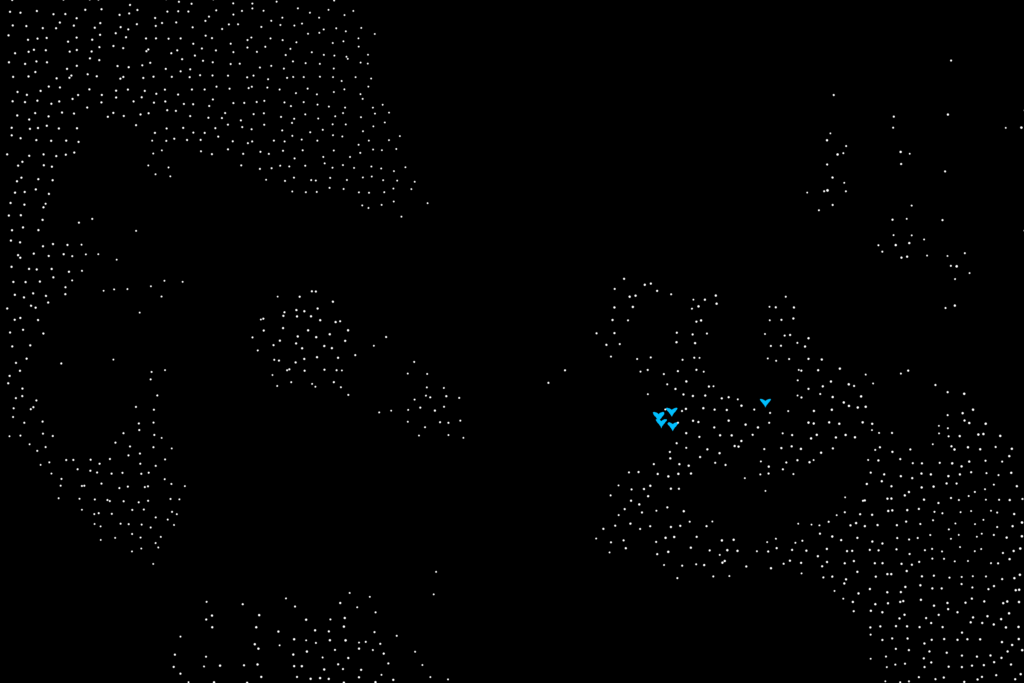
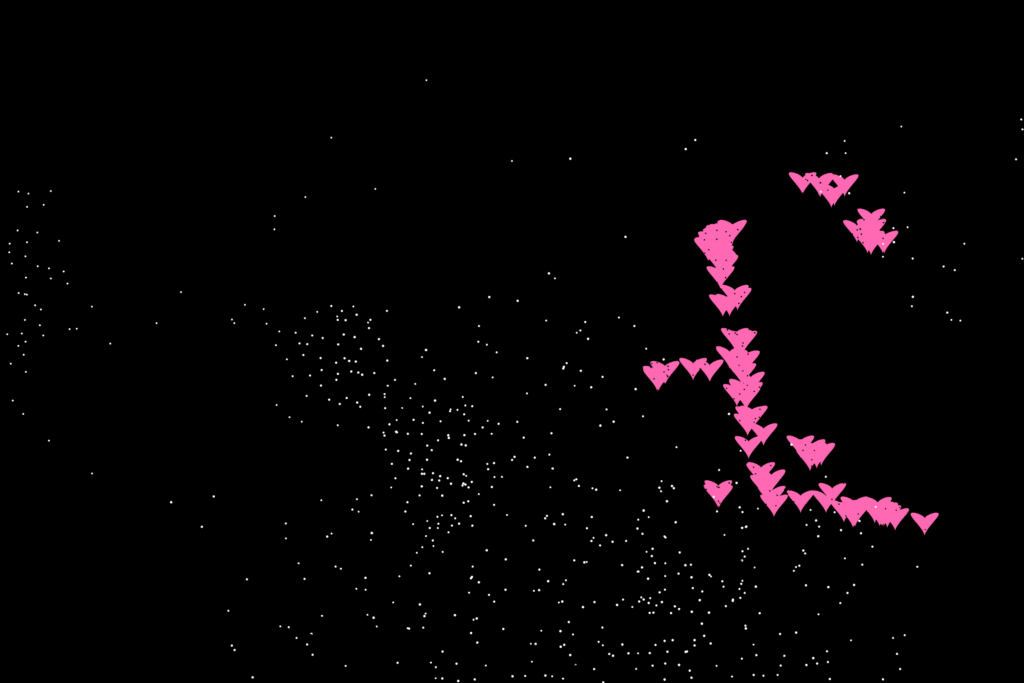
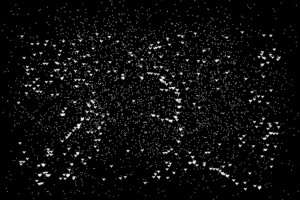
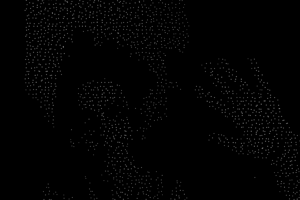
For this week’s assignment, I was inspired by The Coding Train’s fire and falling sand simulations. I wanted to combine these ideas to create a fluid simulation where each particle behaves individually, like the falling sand, and interacts in a way that mimics fluid dynamics, similar to water ripples. I aimed to create an interactive experience where the particles respond to changes in velocity and density. As I started working on the project, the particles began to resemble smoke, with their movement and fading effect, which was visually interesting. Once I added color, the effect took on a glowing, infrared-like appearance, which inspired the project’s name.

Embedded Sketch:

Code I’m Proud Of:

One of the key pieces of code I’m most proud of is the particle fading effect and their interaction with one another. I implemented a system where particles gradually fade as they move, similar to smoke dissipating in the air. I also combined elements of fluid dynamics (from the coding train) and the falling sand simulation to make the particles interact naturally with each other. The movement of each particle is influenced by its neighbors, which makes the simulation more lifelike. The integration of color that simulates infrared light added a unique visual element that I found rewarding to develop.

let fluid;

function setup() {
   let canvas = createCanvas(600, 600); 
  canvas.style('filter', 'blur(0.5px)'); 
   frameRate(22);
   fluid = new Fluid(0.2, 0, 0.0000001);
}

function draw() {
  stroke(51);
  strokeWeight(2);

  let cx = int((0.5 * width) / SCALE);
  let cy = int((0.5 * height) / SCALE);
  for (let i = -1; i <= 1; i++) {
    for (let j = -1; j <= 1; j++) {
      fluid.addDensity(cx + i, cy + j, random(50, 150));
    }
  }

  for (let i = 0; i < 2; i++) {
    let angle = noise(t) * TWO_PI * 2;
    let v = p5.Vector.fromAngle(angle);
    v.mult(0.2);
    t += 0.01;
   fluid.addVelocity(cx, cy, v.x, v.y);
  }
  fluid.step();
  fluid.renderD();
}


function mousePressed() {
  let mx = int(mouseX / SCALE);
  let my = int(mouseY / SCALE);
  
  // Add density where the mouse is clicked
  fluid.addDensity(mx, my, random(100, 200));
  
  // Add a velocity to the clicked point to make the fluid move in a direction
  let angle = random(TWO_PI);
  let v = p5.Vector.fromAngle(angle);
  v.mult(0.5); // Adjust the force of the movement
  fluid.addVelocity(mx, my, v.x, v.y);
}

Key Features:

Some of the key features of the project include:

  • Interactive Particle Control: The user can influence the simulation by adding density and velocity to particles using the mouse.
  • Particle Interaction: Each particle responds to the others, creating a realistic fluid dynamic effect.
  • Fading Effect: Particles gradually fade out, simulating the natural behavior of smoke or fluid dissipating over time.
  • Color Simulation: The particles change color as they move, resembling infrared light or heat signatures, adding an extra layer of visual interest.

Reflection/Future Work:

I’m really happy with how the simulation turned out, especially the fluidity of the particles and their fading behavior. It was exciting to replicate the behavior of smoke and heat visually. Moving forward, I’d like to refine the particle interaction further, perhaps adding more complexity to the way particles influence each other. I’d also like to explore different types of particles or reactions, and experiment with creating more detailed textures or patterns within the simulation. Another area for improvement could be performance optimization, as simulations with many particles can become resource-intensive.

Resources:

The most helpful resources for this project were The Coding Train’s tutorials on fire and sand simulations, which served as a foundation for understanding how to simulate particle behavior. These resources helped me understand the technical aspects of simulating fluid-like behavior in a creative and interactive way.

Week 11 – Cellular Automata – Khalifa Alshamsi

Concept

Cellular automata are mathematical models used to simulate complex systems with simple rules. I’ve built an interactive visualization using p5.js that not only demonstrates these concepts but also allows users to manipulate the simulation in real time.

Highlight of the Code

I’m particularly proud of how I implemented the function to update the grid based on cellular automata rules. Here’s the snippet that captures this logic:

function updateGrid(oldGrid, numRows, numCols) {
  let newGrid = new Array(numRows);
  for (let i = 0; i < numRows; i++) {
    newGrid[i] = new Array(numCols);
    for (let j = 0; j < numCols; j++) {
      let state = oldGrid[i][j];
      let neighbors = countNeighbors(oldGrid, i, j, numRows, numCols);
      if (state == 0 && neighbors == 3) {
        newGrid[i][j] = 1; // Birth
      } else if (state == 1 && (neighbors < 2 || neighbors > 3)) {
        newGrid[i][j] = 0; // Death
      } else {
        newGrid[i][j] = state; // Survival
      }
    }
  }
  return newGrid;
}

This function is central to the automata’s behavior, dynamically calculating each cell’s state in the next generation, creating patterns that can evolve from ordered or chaotic initial conditions.

Full Code

let grid;
let cellSizeSlider;
let colorButton;
let cellSize = 10;
let numRows, numCols;
let prevCellSize = 10; // Stores the previous cell size for comparison.
let colorIndex = 0; // Index to track the current color scheme.
let colorSchemes; // Array to hold different color schemes for the grid.

function setup() {
  createCanvas(600, 600);

  // Creates and position the slider for adjusting the cell size.
  cellSizeSlider = createSlider(5, 20, 10, 1);
  cellSizeSlider.position((width - cellSizeSlider.width) / 2 - 60, height + 10);

  // Initializes color schemes using the color function.
  colorSchemes = [
    [color(255), color(0)], // White and Black
    [color(255, 255, 0), color(0)], // Yellow and Black
    [color(64, 224, 208), color(128, 0, 128)], // Turquoise and Purple
    [color(255, 105, 180), color(255)] // Hot pink and White
  ];

  // Creates and position the button for changing colors, and set its event handler.
  colorButton = createButton('Color');
  colorButton.position(cellSizeSlider.x + cellSizeSlider.width + 10, height + 10);
  colorButton.mousePressed(changeColor);

  // Initializes the grid based on the current slider value.
  updateGridSize();
  grid = initializeGrid(numRows, numCols);
  displayGrid(grid, numRows, numCols);
}

function draw() {
  // Checks if the slider value has changed and update the grid if necessary.
  if (prevCellSize !== cellSizeSlider.value()) {
    prevCellSize = cellSizeSlider.value();
    updateGridSize();
    grid = initializeGrid(numRows, numCols);
  }
  // Updates and displays the grid according to the cellular automata rules.
  grid = updateGrid(grid, numRows, numCols);
  displayGrid(grid, numRows, numCols);
}

function updateGridSize() {
  // Adjusts the number of rows and columns based on the cell size.
  cellSize = cellSizeSlider.value();
  numCols = floor(width / cellSize);
  numRows = floor(height / cellSize);
}

function initializeGrid(numRows, numCols) {
  // Creates a new grid with random initial states.
  let grid = new Array(numRows);
  for (let i = 0; i < numRows; i++) {
    grid[i] = new Array(numCols);
    for (let j = 0; j < numCols; j++) {
      grid[i][j] = floor(random(2)); // Each cell randomly alive or dead.
    }
  }
  return grid;
}

function updateGrid(oldGrid, numRows, numCols) {
  // Applys cellular automata rules to create the next generation of the grid.
  let newGrid = new Array(numRows);
  for (let i = 0; i < numRows; i++) {
    newGrid[i] = new Array(numCols);
    for (let j = 0; j < numCols; j++) {
      let state = oldGrid[i][j];
      let neighbors = countNeighbors(oldGrid, i, j, numRows, numCols);
      if (state == 0 && neighbors == 3) {
        newGrid[i][j] = 1; // Birth
      } else if (state == 1 && (neighbors < 2 || neighbors > 3)) {
        newGrid[i][j] = 0; // Death
      } else {
        newGrid[i][j] = state; // Survival
      }
    }
  }
  return newGrid;
}

function countNeighbors(grid, x, y, numRows, numCols) {
  // Count the live neighbors around a given cell, considering wrap-around.
  let count = 0;
  for (let i = -1; i <= 1; i++) {
    for (let j = -1; j <= 1; j++) {
      if (i == 0 && j == 0) continue; // Skip the cell itself
      let col = (x + i + numRows) % numRows;
      let row = (y + j + numCols) % numCols;
      count += grid[col][row];
    }
  }
  return count;
}

function displayGrid(grid, numRows, numCols) {
  // Displays the grid on the canvas, coloring cells based on their state.
  background(255); // Clear the canvas before redrawing.
  for (let i = 0; i < numRows; i++) {
    for (let j = 0; j < numCols; j++) {
      let x = j * cellSize;
      let y = i * cellSize;
      noStroke();
      fill(grid[i][j] ? colorSchemes[colorIndex][1] : colorSchemes[colorIndex][0]);
      rect(x, y, cellSize, cellSize);
    }
  }
}

function changeColor() {
  // Cycles through the color schemes when the button is pressed.
  colorIndex = (colorIndex + 1) % colorSchemes.length;
}


Sketch

Reflection and Future Work

Reflecting on this project, I am satisfied with the final look. However, there’s always room for improvement and expansion. In future iterations, I would like to explore:

  • Additional Rulesets: Integrating more complex automata rules to show different dynamics and perhaps allow users to switch between them interactively.
  • Performance Optimization: As the grid grows larger, performance can become an issue. Optimizing the sketch to handle larger grids efficiently would be beneficial.
  • User Interaction: Adding more controls for users to configure initial conditions manually or even create presets of interesting patterns to start with.

Week 10 – Assignment

Concept & Inspiration

In this project, I aimed to combine p5.js with the physics simulation capabilities of Matter.js to create an interactive system where bouncing stars move within the canvas, reacting to boundaries. I wanted to explore how these two libraries could be integrated for simple but engaging visual experiences. The stars, initially inspired by the random and organic movements of celestial bodies, move around the canvas with random velocities, reacting to invisible boundaries.

My main focus was on creating something visually appealing while incorporating realistic physical dynamics. The stars move around, bounce off the walls, and continuously change their positions within the boundaries of the canvas. This combination of physics and aesthetics makes the piece both dynamic and fun to interact with.


Features

  1. Random Star Motion: The stars start with random velocities, making their motion unpredictable and engaging.
  2. Boundaries: Stars bounce off invisible walls placed around the canvas, ensuring that they stay within the visible area.
  3. Dynamic Shapes: Each star is drawn in the shape of a star polygon, and its size is randomized for variety.
  4. Physics with Matter.js: The use of Matter.js allows for a realistic simulation of bouncing behavior, including restitution (bounciness) and air resistance.

How It Works

The project uses Matter.js to handle physics simulation and p5.js for rendering and interaction. The following steps were followed to create this effect:

  • Physics Engine Setup: A Matter.js engine is created, and four boundary walls are added to the world to act as the invisible edges of the canvas.
  • Star Creation: 10 stars are generated with random sizes and positions on the canvas. They are assigned random velocities at the start, so they move in random directions.
  • Bounce Behavior: Each star is a circle in the physics world, and the restitution property gives them a bouncy behavior when they collide with walls or each other.
  • Custom Drawing: While the physics simulation treats them as circles, each star is visually represented by a custom star shape using p5.js.

Code

// Matter.js module aliases
let Engine = Matter.Engine,
    Render = Matter.Render,
    Runner = Matter.Runner,
    Bodies = Matter.Bodies,
    Composite = Matter.Composite,
    World = Matter.World,
    Body = Matter.Body; // To manipulate bodies

// Variables for engine and world
let engine, world;
let stars = [];
let walls = [];

function setup() {
  createCanvas(800, 600);

  // Create Matter.js engine and world
  engine = Engine.create();
  world = engine.world;
  
  // Disable gravity (or you can set a lower value to simulate reduced gravity)
  engine.gravity.y = 0.0;

  // Create canvas boundaries (walls)
  let thickness = 50;
  let wallTop = Bodies.rectangle(width / 2, -thickness / 2, width, thickness, { isStatic: true });
  let wallBottom = Bodies.rectangle(width / 2, height + thickness / 2, width, thickness, { isStatic: true });
  let wallLeft = Bodies.rectangle(-thickness / 2, height / 2, thickness, height, { isStatic: true });
  let wallRight = Bodies.rectangle(width + thickness / 2, height / 2, thickness, height, { isStatic: true });

  // Add walls to the world
  World.add(world, [wallTop, wallBottom, wallLeft, wallRight]);

  // Create stars with random velocities
  for (let i = 0; i < 10; i++) {
    let x = random(100, width - 100);
    let y = random(100, height - 100);
    let star = Bodies.circle(x, y, random(20, 40), {
      restitution: 0.8,  // Make the stars bouncy
      frictionAir: 0.01   // Add some air resistance to make them slow down
    });
    stars.push(star);
    World.add(world, star);

    // Apply random initial velocity to each star
    Body.setVelocity(star, {
      x: random(-3, 3), // Random velocity on X axis
      y: random(-3, 3)  // Random velocity on Y axis
    });
  }
}

function draw() {
  background(0);

  // Update the Matter.js engine
  Engine.update(engine);

  // Display the stars
  fill(255, 204, 0);
  for (let star of stars) {
    drawStar(star.position.x, star.position.y, star.circleRadius);
  }
}

function drawStar(x, y, radius) {
  push();
  translate(x, y);
  beginShape();
  let angle = TWO_PI / 5;
  let halfAngle = angle / 2.0;
  for (let a = 0; a < TWO_PI; a += angle) {
    let sx = cos(a) * radius;
    let sy = sin(a) * radius;
    vertex(sx, sy);
    sx = cos(a + halfAngle) * (radius / 2);
    sy = sin(a + halfAngle) * (radius / 2);
    vertex(sx, sy);
  }
  endShape(CLOSE);
  pop();
}

Reflection and Future Work

This project demonstrates a basic integration of p5.js and Matter.js, with the stars floating and bouncing within the defined space. Although the interaction is basic, it opens up various possibilities for future improvements:

  • Interactivity: Adding mouse or keyboard interaction could allow users to influence the stars’ motion or add new stars dynamically.
  • Forces: Introducing different types of forces like gravity or wind could add more complexity to the motion.
  • Collisions: Currently, stars only collide with the walls, but enabling star-star collision effects could add more dynamics to the system.

Sketch – Week 10

Concept

For this week’s assignment, I want to use the Air Friction code from matter.js. In the code, there are three shares that move down at different rates, simulating how different air friction affects different objects. From here, I wanted to create beach ball objects in different sizes, with the biggest beach ball falling at the slowest rate due to it’s larger surface area creating increased air friction, and with the same logic, the smallest ball falling the fastest.

Link to the matter.js code: https://brm.io/matter-js/demo/#airFriction

Code Snippet

function spawnBeachBalls() {
  let ballSizes = [20, 30, 40];
  let airFrictions = [0.001, 0.02, 0.05];

  for (let i = 0; i < ballSizes.length; i++) {
    let ball = Bodies.circle(random(50, width - 50), -30, ballSizes[i], { frictionAir: airFrictions[i] });
    beachBalls.push(ball);
    Composite.add(engine.world, ball);
  }

Embedded Sketch

Reflections

Visually, I like how my code turned out. However, I wanted the beach balls to interact with the person (the mouse) differently. When the person touches the beach ball, the beach ball should float upwards with the same velocity it is moving downwards. I tried to reverse the velocity in the code, but it did not work. As I am working with matter.js, I will have to spend more time figuring out how to get the beach balls to behave the way I want.

Week 10 – Pong Game

For this week’s project I decided to make a classic game: Pong. Pong is a game where you and an AI (or another player) have to knock a ball back and forth until the ball gets past someone. Seeing as we were working with collision and physics for our projects, I thought creating a game would be fun. I thought that paying homage to the very first game ever made would be a cool idea. The sketch is here:

Currently, you can only do PvE and fight a bot in the game. It will follow the ball’s position and try to hit it back towards you. The player’s board will follow the y-axis of your mouse’s position. With each hit, the ball increases in speed, making it harder to hit the longer the round goes. Once it reaches past one of the players, the score will be increased by one for the winning player and the ball will be reset. Currently, when the ball is reset, it will always start going towards the player and not the AI.

Using the Matter.js library for the first time was intimidating. It’s quite an expansive library that is capable of doing a lot. I also found the documentation for the library to not be the best, as it has very limited writing explaining functions (especially how to use them properly) and there are essentially no examples to work with. The examples on GitHub are made to be used with actual JS, and not p5, which meant that the examples can’t be looked at and you have to infer what the programs are trying to do. After some testing, I was more or less able to understand the parts of the library I needed to use and made the program.

The biggest issue I ran into while creating this program had to do with the collision. Firstly, I was very confused on how to properly implement collision detection, because of the aforementioned lack of documentation. There are multiple ways to have collision detection, and I wasn’t sure which was best. I ended up opting for an event listener that also had an embedded collision detection if statement to ensure that it would properly detect the ball collision. Here is the code for this:

Events.on(engine, "collisionStart", collisionEvent);

...

function collisionEvent(event) {
  if (
    Collision.collides(player.body, ball.body) != null ||
    Collision.collides(
      ai.body,
      ball.body || Collision.collides(ball.body, ai.body) != null
    )
  ) {
    Body.setVelocity(ball.body, {
      x: -ball.body.velocity.x * 1.15,
      y: ball.body.velocity.y,
    });
    Body.setPosition(ai.body, { x: width - 20, y: ai.body.position.y });
  }
}

While this is a small line of code, this was arguably the part that took longest to figure out, so I am particularly proud of this working.

I also had an issue where the ball would not collide with the player’s board, and would simply go right through it. After sifting through the documentation many times, I realized that the way I was changing the position of the board in the physics engine was not actually changing it, and I fixed it to use the proper setPosition() method. There are some other issues with the program that I wasn’t able to properly fix because I didn’t have enough time. First, when the ball gets faster, it starts to push the AI board backwards and can knock it off screen when it gets fast enough. I tried to make a bandaid fix to reset its x-position when there was collision detected, but the collision detection for the AI is very inconsistent and only works sometimes. There’s also a weird issue where there seems to be an invisible box the ball can collide with that is in the middle of the edges of the left and right of the screen. I’m not really sure why this is happening, perhaps an issue regarding how the positions are moved on the player. The final issue I’ve seen is that occasionally the ball will gain way more velocity than intended and shoots off the screen really quickly. Occasionally it will also do the opposite and lose all its velocity which renders the game unplayable somewhat. I think this is because the collision is detecting multiple times sometimes, but I don’t know how I could fix this.

Other than fixing these problems, I think there are a few changes I could make to improve the program. First, I want to add options to the game, such as two player support, keyboard controls and AI difficulties. I also would want to improve the AI, making them accelerate towards the ball when it is very close, which is more similar to actual AI in Pong. Due to time constraints, I couldn’t figure this out, but it is definitely something I would want to improve on. The last thing I could consider is a score threshold or some other way to reset the game, which currently will go on forever until the program is restarted. These are the many things that I would like to improve on.

References:

https://www.ponggame.org/

Week 10: Collecting Boxes

Concept

For this assignment, I just wanted to create a simple game. The collecting ball game has a paddle and boxes that are done from the top of the screen and the user moves the paddle to collide with as many boxes as possible. The concept is simple right now and it could be a starting point for a more complicated game

The Game

The users use the left and right arrows to play and some of the challenges I faced in this game were making the movement movement of the paddles smooth and also using matter.js itself was a bit challenging.

Future Improvements

As I have said earlier this could be a starting point for a more complicated game. One way would be to allow users to focus on collecting a specific shape and on other occasions a specific color and sometimes both specific shapes and colors and also changing the area of the screen to focus in the game from left to right meaning asking users only to collect boxes dropping from the top right or top left.  Adding these levels would make the game more interesting. Also, some of the mechanics like the movement of the paddle could be improved.

Week 10: Falling apples

Concept:

For this week’s assignment, I made mini game using matter.js. The user is required to move the basket (boundary) with the right arrow or left arrow key and catch as many apples as possible. Once three apples have fallen, the game restarts on its own.

Sketch:

Code and challenges:

let moveAmount = 6; 

if (keyIsDown(LEFT_ARROW)) {
  let pos = movableBoundary.body.position;
  Body.setPosition(movableBoundary.body, { x: pos.x - moveAmount, y: pos.y });
} else if (keyIsDown(RIGHT_ARROW)) {
  let pos = movableBoundary.body.position;
  Body.setPosition(movableBoundary.body, { x: pos.x + moveAmount, y: pos.y });
}

In this code snippet, I made the boundary move according to the user’s key press.

Future Improvements:

I would want to make it look more visually appealing as well as make the apples move to wherever the basket is moving.

Reference:

  • https://nature-of-code-2nd-edition.netlify.app/physics-libraries/#static-matterjs-bodies (Example 6.5)

Assignment 10- Merge-ocalypse!

Concept

Suika Game is a popular Japanese puzzle game where players combine fruits of the same type to create larger and more complex fruit combinations. The goal is to strategically merge and stack the fruits to fill the board, aiming to reach the largest possible fruit before the space runs out.

For this assignment I decided to recreate the games using matter.js to create a simple interactive physics-based game.

Highlight I’m proud of

Matter.js powers the physics simulation, providing gravity, collisions, and interactions between objects.

const { Engine, World, Bodies, Composite } = Matter;

let engine, world;

// Create an engine and world
engine = Engine.create();
world = engine.world;

When balls of the same size collide, they merge into a larger ball, and the score increases.

// Scoring values for each size index
const scoreValues = [0, 2, 5, 7, 12, 15, 20, 25, 35, 50];

// Handle collisions to merge balls of the same size, update the score, and mark balls as "old" after any collision
function handleCollisions(event) {
  if (gameOver) return;  // Ignore collisions if the game is over

  const pairs = event.pairs;

  for (let pair of pairs) {
    let ballA = droppedBalls.find(b => b.body === pair.bodyA);
    let ballB = droppedBalls.find(b => b.body === pair.bodyB);

    if (ballA && ballB) {
      // Mark both balls as "old" since they've collided
      ballA.hasCollided = true;
      ballB.hasCollided = true;

      // Check if they are of the same size and can merge
      if (ballA.size === ballB.size) {
        const nextSizeIndex = ballA.body.sizeIndex + 1;
        if (nextSizeIndex < ballSizes.length) {
          const newSize = ballSizes[nextSizeIndex];
          const newColor = colors[nextSizeIndex];

          // Create a new merged ball at the midpoint of the two colliding balls
          const midX = (ballA.body.position.x + ballB.body.position.x) / 2;
          const midY = (ballA.body.position.y + ballB.body.position.y) / 2;
          const mergedBall = Bodies.circle(midX, midY, newSize, { restitution: 0.8 });
          mergedBall.size = newSize;
          mergedBall.color = newColor;
          mergedBall.sizeIndex = nextSizeIndex;
          mergedBall.hasCollided = true;  // Mark new merged ball as "old"

          Composite.add(world, mergedBall);
          droppedBalls.push({ body: mergedBall, size: newSize, color: newColor, hasCollided: true });

          // Update the score based on the size of the merged ball
          score += scoreValues[nextSizeIndex];

          // Play merge sound
          mergeSound.play();

          // Remove the original balls from the world and array
          Composite.remove(world, ballA.body);
          Composite.remove(world, ballB.body);
          droppedBalls = droppedBalls.filter(b => b !== ballA && b !== ballB);
        }
      }
    }
  }
}


Players click on the screen to drop a ball, and a preview ball appears under the mouse.


let previewBall = { size: 30, color: '#FF6347' };

// Drop the preview ball when mouse is clicked
function mousePressed() {
  if (!gameOver) {
    dropBall(mouseX, previewBall.size, previewBall.color);
  }
}

function dropBall(x, size, color) {
  const ball = Bodies.circle(x, 0, size, { restitution: 0.4 });
  ball.size = size;
  ball.color = color;
  Composite.add(world, ball);
  droppedBalls.push(ball);
}
Embedded sketch


Edit Sketch: https://editor.p5js.org/mariamalkhoori/sketches/CaVEWClQZb

Reflection and ideas for future work or improvements

-I really wanted to make this more visually appealing, and I even got to draw some shapes for the game. However, it was quite difficult to detect the edges and make them fall properly, as well as assign the size alongside the merging.
-Adding a Start page and highest score system.

References
  • https://suikagame.com/
  • https://www.youtube.com/watch?v=zTNuMUsO-1g&ab_channel=Caleb%27sCodingCorner
  • https://pixabay.com/sound-effects/search/silly/
  • https://git.tombo.sh/tom/suika-game/src/branch/main/index.html

Week #10 – Sound of Triangle

Concept

I will be honest, I did not have that much of ideas for this week assignment… For some reason. Nevertheless, while experimenting with Matter.js I found myself with some interesting behaviors, such as gravity manipulation and collisions. Since I had a bit of interest in adding sound into my projects, I wondered how could I deliver something with at least a bit of creativity and interaction.

Sadly, most of the ideas that came into my mind were time-consuming, and thus, would be impossible to complete on time. Still, one was possible: A triangle which produces sound via the collision of circles.

Embedded sketch

Note: You can click on the Canva to spawn more circles.

Full-screen version: Go to the Full-screen version

Brief explanation of the code

The code itself is simple thanks to the use of Matter.js. That means that all the collision and interaction between bodies are managed by the library. Now, what is happening in this code is the following:

First, a set of circle bodies will be spawned and then attracted to the static circle in the middle:

//Draw circles.
for (let i = 0; i < circles.length; i++) {
  //Attract to attractor and then display.
  let force = attractor.attract(circles[i]);
  circles[i].applyForce(force);
  circles[i].show();
  //Check if there is any geometry outside the canvas.
  if (circles[i].isOffScreen()) {
    circles[i].removeFromWorld();
    circles.splice(i, 1);
    i--; //This fixes the flickering in the code.
  }
}

Secondly, while they are being pulled to the attractor, the circle bodies can move erratically around it due to the force applied. During this erratic movement, they can hit one of the three boundaries forming a triangle, or other circles. So, on hit, they will trigger an event in which a sound will reproduce (only when a boundary is hit) as well as change the color:
Collisions function:

//Done with help of the following material: https://nature-of-code-2nd-edition.netlify.app/physics-libraries/#collision-events
function handleCollisions(event) {
  for (let pair of event.pairs) {
    let bodyA = pair.bodyA;
    let bodyB = pair.bodyB;

    //Retrieve the particles associated with the colliding bodies via the plugin.
    let particleA = bodyA.plugin.particle;
    let particleB = bodyB.plugin.particle;

    if (particleA instanceof Circle && particleB instanceof Circle) {
      particleA.change();
      particleB.change();
    }

    if (particleA instanceof Boundary && particleB instanceof Circle) {
      particleA.change();
      particleB.change();
      bell.play();
    }
  }
}

change() function of boundary.js:

change() {
  this.col = color(random(100, 255));
}

circle() function of circle.js:

change() {
  this.col = color(random(100, 255));
  this.r = random(0, 10);
}

There is also some code that helps with optimization, such as in the case that the circles go out boundaries, as well as cleaning the array appropriately:

//Check if there is any geometry outside the canvas.
if (circles[i].isOffScreen()) {
  circles[i].removeFromWorld();
  circles.splice(i, 1);
  i--; //This fixes the flickering in the code.
}

Reflection and ideas for future work or improvements

I feel that this task end up being uninspiring. While simplistic and stylish in his own way, there are other interactions I would wish to implement. Such interactions include more “artistic” expressions once the circles hit the boundaries, or a more intricate physics simulation where the boundaries could be dynamically moved according to time (as in rotating in a 360 degree manner). I am confident that some ideas will be implemented in future projects, but at the moment, let’s conclude that this is still a phase of learning how to use Matter.js.

Used resources

a. “6. Physics Libraries.” Netlify.app, 2014, nature-of-code-2nd-edition.netlify.app/physics-libraries/#collision-events. Accessed 12 Nov. 2024.

b. “6.1 Matter.js – Introduction.” Thecodingtrain.com, thecodingtrain.com/tracks/the-nature-of-code-2/noc/6-physics-libraries/1-matterjs-introduction.

c. “6.2 Matter.js – Introduction, Continued.” Thecodingtrain.com, 2016, thecodingtrain.com/tracks/the-nature-of-code-2/noc/6-physics-libraries/2-matterjs-introduction-continued. Accessed 12 Nov. 2024.

d. “6.9 Matter.js Attraction by Natureofcode -P5.Js Web Editor.” P5js.org, 2024, editor.p5js.org/natureofcode/sketches/16sblEvax. Accessed 12 Nov. 2024.

e. “Freesound – BELL 0101.Wav by Zgump.” Freesound.org, 2024, freesound.org/people/zgump/sounds/83538/. Accessed 12 Nov. 2024.

Weel 10 _ Magnets_Matters.js

Concept:

  For this project, I got inspired by the nature of codebook examples. Especially the ones about attraction forces and movers. I decided to create a particle system that is affected by attraction and repulsion forces. Through this class, I realized I am obsessed with particles and small shapes working together to create different artworks. I imagined that the particles would slowly get attracted to an attractor but then be repulsed quickly to create a dynamic of contradiction. 

Highlight and Process:

Matters.js library is very new to me. Because it is a physics-based engine, it has its own approach to defining bodies, forces, and interactions, as a result, it was a little different to me. I had to take some time to understand the syntax but more time to explore the possibilities it has. It is a very interesting library to delve into due to many limitations in terms of learning the library and its implementation. I think I did not have enough time to explore it enough to comfortably use its full potential in this assignment. 
For the sketch, I had an attractor class and a mover class. The main functionality of the attractor class is to attract the movers into a circular body via forces. Within the attractor class, there is the set position function which later sets the attracto to a new position when the mouse is pressed. The mover class creates a bouncy object made of 4 circles that is affected by air resistance. Making the movers responsive to forces the way I was imagining it was challenging, as I had to play around with a lot of the parameters.  In terms of interactivity, the attractor changes position to wherever the mouse is, and the movers follow. Additionally, I made a slider to increase or decrease the strength of the force toward the attractor. 


// inspo http://natureofcode.com

const { Engine, Bodies, Body, Composite, Vector } = Matter;

// A Mover and an Attractor
let movers = [];
let attractor;

let engine;

function setup() {
  createCanvas(700, 650);

  // matter engine
  engine = Engine.create();
  engine.gravity = Vector.create(0, 0);

  // slider to control gravitational constant as a way ti change the strength
 
  gravitySlider = createSlider(0.001, 1, 0.05, 0.001);
  gravitySlider.position(20, height - 40);
  gravitySlider.style("width", "90px");

 
    for (let i = 0; i < 800; i++) {
      movers[i] = new Mover(random(width), random(height), random(0.01, 0.5));
    }
    attractor = new Attractor(width / 2, height / 2);
    // attractor[2]  = new Attractor(width /8 , height / 8, 50);
    //attractor[3]  = new Attractor(width , height , 50);
  }


function draw() {
  background(0, 60);
  Engine.update(engine);

  // show slider on canvas
  // Display the current value of the slider
  fill(255);
  stroke(255);
  textFont('Courier');
  textSize(20);
  text("Change strength " + gravitySlider.value().toFixed(5), 25, height - 60);

  // if mouse is pressed, update the attractor position to follow the mouse
  if (mouseIsPressed) {
    attractor.setPosition(mouseX, mouseY);
  }

  // Apply the attractor force to all movers
  for (let mover of movers) {
    let force = attractor.attract(mover);
    mover.applyForce(force);
    mover.show();
  }
  //attractor.show();
}


Embedded Sketch:

Future Work:

In terms of this project, a lot can be improved, for instance, adding more attractions, making the movers more dynamic, and maybe reacting to one another. Additionally, adding more forces and constraints into the sketch. There is a lot to learn and discover about Mattaers.js and other libraries. I think exploring and experimenting more is the best way to learn. 

Resources:

The Coding Train. “5.17: Introduction to Matter.js – the Nature of Code.” YouTube, 7 Mar. 2017, www.youtube.com/watch?v=urR596FsU68.

Acresti, Louis. “Remove Items From Array While Iterating Over It. (Example).” Coderwall, 27 Sept. 2021, coderwall.com/p/prvrnw/remove-items-from-array-while-iterating-over-it.

Matter.Mouse Module – Matter.js Physics Engine API Docs – Matter-js 0.20.0. brm.io/matter-js/docs/classes/Mouse.html.

  1. Physics Libraries. nature-of-code-2nd-edition.netlify.app/physics-libraries/#adding-more-forces.

RGB Color Codes Chart 🎨. www.rapidtables.com/web/color/RGB_Color.html.