CONCEPT:
For my final project, I want to replicate the feeling evoked by Antony Gormley’s work, particularly the quantum physics concept that we are not made of particles, but of waves. This idea speaks to the ebb and flow of our emotions — how we experience ups and downs, and how our feelings constantly shift and flow like waves. When I came across Gormley’s work, I knew that I wanted to replicate this dynamic energy and motion in my own way, bringing my twist to it through code. I aim to visualize the human form and emotions as fluid, wave-like entities, mirroring the infinite possibilities of quantum existence.
embedded sketch:
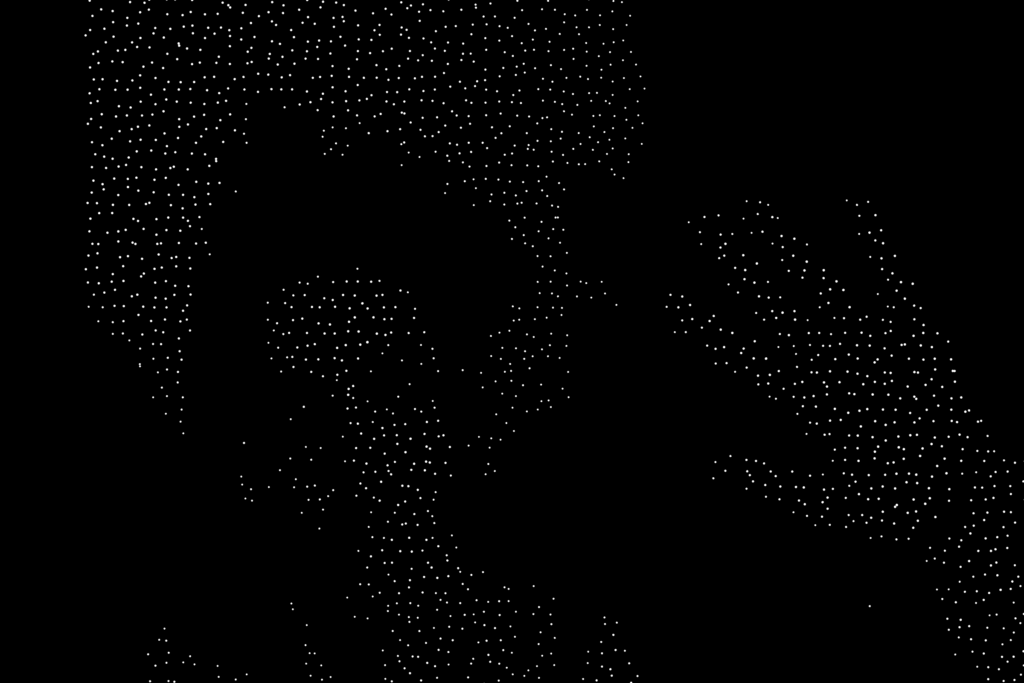
The code creates an interactive visual experience that features fluid particle movement and dynamic lines. Particles jitter and move across the screen, leaving fading trails and regenerating in new positions as they age. Lines are drawn between points that flow smoothly, and real-time body tracking is used to draw a skeleton based on detected body landmarks. This combination of moving particles, flowing lines, and live body visualization creates an ever-changing and organic display, offering a dynamic and visually engaging experience.
INTERACTION METHODOLOGY:
To create an interactive experience where users influence the flow field particles with their movements, I started by building a skeleton using TensorFlow and ml5.js. This skeleton provides all the necessary body points that will be tracked both by the camera and by the particles drawn to them. I began by leveraging TensorFlow and ml5.js’s pre-trained models to establish the foundational body pose detection system. This skeleton not only tracks key points in real time but also serves as a bridge to manipulate the behavior of the flow field particles based on the user’s movements.
Steps to Implement Interaction:
- Pose Detection: I used the pose detection model (MoveNet) from ml5.js in combination with TensorFlow.js. This setup enables the webcam to track key body points such as shoulders, elbows, wrists, hips, and knees. These body points are crucial because they provide the coordinates for each joint, creating a skeleton representation of the user’s body. The skeleton’s structure is essential for detecting specific gestures and movements, which will then influence the flow field.
- Movement Capture: The webcam continuously captures the user’s movement in real time. TensorFlow’s MoveNet model processes the webcam feed frame by frame, detecting the position of the user’s body parts and providing their precise coordinates. These coordinates are translated into interactions that affect the flow field. For example, when the user raises an arm, the corresponding body points (such as the shoulder, elbow, and wrist) will influence nearby particles, causing them to move in specific ways.
- Flow Field & Particle Interaction: The interaction is centered around two distinct modes, which the user can toggle between:
- Flow Field Mode:
In this mode, you control the movement of particles in the environment. Your body’s movements, such as waving your arms or shifting your position, influence how the particles move across the screen. The particles will either be attracted to you or pushed away based on where you are and how you move. The result is a dynamic, fluid motion, as if the particles are reacting to your gestures. You’re shaping the flow of the field by simply moving around in space.Particle Mode:
In this mode, you become a particle yourself. Instead of just controlling the particles, your body is now represented as a single particle within the field. Your movements directly control the position of your particle. As you move, your particle interacts with the surrounding particles, affecting how they move and react. This mode makes you feel like you’re actually part of the field, interacting with it in a more direct and personal way.
- Mode Toggle: A button will be implemented to allow the user to toggle between the two modes. When the user clicks the button, the system will switch from Flow Field Mode to Particle Mode, giving the user control over how they wish to engage with the system. In both modes, the user’s body movements drive how the particles behave, whether influencing the flow field or being represented as a particle within it.
Code i’m proud of:
function renderFluid() {
  background(0, 40); // Dim background for a trailing effect

   fill(255, 150); // White color with slight transparency
  textSize(16); // Adjust the size as needed
  textAlign(CENTER, TOP); // Center horizontally, align to the top
  text("We are not mere particles, but whispers of the infinite, drifting through eternity.", width / 2, 10);


  for (j = 0; j < linesOld.length - 1; j += 4) {
    oldX = linesOld[j];
    oldY = linesOld[j + 1];
    age = linesOld[j + 2];
    col1 = linesOld[j + 3];
    stroke(col1); // Set the stroke color
    fill(col1); // Fill the dot with the same color
    age++;

    // Add random jitter for vibration
    let jitterX = random(-1, 1); // Small horizontal movement
    let jitterY = random(-1, 1); // Small vertical movement
    newX = oldX + jitterX;
    newY = oldY + jitterY;

    // Draw a small dot
    ellipse(newX, newY, 2, 2); // Small dot with width 2, height 2

    // Check if the particle is too old
    if (age > maxAge) {
      newPoint(); // Generate a new starting point
    }

    // Save the updated position and properties
    linesNew.push(newX, newY, age, col1);
  }

  linesOld = linesNew; // Swap arrays
  linesNew = [];
}


function makeLines() {
  background(0, 40);

  fill(255, 150); // White color with slight transparency
  textSize(16); // Adjust the size as needed
  textAlign(CENTER, TOP); // Center horizontally, align to the top
  text("We are made of vibrations and waves, resonating through space.", width / 2, 10);

  for (j = 0; j < linesOld.length - 1; j += 4) {
    oldX = linesOld[j];
    oldY = linesOld[j + 1];
    age = linesOld[j + 2];
    col1 = linesOld[j + 3];
    stroke(col1);
    age++;
    n3 = noise(oldX * rez3, oldY * rez3, z * rez3) + 0.033;
    ang = map(n3, 0.3, 0.7, 0, PI * 2);
    //ang = n3*PI*2; // no mapping - flows left
    newX = cos(ang) * len + oldX;
    newY = sin(ang) * len + oldY;
    line(oldX, oldY, newX, newY);
    if (
      ((newX > width || newX < 0) && (newY > height || newY < 0)) ||
      age > maxAge
    ) {
      newPoint();
    }
    linesNew.push(newX, newY, age, col1);
  }
  linesOld = linesNew;
  linesNew = [];
  z += 2;
}

function newPoint() {
  openSpace = false;
  age = 0;
  count2 = 0;
  while (openSpace == false && count2 < 100) {
    newX = random(width);
    newY = random(height);
    col = cnv.get(newX, newY);
    col1 = get(newX, newY + hgt2);
    if (col[0] == 255) {
      openSpace = true;
    }
    count2++;
  }
}

function drawSkeleton() {
  cnv.background(0);
  // Draw all the tracked landmark points
  for (let i = 0; i < poses.length; i++) {
    pose = poses[i];
    // shoulder to wrist
    for (j = 5; j < 9; j++) {
      if (pose.keypoints[j].score > 0.1 && pose.keypoints[j + 2].score > 0.1) {
        partA = pose.keypoints[j];
        partB = pose.keypoints[j + 2];
        cnv.line(partA.x, partA.y, partB.x, partB.y);
        if (show == true) {
          line(partA.x, partA.y + hgt2, partB.x, partB.y + hgt2);
        }
      }
    }
    // hip to foot
    for (j = 11; j < 15; j++) {
      if (pose.keypoints[j].score > 0.1 && pose.keypoints[j + 2].score > 0.1) {
        partA = pose.keypoints[j];
        partB = pose.keypoints[j + 2];
        cnv.line(partA.x, partA.y, partB.x, partB.y);
        if (show == true) {
          line(partA.x, partA.y + hgt2, partB.x, partB.y + hgt2);
        }
      }
    }
    // shoulder to shoulder
    partA = pose.keypoints[5];
    partB = pose.keypoints[6];
    if (partA.score > 0.1 && partB.score > 0.1) {
      cnv.line(partA.x, partA.y, partB.x, partB.y);
      if (show == true) {
        line(partA.x, partA.y + hgt2, partB.x, partB.y + hgt2);
      }
    }
    // hip to hip
    partA = pose.keypoints[11];
    partB = pose.keypoints[12];
    if (partA.score > 0.1 && partB.score > 0.1) {
      cnv.line(partA.x, partA.y, partB.x, partB.y);
      if (show == true) {
        line(partA.x, partA.y + hgt2, partB.x, partB.y + hgt2);
      }
    }
    // shoulders to hips
    partA = pose.keypoints[5];
    partB = pose.keypoints[11];
    if (partA.score > 0.1 && partB.score > 0.1) {
      cnv.line(partA.x, partA.y, partB.x, partB.y);
      if (show == true) {
        line(partA.x, partA.y + hgt2, partB.x, partB.y + hgt2);
      }
    }
    partA = pose.keypoints[6];
    partB = pose.keypoints[12];
    if (partA.score > 0.1 && partB.score > 0.1) {
      cnv.line(partA.x, partA.y, partB.x, partB.y);
      if (show == true) {
        line(partA.x, partA.y + hgt2, partB.x, partB.y + hgt2);
      }
    }

    // eyes, ears
    partA = pose.keypoints[1];
    partB = pose.keypoints[2];
    if (partA.score > 0.1 && partB.score > 0.1) {
      cnv.line(partA.x, partA.y, partB.x, partB.y);
      if (show == true) {
        line(partA.x, partA.y + hgt2, partB.x, partB.y + hgt2);
      }
    }
    partA = pose.keypoints[3];
    partB = pose.keypoints[4];
    if (partA.score > 0.1 && partB.score > 0.1) {
      cnv.line(partA.x, partA.y, partB.x, partB.y);
      if (show == true) {
        line(partA.x, partA.y + hgt2, partB.x, partB.y + hgt2);
      }
    }
    //nose to mid shoulders
    partA = pose.keypoints[0];
    partB = pose.keypoints[5];
    partC = pose.keypoints[6];
    if (partA.score > 0.1 && partB.score > 0.1 && partC.score > 0.1) {
      xAvg = (partB.x + partC.x) / 2;
      yAvg = (partB.y + partC.y) / 2;
      cnv.line(partA.x, partA.y, xAvg, yAvg);
      if (show == true) {
        line(partA.x, partA.y + hgt2, xAvg, yAvg + hgt2);
      }
    }
  }
}
renderFluid():
This function creates a visual effect where particles (dots) move and vibrate on the screen. It starts by dimming the background to create a trailing effect, then displays a poetic message at the top of the screen. The main action involves iterating over previously drawn particles, moving them slightly in random directions (adding jitter for a vibrating effect), and drawing small dots at their new positions. If a particle becomes too old, it generates a new starting point. The particles’ positions and attributes (like color and age) are updated in arrays, creating an evolving, fluid motion.
makeLines():
This function generates moving lines, giving the impression of swirling or vibrating patterns. It displays another poetic message and creates lines that move based on Perlin noise (a smooth, continuous randomness). The lines change direction slightly each time, based on a calculated angle, and are drawn between old and new positions. If a line moves off-screen or exceeds its “age,” a new starting point is generated. The result is a dynamic flow of lines that appear to resonate across the screen, influenced by the noise function.
newPoint():
This function creates a new starting point for particles or lines. It looks for a location on the screen that hasn’t been used yet, ensuring that new points are placed in open spaces (areas where the color is white, meaning they are empty).
drawSkeleton():
This function visualizes a human skeleton-like figure using landmarks detected by a pose detection algorithm (likely from a camera feed). It draws lines connecting key points on the body (shoulders, wrists, hips, etc.) to form a skeleton-like structure. The positions of the body parts are updated continuously, and the function adds new lines as the pose changes. If a body part is detected with a low confidence score, it is ignored. The code allows for a 3D-like visualization by slightly adjusting the position in the Y-axis, depending on the show variable.
Future Work:
For future work, I plan to enhance the project by adding music to complement the visuals, with background tunes or sound effects triggered by movement. I also aim to refine the design, improving the layout and color scheme for a more immersive experience, and potentially adding customization options for users.
Additionally, I want to introduce a feature that lets users snap a picture of the live scene, capturing the dynamic motion of particles and body tracking. Users could save or share the image, with options to apply filters or effects before capturing, offering a more personalized touch.