Al-Muraud (The Chase)
A simulation of UAE falconry using flocking behavior and physics forces
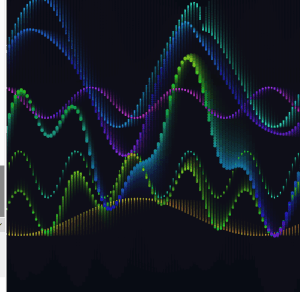
Embedded Sketch
How to Interact
- Move your mouse : The falcon follows and birds run away
- Click : Creates a dive attack with spinning chaos
- Press +/- : Add or remove birds
- Press R : Reset everything
- Press S : See the invisible force circles (debug mode)
Concept & Inspiration
I wanted to create something connected to UAE culture, so I chose falconry the traditional hunting practice where falcons chase desert birds called Houbara Bustards. The idea is simple: you control a falcon (the mouse), and it hunts a flock of birds. The birds try to stick together for safety, but when the falcon gets close, they scatter. There are also two green “oasis” spots where birds naturally want to gather. When you click, the falcon does a dive attack that creates a spinning vortex.
My inspiration came from:
Code Organization & Variable Names
I organized my code into two main classes:
1- Houbara Class (The Prey)
Variables:
- perceptionRadius – How far a bird can “see” neighbors
- panicLevel – Maps speed to fear (0 = calm, 1 = terrified)
- maxForce – How sharply a bird can turn
Methods that organize behavior:
- cohesion() – Pull toward flock center
- separation() – Avoid crashing into neighbors
- flee() – Escape from predator
- seekOasis() – Drift toward safe zones
- turbulence() – Get caught in chaos vortex
- flock() – Combines all forces with priorities
2-Falcon Class (The Predator)
Variables:
- wingAngle – For flapping animation
- sizeMultiplier – Grows when moving fast
Methods:
- follow() – Smoothly chase mouse
- show() – Draw with animated wings
Global Variables
Clear names that explain themselves:
- diveActive – Is turbulence happening right now?
- divePos – Where did the user click?
- diveDuration – Countdown timer for chaos
- showDebug – Toggle for seeing perception circles
Code Highlights
Here are three pieces of code I’m particularly proud of:
1. Panic Escalation System
// FLEE: Escape from predator
// Force strength increases as falcon gets closer (gradient of fear)
flee(target) {
  let perceptionRadius = 150; // How far bird can sense danger
  let desired = p5.Vector.sub(this.pos, target); // Point AWAY from falcon
  let d = desired.mag(); // Distance to falcon

  // Only flee if falcon is within perception range
  if (d < perceptionRadius) {
    desired.setMag(this.maxSpeed); // Set to maximum speed (fleeing urgently)
    let steer = p5.Vector.sub(desired, this.vel); // Steering = desired - current
    steer.limit(this.maxForce); // Don't turn impossibly sharp

    // KEY FEATURE: Map distance to force strength
    // Close (0px) = 2x force, Far (150px) = 0.5x force
    let strength = map(d, 0, perceptionRadius, 2, 0.5);
    steer.mult(strength);

    return steer;
  }
  return createVector(0, 0); // No force if falcon is far
}
The map() function creates a gradient of fear. At 0 distance = 2x force. At 150 pixels = 0.5x force. This makes the behavior feel natural instead of just on/off. Birds don’t just “run”, they panic MORE as danger gets closer.
2. Creating the Spinning Vortex
// Create spinning vortex force
let toCenter = p5.Vector.sub(diveCenter, this.pos);
let vortex = toCenter.copy();
vortex.rotate(HALF_PI); // KEY: Rotate 90° transforms "pull" into "orbit"

// Add random chaos
let chaos = p5.Vector.random2D();
chaos.mult(random(2, 5));

// Combine structured spin + random chaos
let turbulence = p5.Vector.add(vortex, chaos);
The key insight is that rotating a force 90 degrees turns “pull toward center” into “orbit around center”. Then adding random chaos makes it unpredictable but still structured. This one line vortex.rotate(HALF_PI) is the difference between an explosion and a whirlwind.
3. Weighted Separation Force
let diff = p5.Vector.sub(this.pos, other.pos); // Point away from neighbor
diff.div(d); // IMPORTANT: Closer neighbors create stronger push
Dividing by distance means: bird at 10px pushes 10x harder than bird at 100px. This single line creates realistic personal space. It’s elegant math that produces natural behavior.
Development Milestones & Challenges
I built this in 6 steps, adding one feature at a time:
Milestone 1: Basic Birds Moving Around
I started by creating a Houbara class with basic physics: position, velocity, and acceleration. At this point, birds just drifted randomly across the screen.
Challenge: Getting the triangle shape to point in the direction they’re moving using rotate(this.vel.heading()).
At first I tried rotating without translate() first, which made all the birds rotate around the canvas origin (0,0) instead of their own centers. Solution: Use push(), then translate() to the bird’s position, then rotate(), then draw the shape, then pop(). The order matters!
Milestone 2: Flocking Behavior
Added two forces based on Craig Reynolds’ Boids algorithm:
- Cohesion – Birds want to move toward the center of the flock
- Separation – Birds don’t want to crash into each other
Challenge: At first, all the birds just merged into one blob. They were stuck together in a tight cluster.
Solution: I made the separation force stronger (1.5x weight) and gave it a smaller radius (50px vs 100px for cohesion). This creates the “nervous flock” behavior they want to stay together but maintain personal space.
Milestone 3: Falcon Chases Birds
Made the mouse act like a predator using Reynolds’ Steering Behaviors. Birds flee when the falcon gets within 150 pixels.
Challenge: The flee force was either too weak (birds didn’t care about falcon) or too strong (birds shot off screen instantly).
Solution: I used map() to scale flee force from 0.5x to 2x based on distance. This creates realistic panic where birds freak out more when danger is right on top of them. It’s a gradient instead of binary.
Milestone 4: Dive Attack Turbulence
When you click, it creates chaos at that spot. The turbulence combines two things:
- A vortex that spins birds in a circle (by rotating the force vector 90 degrees)
- Random chaos pushing birds in unpredictable directions
Challenge: I initially just pushed birds away from the click point, which looked like an explosion. Boring.
Solution: The breakthrough was understanding that vortex.rotate(HALF_PI) turns a “push away” force into circular motion. This creates the spinning whirlwind effect.
Milestone 5: Making It Look Good
Added visual improvements:
- Created an actual Falcon class with flapping wings
- Added the two green oasis spots
- Birds leave motion trails
- Birds change color based on speed (tan → reddish)
- Sand particles scatter during dive
Challenge: I accidentally put the seekOasis() function in the Falcon class instead of the Houbara class. Got error: TypeError: this.seekOasis is not a function
Solution: Read the error message carefully! It told me exactly what was wrong. Moved the method to the correct class (birds seek oases, not falcons).
Milestone 6: Polish & Controls
Final touches:
- Designed the UI with desert colors (browns and golds)
- Added keyboard controls (R, +, -, S)
- Made the oases pulse using sin() animation
- Changed edge wrapping to bouncing physics
- Made the falcon grow bigger when moving fast
Challenge: The perception circle was appearing in the wrong spot because it was inside the falcon’s rotation transformation.
Solution: I moved the circle drawing from inside Falcon.show() to the main draw() function, before any transformations are applied. Now it uses absolute world coordinates instead of the falcon’s rotated local coordinates.
The final polished version with all features is available in the embedded sketch above.
How the Forces Work Together
Each bird calculates 5 forces every frame and combines them:
- cohesionForce.mult(1.0); // Want to stay with group
- separationForce.mult(1.5); // Don’t crash into neighbors
- fleeForce.mult(2.5); // RUN FROM DANGER (strongest)
- oasisForce.mult(0.8); // Drift toward safety
- turbulenceForce.mult(2.0); // Get caught in chaos
The weights create a priority system:
Survival > Safety > Chaos > Togetherness > Comfort
This matches how real animals behave: immediate threats override long-term goals.
Reflection
What I Learned
Simple rules create complex patterns. Each bird only knows about its nearby neighbors, yet the whole flock moves as one. This is called “emergent behavior.”
Small numbers matter.
Changing flee force from 2.0 to 2.5 completely changed how scared birds act. The difference between good and great simulation is often just finding the right numbers.
Building step-by-step works.
Adding one feature at a time made debugging way easier than trying to do everything at once.
Theme matters.
Framing this as falconry instead of “particles following forces” made it way more interesting.
What Worked Well
- Force priority system feels natural (survival > safety > togetherness)
- Visual feedback makes invisible forces visible (color changes, trails, size)
- Keyboard controls make it interactive
- Vortex turbulence looks really cool
What I’d Improve
- Plan UI design earlier instead of adding it last
- Use systematic testing for force weights instead of random tweaking
- Add sounds (wing flaps, bird chirps, dive whoosh)
- Implement energy system (birds get tired, need to rest)
- Create visual dive animation (falcon swoops before turbulence)