Final Project

The Abyss

Concept

My final project is an interactive, digital, abyssal ecosystem built using p5.js and ml5.js (Handpose). The core metaphor places the user in a deep-sea abyss, acting as a foreign light source (your hand) interacting with a school of highly reactive, bioluminescent organisms.

Instead of treating the user merely as a cursor, the project aims to create a living, breathing environment that responds not just to where the user is, but how they are acting. Through computer vision and audio reactivity, the ecosystem shifts between states of calm curiosity and chaotic panic, simulating a delicate, emotional underwater environment.

Sketch Link

Ml5.js won’t work on the blog so click on the link to view the project.

Video Documentation

Process, Milestones and Challenges

Building this ecosystem was a multi-step process, evolving from a simple particle system into a complex, living simulation.

Phase 1: The Core Prototype (The Abyssal Mirror)

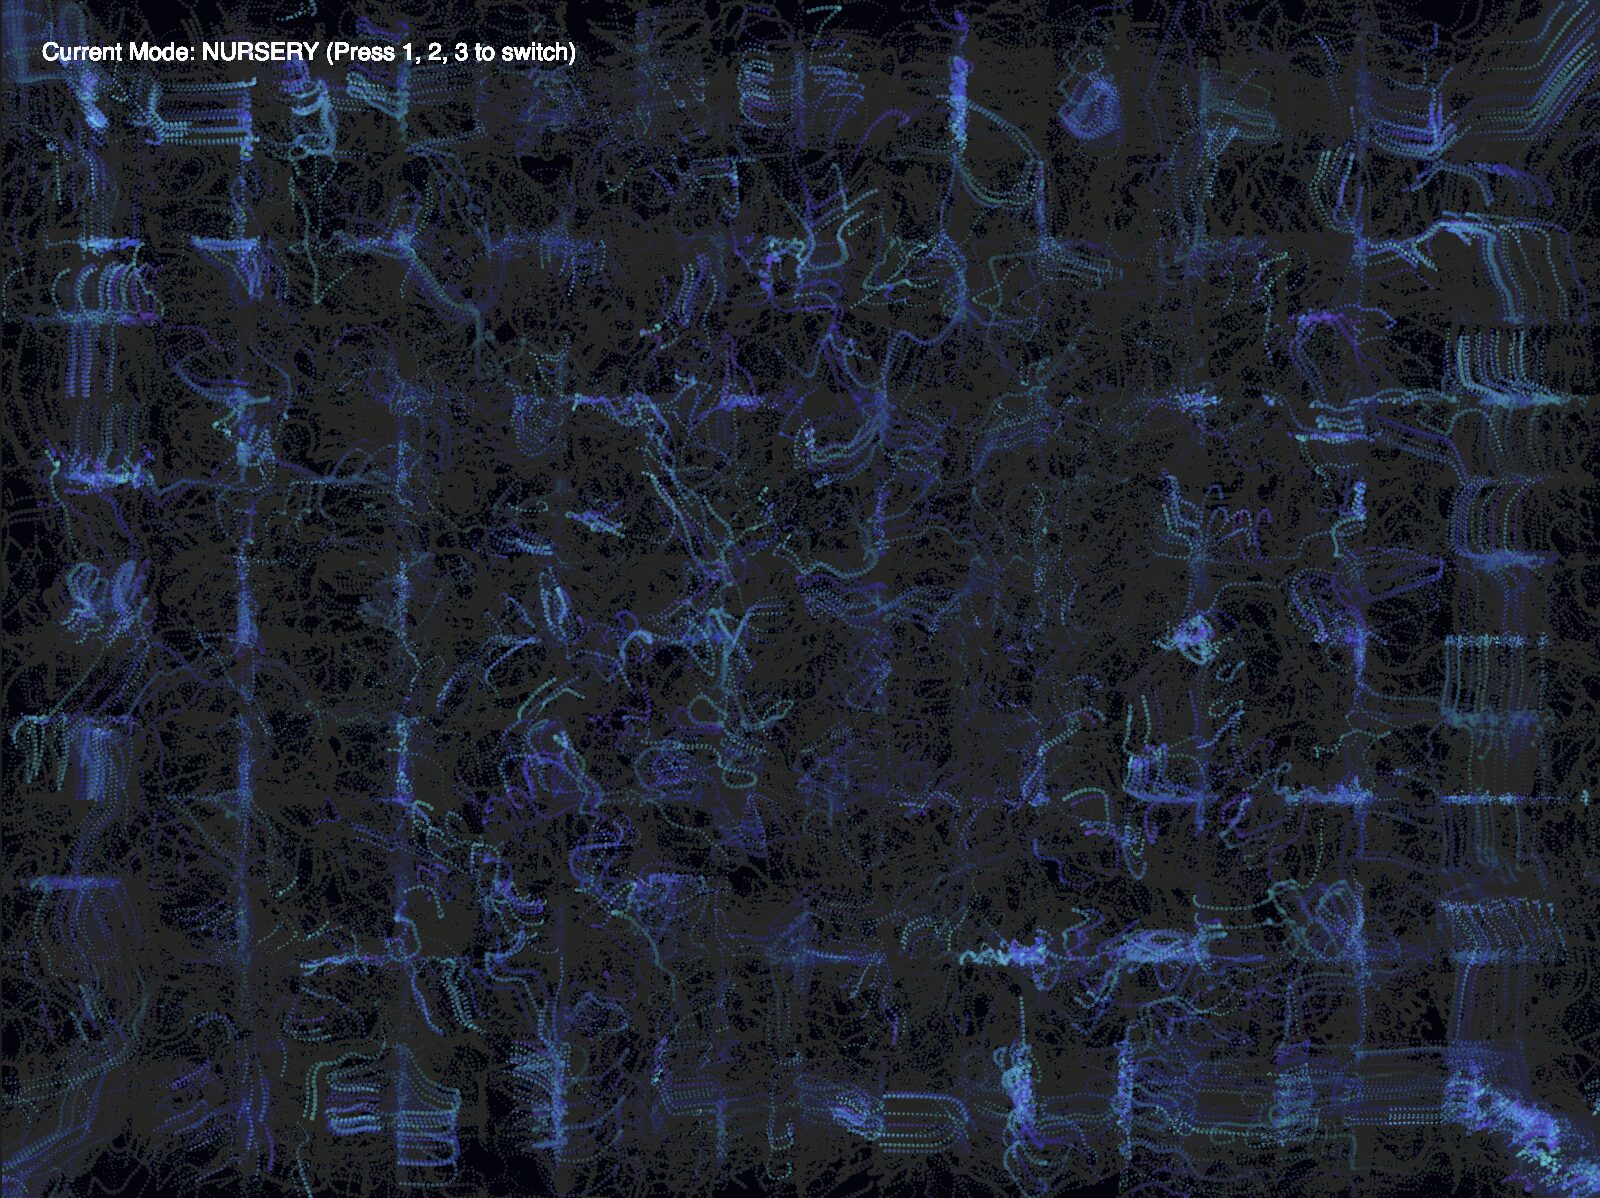
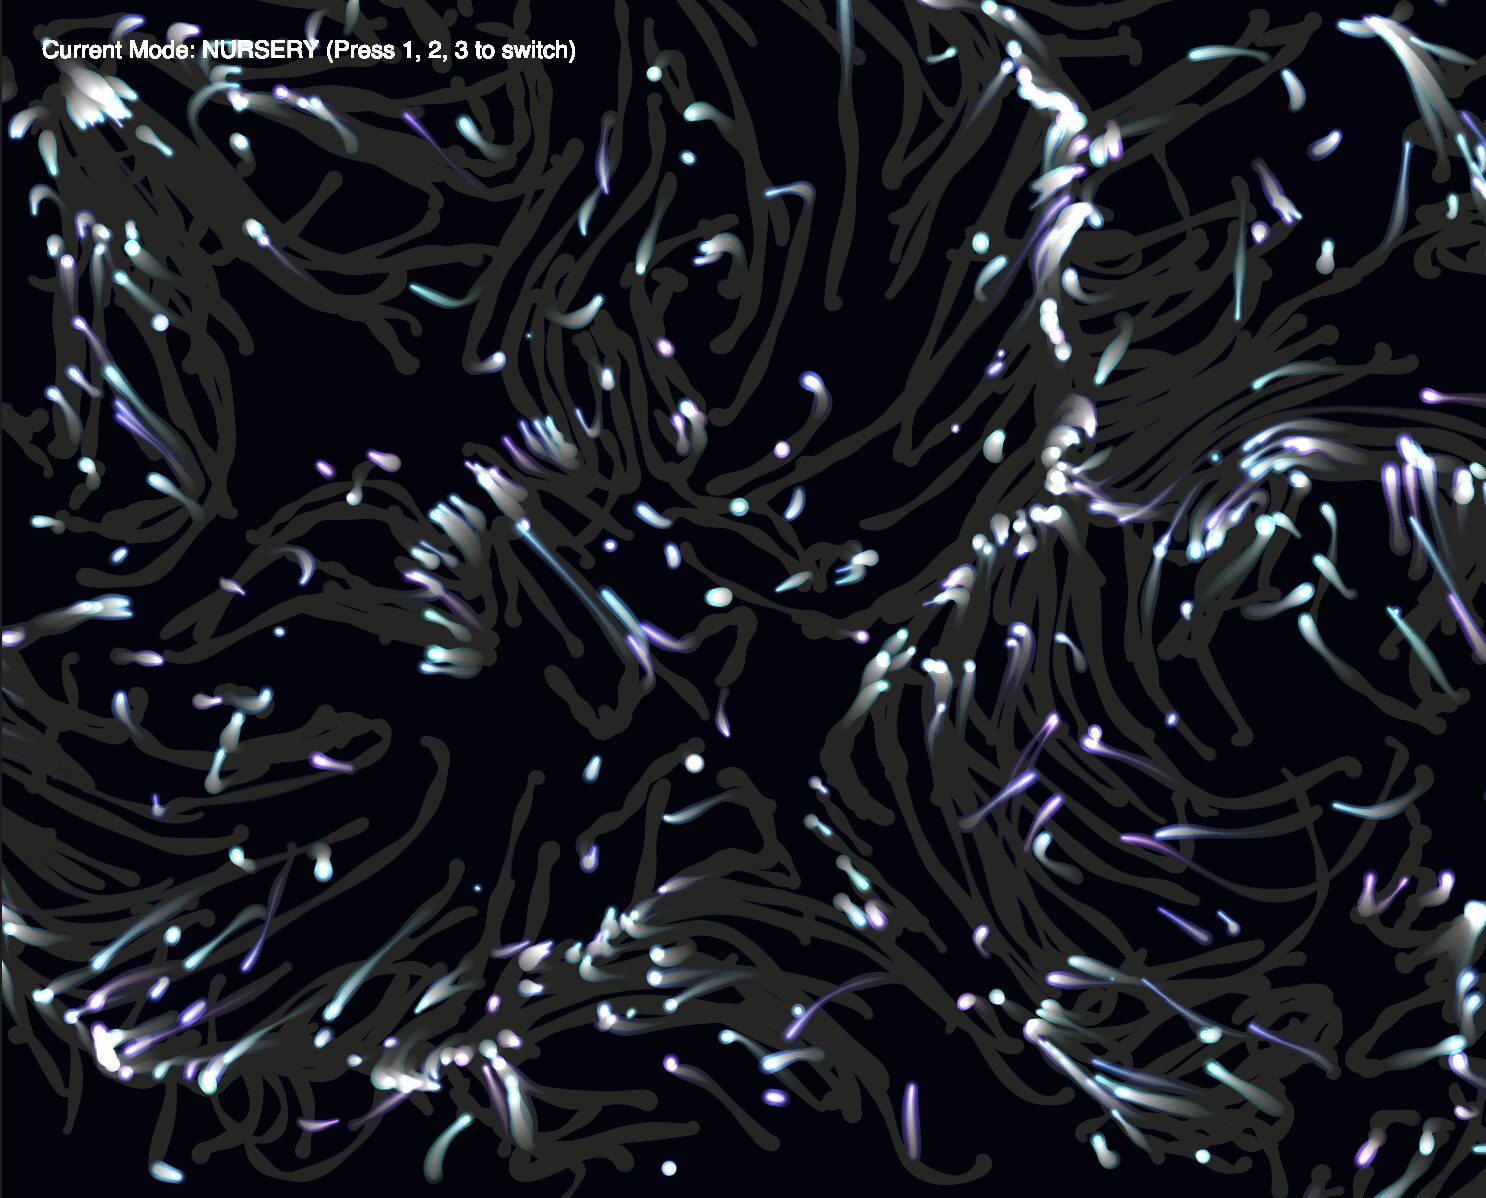
The initial prototype focused on getting the foundation working: rendering the flocking algorithm (boids) and hooking it up to the webcam using the ml5.js Handpose model.

  • The Challenge: Raw webcam data is incredibly jittery, which made the boids twitch erratically.

  • The Solution: I implemented a handExistenceBuffer to prevent the hand from “disappearing” on dropped frames, and used lerp() (linear interpolation) to smooth out the tracking coordinates.

  • Basic Heuristics: I started with simple interactions by calculating the average distance of the fingertips from the palm. A low distance triggered a
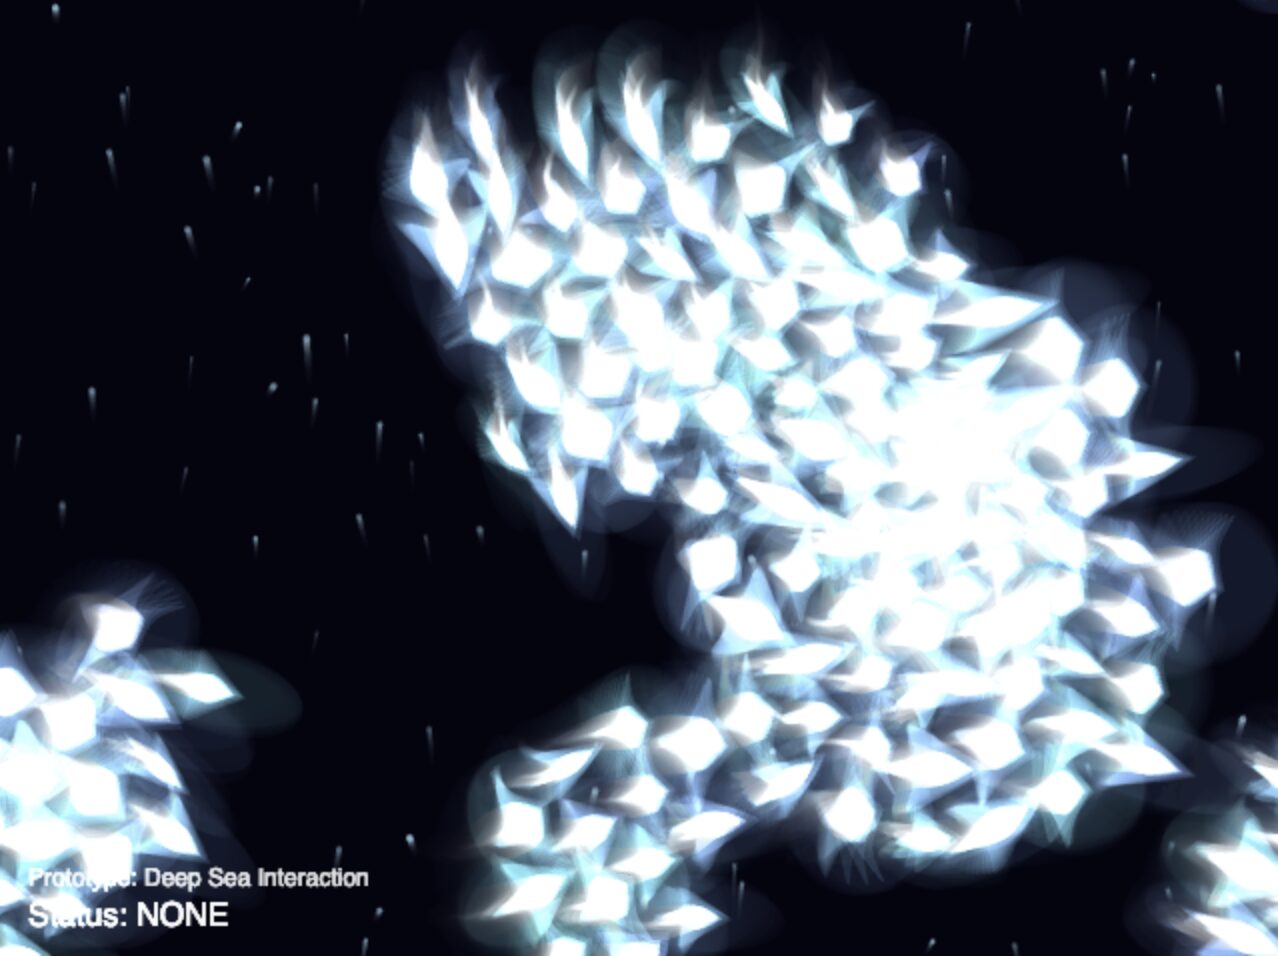
 FIST (attract), and a high distance triggered an OPEN hand (repel).

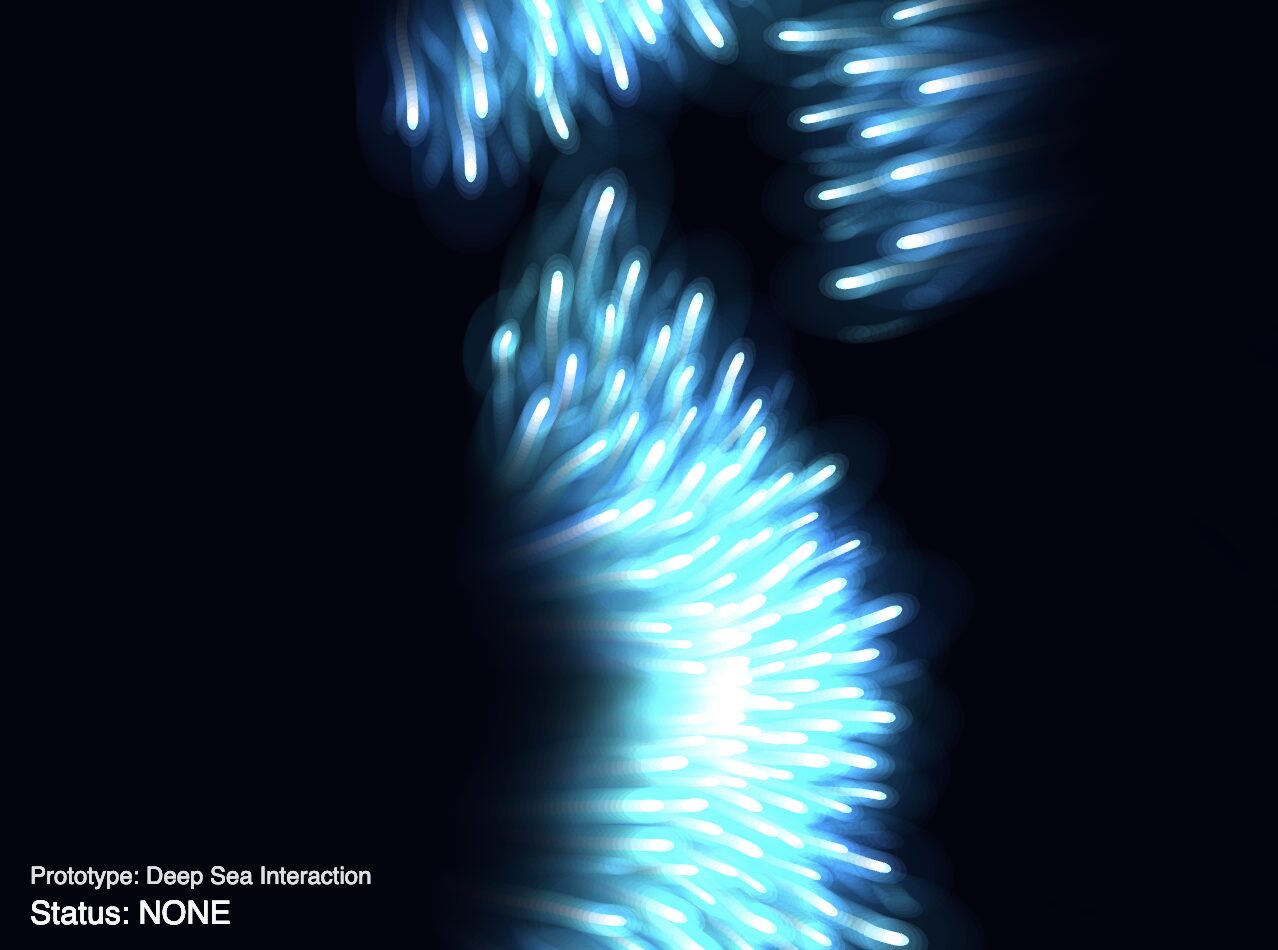
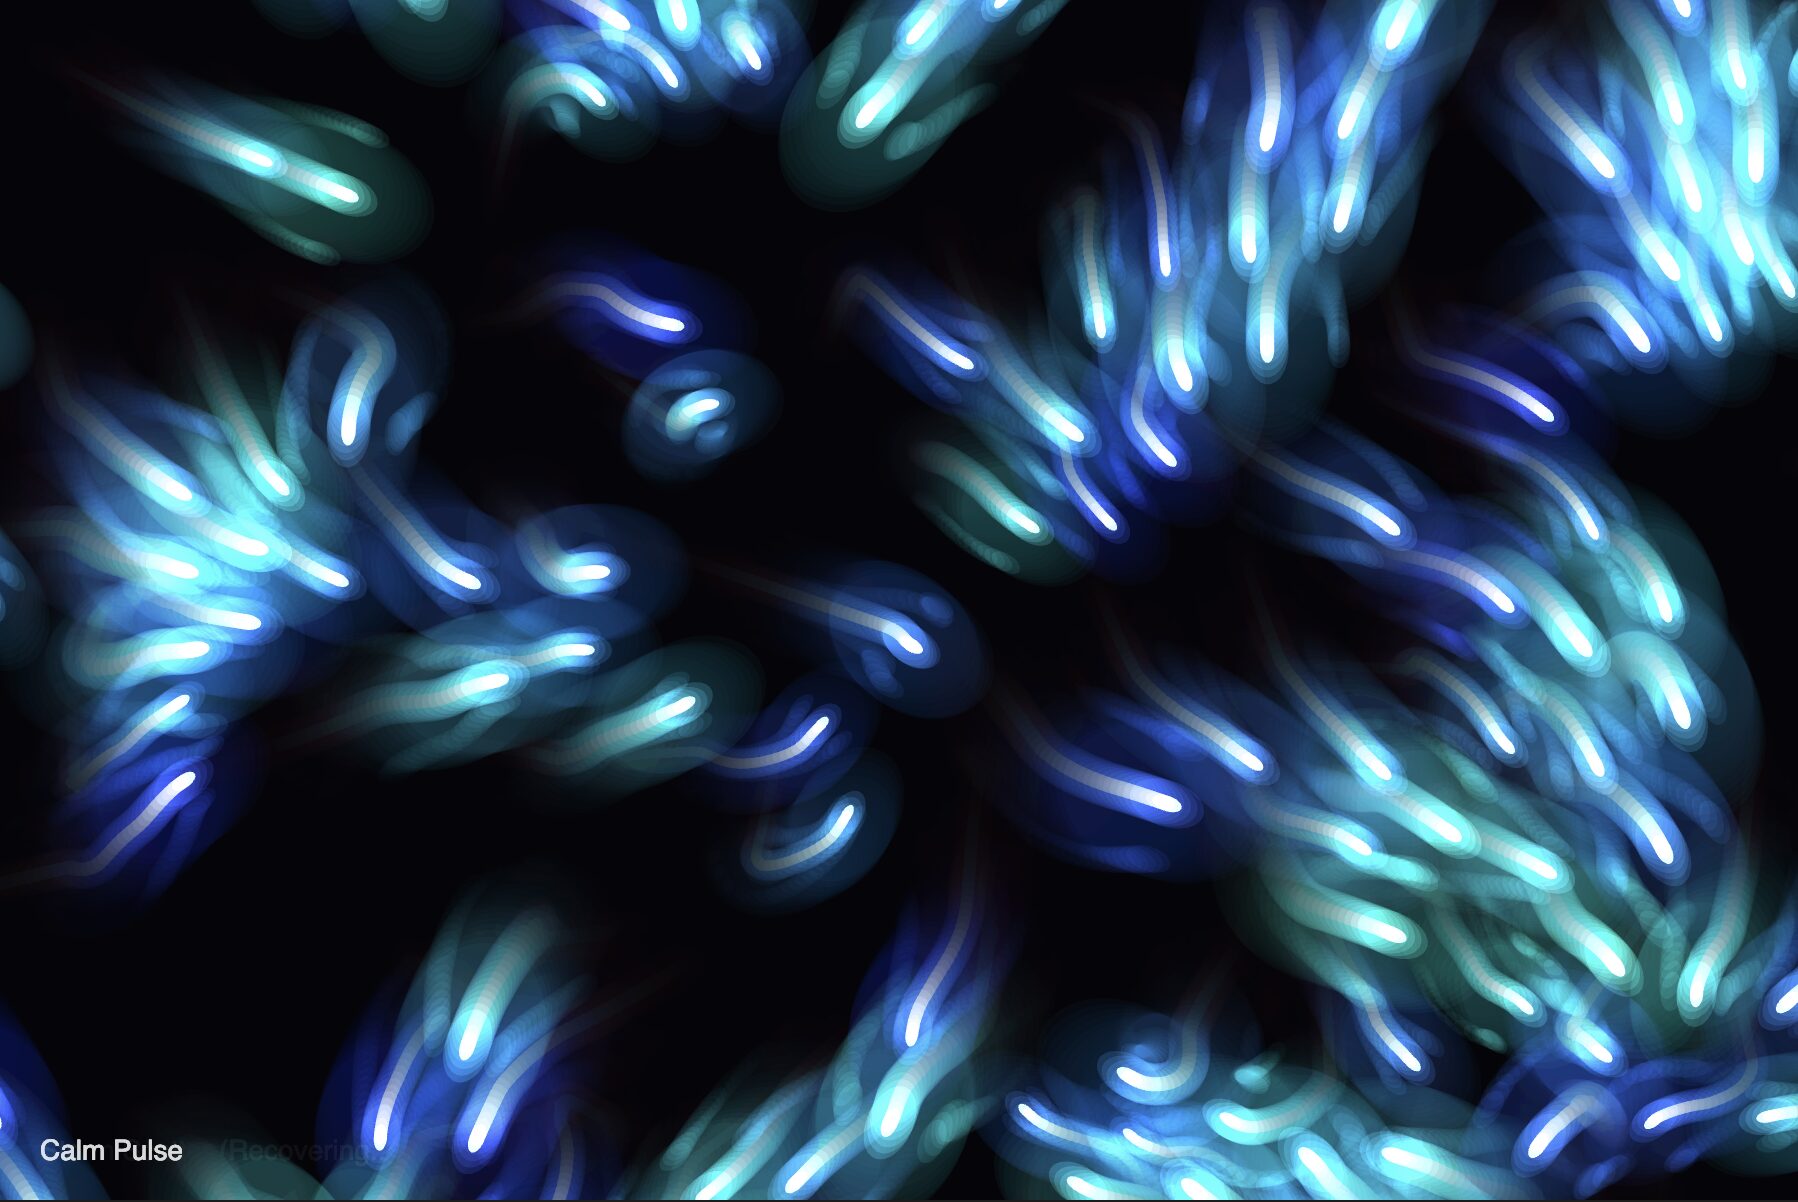
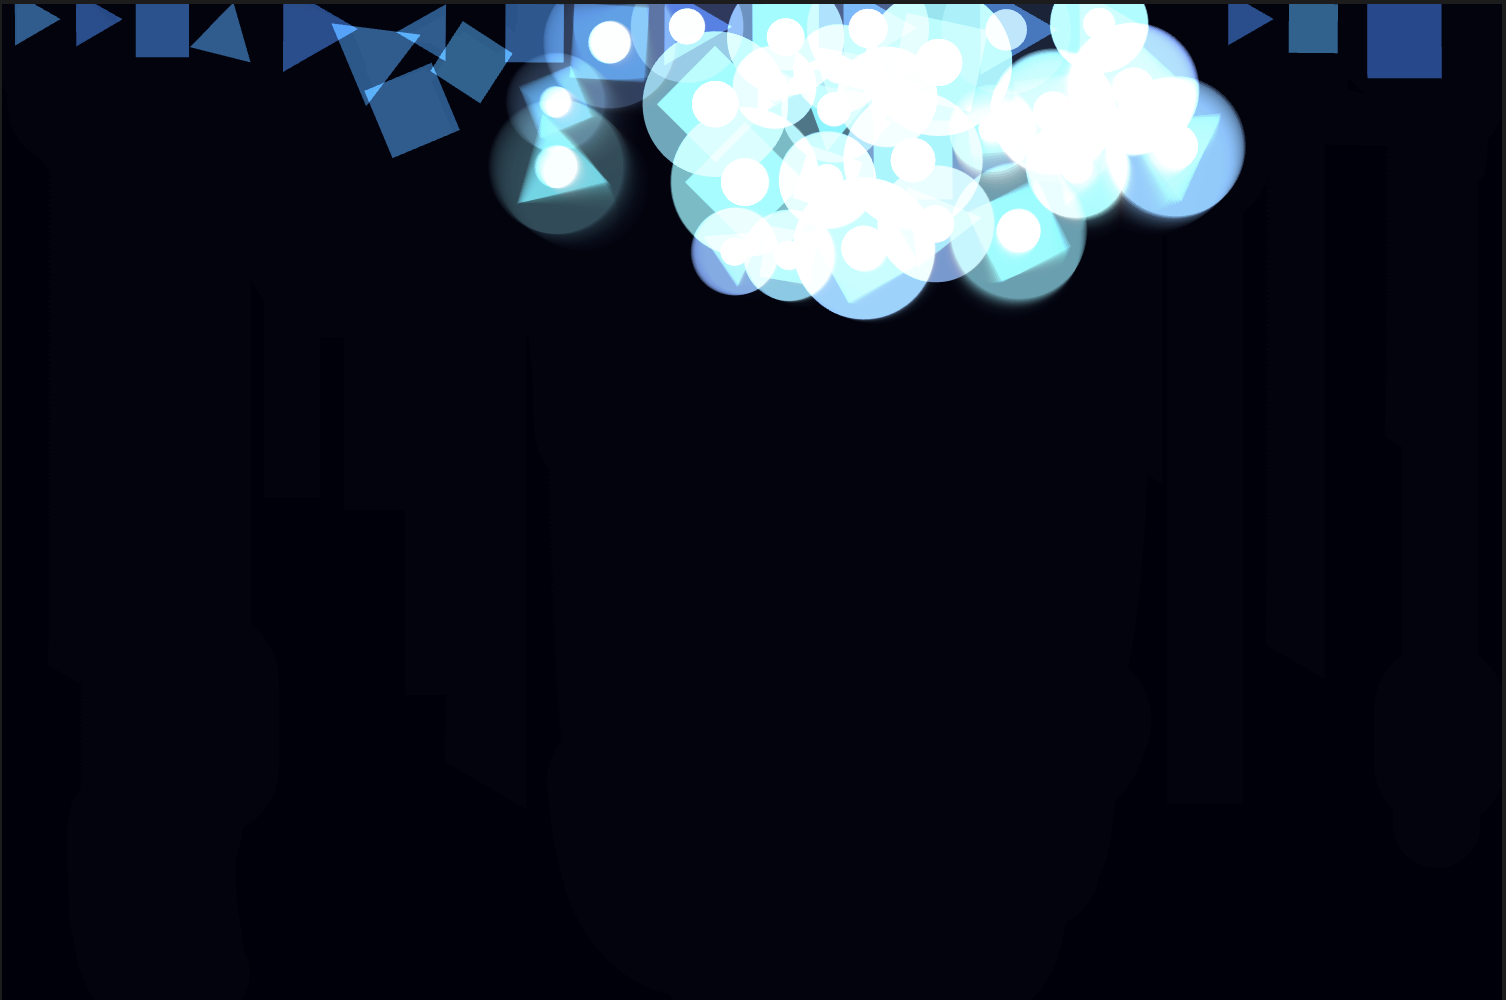
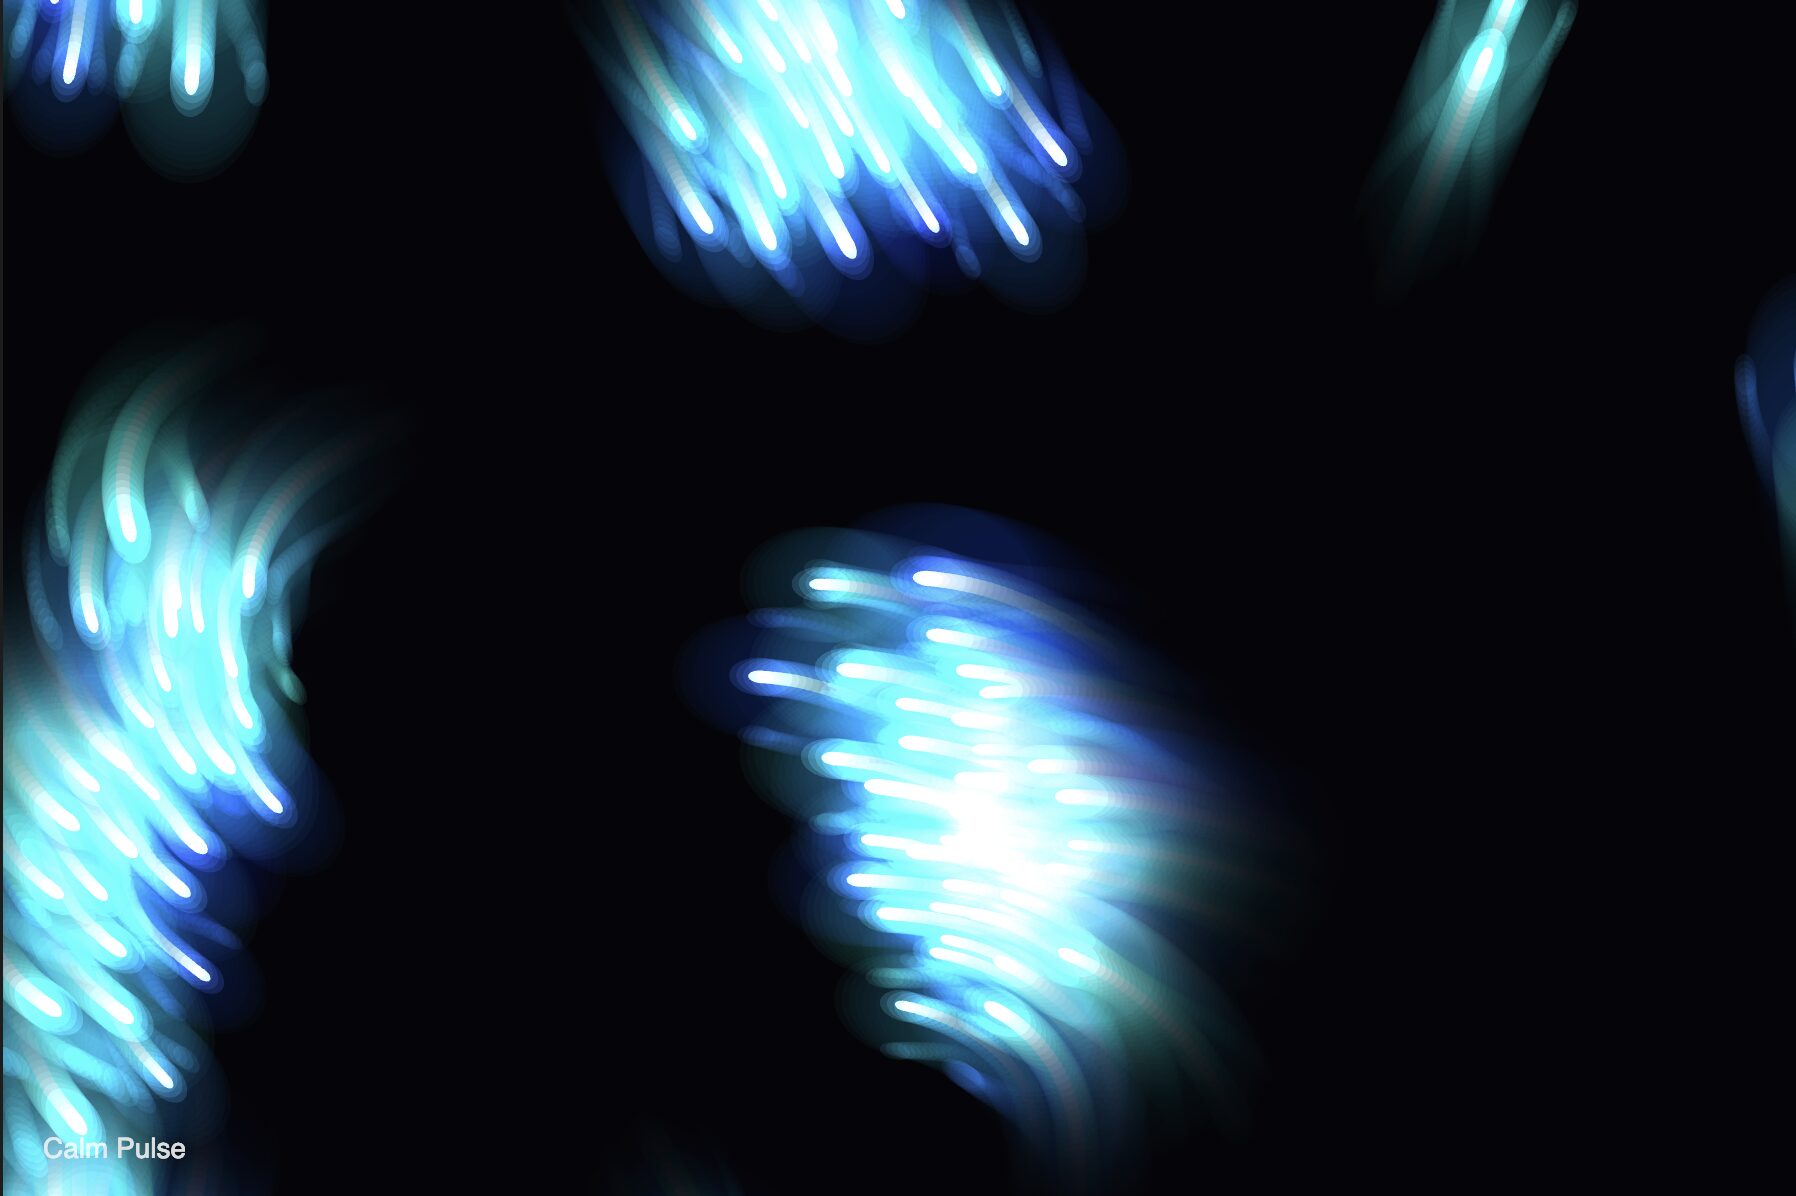
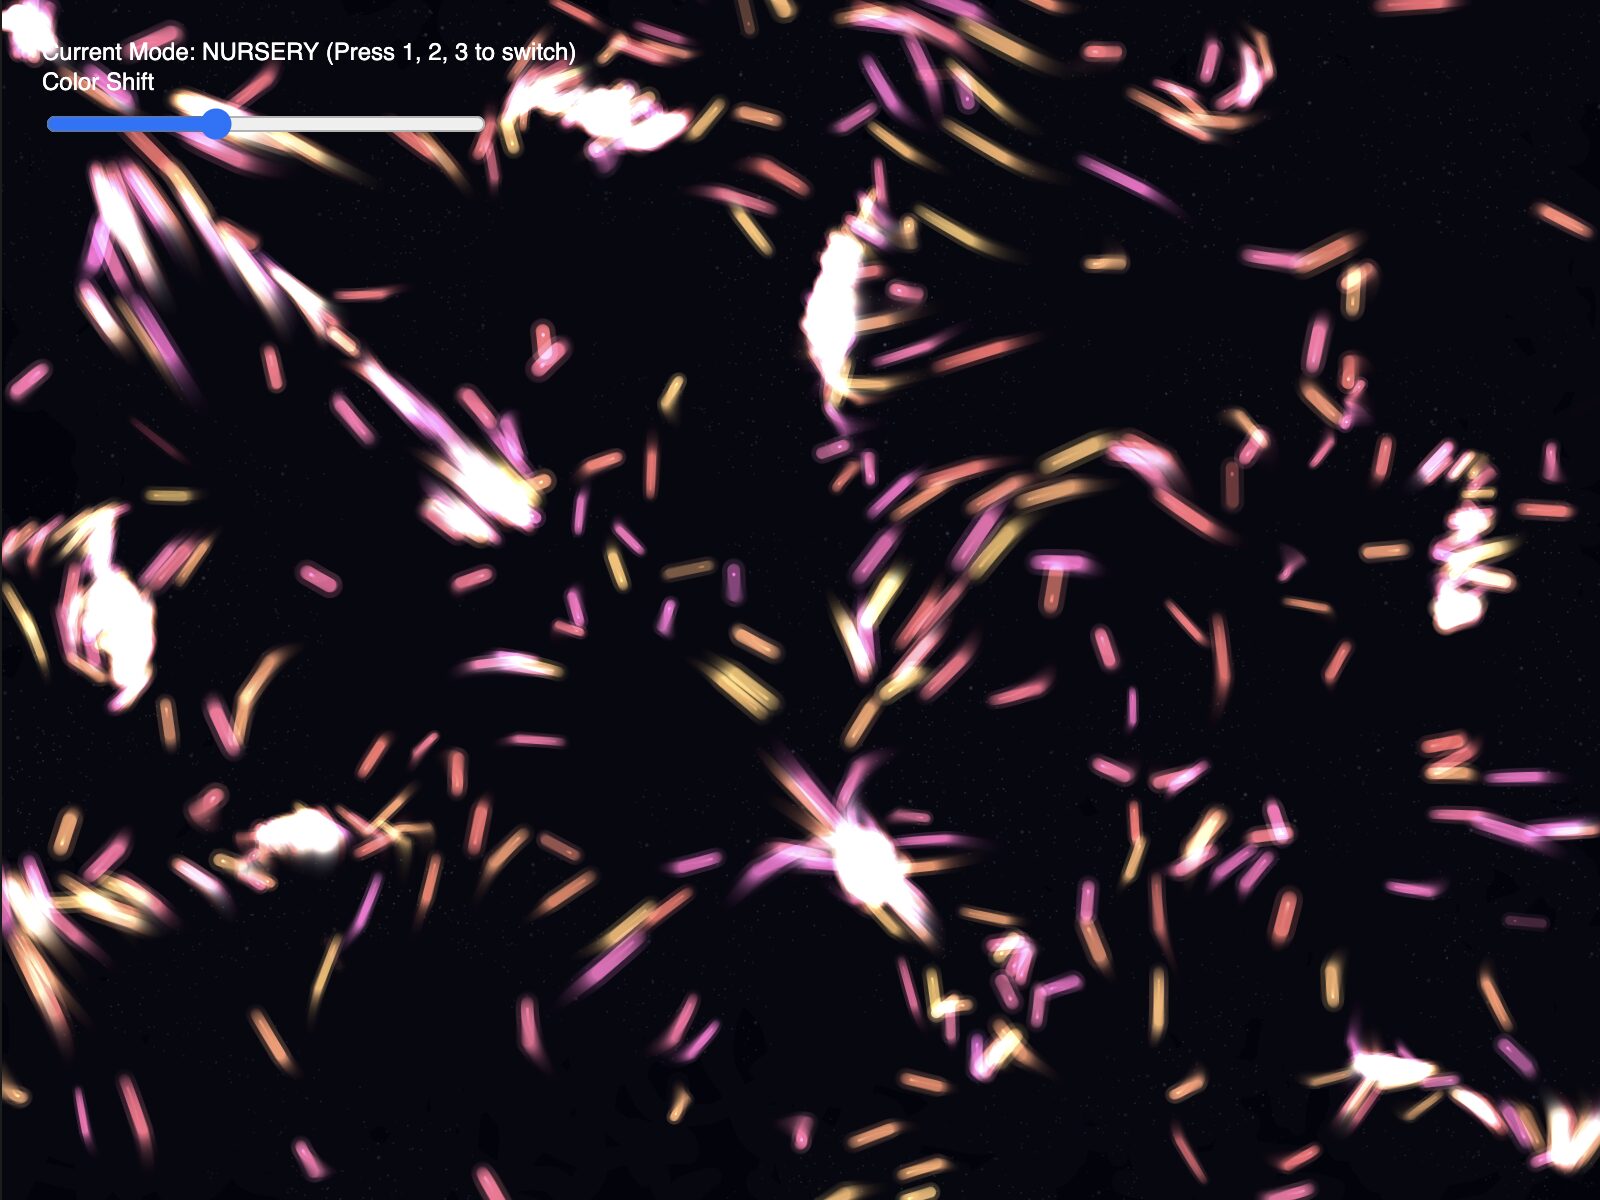
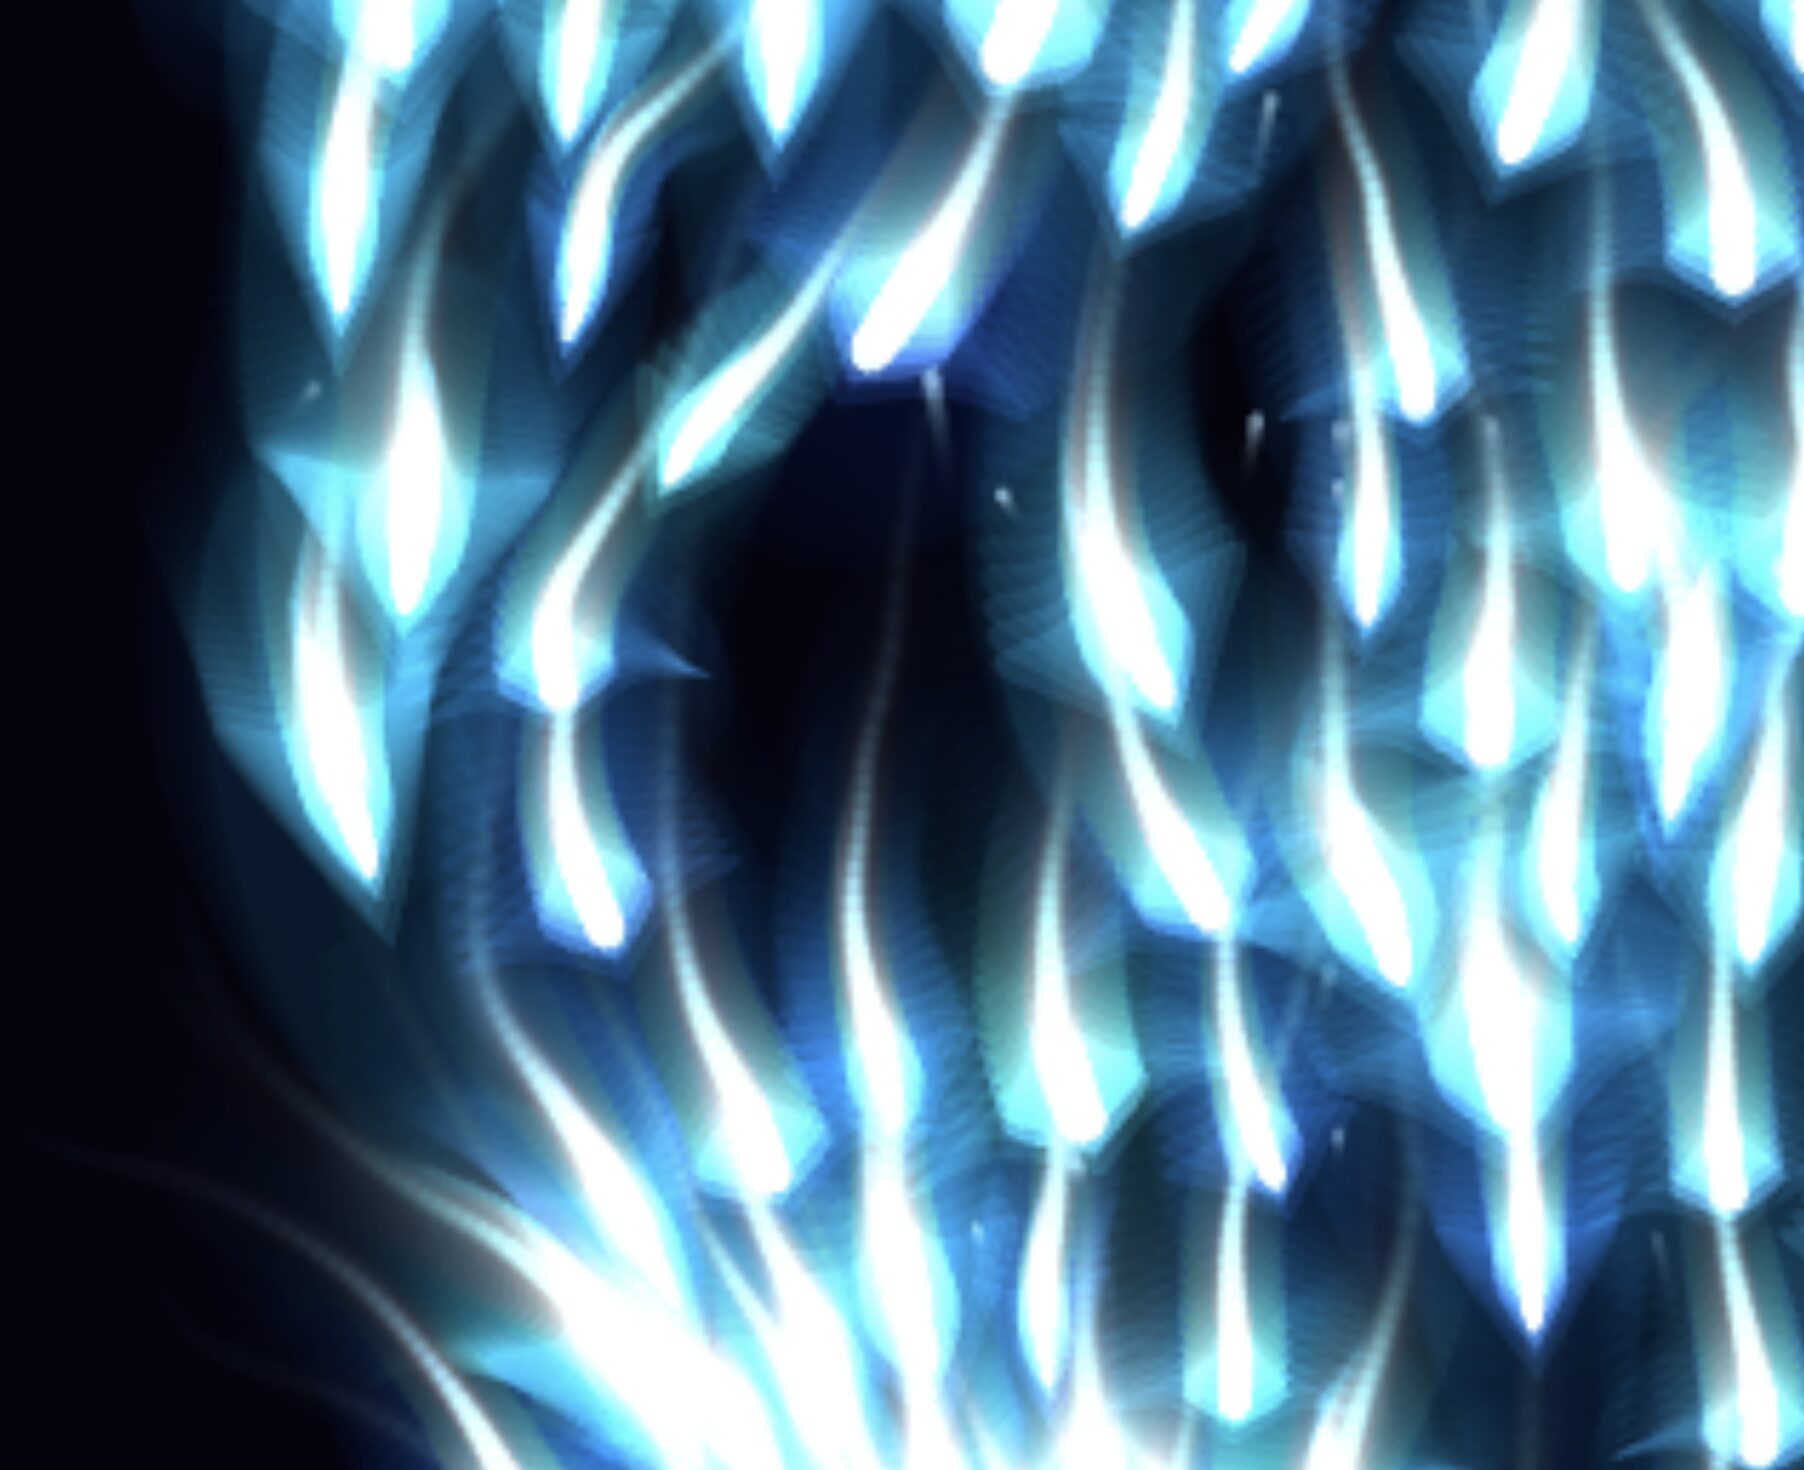
Visually, I knew I wanted it to be a bioluminescent vibe, so I used blendmode(ADD) and neon colors for the beings, taking inspiration from an old assignment. However, I wanted to make it visually differentiable from the assignment, so more on that later.

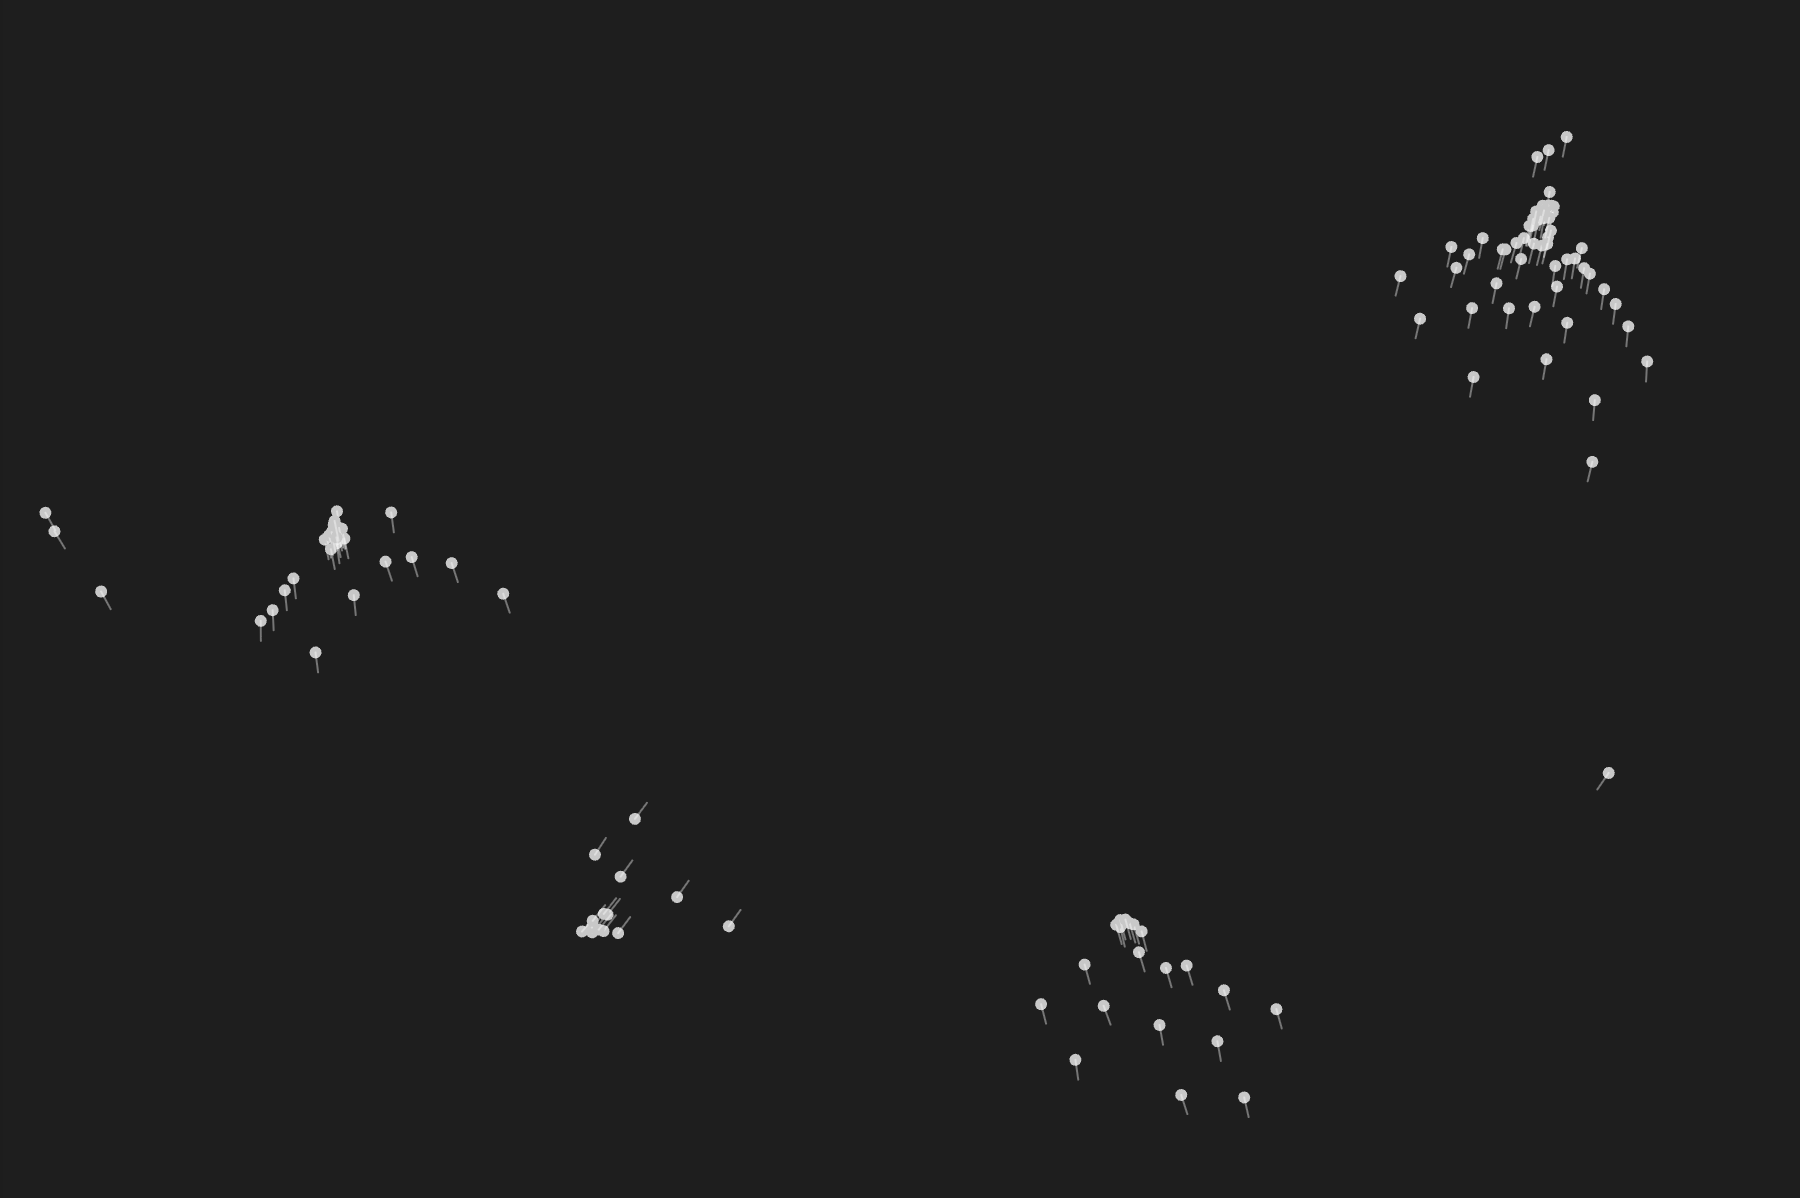
One of the challenges was getting the revolving animation working. Here is what the boids would do initially when I held up my fist, when I wanted them to orbit it out of curiosity for this new life source:

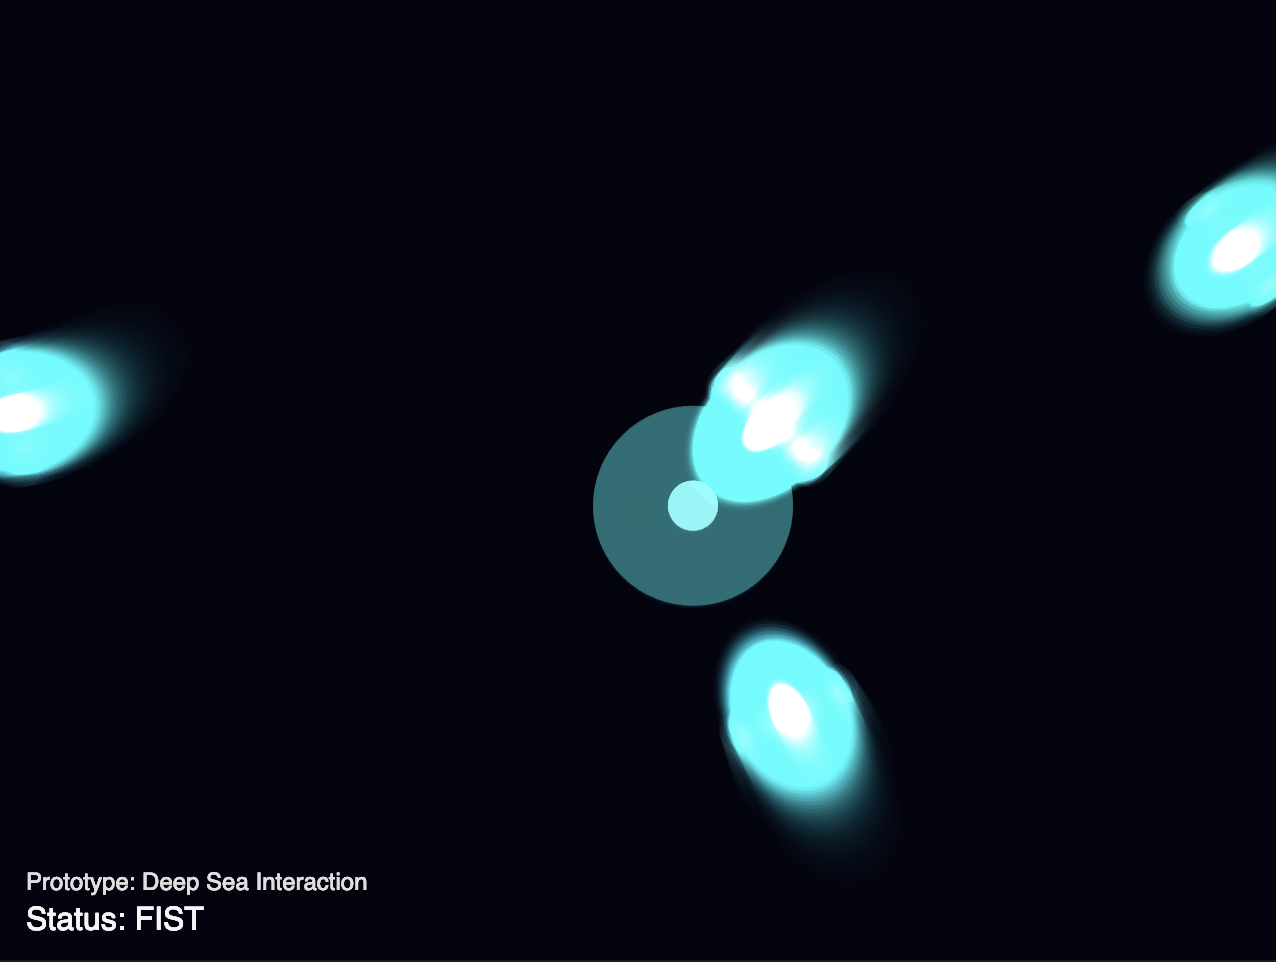
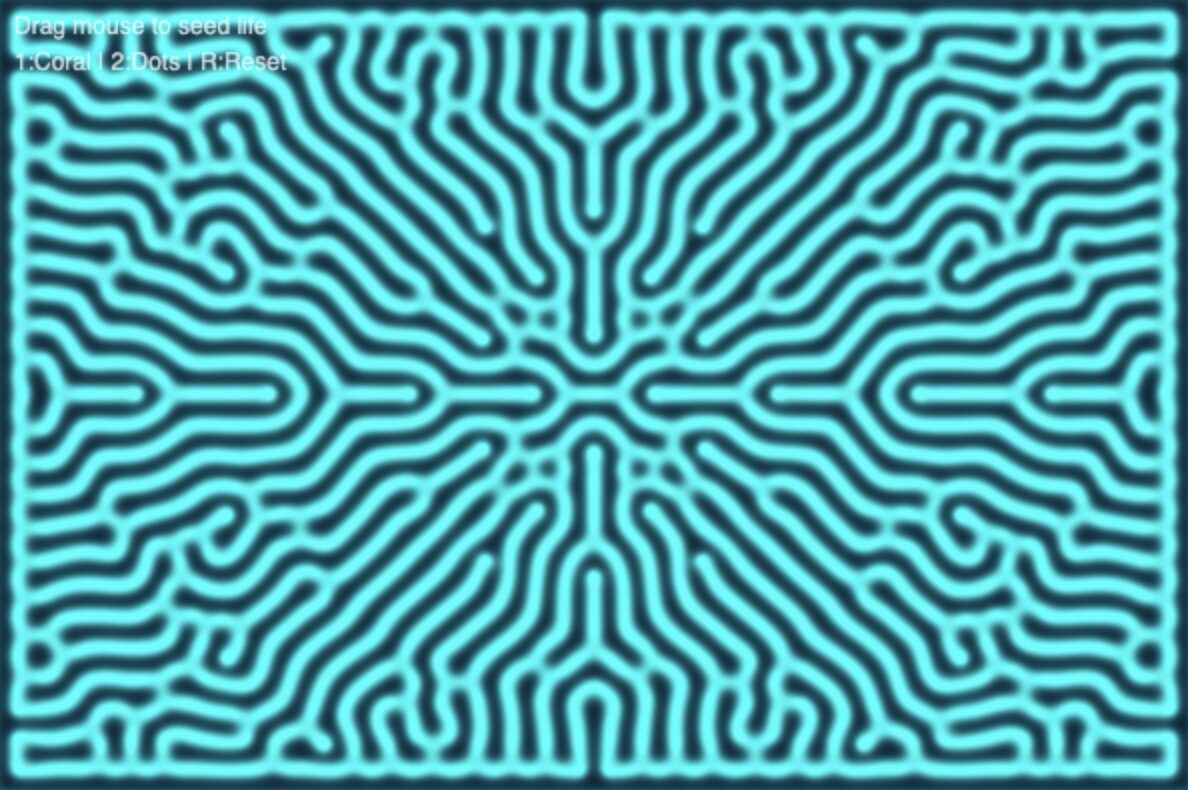
As you can see, they would just group together, intially in local groups, and then all of those would mesh into one, creating a confusing visual where all the fish were stacked on each other and moving as one. I took inspiration from Afra’s Assignment 9 where her sketch included a working revolving mechanism with the boids evenly spaced out instead of conjoining and used that sketch to make the boids orbit my fist in my sketch.

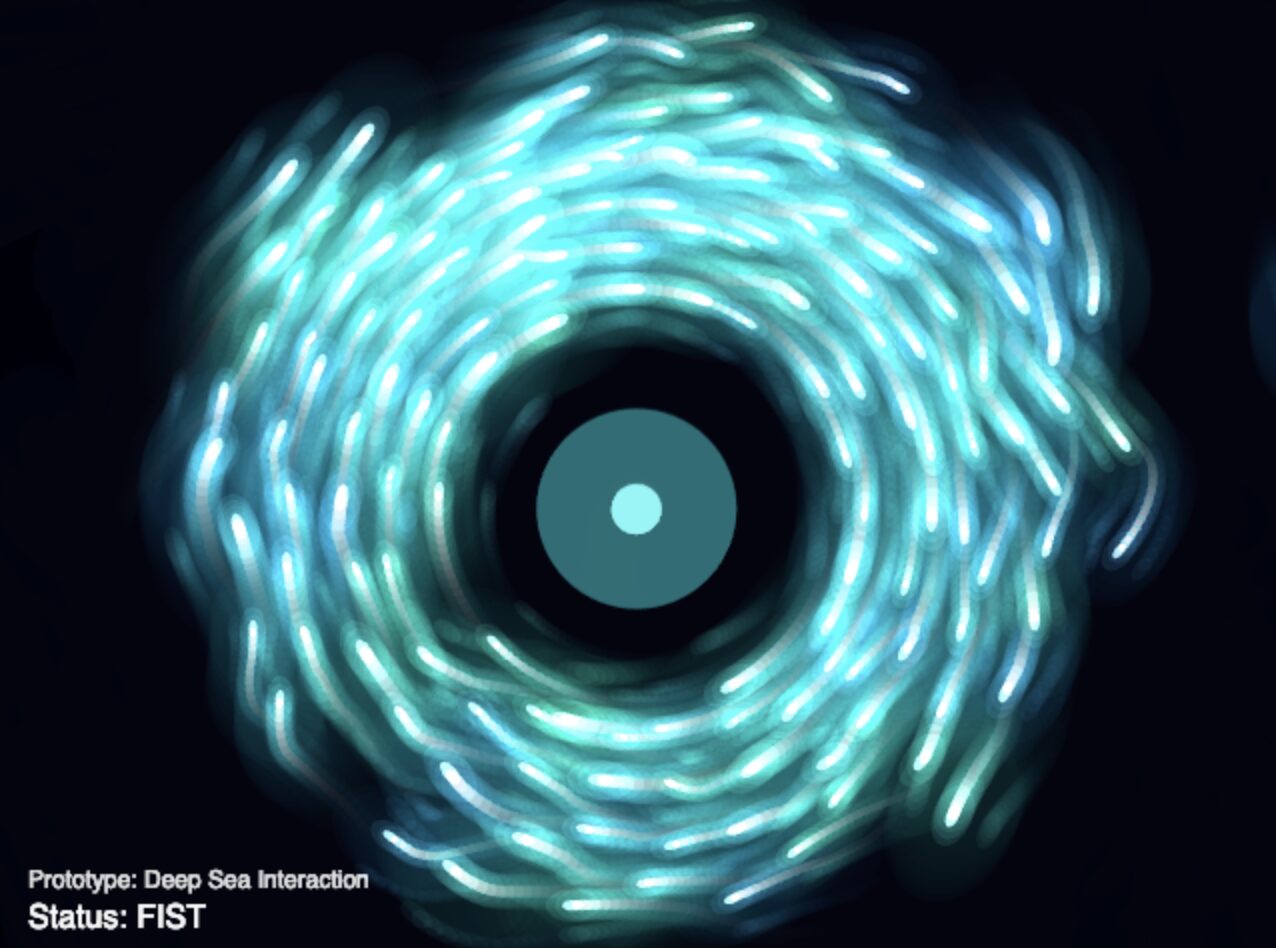
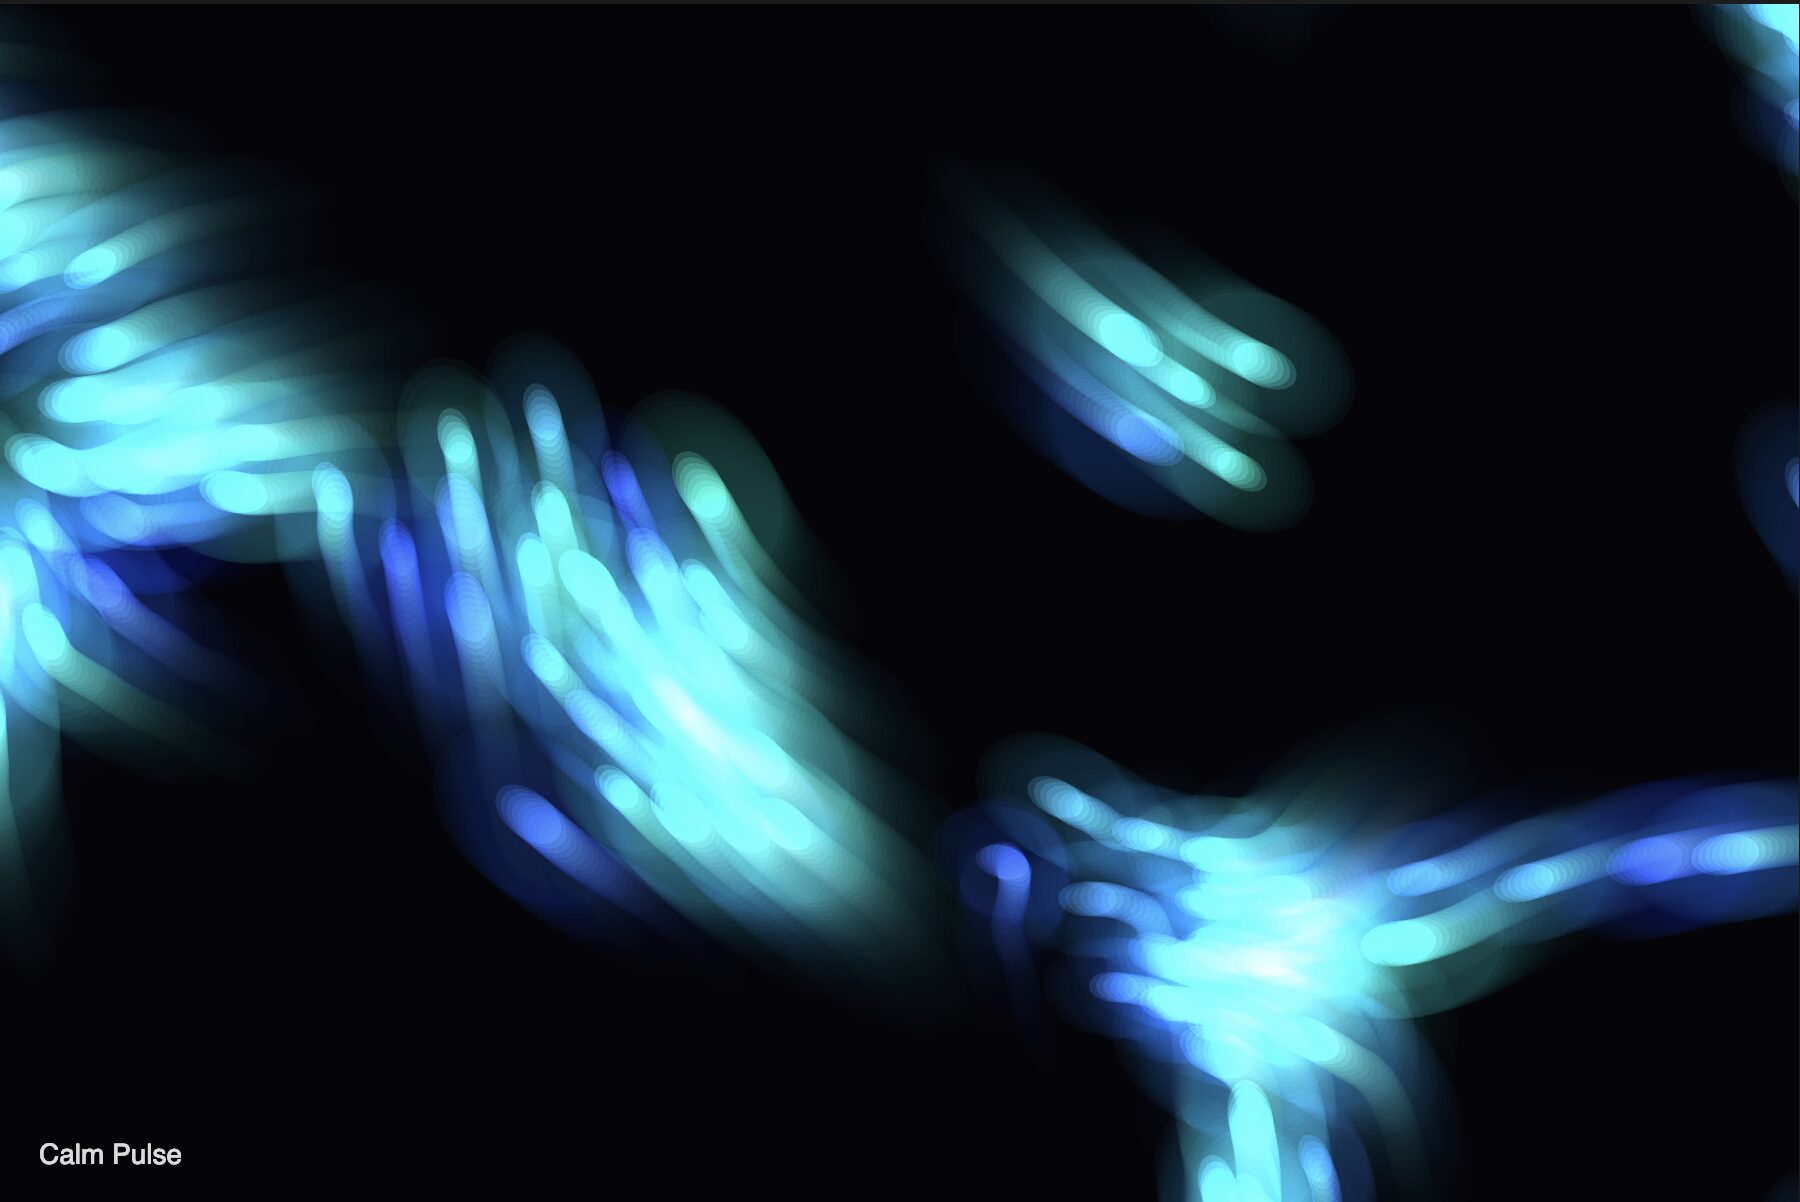
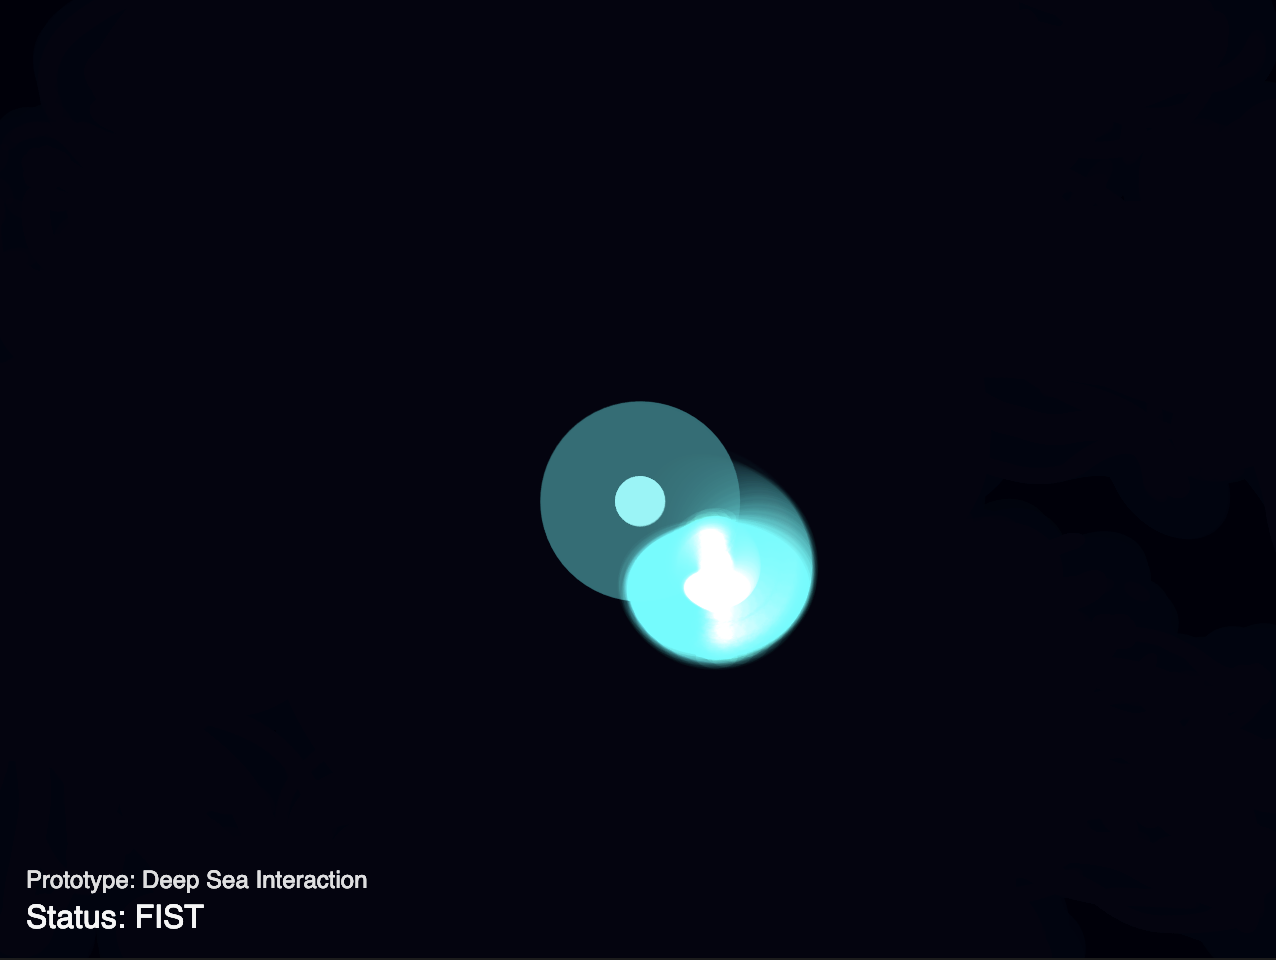
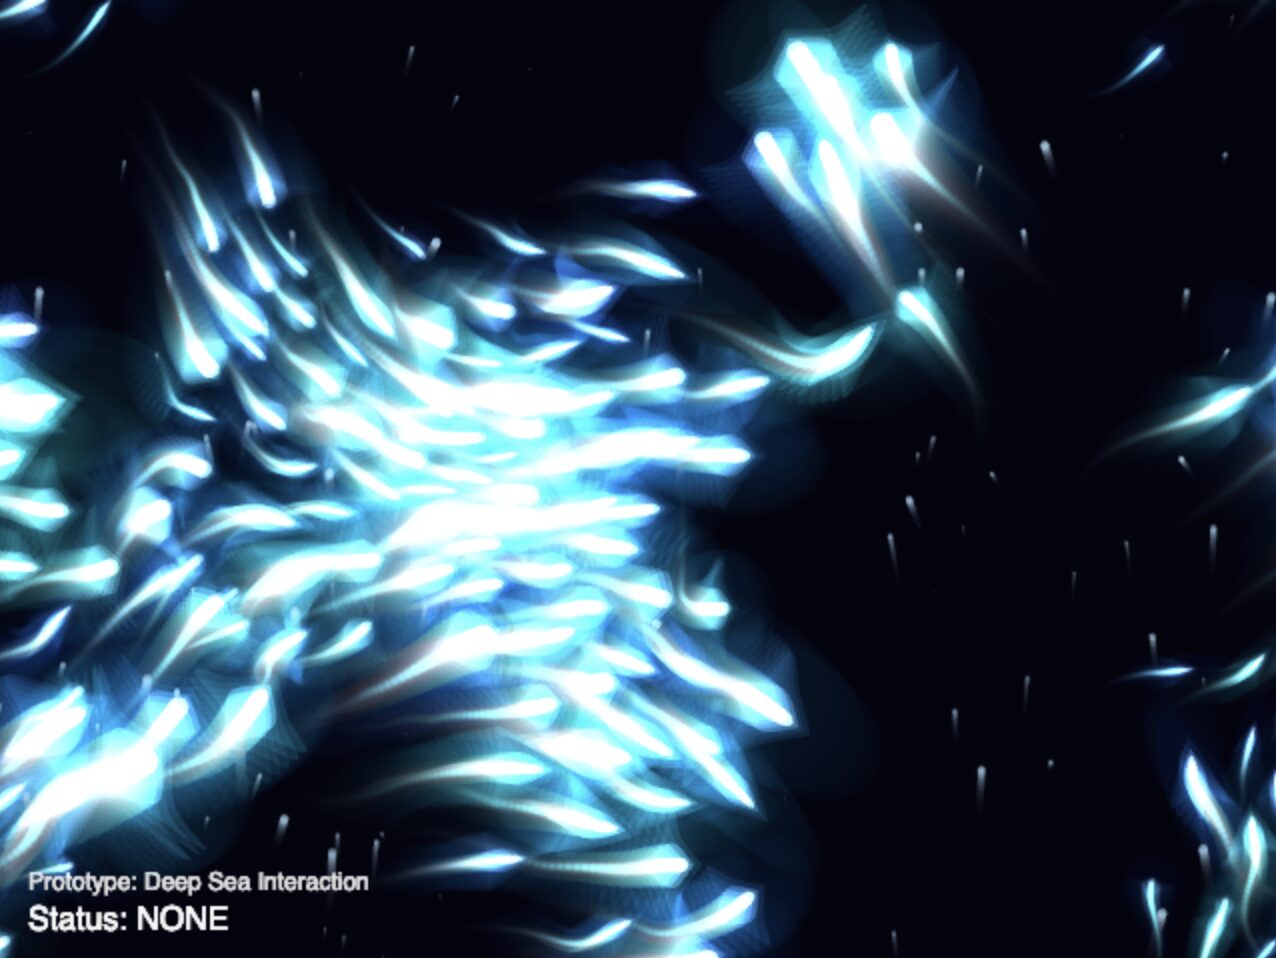
You can see how different it looks here from before, and how much closer it is to my vision of orbiting around this foreign light source. Basically, The FIST interaction was upgraded from a simple magnet to an orbital force. By calculating tangent vectors, the creatures now swirl gracefully around a closed fist like moths around a lantern.

Phase 2: Breathing Life into the Ecosystem

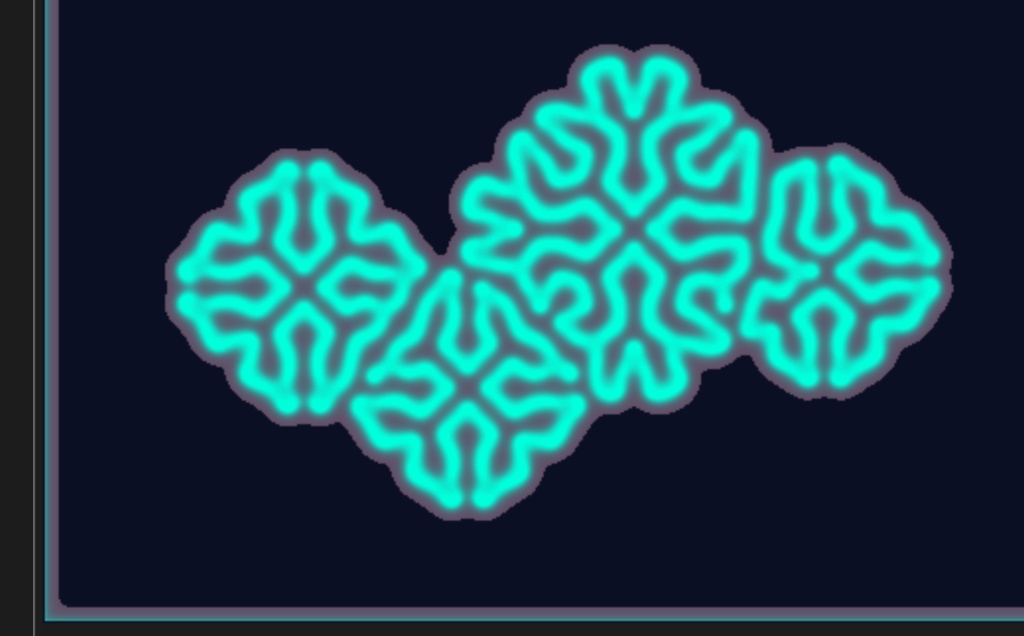
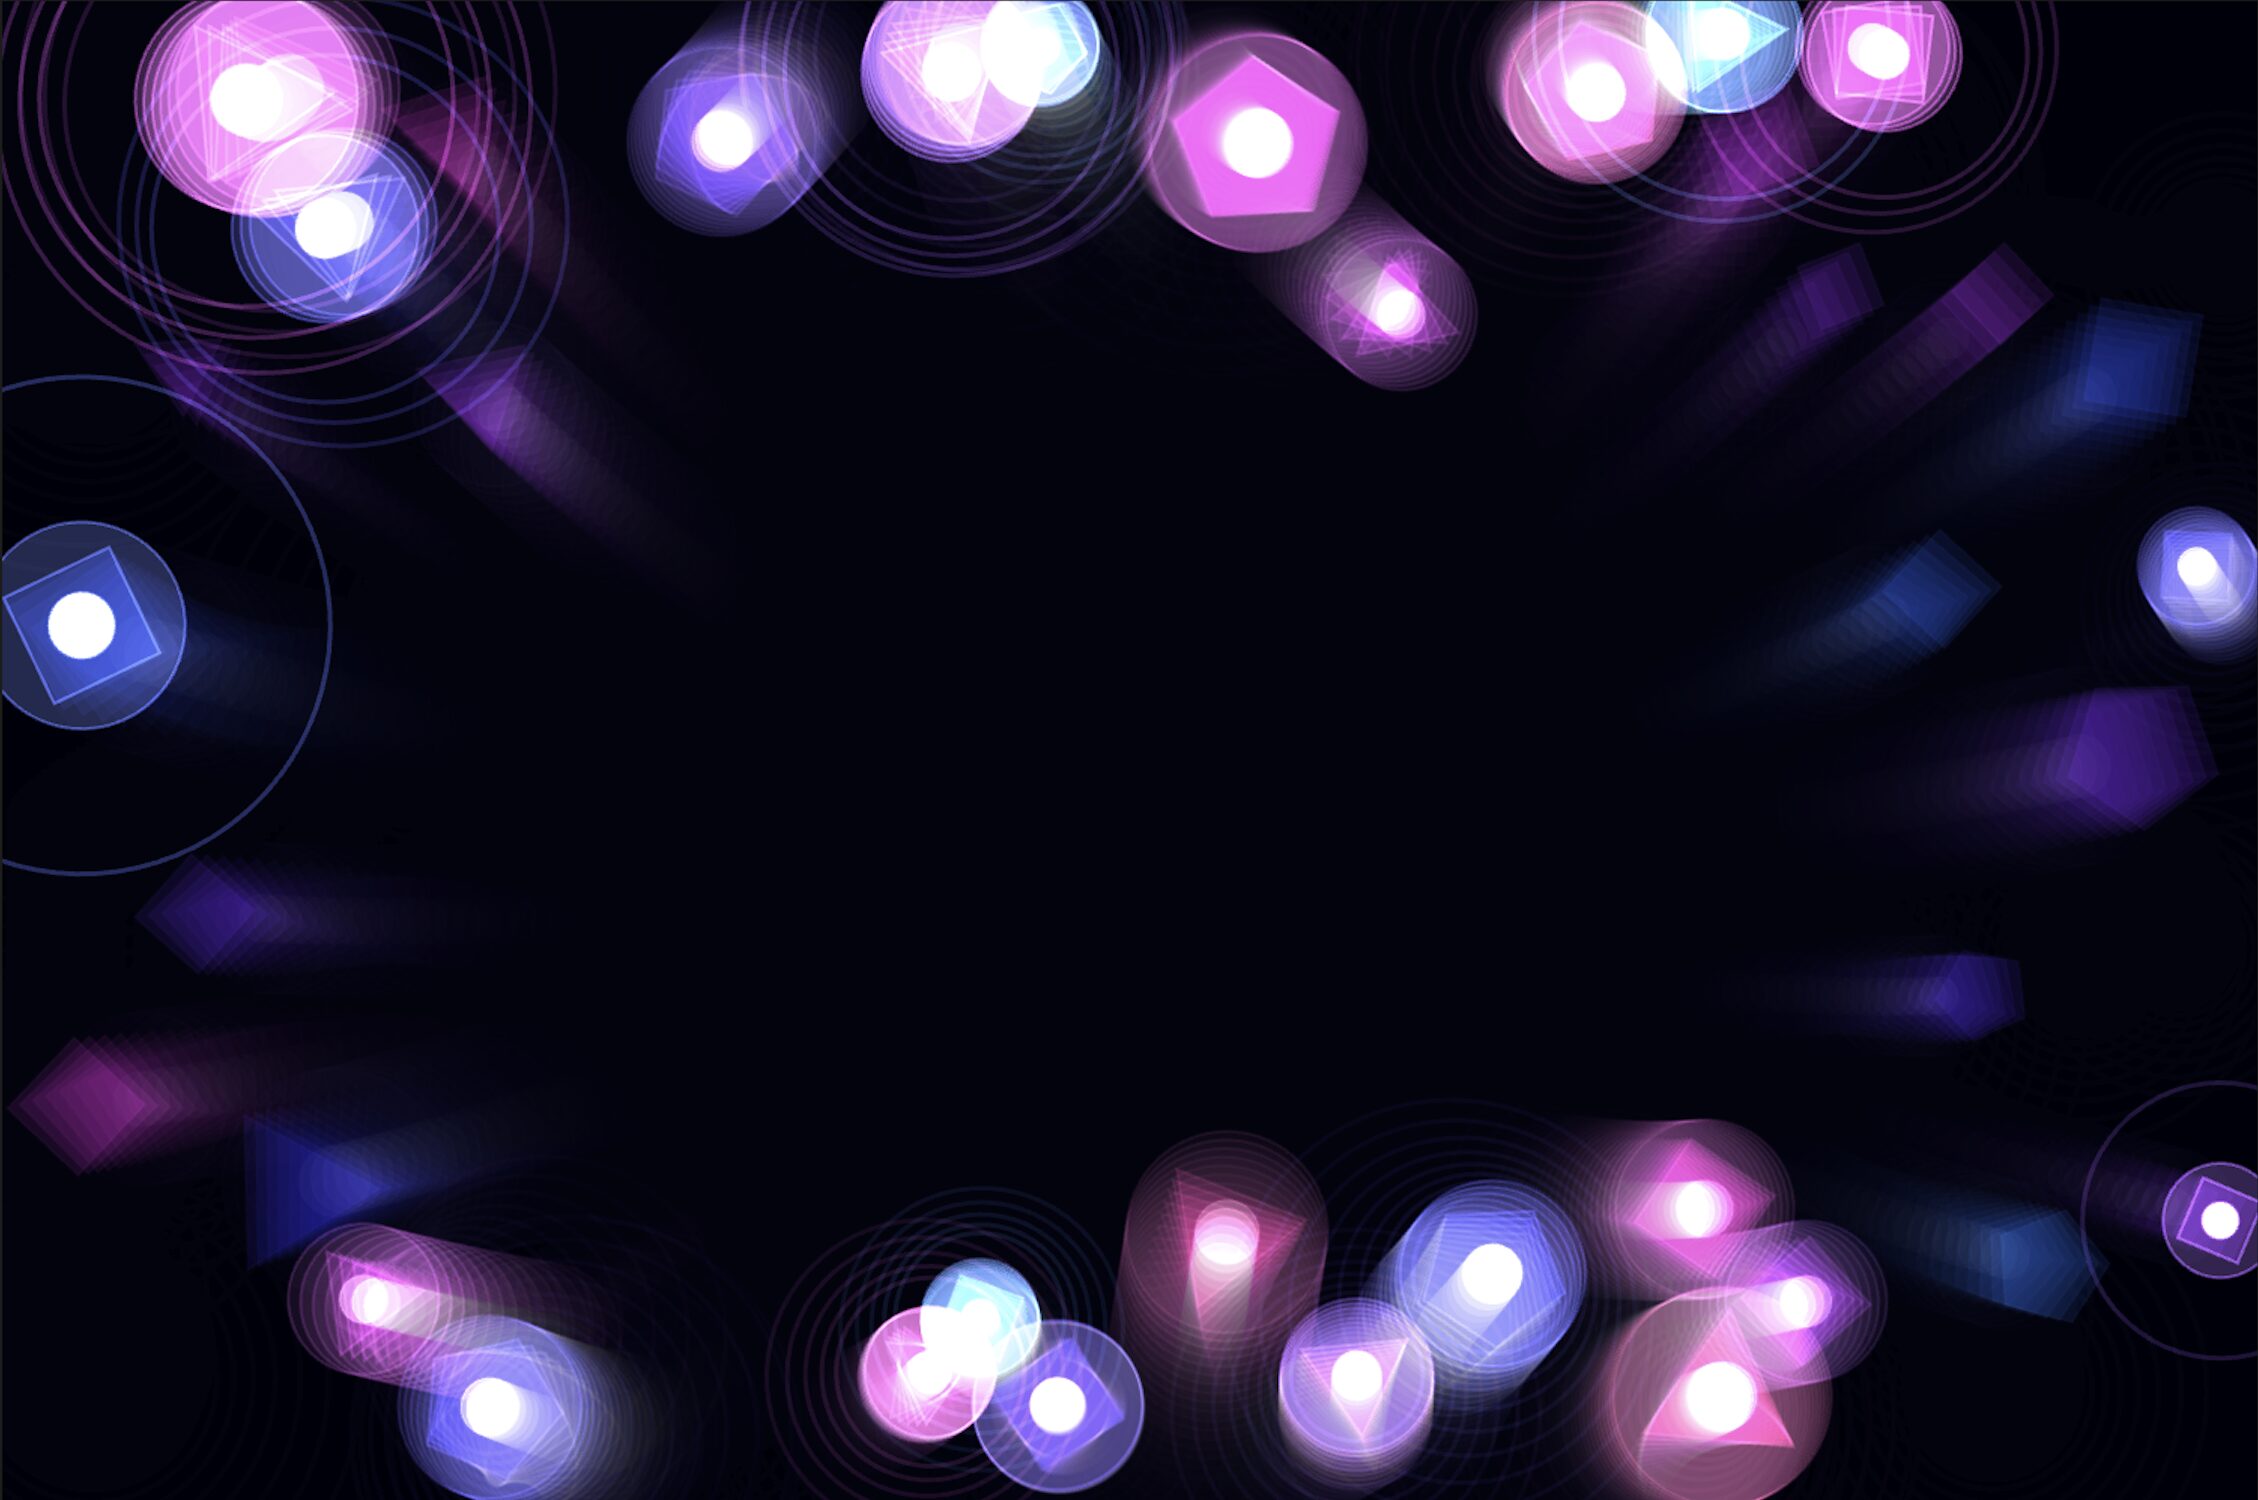
Once the logic worked, the geometric shapes felt too robotic and similar to what I’ve previously done. I wanted the creatures to feel organic and squishy.

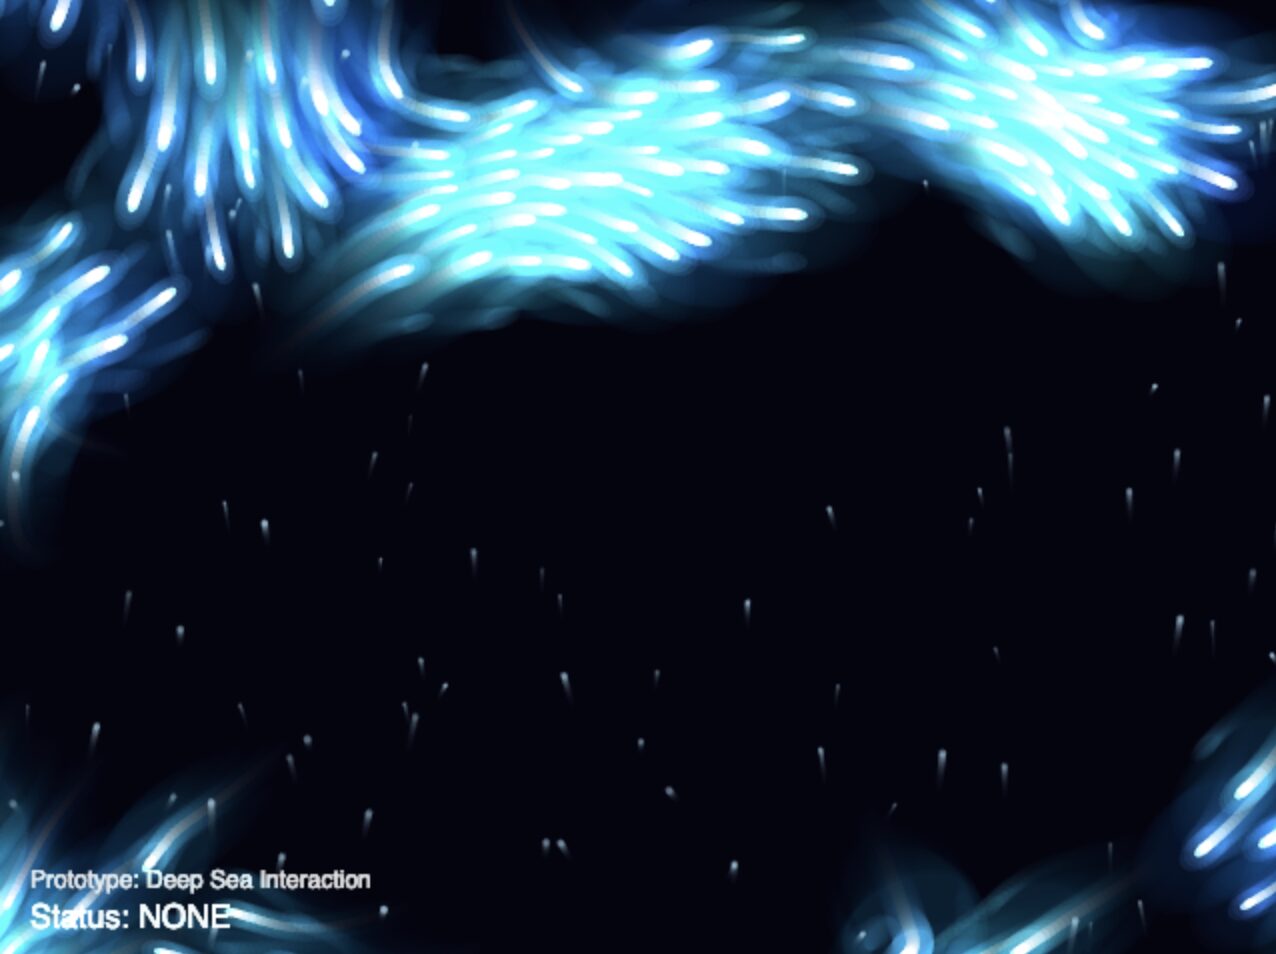
  • Fake Depth: To make the 2D canvas feel like an ocean, I introduced marine snow as you can see in the following visual. This added detail to the background to make it look more like an abyssal setting.

  • Organic Undulation: I replaced the basic shapes with a custom beginShape() drawing that utilizes squash and stretch animation principles driven by a sin() wave. I also added ribbon trails that fade out using the boids’ movement history.

i.e. Adding tails

i.e Updating visuals from simple circles to more detailed shapes and fins

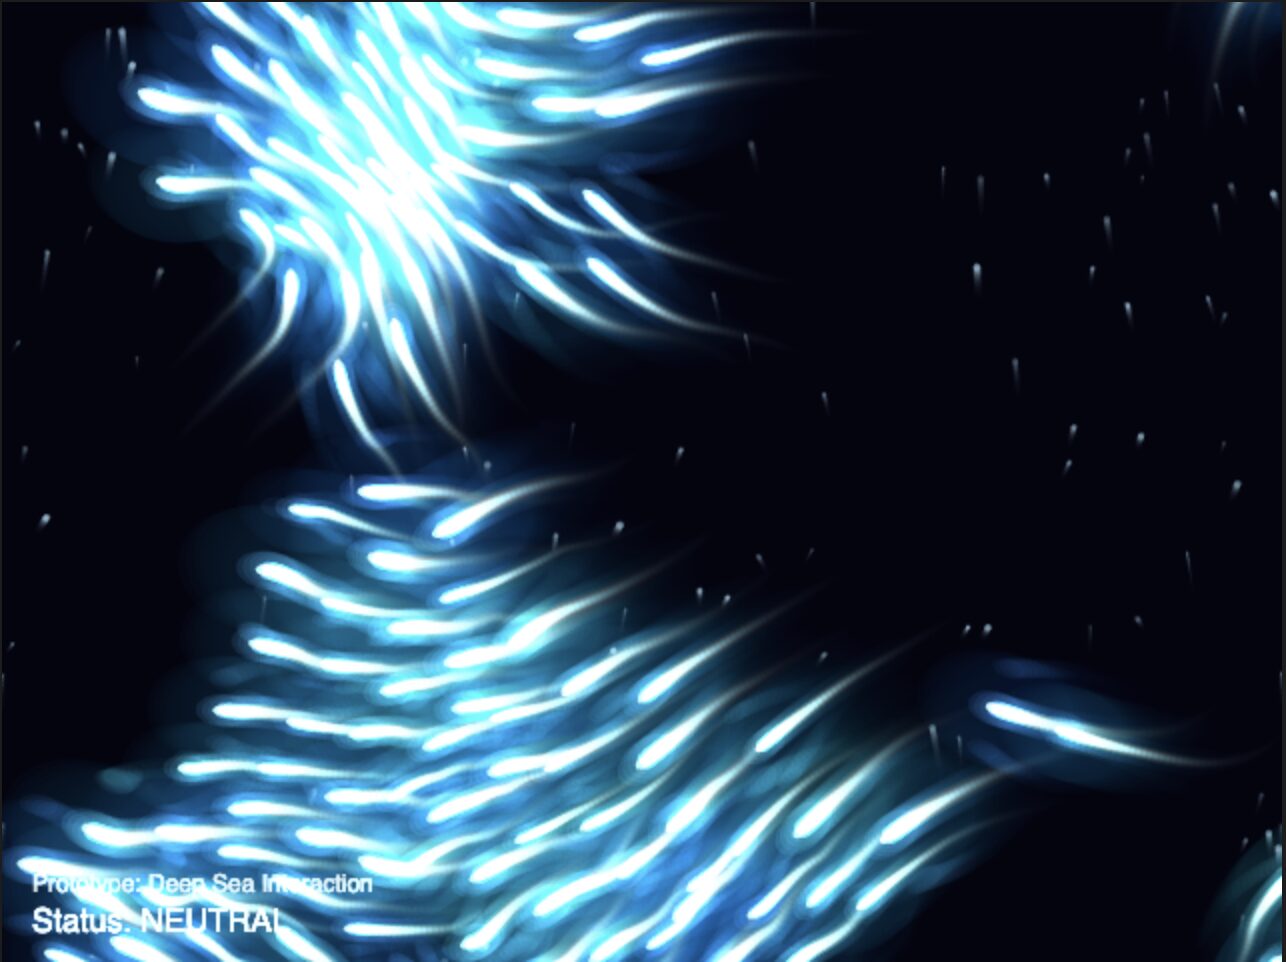
  • Fake 3D: I also introduced a z multiplier. Boids and newly added marine snow particles are assigned a random depth value. This z value scales their size, speed, and opacity. By sorting the arrays (flock.sort((a, b) => a.z - b.z)), the background elements draw first, creating a beautiful parallax effect. You can see the different sizes reflected in the updated visual:

Phase 3: Deepening the Interaction (Pointing & Audio Input)

To make the environment feel truly responsive, I expanded the inputs beyond simple hand shapes.

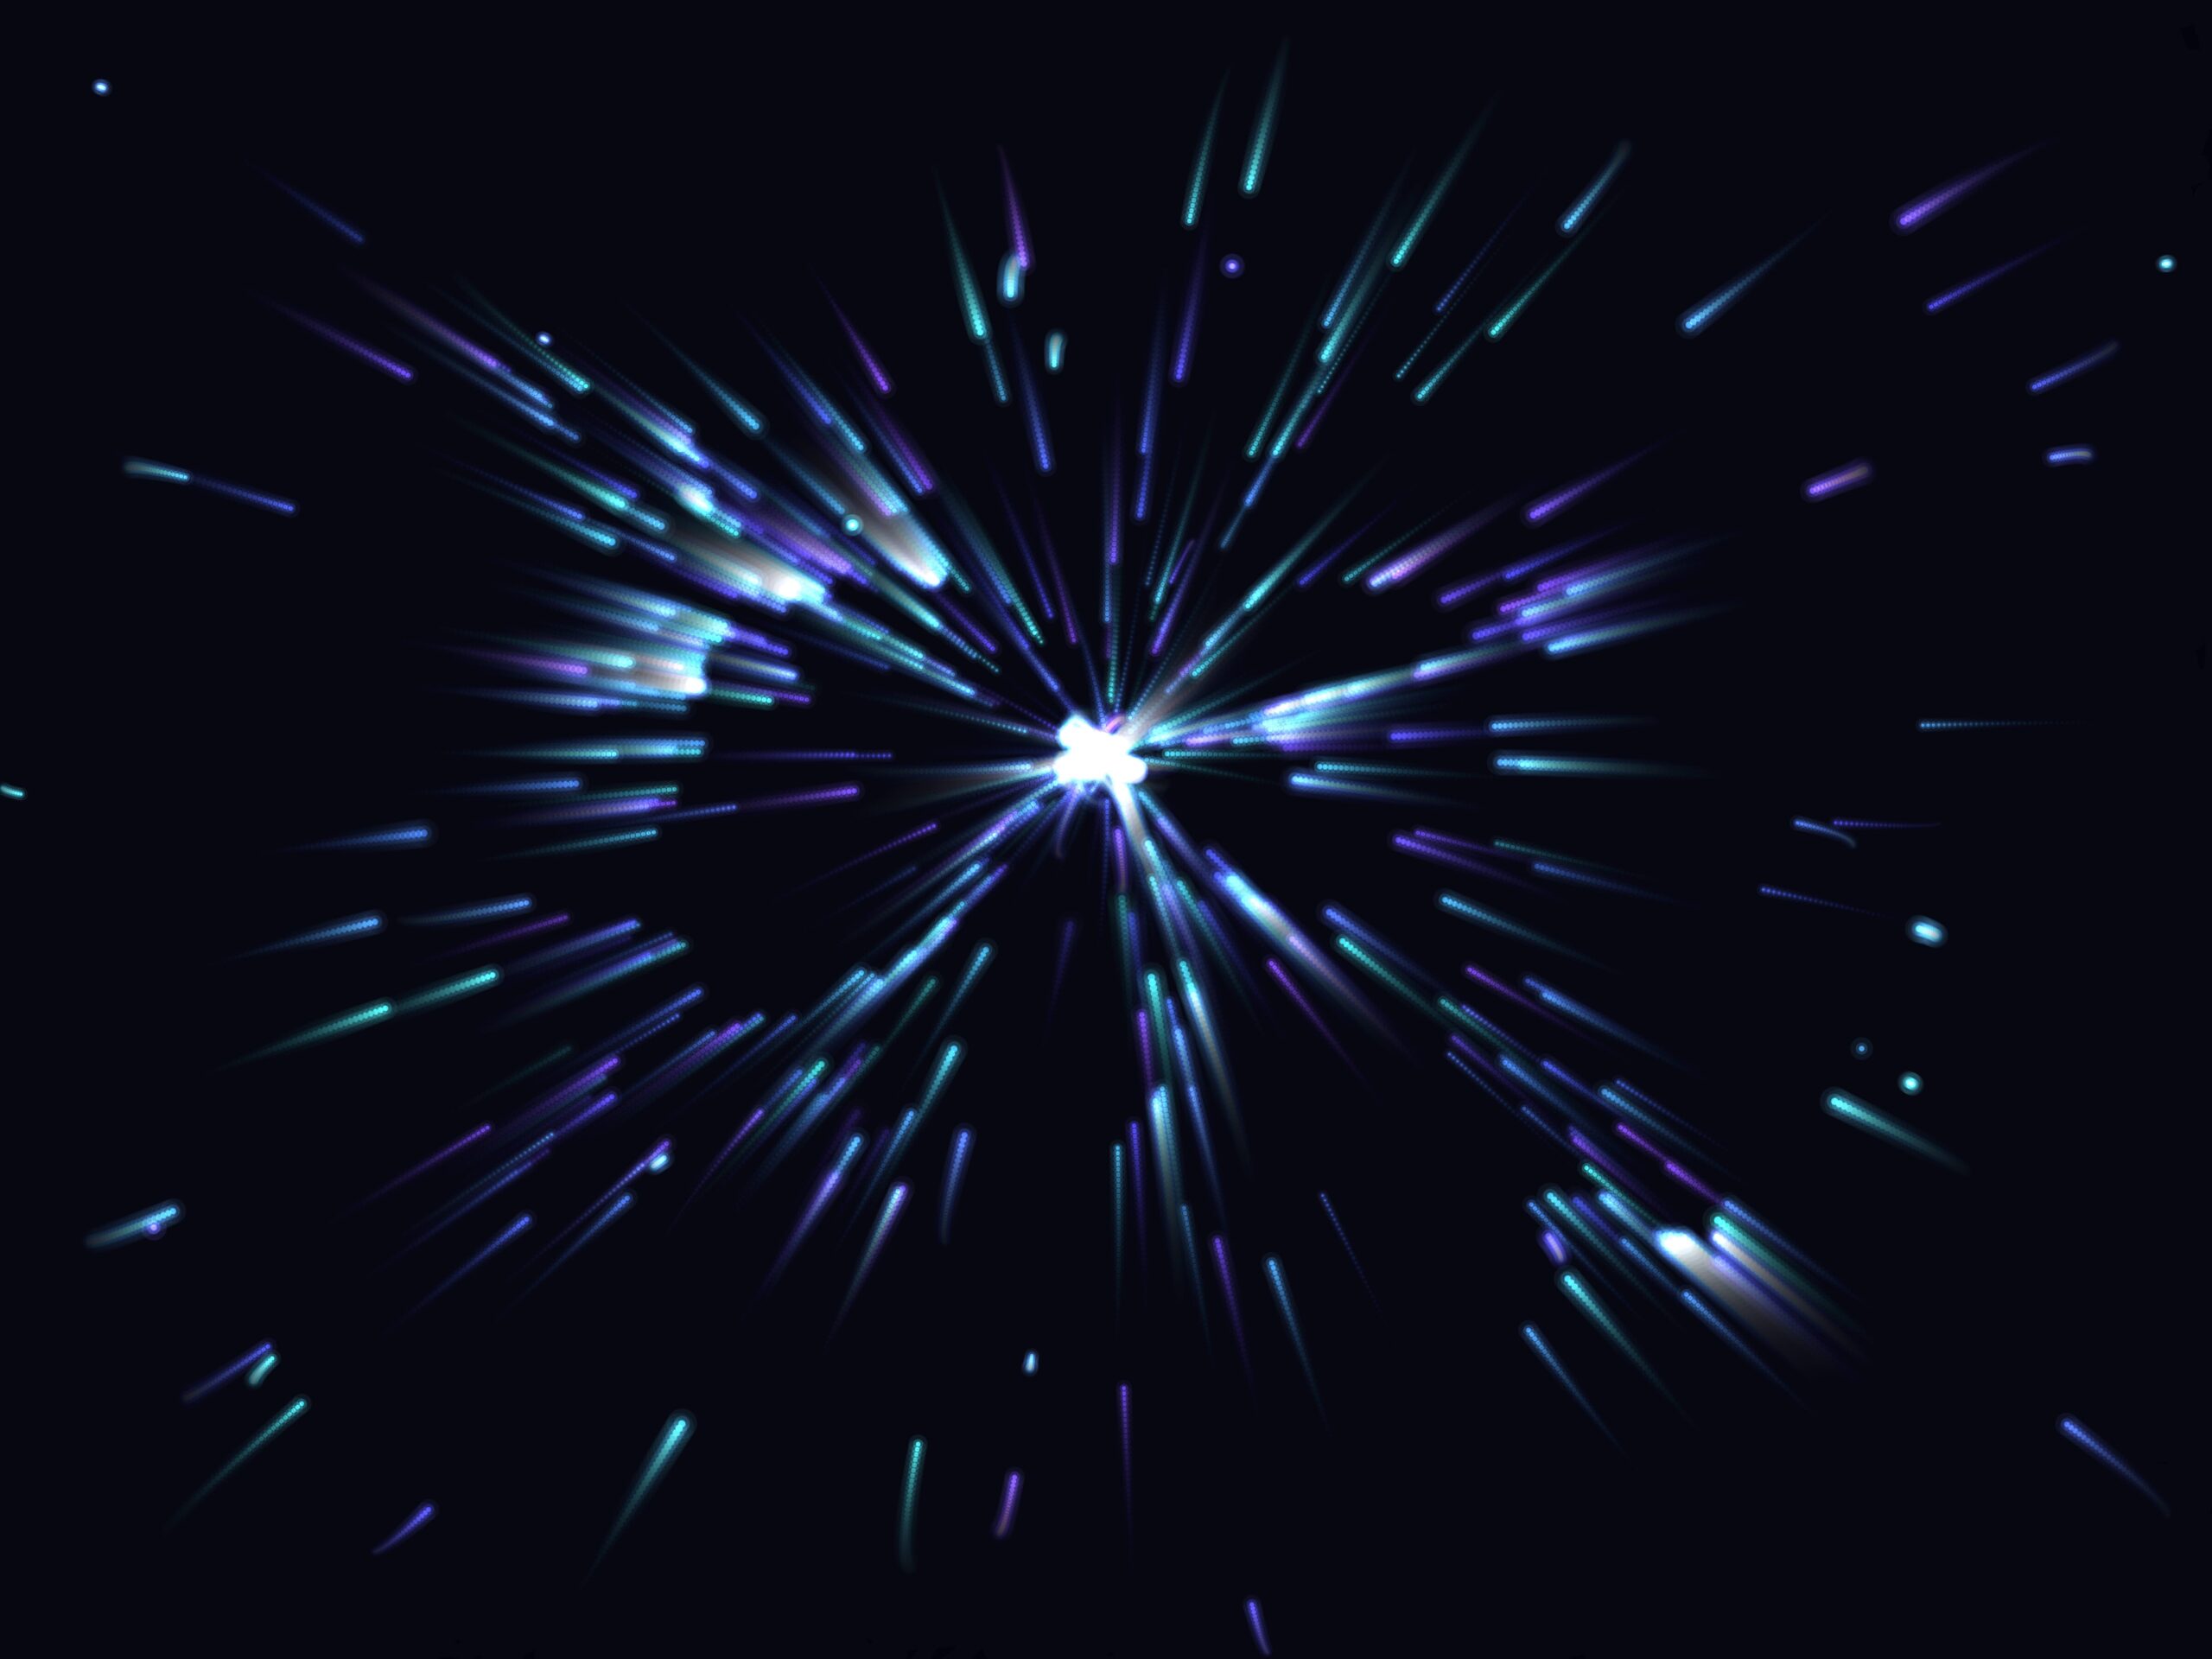
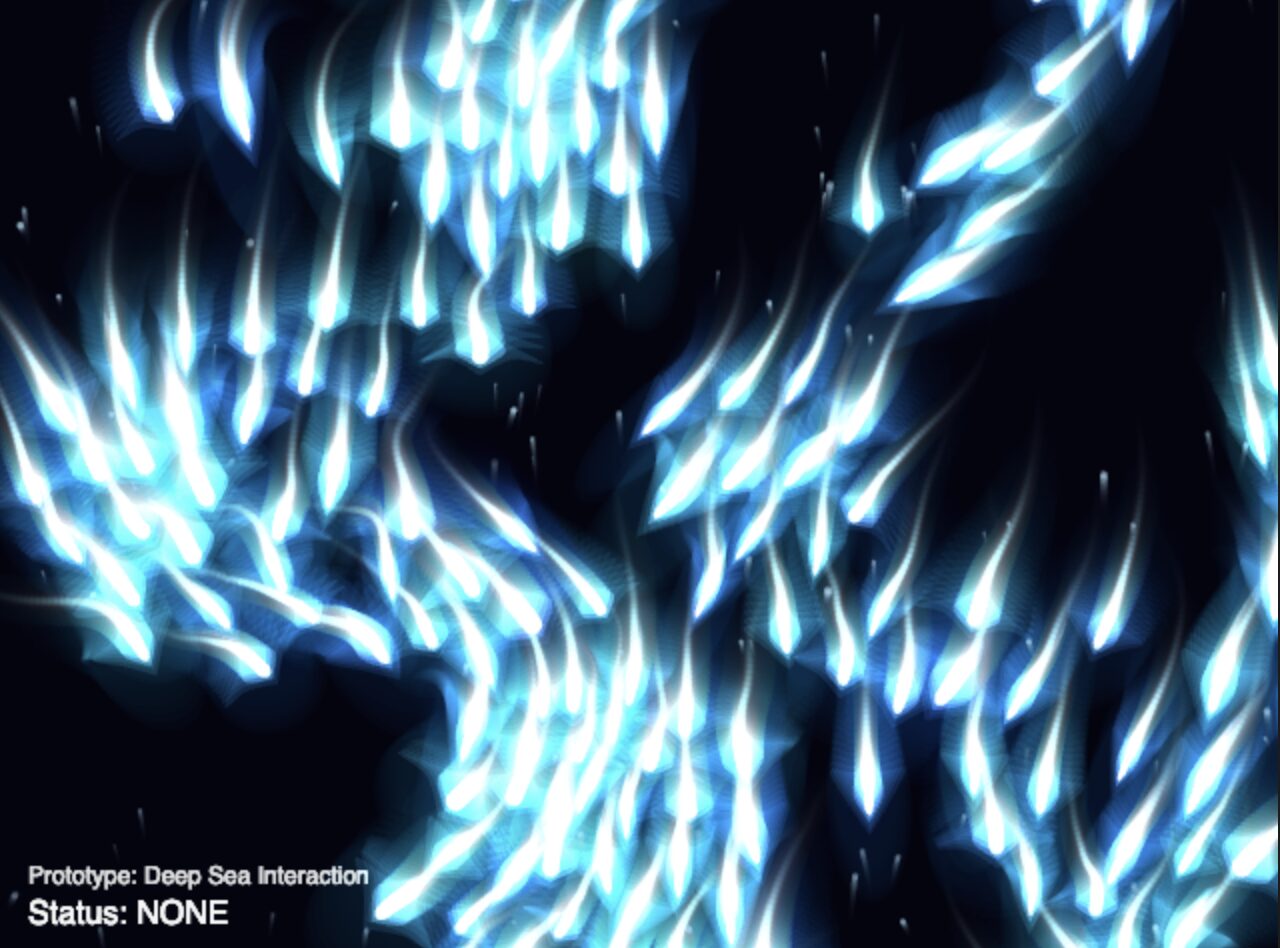
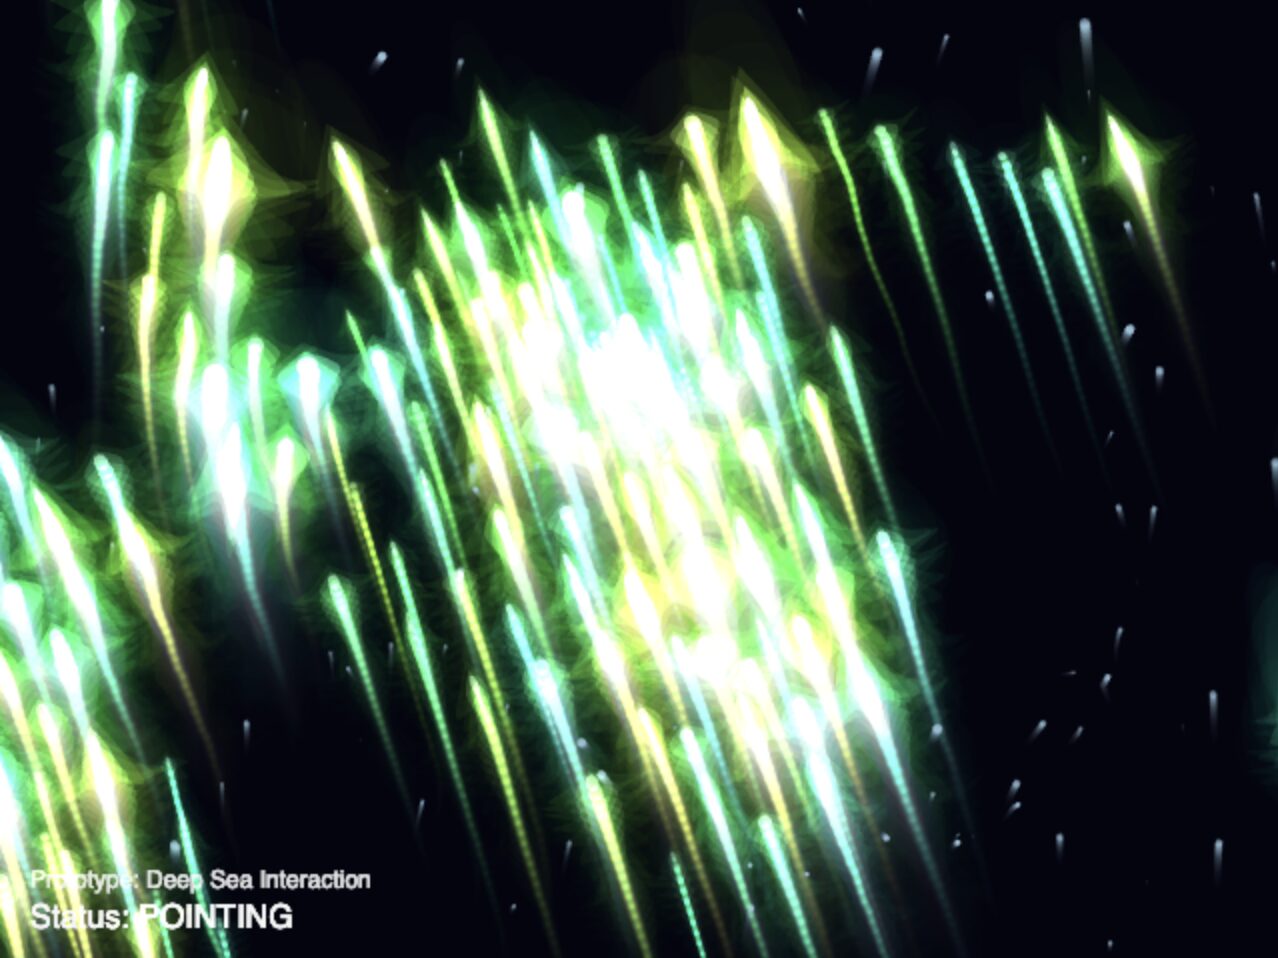
  • Pointing Logic: I added a specific pose check: if the index finger is extended but the others are curled, the system calculates a 2D vector from the knuckle to the fingertip. The boids now blast away in the exact direction you point. To differentiate it, they change colors depending on their behavior.

  • Microphone Input: Deep sea creatures are sensitive to vibrations. I integrated p5.AudioIn() so that sudden loud noises (like clapping) trigger a sonar “ping”, lighting up the boids and playing a muffled heartbeat sound.

Phase 4: The Emotional Engine

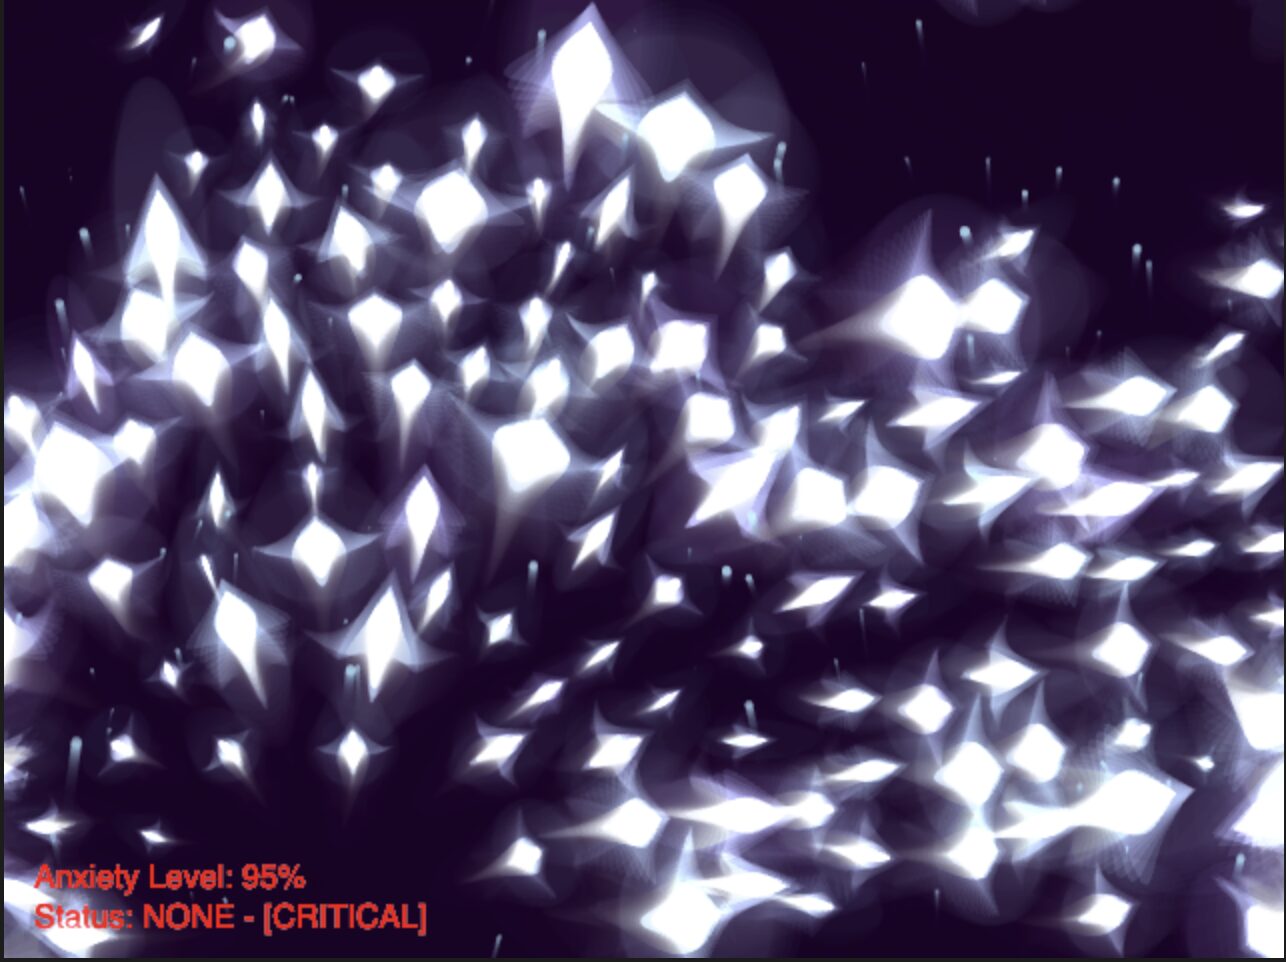
The final layer was adding “Anxiety.” I introduced an anxietyLevel variable (from 0.0 to 1.0) that acts as the emotional memory of the ecosystem.

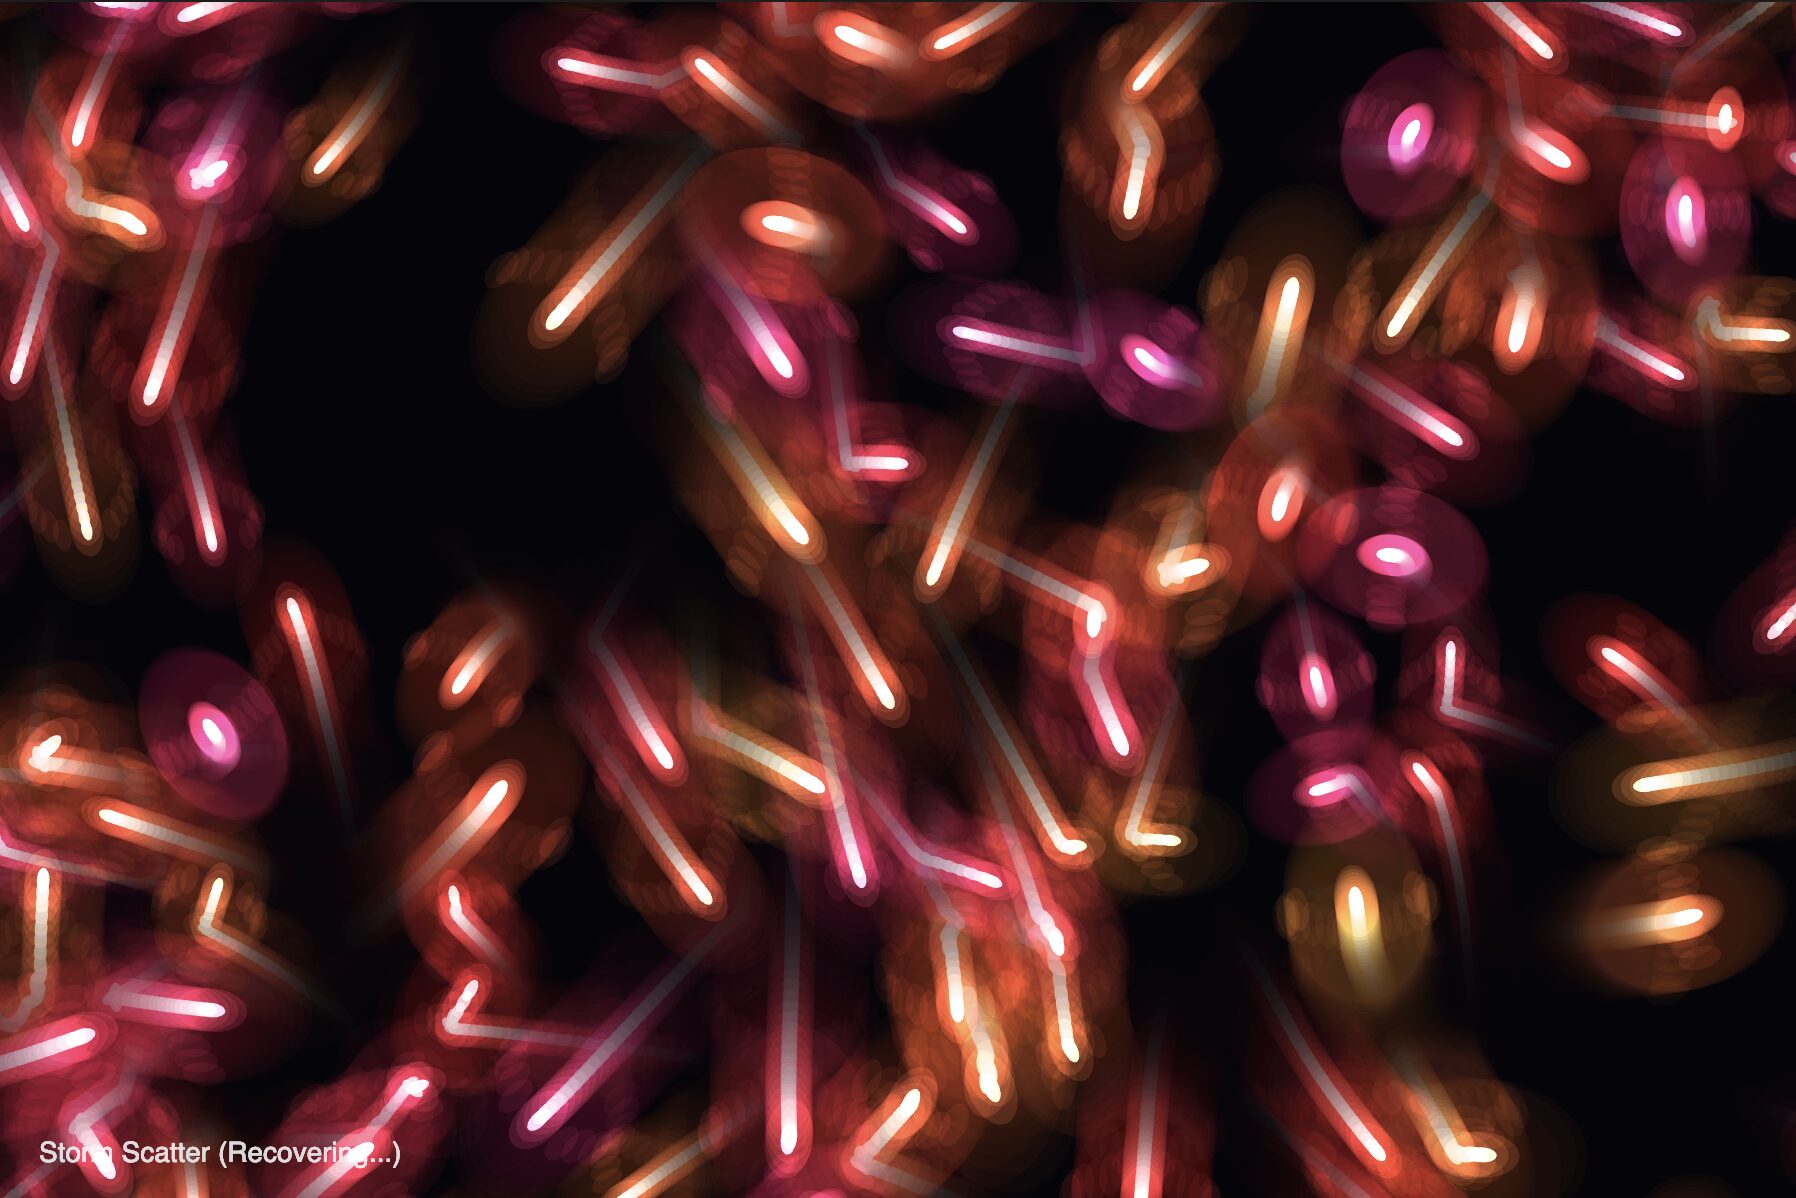
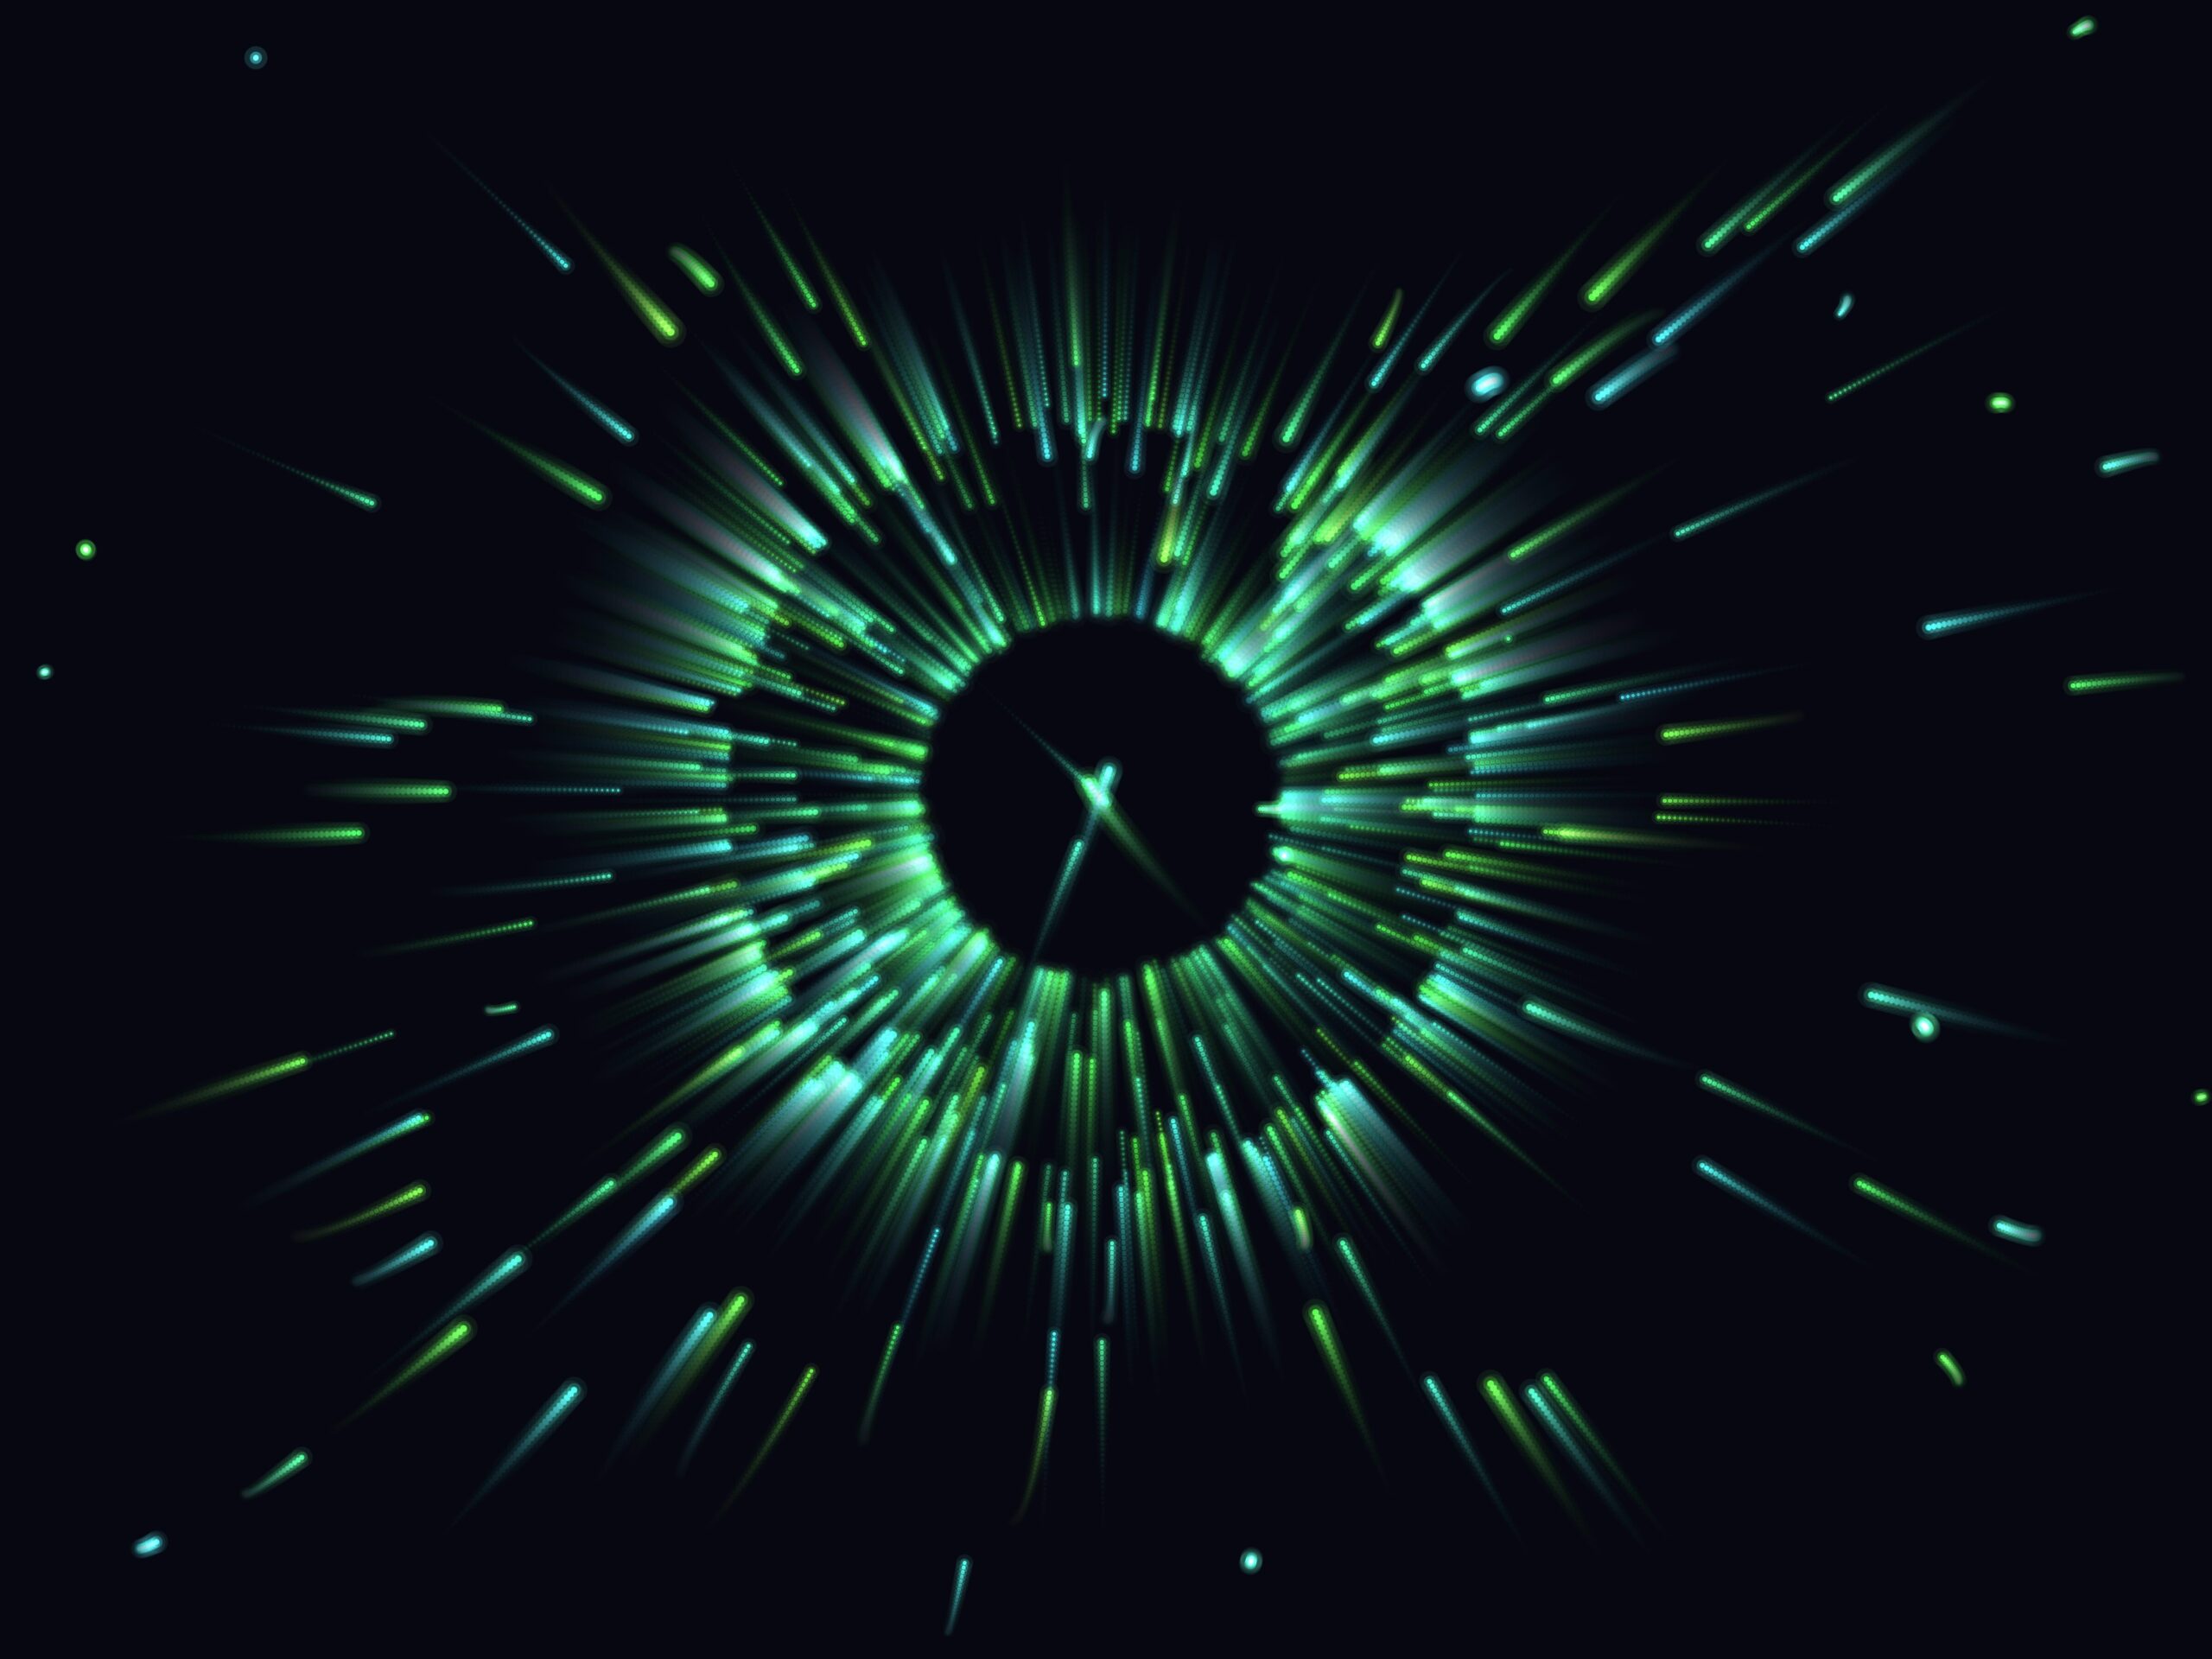
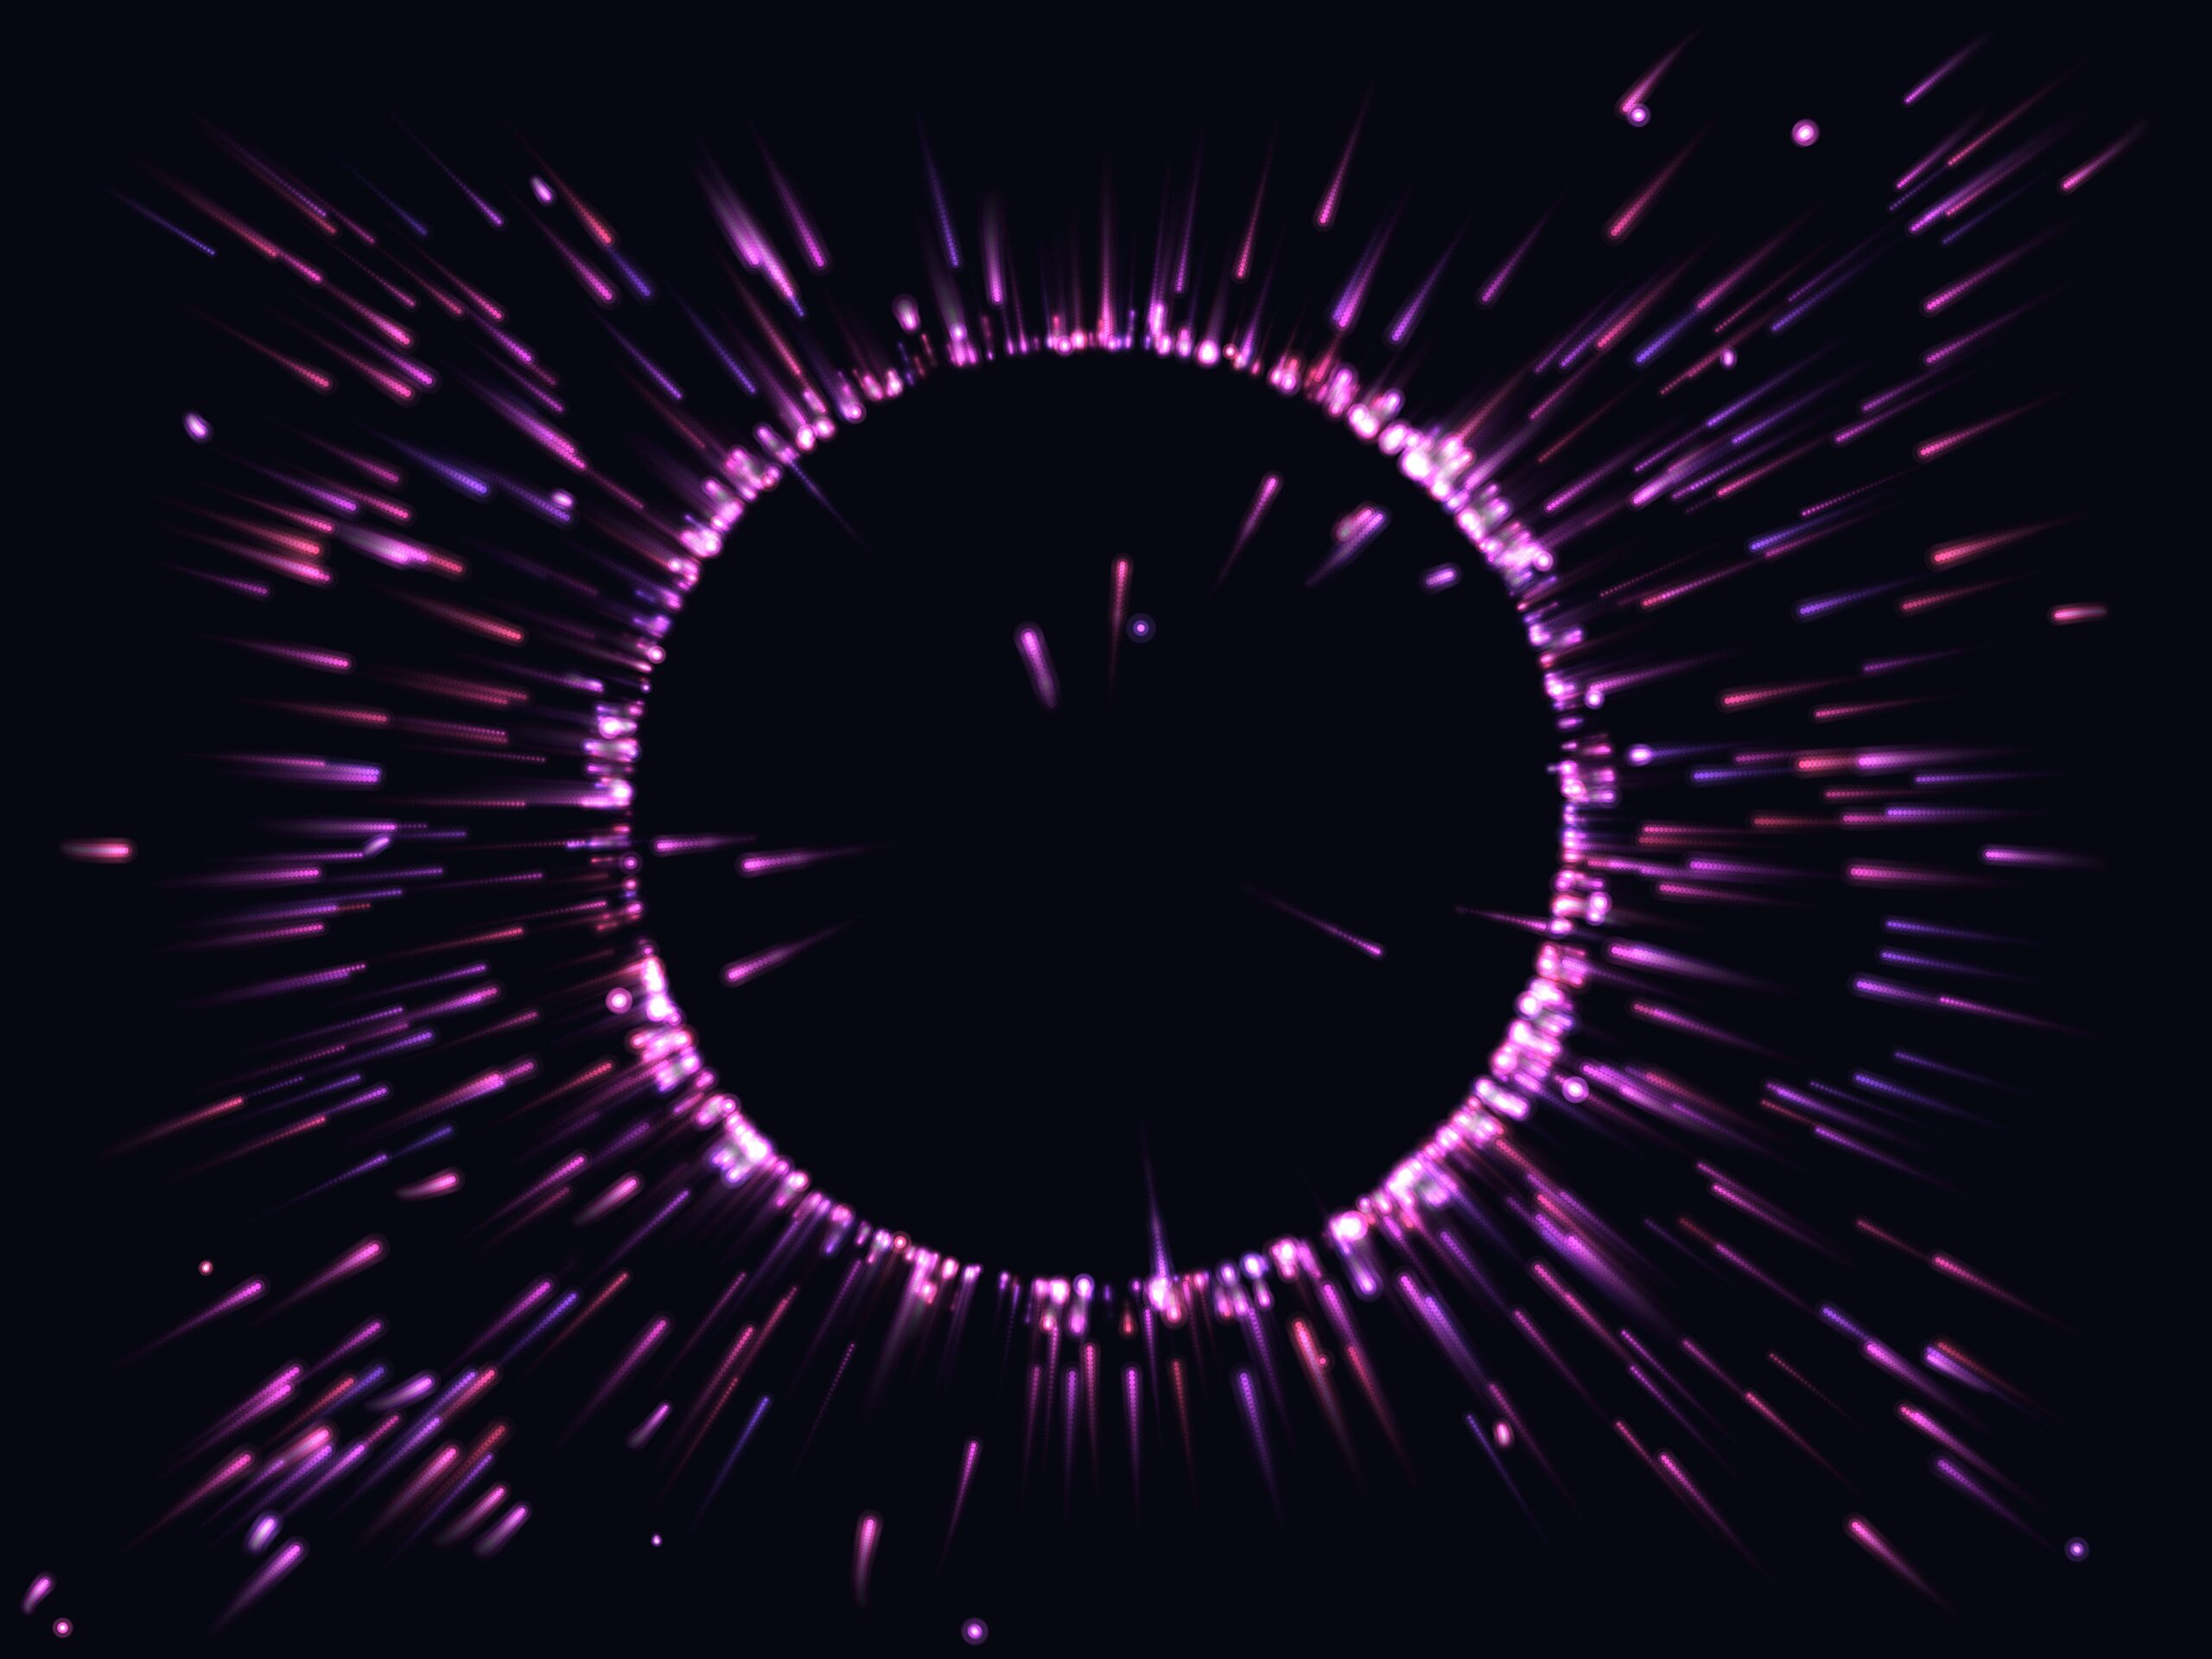
  • Building Tension: Clapping spikes the anxiety. As anxiety rises, the environment shifts drastically. The water color transitions from a calm deep blue to a chaotic, flickering violet/red. The boids lose their cohesion and dart around frantically.

  • Active Soothing: If the user moves their hand very slowly (distMoved < 1.5) and holds a gentle pose, a stillnessTimer activates, slowly bringing the anxiety back down, actively soothing the ecosystem. You can see them slowing down as you calm them down.

  • Immersive Audio: I layered multiple audio tracks to cement the mood. An ambient underwater rumble plays constantly. Transitioning to a FIST triggers a mysterious pulsing loop, while snapping to an OPEN hand fires off a visual shockwave and an underwater explosion sound. I really think the audio experience adds a lot to the overall feel and immersion of the interactions.

Phase 5: UI

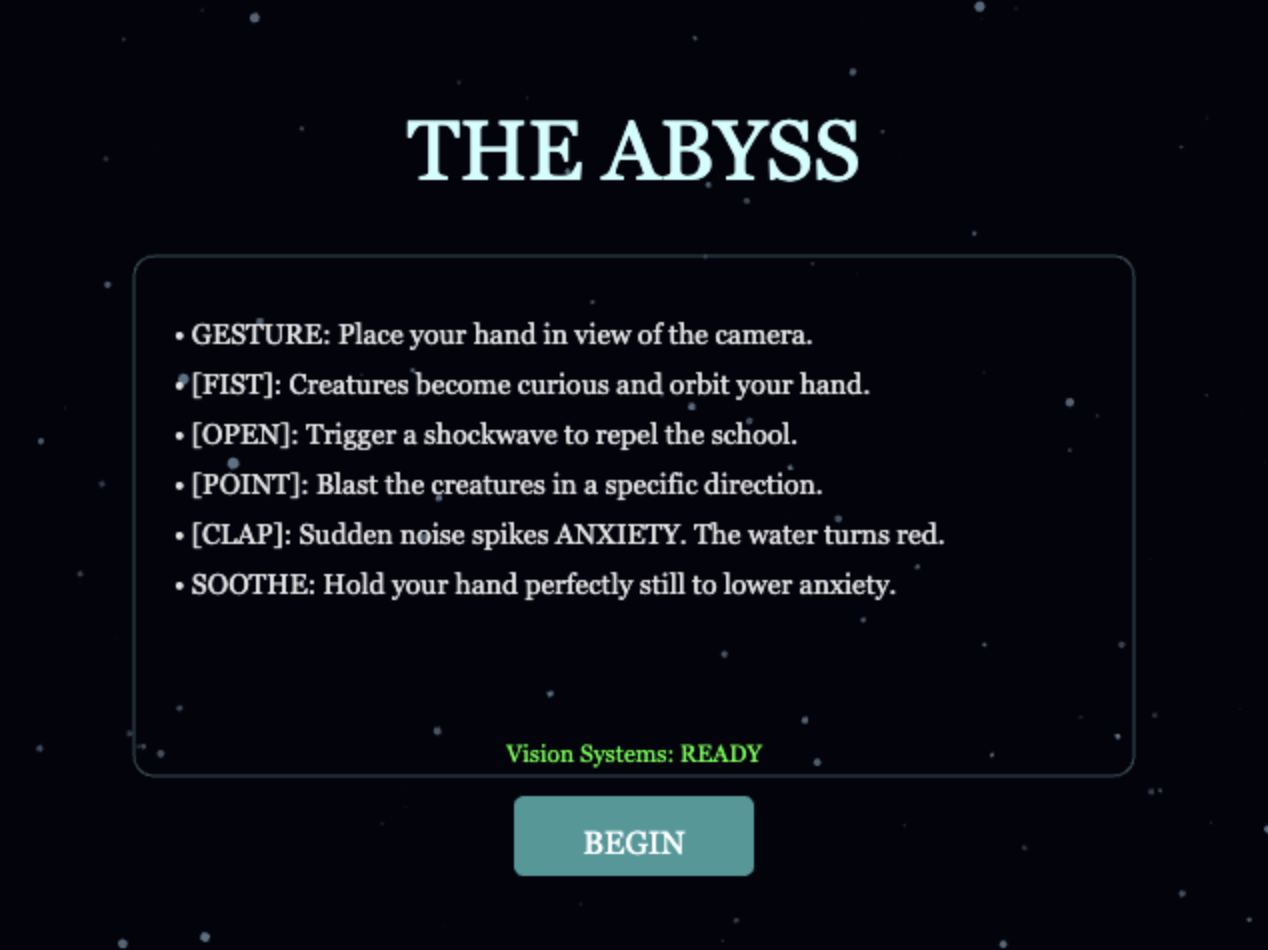
Finally, on hearing some feedback during the presentation, I added some UI to guide the user on the experience through a landing screen with instructions. I used Gemini to help with the UI as I did not want to bother with centering the text and styling boxes and whatnot (sue me).

Reflection & Future Improvements

The transition from a sterile particle system to a breathing, emotional ecosystem was incredibly rewarding. The inclusion of the anxietyLevel variable fundamentally changed the user experience. Instead of just “using” the sketch, users must actively consider their physical presence—moving too fast or making loud noises disrupts the environment, requiring physical stillness to repair it.

Future Improvements:

  • Performance Optimization: Currently, the boids use nested loops to check distances for flocking ($O(N^2)$ complexity). Implementing a Spatial Hash Grid or Quadtree would allow for hundreds more boids without dropping the framerate.

  • Complex Gestures: Integrating a more robust gesture recognition system to replace my simple distance-based heuristics (perhaps a trained neural net just for specific hand symbols).

References

  • Libraries: p5.js, p5.sound, and ml5.js (Handpose).

  • Algorithms: Craig Reynolds’ Boids (Flocking Simulation) and Afra’s Assignment 9 sketch for the orbiting logic.

  • Audio Assets: All sound effects were sourced from pixbay.com.

  • AI Disclosure: Large Language Models were used during the development process to assist in debugging scope issues (lagging, which I realized later was an ml5.js issue as debugging boid performance didn’t help), optimizing the audio filter logic, brainstorming the vector math for the pointing and other hand gestures, and UI. Also used for help with documentation.

Final Project Progress

The Milestone

Over the last week, I made massive headway on my project. The biggest hurdle was getting the complex ml5.js Handpose computer vision model to successfully talk to my custom physics and flocking simulation.

I’ve managed to get the core interaction loop fully functional! I wrote a custom pose-classification function that measures the distance between the palm and the fingertips to figure out what gesture the user is making.

The Working Prototype

(Make sure you are in a well-lit room and give the model a few seconds to load. Try making a tight fist, and then suddenly opening your hand!)

Technical Hurdles & Fixes

Getting the interaction to work was only half the battle; getting it to run smoothly is the real challenge. Combining an $N^2$ flocking simulation (where every agent checks every other agent) with a live neural network absolutely tanked my framerate at first.

To get this ready for user testing, I had to optimize heavily:

  • Performance Tuning: I tried lowering the hidden webcam capture resolution so the machine learning model had less data to crunch, but that caused some issues with hand detection in low lighting. I can also optimize the boids’ visual rendering, stripping out some of the heavier additive blending layers that were killing the GPU, and slightly reduce the total population, but I don’t know what I’ll actually do.

  • Jitter Smoothing: Raw webcam data is incredibly noisy. If I mapped the flock’s target directly to the raw hand coordinates, everything vibrated uncontrollably. I implemented vector smoothing (lerp) so the digital orb that tracks your hand glides smoothly across the screen.

Next Steps

The sketch is finally in a place where I can put it in front of people. For user testing, my main goal is to see if the gestures (fist vs. open hand) feel intuitive, and if the visual feedback of the glowing orb clearly communicates what the user is doing to the swarm.

Honestly, I still think the direction of this project could do a 180 any time.

Final Project Proposal

Concept & Artistic Intention

For my final project, I am building an interactive digital environment that revolves around a flock of autonomous agents.

The artistic intention is to explore the tension between curiosity and fear in nature. The user plays the role of a foreign, glowing entity intruding on this dark abyss. I want the environment to feel organic, slightly eerie, and highly responsive to physical presence, stepping away from standard mouse-and-keyboard inputs.

Interaction Methodology

To achieve an unconventional interface, I will use ml5.js (Handpose) to track the user’s hand via webcam. The user’s hand will act as a massive physical force field within the simulation.

The interaction is mapped to specific hand gestures:

  • Neutral / No Hand: The boids exhibit standard, calm flocking behavior (wandering, aligning).

  • Closed Fist: The sketch interprets this as a small, dense, magnetic energy source. It triggers a Curious Attraction force. The boids tighten their formation and slowly swarm toward the hand.

  • Open Hand (Fingers Spread): The sketch interprets this as a sudden, bright flash of energy or a predator. It triggers a violent repulsion force. The flock’s cohesion drops to zero, their speed spikes, and they scatter away from the hand in a panic.

Canvas Design & User Experience

The visual aesthetic will rely heavily on blendMode(ADD) to create glowing, stacking neon colors against a near-black “abyssal” background.

The webcam feed will be horizontally flipped (so it acts like a mirror) but heavily tinted and darkened so it barely registers in the background.

To give the user immediate visual feedback of where their hand is in the digital space, a glowing orb will track their palm. The orb will change color and size based on the detected gesture (e.g., a tight cyan core for a fist, a large pulsing magenta explosion for an open hand).

Initial Explorations & Technical Plan

While I am not including the code in this proposal, I have already begun prototyping the physics. I might reuse code from the boids assignment initially to get an idea.

The biggest technical challenge I anticipate is performance. Running an $N^2$ flocking simulation (where every boid checks every other boid) at the same time as a neural network (ml5.js) is heavy on the browser.

My technical roadmap involves:

  • Optimizing the boid math by limiting interaction radii.

  • Lowering the background webcam capture resolution to speed up the ML model.

  • Refining the heuristic math that determines what constitutes a “fist” versus an “open hand” by calculating the distance between the fingertip landmarks and the palm base.

Assignment 11

Concept

For this assignment, I wanted to explore something that felt truly organic. My sketch is built on a mathematical model called Reaction-Diffusion (specifically the Gray-Scott model).

The concept mimics how two virtual liquids – Chemical A (the environment) and Chemical B (the organism) – interact over time. Chemical B eats Chemical A to reproduce, while also slowly dying off. This eternal tug-of-war is actually the exact same math that dictates how real-life animals get their spots and stripes, or how corals branch out! That was what inspired me to recreate this in a sketch.

Visually, I wanted the sketch to feel like you were peering into a dark ocean trench and watching neon coral grow in real-time. Just something about oceans.

Sketch

Milestones and Challeneges

Reaction-Diffusion is notoriously heavy. It requires calculating complex math for every single pixel, multiple times per frame. My initial versions of this sketch were incredibly slow and completely hung my browser.

I had to rethink how the data was stored. I moved away from standard 2D arrays and rewrote the grid using 1D Float32Arrays. This stores the data in a flat, highly optimized memory space. I also added bitwise operations for fast multiplication to keep the framerate high enough to actually watch the coral grow.

Getting the bioluminescent aesthetic right was also trickier than I expected. When I first tried to separate the glowing coral from a solid dark background, I used a hard cutoff (e.g. if the chemical value is above X, paint the background). Because the simulation uses continuous floating-point math, this resulted in ugly, pixelated ghost borders where the shapes used to be.

I went back to basics and removed the hard if/else statements. Instead, I used mathematical ratios to smoothly blend the colors based purely on the exact concentration of the chemicals.

The patterns are completely driven by two parameters: the Feed Rate (how fast Chemical A is added) and the Kill Rate (how fast Chemical B dies). Experimenting with these numbers yields wildly different shapes. I eventually curated two distinct modes for the final sketch: a classic branching “Coral” mode and a struggling, isolated “Dots” mode.

Reflection & Future Work

This project pushed my understanding of performance optimization in JavaScript. Moving from simple binary states (1s and 0s) to a Continuous Cellular Automata (floating-point numbers) completely changes how you have to handle memory and rendering in p5.js.

If I were to take this further, the next logical step would be moving the math out of the CPU entirely and rewriting it in WebGL (Shaders). That would allow the simulation to run at fullscreen resolution instantly. I’d also love to introduce an interactive element where the mouse acts as a “repellent” to the coral, forcing it to grow around your cursor.

Assignment 10

Concept

For this assignment, I wanted to move away from the autonomous movement of bird-like agents and explore the visceral reaction of physical matter. My concept was to create a deep-sea environment filled with glowing, floating crystalline shards that react to gravity, magnetism, and violent collisions.

I was inspired by:

  • Matter.js Physics: Moving from simple circles to complex polygons that tumble and rotate based on their center of mass.

  • Bioluminescence: I wanted the shards to feel like living crystals. They stay dim and calm while drifting but scream with light and ripples when they collide or shatter.

  • Interactive Chaos: Instead of just watching a simulation, I wanted the user to be a destructive force within the world.

Sketch

Keep the mouse pressed to attract the objects. Click on an object to make it explode. Double click in empty space to add more objects.

Highlight

I am particularly proud of the explode() function. It pushes objects away by calculating a radial impulse. When you click a shard, it calculates the distance and angle of every other shard in the vicinity and applies a force that dissipates the further away it is.

// Applying a shockwave force based on distance from the click
let forceDir = createVector(b.position.x - targetX, b.position.y - targetY);
forceDir.normalize();

// Strength drops off as shards get further from the blast center
let strength = map(distance, 0, explosionRadius, explosionForce, 0);

Body.applyForce(b, b.position, {
  x: forceDir.x * strength * b.mass,
  y: forceDir.y * strength * b.mass
});

This makes the world feel heavy and reactive, as the shards get “blasted” back and spin wildly.

Milestones and Challenges

The first hurdle was setting up the Matter.js world. I started with simple squares and triangles to ensure they weren’t overlapping. The challenge here was the relative coordinates problem. If you don’t subtract the body’s position from the vertices, the shards draw in the wrong place.

Once the physics were solid, I added the aesthetics. I implemented a this.glow variable that spikes on collision. I also added a ripple effect – a ring that expands and fades – which visually communicates the “energy” of a collision.

The final stage was adding the magnetism (hold mouse) and the explosion (click object). I had to ensure that when a shard is clicked, it is properly removed from both the Matter.js world and my own array, or the ghost-physics would cause invisible collisions.

Reflection and Ideas

Matter.js opened up a whole new world of crunchy interaction that p5.js vectors alone struggle with. The way the shards tumble and catch on each other’s corners makes the simulation feel grounded in reality, despite the neon colors.

  • Dynamic Sound: I’d love to add a glass clinking sound that scales in volume and pitch based on the intensity of the collision.

  • Shard Fragmentation: Instead of the shard simply disappearing, I’d like it to break into smaller, actual Matter.js fragments that eventually dissolve.

Assignment 9

Concept and Sketch

For this assignment, I wanted to explore the concept of tension and release within a biological system. I was inspired by the way starling murmurations move as a single, fluid organism, and how that harmony is momentarily shattered by external threats.

My visual goal was to move away from the triangle-boid aesthetic and create something more aetherial: bioluminescent beings. I drew inspiration from the use of additive blending and light trails to create volumetric glow that we’ve seen in our course before.

The sketch begins in a state of calm flocking. The beings move in a coordinated, rhythmic dance, glowing with soft blue hues. Their wings flap slowly, and they form dense, glowing clouds.

When the user clicks, a lightning strike occurs. A thunder crack sounds, the screen flashes, and the flock’s physics instantly shift into a scatter behaviour. They turn a fiery red, their wings flap frantically, and they fly away from each other in a panic. However, nature always finds its way back to balance; after five seconds, the storm passes, and the beings slowly regroup into their peaceful blue pulse.

Highlight

I am particularly proud of how I achieved the cloudy look of the swarm without using expensive blur filters. By using blendMode(ADD) and layering multiple ellipses with very low opacity, the light “stacks” wherever the beings are close together.

// This creates the "Nebula" effect when birds cluster
fill(h, 90, 100, 3); // Only 3% opacity
ellipse(0, 0, this.bodySize * 7, this.bodySize * 5);

// The "Hot Core" stays visible in the center
fill(h, 15, 100, 85);
ellipse(0, 0, this.bodySize, this.bodySize * 0.5);

This means a single bird looks like a faint spark, but a cluster of fifty birds creates a brilliant, white-hot center that fades into a saturated blue aura.

Milestones and Challenges

The first step was getting the math right. I started with simple, non-glowing circles to ensure the Separation, Alignment, and Cohesion forces were balanced. The challenge here was making the movement feel organic rather than robotic.

Once the movement was smooth, I replaced the circles with layered ellipses and enabled blendMode(ADD), and it transformed the dots into a cohesive, glowing nebula.

To make the agents feel like beings rather than particles, I added wings. I used a sin() wave to oscillate the position of two side-ellipses. Matching the flap speed to the flock’s velocity made a huge difference in the realism of the motion.

The biggest logic challenge was creating the Auto-Revert system. I had to implement a timer using millis() so that the scatter state wasn’t permanent. I also added the lightning flash and the thunder sound to turn the state change into a sensory event.

Reflection

This project taught me again how small changes in physics parameters (like increasing separation while decreasing cohesion) can completely change the emotional tone of a piece. Thematically, it was a reminder of something we often forget: this too shall pass. Working on this sketch reminded me of an Urdu quote from the legend Faiz Ahmed Faiz: “لمبی ہے غم کی شام مگر شام ہی تو ہے”. Translated, it means: “The night of sorrow is long, but it is still just a night.

The storm will clear. The sun will rise!

Assignment 8

Concept

For this assignment, I wanted to explore Autonomous Agents. I took inspiration from Craig Reynolds’ Steering Behaviors, specifically the idea that a vehicle can “perceive” its environment and make its own decisions.

My goal was to create a Living City. I designed a system of commuters or normal vehicles that dutifully follow a circular traffic path, and a Police car (the interceptor) controlled by the mouse. The commuters get out of the police car’s way as it approaches. The project explores the tension between order (Path Following) and chaos (Fleeing from danger).

Sketch

Process and Milestones

I started by building a multi-segment path. The biggest challenge here was the logic required to make the vehicles drive in a continuous loop. I used the Modulo operator (%) in my segment loop so that when a vehicle reaches the final point of the rectangle, its “next target” automatically resets to the first point.

At first, my vehicles were “shaking” as they tried to stay on the path. I realized they were reacting to where they are right now, which is always slightly off the line. I implemented Future Perception—the vehicle now calculates a “predict” vector 25 pixels ahead of its current position. By steering based on where it will be, the movement became much smoother and more life-like.

The most interesting part of the process was coding the transition between behaviors. I wrote a conditional check: if the distance to the Interceptor (mouse) is less than 120 pixels, the Commuter completely abandons its followPath logic and switches to flee. I also increased their maxSpeed during this state to simulate “panic.” Once the danger passes, they naturally drift back toward the road and resume their commute.

Code I’m Proud Of

I am particularly proud of the logic that allows the vehicle to choose the correct path segment. It doesn’t just look at one line; it scans every segment of the “city” to find the closest one, then projects a target slightly ahead of its “normal point” to ensure it keeps moving forward.

// Predictive Path Following logic
followPath(path) {
  // look into the future
  let predict = this.vel.copy().setMag(25);
  let futurePos = p5.Vector.add(this.pos, predict);

  let target = null;
  let worldRecord = 1000000;

  // scan all road segments for the closest point
  for (let i = 0; i < path.points.length; i++) {
    let a = path.points[i];
    let b = path.points[(i + 1) % path.points.length];
    let normalPoint = getNormalPoint(futurePos, a, b);

    // ... (boundary checks) ...

    let distance = p5.Vector.dist(futurePos, normalPoint);
    if (distance < worldRecord) {
      worldRecord = distance;
      // look 15 pixels ahead on the segment to stay in motion
      let dir = p5.Vector.sub(b, a).setMag(15);
      target = p5.Vector.add(normalPoint, dir);
    }
  }

  // steer only if we've drifted outside the lane
  if (worldRecord > path.radius) {
    this.seek(target);
  }
}

Reflection

This project shifted my perspective on coding movement. In previous assignments, we moved objects by changing their position; here, we’re moving them by changing their desire. It feels much more like biological programming than math.

I also noticed that instead of commuters giving way to the police car, it looks like the cars are racing cars on a track fleeing from the police as it approaches. I’ve left the final interpretation up to the reader’s imagination…

Future Ideas

  • I want to add a separation force so that commuters don’t overlap with each other, creating more realistic traffic jams.
  • Allowing the user to click and drag the path points in real-time, watching the agents struggle to adapt to the new road layout.
  • Integrating the p5.sound library to make the interceptor’s siren get louder as it gets closer to the vehicles (Doppler effect).

Midterm Project

Project Overview

This project explores a single question: can a particle system feel less like simulation and more like atmosphere?

I designed a generative system that behaves like a living cloud of cosmic dust. Instead of producing one fixed composition, the sketch continuously evolves and can be steered into different “cosmic events” through three operating modes:

  1. NURSERY — diffuse, drifting birth-fields of matter
  2. SINGULARITY — gravitational collapse toward a center
  3. SUPERNOVA — violent outward blast and shock-like motion

The visual goal was to create images that feel photographic and painterly at the same time: soft glows, suspended particles, and dynamic trails that imply depth.

Core Concept

The concept is inspired by astronomical imagery, but translated into a procedural language:

  • Birth (diffusion)
  • Attraction (collapse)
  • Explosion (release)

These are treated not only as physical states but as aesthetic states. The same particle population is reinterpreted through changing force fields and trail accumulation over time.

I was particularly interested in the tension between control (known forces, reproducible logic), and emergence (unexpected compositions and visual accidents).

This is what makes the output truly generative: the system is authored, but each frame remains open-ended.

What Changed from the Starting Sketch

The starting version established the core particle loop and 3 state controls.

However, it was still a prototype:

  • Only a single rendering style (point strokes)
  • Low-resolution/off-target export buffer
  • Background tint drift issues over time
  • No dedicated print workflow
  • No color interaction controls

The sketch went through a series of transformations and visual changes as I experimented with different styles and debugged:

Here, I tried to play with the visual style of the dust and also tried to make them move uniformly over the sketch in the Nursery mode using grid coordinates, only allowing a few particles in each grid. But as you can see, that led to some unexpected behavior where the particles repeatedly jumped between grid boxes, giving the impression of being clung to the edges of the grid, showing the grid pattern. I scrapped this idea altogether.

This is where I started to get the particles’ look right. I added halos around the particles for visual appeal. There was still, however, the issue of the trails permanently discoloring the background canvas, and so I looked into fixing that. The end result after some tweaks is what you see in the final sketch.

I did experiment a bit further, tweaking parameters to see if I could stumble upon something interesting. Here is an example of a variant I made this way:

Even though this looked striking, it wasn’t true to the vision of dust I set out with, so I settled with the final look.

The final midterm version is substantially expanded from the initial sketch:

A) Rendering pipeline upgrade
– Introduced layered rendering via `trailLayer` (screen) and `trailLayerHR` (high-res memory).
– Trails are preserved and faded over time independently of the base background.
– This allows longer atmospheric strokes without permanently destroying background consistency, as was happening before in the first iteration.

B) Visual quality upgrade
– Multi-pass glow rendering per particle (halo + mid + core).
– More controlled velocity damping and motion smoothing.
– Larger and more visible dust behavior for stronger material presence.

C) Interaction + composition upgrade
– Added a Color Shift slider (`0–360`) to rotate the palette across HSB space.
– Default keeps the original blue/purple range; slider supports warm/yellow/red variants for alternate print moods.

D) Output and print-readiness upgrade
– Export target standardized at 4800 × 3600.
– Save trigger implemented on S key.
– Timestamped filenames generated for iteration tracking.

Technical Implementation

4.1 Particle engine

The sketch uses a classic particle architecture:

  • `Dust` class with:
  • `pos`, `vel`, `acc`
  • `lifespan`
  • per-particle hue and size attributes
  • `applyForce()` for composable behavior
  • state-based force fields applied every frame

This combines core programming techniques from class:

1. Particle systems (object lifecycle + continual spawn/death)
2. Vector-based force simulation (`p5.Vector`, gravity/repulsion/drag)

It also uses:

– oscillation (`sin`) for shimmer dynamics,
– state machine logic for mode switching,
– off-screen rendering buffers for high-resolution output.

4.2 State logic

The state variable controls force behavior:

– NURSERY: noise-like drifting flow
– SINGULARITY: attraction toward cursor
– SUPERNOVA: repulsion blast from cursor zone

This keeps one core system while producing multiple visual outcomes from the same underlying model.

4.3 Trail architecture and background consistency

A key challenge was preserving a stable background while retaining long-lived trails.

Solution:

– render base color to main canvas each frame,
– draw particles to transparent trail layers,
– fade trails by reducing alpha over time,
– composite trail layer over base.

This decouples “world background” from “particle residue,” preventing muddy drift and preserving consistent color identity.

Final Outputs

A major shift in mindset was treating the sketch not just as a visual toy, but as a capture instrument for composition.

I began composing moments intentionally:

– waiting for dense flow regions,
– steering with cursor in singularity/supernova moments,
– selecting color shift and temporal build-up before capture.

This made each final export less like a screenshot and more like a harvested frame from a living system.

I particularly like the third one, which reminds me of the film Arrival (2016), where extraterrestrials use circular logograms like the one depicted in the third output to communicate visually. Try to see if you can achieve this in the sketch!

Video Documentation

Reflection

This project taught me that strong generative outcomes come from balancing three layers:

  1. Physics logic (how particles move)
  2. Render logic (how particles appear)
  3. Capture logic (how moments are preserved).

The starting sketch had the first layer; the final midterm became successful only after all three were integrated.

What worked best:

  • Robust mode switching with meaningful visual differences
  • Stable background + persistent trails
  • High-resolution pipeline aligned with print requirements.

What I would improve next:

  • Richer mode-specific rendering signatures (even stronger distinction per mode)
  • Static star-dust depth field layer

References / Inspirations

  • p5.js Reference — https://p5js.org/reference/
  • p5.js `createGraphics()` documentation
  • Astrophotography color references (nebula palettes)
  • Class lecture notes on particle systems, vectors, and oscillation

AI Disclosure

AI assistance was used during development for debugging rendering behavior, refining export strategy, and structuring documentation. All concept direction, aesthetic decisions, interaction design, and final selection of outputs were authored and curated myself.

Assignment 7

Inspiration and Concept

I chose to recreate the butterfly installation because of the profound way it handles the cycle of life. In the exhibition, the butterflies seem to move slowly, almost suspended in the moment, but before you know it, they are gone. It is a reminder of how fleeting time is.

Interestingly, the butterflies in the exhibit are affected by human interaction. On approaching them, they seemed to diffuse and on touching the space they were projected onto, they would fall, as if we’d killed them. I  incorporated this interaction in my sketch as well.

My twist on the original visual is that the end of one life becomes the catalyst for another. When a butterfly “dies” (is clicked), instead of just disappearing, it falls to the earth and seeds a new, different, but equally beautiful life: a flower. To me, this represents the idea that contentment comes from accepting the changing nature of things. Even when a specific chapter ends, it provides the nutrients for something new to bloom.

Sketch

Butterflies emerge from the forest floor and drift upward.

Touch: Click a butterfly to end its flight. Watch it fall and reincarnate as a swaying flower (you might need to scroll to see the ground in this blogpost).

Interact: Move your mouse near the butterflies or flowers to see them glow brighter. The butterflies will gently shy away from your cursor.

Milestones & Challenges

The first goal was to get the butterflies moving from the bottom to the top. I used Perlin Noise to give them a natural, fluttery motion. However, I immediately hit a snag: the butterflies started accelerating aggressively toward the left or right edges of the canvas instead of staying on an upward path.

The Fix: I implemented a velocity limit and a constant “lift” force. This kept their speed under control while ensuring their primary direction remained vertical.

Next, I had to handle the transition from flying to falling. This required a State Machine within the Butterfly class. I added a state variable (FLYING or FALLING). When the mouse is clicked near a butterfly, its state flips, gravity is applied, and the “wing flap” oscillation slows down to simulate a loss of vitality.

The final stage was the “twist.” I created a Flower class that triggers at the exact x-coordinate where a butterfly hits the ground. I also added Sensory Logic:

  • Fleeing: Butterflies now calculate a repulsion vector from the mouse.

  • Proximity Glow: Using the dist() function, both butterflies and flowers “sense” the cursor and increase their transparency mapping (alpha) to glow brighter as you get closer.

Highlight

I am particularly proud of how the butterfly “seeds” the flower. To maintain the visual connection, I pass the specific hue of the butterfly to the new Flower object. This ensures that the life cycle feels continuous; the “soul” of the butterfly determines the color of the bloom.

// Inside the main draw loop
if (b.state === "FALLING" && b.pos.y > height - 25) {
  // We pass the butterfly's unique hue to the new flower
  flowers.push(new Flower(b.pos.x, b.hue)); 
  butterflies.splice(i, 1); // The butterfly is removed
}

Reflection

This assignment taught me how powerful Additive Color Mixing (layering semi-transparent shapes) is for recreating the feel of a light projection. By using the HSB color space, I was able to match the neon, ethereal palette of the teamLab forest. Some potential improvements:

  • Life Span: I’d like to make the flowers eventually fade away as well, completing the cycle and allowing the ground to remain “clean” for new growth.

  • Collision Detection: It would be interesting if butterflies had to navigate around the stems of the flowers that the user has created.

  • Soundscape: Adding a soft, shimmering sound effect when a butterfly transforms into a flower would deepen the emotional impact of the interaction.

Assignment 5

Concept

On brainstorming for my midterm project, thought of mimicking nature with my sketches, as I’ve done for a few of my sketches so far. I was intrigued by particle systems, which I felt like I had actually unknowingly used in my ocean sketch. I wanted to do something with particle systems again, pairing it up with another concept we’ve covered in class. I debated between two ideas: a mycelium system, or a cosmic dust cloud. I settled on the cosmic dust idea because I felt like the prints or images coming out if it could be very painterly.

So the idea is a generative system that simulates the birth, motion, and destruction of cosmic dust. The goal is to create a painterly vacuum: a space that feels filled with fluid-like gas clouds. By combining Particle Systems with Newtonian Forces (Gravity/Drag) and Periodic Oscillation, I want to produce high-resolution prints that capture the shimmer of deep-space photography.

Sketch

Implementation

  • The Particle Engine: I’ve developed a Dust class that handles movement and lifespan. Each particle is aware of its age, allowing the system to constantly recycle itself and stay generative.

  • The Different States: I’ve established three distinct states: NURSERY (Noise-driven movement), SINGULARITY (Point-based gravity), and SUPERNOVA (Radial repulsion).

  • Oscillation: I integrated Sine waves into the strokeWeight of the particles to create a subtle “twinkling” or shimmering effect that mimics starlight.

The Frightening Part & Risk Reduction 

One of the core requirements for the midterm is having multiple distinct operating modes. I handled this by implementing a State Machine – a logic structure that allows the entire physics engine of the sketch to change based on a single variable (state).

In my draw() loop, the particles check the current state of the “universe” every frame, instead of moving randomly. Using an if/else if structure tied to the keyPressed() function, I can switch between NURSERY, SINGULARITY, and SUPERNOVA instantaneously. This was a challenge at first because I had to ensure that the particles didn’t just break when the forces changed; by using p5.Vector and applyForce(), the transition between modes feels fluid, as the particles’ existing momentum carries over into the new force field.

Additionally, one of the most uncertain parts of this project is ensuring that the complex, high-particle-count visuals can be exported at A3 resolution without crashing the browser. If I simply used saveCanvas(), the print would be blurry and pixelated.

I settled on implementing a p5.Graphics buffer (canvasBuffer). This allows me to develop the logic on a small, fast 800 * 600 canvas while maintaining a hidden, high-resolution print-ready canvas in the background. My current save logic triggers on the ‘S’ key:

function saveHighRes() {
  canvasBuffer.background(240, 80, 5);
  // Future implementation:
  // for (let p of particles) { p.drawToBuffer(canvasBuffer); }
  canvasBuffer.save("nebula_output.png");
}

Instead of saving the current frame, I plan to loop over the particles one final time and re-render them onto this larger 1600 * 1131 canvas. This upscaling is a critical risk-reduction step that gives me peace of mind for the final physical print.

Another frightening part is thinking about how I’m going to make this sketch interesting enough to be a final midterm piece. Right now, it’s a skeleton. However, the basic physics – the drag (friction) that makes particles feel like they are moving through thick gas, and the Oscillation (shimmer) that makes them feel like stars – are already providing a strong foundation. I’m trusting the process: once the math is solid, the beauty usually follows in the polishing phase where I’ll play with color gradients and force magnitudes.