Concept
For the final project, I wanted to try something with WebGL for the first time. I’ve always been fascinated by how film producers make 3D space simulations for certain movie scenes, and I think a WebGL p5 sketch is a great way to do it.
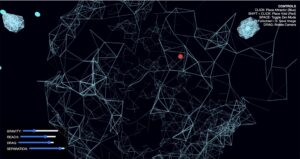
How the controls look like. The red dots are Cosmic Voids and the blue dots are Great Attractors
I made an interactive, 3D generative environment that simulates the Cosmic Web—the largest known structure in the universe. In this digital cosmos, you are not merely a spectator but the architect of galactic scaffolding. The project utilizes thousands of Dark Matter points that interact through complex gravitational laws, where the true sculpture emerges from the filaments woven between them.
The core intent of this project is to provide a tactile way to explore Large-Scale Structure and Deterministic Chaos. The environment is designed to be highly responsive, allowing users to lay out Space with universal constants in real-time.
How to Architect Your Universe:
-
Navigation: Click and Drag the background to rotate your perspective. The engine distinguishes between navigation and placement, so your universe won’t warp while you are just trying to find a better view.
-
Creation: Click anywhere in the 3D void to place a Great Attractor (indicated by a blue sphere). This creates a localized gravity well that pulls filaments into dense superclusters.
-
Manipulation: Shift + Click to place a Cosmic Void (indicated by a red sphere). These act as repulsors, pushing filaments away to create vast, empty regions of space.
-
Universal Constants: Use the Control Panel in the bottom left to modify the physics:
-
Gravity: Adjusts the intensity of the pull from Attractors.
-
Reach: Sets how far a filament can stretch to find a neighboring particle.
-
Drag: Controls the “friction” of space. Low drag creates a chaotic vacuum. High drag makes the universe feel fluid.
-
Separation: Sets a “personal space” for particles to prevent them from lagging into a single point.
-
-
System Controls: Press ‘F’ to toggle Fullscreen, ‘S’ to save a high-resolution PNG snapshot, and Space to enter Zen Mode—hiding all UI and helpers for a pure visual experience.
Implementation Details/Milestones
To maintain a high quality experience, the project moves away from standard drawing methods and employs professional-grade optimization:
-
Spatial Hash Grid: The universe is divided into 3D “buckets.” Instead of every particle checking every other particle O(N² ), each node only checks its immediate 3 * 3 * 3 neighborhood, reducing complexity to O(N).
// Spatial Hash Construction
let grid = new Map();
for (let p of matter) {
    // Convert 3D coordinates into a string key (the "bucket")
    let key = `${floor(p.pos.x / GRID_SIZE)}|${floor(p.pos.y / GRID_SIZE)}|${floor(p.pos.z / GRID_SIZE)}`;
    if (!grid.has(key)) grid.set(key, []);
    grid.get(key).push(p);
}
-
Vertex Batching: Rather than thousands of individual
line()calls, Kinesis usesbeginShape(LINES)to send all filament data to the GPU in a single “chunk,” drastically reducing the draw-call overhead.
beginShape(LINES); // Open one big batch for the GPU
for (let p of matter) {
    // ... search neighbors ...
    if (dSq < MAX_DIST_SQ) {
        stroke(190, 40, 100, alpha);
        vertex(p.pos.x, p.pos.y, p.pos.z); // Start of line
        vertex(other.pos.x, other.pos.y, other.pos.z); // End of line
    }
}
endShape(); // Close batch
-
Squared Distance Logic: To avoid expensive square-root calculations, distances are compared using the formula
d² = (x_1 – x_2)² + (y_1 – y_2)² + (z_1 – z_2)².
The primary technical challenge was overcoming the “Density Bottleneck”—the lag created when hundreds of particles converged into a single point.
-
Before Optimization O(N²): The sketch choked at 400 particles. Any attempt to create a “Great Attractor” resulted in a frame rate drop to 12 FPS as the CPU struggled with redundant distance checks.
-
After Optimization (O(N) + Culling): By implementing the Spatial Hash Grid and Proximity Culling (skipping lines between particles that are too close to be seen), the engine handles 1,200+ particles at a consistent 60 FPS, even during intense gravitational collapses.
Reflection & References
The inclusion of Zen Mode and the Architect’s UI transforms the project from a simple simulation into a dynamic tool for creative expression. The most rewarding aspect is the emergent behavior: the way filaments naturally reorganize themselves into “walls” and “voids” mirrors the actual structural evolution of our universe.
-
Inspiration: The Millennium Simulation Project; The Nature of Code by Daniel Shiffman.
-
Technical Foundations: p5.js WebGL and DOM documentation.
-
AI Disclosure: The optimized logic and some debugging efforts were developed using Gemini 3 Flash.


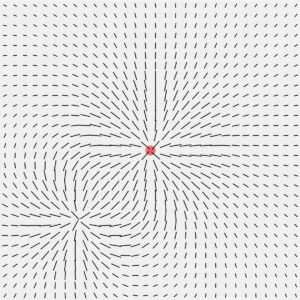
 Memo Akten’s Simple Harmonic Motion #6 Performance proof of concept (2011)