Interactive Sadu Weaving Environment
Project Overview
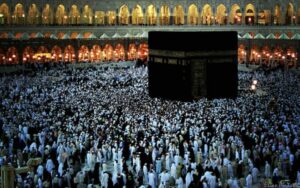
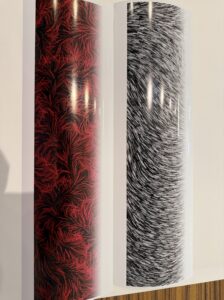
My final project explores how traditional UAE heritage can be translated into a contemporary interactive digital environment. The work is inspired by Al Sadu, a traditional Bedouin weaving practice known for its geometric motifs, repetition, rhythm, and handcrafted structure.
The project imagines the user a weaver. Through hand gestures captured by a webcam, the user interacts with a woven digital textile in real time. Their movement shapes patterns, places motifs, and disturbs the surface of the cloth, creating a continuously evolving visual field.
The artistic intention is to explore how cultural heritage can exist dynamically through technology. Instead of presenting tradition as something static, the project allows it to be experienced as something responsive, alive, and constantly transforming.
The key themes explored are:
- Handcraft vs algorithm
- Tradition translated through code
Implementation Details
The project was developed using p5.js and ml5.js HandPose tracking. The webcam detects the user’s hand, and the index finger is used as the primary interaction point. This position is mapped from camera space to canvas space and used to interact with a grid-based woven system.
The project evolved through four main milestones:
Milestone 1: Basic Interactive Weaving System
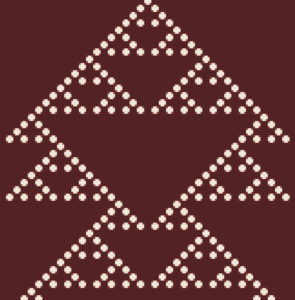
The first version established the core interaction. A grid of cells represented a simplified woven surface, where each cell could either display a background block or a basic cross motif.
Using HandPose, the position of the user’s index finger was tracked and mapped onto the canvas. When the finger moved across the grid, nearby cells flipped states, creating the effect of disturbing or weaving the pattern.
Outcome:
This stage confirmed that the core interaction worked. However, the visual system was limited, and the interaction felt more like toggling pixels rather than weaving a rich textile.
Milestone 2: Motif Expansion and Generative Behavior
In the second version, the visual complexity increased significantly. Multiple Sadu-inspired motifs were introduced, including cross, diamond, stripe, and block-based patterns.
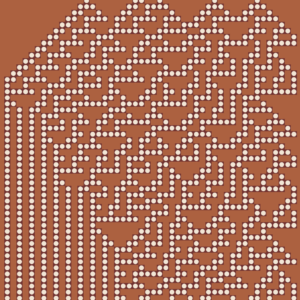
A cellular automata system was added, allowing the weave to evolve over time. Cells could grow, spread, or disappear depending on their neighbors, making the textile feel alive even without user input. Hand speed was also incorporated as a parameter. Faster movement resulted in a larger brush radius, allowing the user to affect a wider area of the weave.
Key additions:
- Multiple motif types
- Sadu-inspired color palette
- Cellular automata system
- Hand speed controlling brush size
- Keyboard-based motif switching
Outcome:
The system became more generative and dynamic. The textile was no longer static but continuously evolving. However, interaction was still partially dependent on the keyboard, which interrupted the flow of the experience.
Milestone 3: Interface Design and User Experience
This stage focused on improving usability and visual clarity. Motif selection was moved into visible buttons, making the system easier to understand. The interaction area was restricted to the woven field, preventing accidental input in the interface zones.
Outcome:
The interface became more intuitive and readable. However, motif selection still relied on mouse interaction, which created a disconnect from the hand-based system. This is where I took it to the second stage where I wanted the hand to hover on the buttons
Milestone 4: Gesture-Based Interaction and Flow Field System
The final version fully integrates gesture-based interaction across the system. Users can select motifs by pointing at buttons and holding their hand steady for three seconds. A visual progress bar provides feedback during this interaction. The most significant development in this stage is the transformation of Motif 4 into a flow field system.
Unlike the other motifs, which are governed by cellular automata, Motif 4 operates as a dynamic flow field. Each cell contains directional movement, causing the internal elements of the motif to continuously shift and distort over time. The user’s hand acts as a force within this system.
This creates a layered interaction:
- Motifs 1–3 behave as structured, generative weaving systems
- Motif 4 behaves as a fluid, responsive flow field shaped by gesture
Motif 4 is also excluded from the cellular automata system, meaning it does not grow or decay automatically. It remains as a direct trace of the user’s interaction.
Key additions:
- Gesture-based UI (hover + dwell interaction)
- Flow field system for Motif 4
- Hand-influenced distortion behavior
- Separation of algorithmic and gesture-driven layers
Outcome:
This version successfully merges interaction, generative systems, and visual expression. The system now reflects both structured weaving and fluid transformation, aligning more closely with the conceptual goals of the project.
Technical Process
The project is built around a grid system where each cell represents a unit of the woven textile. Each cell stores a value corresponding to a motif type. Hand tracking data from the webcam is mapped to the canvas, allowing the user to “paint” motifs onto the grid. Hand speed determines brush size, creating variation in interaction. A cellular automata system controls the growth and decay of Motifs 1–3 based on neighboring cells, introducing generative behavior. Motif 4 operates differently. It uses a flow field where each cell has a directional vector that affects how its internal elements are drawn. This produces continuous motion and distortion.
Video Documentation
Reflection
My project translates elements of traditional Sadu weaving into an interactive digital form. The use of hand tracking allows the user to engage with the system in a physical and intuitive way, reinforcing the idea of weaving as a gesture-based practice.
One of the most important developments was introducing the flow field in Motif 4. This created a contrast between structured, rule-based generation and fluid, responsive movement. It reflects the tension between tradition and transformation, which is central to the project’s concept.
A key challenge was balancing user control with generative behavior. Early versions either felt too static or too unpredictable. Separating Motif 4 from the cellular automata helped resolve this by giving the user a more direct and lasting impact on the system. I was also facing an issue of implementing decoding nature codes into this idea and i felt that motif 4 helped with that.
For future improvements, I would like to:
- Add sound elements that respond to interaction
- Develop more motifs based on authentic Sadu patterns
- Introduce gesture variations (e.g., open palm, multiple hands)
- Allow users to save or export their woven compositions (this was something i was willing to do but due to time constraints i decided to draft this idea)