Final Project update

This project ended up being inspired by bukhoor, but not in a literal way. I was more interested in how it feels than how it looks. Bukhoor is something small and everyday, but it carries a lot, like memory, comfort, and presence, mostly through the smoke. The smoke became the main thing for me because it is always moving and never fixed.

While building my p5.js sketch , I started focusing less on making a realistic object and more on building a system. The piece is made of different parts that work together, the embers, the smoke, and the environment. The smoke especially became central because it reacts, grows, fades, and shifts over time. It is not something you can fully control, which felt important to keep.

After user testing, I realized the project was stuck between being realistic and abstract in a way that did not feel intentional. That made me rethink my direction. I considered pushing it to be fully stylized and less real, but instead I worked on balancing it better. I kept the expressive and generative aspects, but made parts of the bukhoor, especially the madhkhanah, feel more grounded.

I also started working more on the background. I added very subtle Islamic geometric patterns using a fractal system. They are not meant to stand out, but to sit behind everything and give context. It was important for me that they do not overpower the smoke or the interaction.

In the end, the project is not about showing bukhoor as an object. It is more about building an atmosphere that you experience over time. It sits somewhere between something you recognize and something that is constantly changing.

Final Project Progress

The Milestone

Over the last week, I made massive headway on my project. The biggest hurdle was getting the complex ml5.js Handpose computer vision model to successfully talk to my custom physics and flocking simulation.

I’ve managed to get the core interaction loop fully functional! I wrote a custom pose-classification function that measures the distance between the palm and the fingertips to figure out what gesture the user is making.

The Working Prototype

(Make sure you are in a well-lit room and give the model a few seconds to load. Try making a tight fist, and then suddenly opening your hand!)

Technical Hurdles & Fixes

Getting the interaction to work was only half the battle; getting it to run smoothly is the real challenge. Combining an $N^2$ flocking simulation (where every agent checks every other agent) with a live neural network absolutely tanked my framerate at first.

To get this ready for user testing, I had to optimize heavily:

  • Performance Tuning: I tried lowering the hidden webcam capture resolution so the machine learning model had less data to crunch, but that caused some issues with hand detection in low lighting. I can also optimize the boids’ visual rendering, stripping out some of the heavier additive blending layers that were killing the GPU, and slightly reduce the total population, but I don’t know what I’ll actually do.

  • Jitter Smoothing: Raw webcam data is incredibly noisy. If I mapped the flock’s target directly to the raw hand coordinates, everything vibrated uncontrollably. I implemented vector smoothing (lerp) so the digital orb that tracks your hand glides smoothly across the screen.

Next Steps

The sketch is finally in a place where I can put it in front of people. For user testing, my main goal is to see if the gestures (fist vs. open hand) feel intuitive, and if the visual feedback of the glowing orb clearly communicates what the user is doing to the swarm.

Honestly, I still think the direction of this project could do a 180 any time.

Final Project Proposal

Concept & Artistic Intention

For my final project, I am building an interactive digital environment that revolves around a flock of autonomous agents.

The artistic intention is to explore the tension between curiosity and fear in nature. The user plays the role of a foreign, glowing entity intruding on this dark abyss. I want the environment to feel organic, slightly eerie, and highly responsive to physical presence, stepping away from standard mouse-and-keyboard inputs.

Interaction Methodology

To achieve an unconventional interface, I will use ml5.js (Handpose) to track the user’s hand via webcam. The user’s hand will act as a massive physical force field within the simulation.

The interaction is mapped to specific hand gestures:

  • Neutral / No Hand: The boids exhibit standard, calm flocking behavior (wandering, aligning).

  • Closed Fist: The sketch interprets this as a small, dense, magnetic energy source. It triggers a Curious Attraction force. The boids tighten their formation and slowly swarm toward the hand.

  • Open Hand (Fingers Spread): The sketch interprets this as a sudden, bright flash of energy or a predator. It triggers a violent repulsion force. The flock’s cohesion drops to zero, their speed spikes, and they scatter away from the hand in a panic.

Canvas Design & User Experience

The visual aesthetic will rely heavily on blendMode(ADD) to create glowing, stacking neon colors against a near-black “abyssal” background.

The webcam feed will be horizontally flipped (so it acts like a mirror) but heavily tinted and darkened so it barely registers in the background.

To give the user immediate visual feedback of where their hand is in the digital space, a glowing orb will track their palm. The orb will change color and size based on the detected gesture (e.g., a tight cyan core for a fist, a large pulsing magenta explosion for an open hand).

Initial Explorations & Technical Plan

While I am not including the code in this proposal, I have already begun prototyping the physics. I might reuse code from the boids assignment initially to get an idea.

The biggest technical challenge I anticipate is performance. Running an $N^2$ flocking simulation (where every boid checks every other boid) at the same time as a neural network (ml5.js) is heavy on the browser.

My technical roadmap involves:

  • Optimizing the boid math by limiting interaction radii.

  • Lowering the background webcam capture resolution to speed up the ML model.

  • Refining the heuristic math that determines what constitutes a “fist” versus an “open hand” by calculating the distance between the fingertip landmarks and the palm base.

Assignment 11

Concept

For this assignment, I wanted to explore something that felt truly organic. My sketch is built on a mathematical model called Reaction-Diffusion (specifically the Gray-Scott model).

The concept mimics how two virtual liquids – Chemical A (the environment) and Chemical B (the organism) – interact over time. Chemical B eats Chemical A to reproduce, while also slowly dying off. This eternal tug-of-war is actually the exact same math that dictates how real-life animals get their spots and stripes, or how corals branch out! That was what inspired me to recreate this in a sketch.

Visually, I wanted the sketch to feel like you were peering into a dark ocean trench and watching neon coral grow in real-time. Just something about oceans.

Sketch

Milestones and Challeneges

Reaction-Diffusion is notoriously heavy. It requires calculating complex math for every single pixel, multiple times per frame. My initial versions of this sketch were incredibly slow and completely hung my browser.

I had to rethink how the data was stored. I moved away from standard 2D arrays and rewrote the grid using 1D Float32Arrays. This stores the data in a flat, highly optimized memory space. I also added bitwise operations for fast multiplication to keep the framerate high enough to actually watch the coral grow.

Getting the bioluminescent aesthetic right was also trickier than I expected. When I first tried to separate the glowing coral from a solid dark background, I used a hard cutoff (e.g. if the chemical value is above X, paint the background). Because the simulation uses continuous floating-point math, this resulted in ugly, pixelated ghost borders where the shapes used to be.

I went back to basics and removed the hard if/else statements. Instead, I used mathematical ratios to smoothly blend the colors based purely on the exact concentration of the chemicals.

The patterns are completely driven by two parameters: the Feed Rate (how fast Chemical A is added) and the Kill Rate (how fast Chemical B dies). Experimenting with these numbers yields wildly different shapes. I eventually curated two distinct modes for the final sketch: a classic branching “Coral” mode and a struggling, isolated “Dots” mode.

Reflection & Future Work

This project pushed my understanding of performance optimization in JavaScript. Moving from simple binary states (1s and 0s) to a Continuous Cellular Automata (floating-point numbers) completely changes how you have to handle memory and rendering in p5.js.

If I were to take this further, the next logical step would be moving the math out of the CPU entirely and rewriting it in WebGL (Shaders). That would allow the simulation to run at fullscreen resolution instantly. I’d also love to introduce an interactive element where the mouse acts as a “repellent” to the coral, forcing it to grow around your cursor.

Final Project Progress – Terra

I got inspired to make this project by looking at the world map and imaging it made in Cellular Automata. So after brainstorming I decided to make an interactive canvas for drawing maps and terraforming them with painting, erasing, and natural disasters.

Draft 1 code (not interactive)

The way I executed this code is by uploading this map png initFromImage() samples the source image pixel by pixel and converts it into a binary 2D grid, where each cell maps to a 4×4 block on the canvas.

Map Image

The rule is simple: if a pixel is opaque enough (alpha above 128) and dark enough (red channel below 80), it becomes a wall, marked as 1. Everything else becomes open space, marked as 0. The result is a grid that already carries the silhouette and rough geography of the original image, before a single CA rule has fired.

From there, generations of a cave-generation ruleset called B5678/S45678 reshape the terrain.

  • Birth (B5678): A floor cell turns into a wall if it has 5, 6, 7, or 8 neighboring wall cells.
  • Survival (S45678): A wall cell remains a wall if it has 4, 5, 6, 7, or 8 neighboring wall cells.

Each cell checks its eight Moore neighbors, and the rules are biased heavily toward consolidation: a dead cell comes alive if five or more neighbors are walls, and a living cell stays alive as long as four or more neighbors are walls. Cells at the border of the canvas are treated as walls unconditionally, which keeps the edges solid and prevents the map from fraying outward.  Isolated specks get absorbed into larger masses, jagged edges smooth into cave-like contours, and the map starts to feel less like a traced image and more like something that grew.

Here’s how the generation looks

Generation GIF

So then I added interactivity. The idea was simple: click on the canvas to paint land, press A to cycle between modes like paint, erase, earthquake, and tsunami, and use those modes to terraform the map in real time. It did not work. Pressing A did nothing. The canvas was registering mouse clicks to display focus but not actually gaining keyboard focus in the browser sense, so every keypress was going nowhere. I spent an ungodly amount of time on this. I tried canvas.focus(), I tried tabIndex, I tried clicking the element programmatically. Nothing stuck. The browser just refused to route keyboard events to the canvas the way I needed it to. I also didn’t want to add ugly UI buttons that ruins the aesthetics.

So I scrapped the whole clicking mechanism. The fix was to stop relying on canvas focus entirely and attach the key listeners to document instead. That meant rethinking the interaction model from scratch. Clicking to paint was gone. Instead, you hold Space to apply whatever mode is active, and press A to cycle through the modes: paint, erase, earthquake, tsunami, volcano. It is honestly a better interaction than what I had before. Holding Space to draw land feels more deliberate, like you are actively shaping the terrain rather than just clicking around. And cycling modes with A while holding Space to apply gives you a kind of two-handed control that actually makes sense for something like terraforming.

Painting Terrain

The modes themselves are where the real fun is. Paint and erase are straightforward, a circular brush radius of 3 cells that stamps land or water wherever the cursor sits. Earthquake cracks the terrain open along four random fault lines radiating from the cursor, each one carving through cells and kicking up particle debris.

Earthquake demo

Tsunami sends five expanding ring waves outward from the click origin, erasing wall cells on contact and spawning blue water particles as they break through. Volcano is the most involved: it blasts the center open into a crater, sprays upward lava particles in an arc, and slowly grows a lava field outward that has a 6% chance per cell per frame of solidifying into new land. The cellular automata rules here are brilliant to watch work together to increase this 6%. The eruption runs for 180 frames and dies down gradually, with spark count and lava radius both scaling with the remaining timer so the whole thing feels like it has weight and momentum.

Volcano


Here’s Draft 2 so u can TERRAform as you like.


Dancing circles (Harmonic Motion) – Assignment 4

The Concept

After exploring Memo Akten’s work, I got obsessed with how he uses mathematical functions to create these organic, almost living visuals. His pieces feel like they’re breathing, expanding and contracting in this hypnotic rhythm.

I wanted to create something that captures that same feeling using Simple Harmonic Motion. Instead of pendulums, I thought: what if I used the sine wave to control the size, position, and color of circles? Like watching something breathe or pulse to an invisible heartbeat.

The idea was to start with one breathing circle, then expand it into grids and layers, creating interference patterns that feel natural and meditative. Think of it like ripples in a pond, but frozen in time and space, constantly shifting.

The Physics Behind It

Simple Harmonic Motion shows up everywhere in nature – springs, sound waves, light waves, even the motion of atoms. At its core, it’s just the sine function:

position = amplitude × sin(frequency × time + phase)

Where:

  • Amplitude controls how far it moves
  • Frequency controls how fast it oscillates
  • Phase offsets the starting point

The beautiful thing about sine waves is that when you combine multiple ones with different parameters, you get these complex, organic patterns. It’s the foundation of how we understand waves in general.

Building It Up: Milestones & Challenges

Milestone 1: Single Breathing Circle

I started with the most basic concept – a single circle that grows and shrinks using a sine wave. This was about getting the rhythm right and understanding how amplitude and frequency affect the motion.

Here’s Milestone 1:


This proved the concept – a circle that breathes in and out smoothly. The challenge was finding the right frequency. Too fast, and it looks jittery. Too slow and it’s boring. I settled on 0.02, which gives it that calm, meditative breathing pace.

Milestone 2: Grid of Oscillating Circles

Next, I wanted to fill the whole canvas with breathing circles. I created a grid where each circle’s phase is determined by its distance from the center, creating a ripple effect that propagates outward.

Here’s Milestone 2:

The wave propagates from the center outward! Each circle’s phase is determined by its distance from the center, creating this mesmerizing ripple effect. You can see waves of expansion and contraction flowing across the grid.

Milestone 3: Multi-Layer Concentric System

This is where it got really interesting. I went back to a single point but added multiple concentric layers, each oscillating at different frequencies. The code I’m most proud of is the layering system:

for (let layer = 0; layer < 3; layer++) {
  let layerFreq = 0.02 + layer * 0.015;
  let layerPhase = layer * TWO_PI / 3;
  
  for (let i = numCircles - 1; i >= 0; i--) {
    let phase = i * PI / 8 + layerPhase;
    let size = (baseSize + i * 45) + amplitude * sin(time * layerFreq + phase);
    // ... draw circle
  }
}

By offsetting each layer’s phase by 120 degrees (TWO_PI / 3), they create this three-part harmony. When one layer is expanding, another is contracting, creating constant motion and depth.

Here’s Milestone 3:


The three-layer system creates this incredible depth where you can see different rhythms happening simultaneously. It’s almost musical – like hearing three different instruments playing in harmony. The circles breathe in and out of sync, creating these beautiful interference patterns.

Milestone 4: Combining Grid + Multi-Layer (The Final Form)

For the final version, I combined everything – the grid layout from Milestone 2 with the multi-layer system from Milestone 3. Each point on the grid now has its own concentric breathing system, and they all ripple together based on distance from the center.

This is where the magic happens. You get the propagating wave effect from the grid, but with the depth and complexity of the multi-layer system. It’s like watching a field of flowers breathing together in the wind.

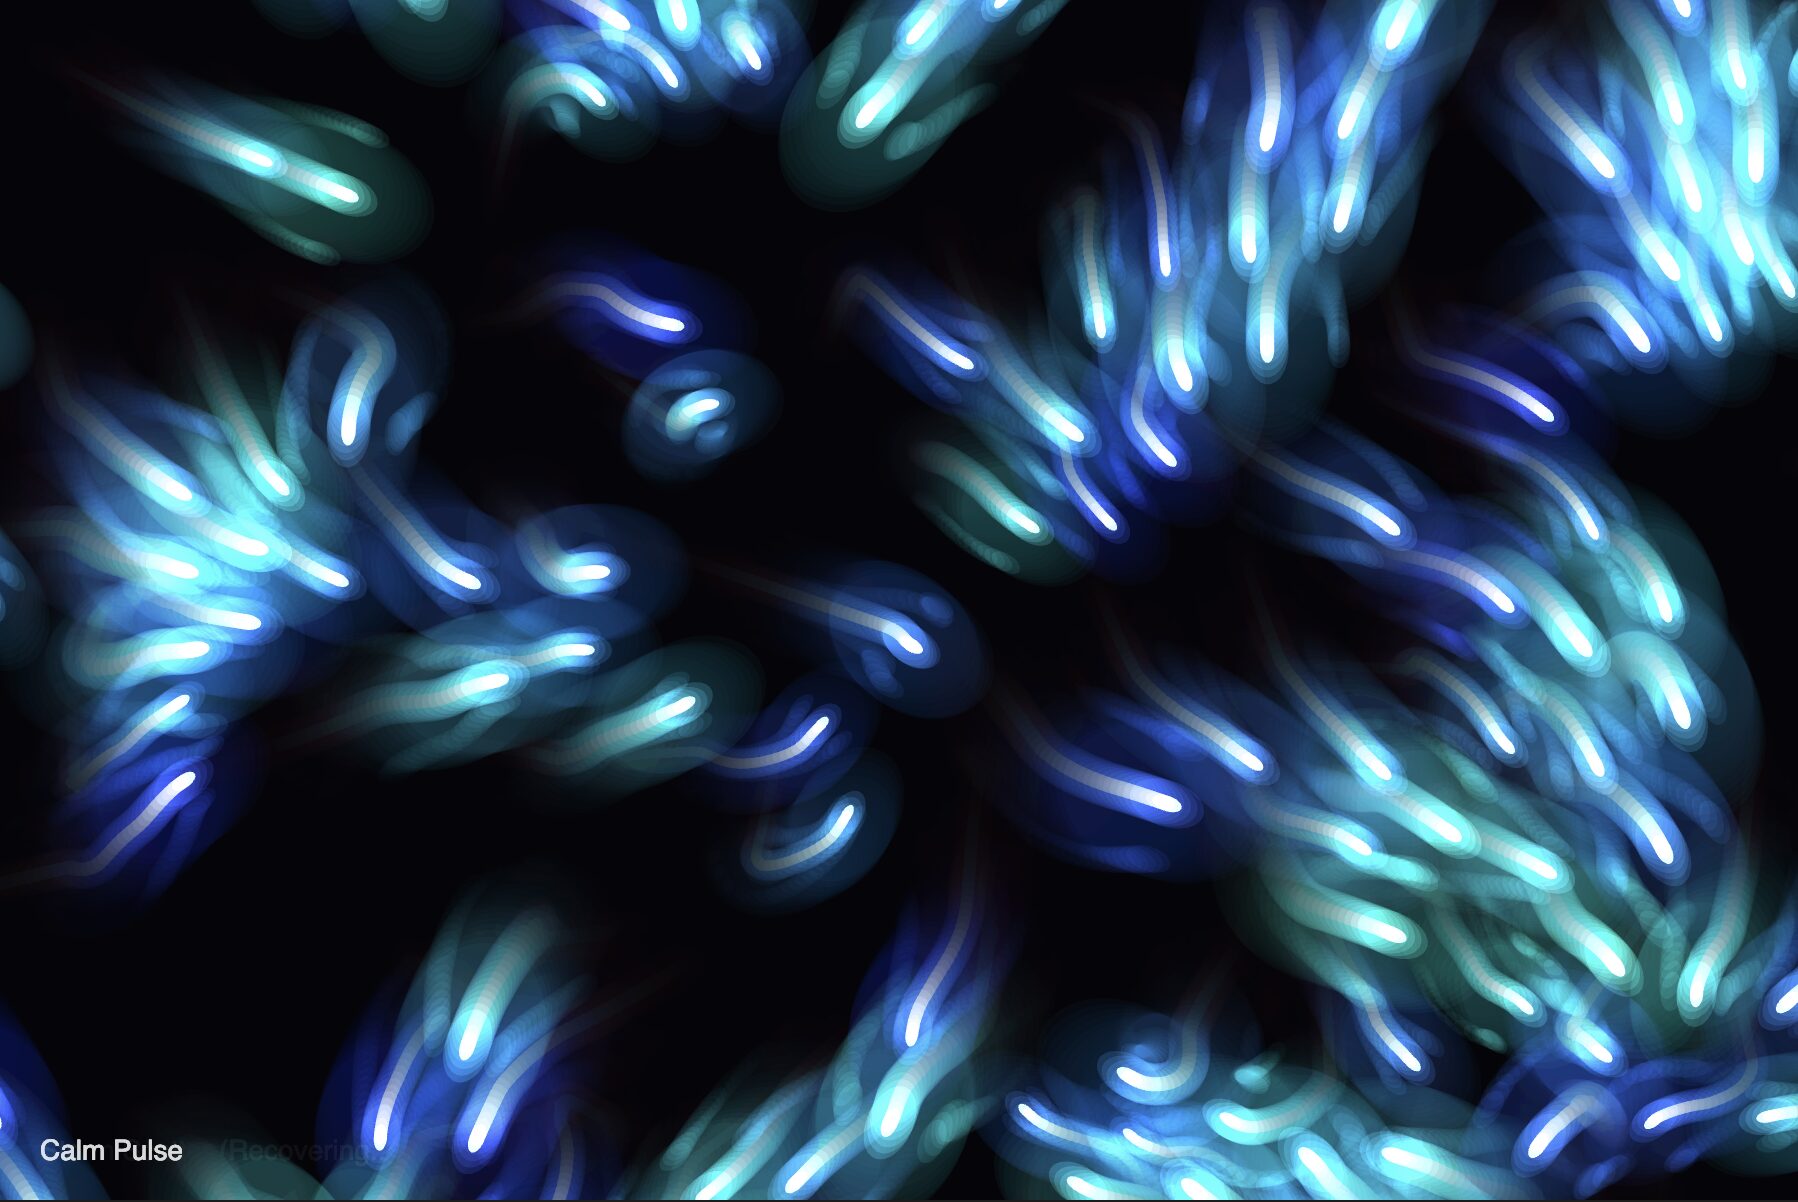
Here’s the final version:

The final version creates this hypnotic field of breathing circles. Each cluster has its own internal rhythm (the three layers), but they’re all synchronized by the wave propagating from the center. Sometimes they all sync up for a moment, then slowly drift apart again into complex interference patterns.

I added keyboard controls to adjust the frequency in real-time so you can find your own favorite rhythm. Press ‘H’ to hide the UI for a cleaner view, and ‘S’ to save a frame.

Reflection & Future Work

This project really opened my eyes to how much beauty you can create with just the sine function. By layering multiple oscillations with different frequencies, phases, and amplitudes, you get these rich, complex patterns that feel alive and organic.

What I learned:

  • The sine wave is amazing for creating organic motion
  • Layering multiple frequencies creates visual richness and depth that a single oscillation can’t achieve
  • Phase offsets are crucial – they prevent everything from syncing up and create that wave propagation effect
  • Combining grid layouts with complex per-point systems creates the most interesting results
  • Even simple mathematical rules can create patterns that feel natural and alive

What I’d add next:

  • Audio reactivity – make it respond to music, with frequencies mapped to sound frequencies
  • 3D version – spheres breathing in 3D space with depth and perspective
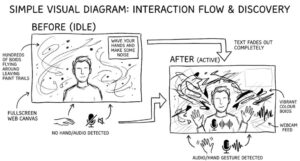
  • Mouse interaction – let users disturb the field and watch the waves respond
  • Different grid patterns – hexagonal grids, Voronoi cells (I learned about this in parametric design lab class with prof Aya), or organic spacing
  • Color schemes – different palettes for different mood s
  • More control parameters – adjust layer  count, circle count, amplitude separately
  • Recording mode – export as video to create seamless loops (I bet this can viral on instagram reels)

The most hypnotic part is just letting it run and watching the patterns emerge. The waves flow across the grid, the layers breathe in and out of sync, and sometimes everything aligns for just a moment before drifting apart again. It’s meditative – I’ve caught myself just staring at it, watching the patterns shift and evolve.

Simulated F1 Track using Attractors – Assignment 3

The Concept

I wanted to create an F1 race car simulation using pure physics and particle systems . The idea was to use gravitational attractors positioned around a track like invisible “apex guides” that would pull the car through racing lines, just like how planets use gravity assists in space. I also thought that playing with attractors would give the car freedom or a factor of random drifting just like it happens in real life if drivers took a turn on a wrong speed; and it turned out as I expected.

The big challenge was making the car follow a racing line without getting trapped by the attractors or flying off into oblivion.

The Physics Behind It

The core of this simulation uses Newton’s law of universal gravitation as we did in class: F = G × (m₁ × m₂) / r²

Each attractor pulls on the car with a force that depends on:

  • The masses of both objects
  • The distance between them (squared)
  • A gravitational constant G that I tuned to 8000 (after trial and error with the numbers)

The tricky part was constraining the distance to prevent extreme forces when the car gets too close or too far.

Smart Attractor Activation

My first huge challenge was that the car would just get stuck orbiting the first attractor like a satellite. As expected, whatever I tried didn’t work to avoid getting the car trapped around one attractor or skipping all of them and getting lost. Nothing worked until I explored the idea of turning attractors on and off dynamically with their order through the track.

This was my breakthrough moment. Instead of having all attractors active at once, I created a workflow where only two are active at any time, and they activate/deactivate based on the car’s distance and velocity direction.

The code I’m most proud of uses the dot product to detect when the car is moving away from an attractor. When the dot product is negative, it means the car has passed the attractor and is heading away, so it’s safe to deactivate it and move to the next one. This prevents the car from getting pulled back!

Yellow attractors are active and pulling the car, while green ones are waiting their turn. Watch how they light up as the car approaches and turn off after it passes!

Here is the initial sketch I built while experimenting trying to figure out the physics details:


This proof-of-concept showed me the path was working. You can see the overlapping circles creating the racing line as the car laps around the track.

Building It Up: Milestones & Challenges

Milestone 1: Speed Management

Even with the activation system working, the car was either crawling or shooting off into space. I needed consistent speed for realistic racing. I added speed clamping that keeps the car between 4-9 units per frame. If it goes too fast, it gets clamped down. If it’s too slow, it gets boosted up. This gives it that consistent racing feel where you can actually follow the motion.

Milestone 2: Positioning the Attractors

Designing the track layout took forever. I had to position 9 attractors perfectly so they’d create smooth curves without sharp angles or weird wobbles. Each attractor has:

  • A specific mass (controls pull strength)
  • An attraction radius (how far out it affects the car)
  • A position that creates the racing line

The key insight was positioning them inside the curves. The car gets pulled toward the inside of the corner, creating this kinda perfect racing line, then slingshots out on the exit.

I spent a lot tweaking these positions, running the sketch, adjusting by a few pixels, running again… over and over until the car flowed smoothly through every turn.

Milestone 3: Visual Polish

Once the physics worked perfectly, I went all-in on the visuals. This is where it transformed from a proof-of-concept into something that actually looks like a racing game.

I added:

  • A proper asphalt track
  • Red and white rumble strips on the edges
  • A grass infield and grass surroundings
  • White racing line markings
  • A detailed F1 car with cockpit, front wing, rear wing, and wheels
  • Drift smoke trails that fade out gradually
  • A checkered start/finish line positioned horizontally across the track

The car rotates based on its velocity heading using vel.heading(), so it naturally points in the direction it’s moving. I implemented another visual trick to save the last 80 positions and draws an effect with fading opacity and decreasing stroke weight for that realistic drift smoke effect.

Milestone 4: Interactive Features

I added keyboard controls to make it more interactive:

  • Press ‘A’: Toggle attractor visibility so you can see the physics at work or hide them for a cleaner look
  • Press ‘R’: Reset the car to the start position for another lap
  • Press 1-9: Manually toggle individual attractors – this is great for experimenting with different configurations and seeing how each attractor affects the car’s path

The Final Result

Reflection & Future Work

This project taught me SO much about physics simulation and the importance of tuning parameters. The gravitational constant G, the masses, the attraction radii, the speed limits – they all needed to be just right to work together. Change one value and the whole thing falls apart!

What I learned:

  • Vector math is incredibly powerful for physics simulations
  • Small tweaks to physics parameters can have massive effects
  • Visual polish takes just as much time as getting the physics right
  • Breaking down complex problems (like “make a car race around a track”) into smaller pieces (activation system, speed management, visual layers) makes them manageable

What I’d add next:

  • Multiple cars racing against each other with different colors
  • Collision detection between cars
  • Lap counter and timing system to track bests scores
  • Different track layouts – maybe even let users draw their own tracks? I think is a bit challenging
  • Damage system – if you hit the walls too hard, you slow down
  • Pit stops – strategic element where you can reset speed but lose time

Yash – Final Project Proposal

Final Project Proposal: Boids, Audio, and Hand Gestures

Concept and Artistic Intention

For my final project, I want to build on my ninth assignment, Ephemeral Flocks, and turn it into something much more interactive. In that project, I worked with boids, which connects directly to the idea of autonomous agents from The Nature of Code.

Visually, it was really interesting to watch the flock respond to the webcam feed, it felt like they were “decoding” reality in their own way. But at the same time, the experience felt a bit passive. The user basically just clicked and watched, and I think that limited the potential of the piece.

This time, I want to bring the human back into the system in a more active way. The idea is for the user to feel like they’re conducting the flock, almost like an orchestra conductor. Instead of freezing the screen, the boids will constantly move over a live video feed, painting it with this messy, expressive texture inspired by Van Gogh or Studio Ghibli.

But the key difference is that now, the system will respond to the user’s body and voice, it will listen and react, not just exist.

Interaction Methodology

I’m planning to use two main types of input to control the behavior of the boids:

  • Hand gestures (via ml5)
  • Microphone input (via p5.sound)

The hand will act as a kind of steering force. Wherever the user moves their hand on the screen, it will create an attraction vector that pulls the flock toward that position. So you’re literally guiding them through space.

The microphone will control how chaotic the system becomes. If the user is quiet, the boids will behave more calmly, they’ll stay cohesive, aligned, and move smoothly as a group. But if the user makes noise (like clapping or speaking loudly), that volume will increase the separation force, causing the boids to scatter and behave more unpredictably.

So in a way, the user is constantly balancing control and chaos through movement and sound. This directly ties back to the forces and vector systems we’ve been working with in class, but turns them into something you can physically feel and experiment with.

Initial p5.js Sketch [Please Open Web Editor, give webcam permissions and wave your hand]

Design of the Canvas

I want the visual experience to feel minimal and immersive, almost like an installation rather than a typical interactive app. That means no buttons, no heavy UI,just the system itself.

Layout (rough idea):

[Image generated using gemini]

  • A fullscreen web canvas
  • The live webcam feed sits in the background
  • Hundreds of boids move across the screen, leaving painterly trails over the video
  • In the top-right corner, there’s a small line of text:
    “wave your hands and make some noise”

Once the system detects movement or sound, that text fades away so it doesn’t distract from the visuals.

The important part is that all control comes from the user’s body and voice. There are no sliders or settings, just interaction. The goal is for users to slowly discover how their gestures and sounds shape the digital painting over time, without being explicitly told how it works.

Final project proposal

“عود (Oud): A Responsive Atmosphere”

This project started from something very small and familiar to me: the moment when oud smoke rises. It is never still. It folds into itself, disappears, comes back, reacts to the smallest movement in the air. I kept thinking about how that feels less like an object and more like a system that is alive.

For me, decoding nature is not about representing trees or landscapes. It is about understanding behavior. How things move, how they react, how they carry presence without being solid.

So I built a system where smoke becomes the main language.

Concept

This work simulates a bukhoor burner where smoke, embers, and air exist as a responsive environment. The smoke is not pre-animated. It is generated through particles that move using forces like turbulence, attraction, and separation, similar to how natural systems behave.

The system is also reactive. When activated, it listens. Sound changes the environment. The smoke becomes heavier, faster, more chaotic. When there is no sound, it returns to a quieter, almost breathing state.

It feels like the space is aware of you.

Process

I worked with p5.js to build this from the ground up as a living system rather than an animation.

  • I used particle systems to construct the smoke and embers
  • I implemented flocking behaviors so particles move collectively instead of randomly
  • I used noise to introduce instability and natural variation
  • I connected the system to microphone input so it can respond in real time

What I found interesting is that the more I tried to control it, the less natural it felt. So the process became about letting the system behave on its own terms.

Visual Direction

Visually, the work sits between two conditions.

There is structure. The background uses a very subtle geometric pattern inspired by Islamic repetition and symmetry. It feels ordered, quiet, almost fixed.

Then there is the smoke. It interrupts that order. It drifts, breaks, spreads, disappears.

I wanted that tension between control and unpredictability to exist in the same space.

The color palette stays very minimal. Dark, warm tones with a soft glow from the coal. Nothing too loud. It should feel atmospheric, not illustrative.

Why Oud

Oud is important here because it is already a system. It is not just smell or smoke. It is memory, ritual, presence. It fills space without being seen clearly.

I am not trying to recreate it realistically. I am translating what it does into code.

Outcome

The final piece is an interactive sketch where:

  • Smoke continuously generates and evolves
  • The system responds to sound and presence
  • The environment shifts between calm and intensity

It becomes something you do not just look at, but exist with for a moment.

Haris – Final Project Proposal

Concept

For my final project, I want to create an interactive visual system in which particles move in a collective way and can be influenced through the user’s hand gestures captured by a webcam. The particles will behave like a living swarm using the flocking mechanism we have learned in class. Rather than interacting through a mouse or keyboard alone, the user will use their literal hands to push, scatter, gather, and possibly hold the particles in place. Through these gestures, the user will be able to create constantly changing visual compositions in real time.

The main interaction methodology will be webcam-based hand tracking. The user’s hands will become active forces inside the particle environment. Depending on the gesture or hand position, the particles may respond in different ways. A hand moving toward the swarm may push particles away as if creating a wave or gust. Slower or more stable hand positions may attract and gather particles into denser clusters. If both hands are used, they may create a temporary holding area between them, allowing the user to trap or guide a portion of the particles through the space. Faster gestures could create turbulence or scatter the particles more dramatically, while gentler movements could produce quieter, more controlled shifts. I may also include keyboard controls to switch between interaction modes if needed, but the webcam and hands will remain the main interface.

Hand Sketch

Interaction Design

  • One hand: pushes, repels, or redirects nearby particles
  • Two hands: gathers or traps particles between them
  • Fast motion: creates turbulence and scattering
  • Slow / steady motion: creates attraction or calm clustering

Initial p5 Sketch