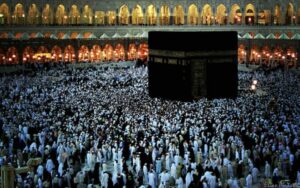
My concept for the flocking system is inspired by the sacred ritual of Umrah. I wanted to explore flocking in a different way where movement is not random or purely emergent, but organized around a central point. In Umrah, Muslims perform a ritual in which they circle the Kaaba seven times. I was interested in translating this idea into a computational system, where agents revolve around a central structure. In this project, I aimed to reflect that circular, collective movement in an abstract and respectful way, without directly representing people. Instead, I used simplified forms to suggest a crowd while keeping the focus on motion and spatial relationships. My visual inspiration also comes from a drawing of the Kaaba displayed in the art center, located beside the lift on the right side. Although I do not have an image of it, the composition and presence of that piece influenced how I approached the central structure in my work.
A highlight of some code
orbitForce() {
let center = createVector(width / 2, height / 2);
let radial = p5.Vector.sub(this.pos, center);

if (radial.mag() === 0) return createVector(0, 0);

// convert radial direction into circular motion
let tangent = createVector(-radial.y, radial.x);
tangent.normalize();
tangent.mult(this.maxSpeed);

let steering = p5.Vector.sub(tangent, this.vel);
steering.limit(this.maxForce * 1.3);
return steering;
}
One part of the code I am particularly proud of is the orbit behavior. Instead of having agents move randomly or only react to nearby neighbors, I introduced a force that converts their position relative to the center into a tangential direction. This allows the agents to move in a circular path around the central square. This was important to my concept, as it transforms a typical flocking system into a structured, collective movement organized around a focal point.
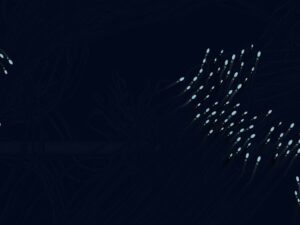
Here I was exploring how a flocking system could revolve around a central structure. I combined basic flocking behaviors with a simple orbit force to create circular movement. At this stage, the system is intentionally minimal, focusing on testing the core idea before adding complexity like time-based changes or refined visuals.
In this video, I wanted to highlight the interaction of dragging the mouse to generate agents in the system. As more agents are added, the movement becomes slower and more dense. This reflects how, in Umrah, movement naturally slows down as the crowd becomes more crowded, creating a more compressed and collective flow.
Challenge
One of the main challenges in this project was balancing control and emergence. While flocking systems are naturally unpredictable, I needed the agents to consistently move in a circular path around the central square without losing the organic quality of the motion. Another challenge was achieving the right level of simplicity in the visuals, ensuring the system remained clear and readable without becoming overly complex or decorative.
Reflection and ideas for future work or improvements
I developed a better understanding of how simple rules can produce complex and meaningful collective behavior. I learned how to balance structure and emergence. For future work, I would explore making the movement more varied and responsive, such as introducing different types of agents or layering multiple rings of circulation.
After working on the flocking system for the assignment 8 I wanted to do something similar but also structurally different for this assignment. I wanted to make a collective behavior of the flock, or in this case, the school of fish which changes under extreme circumstances. The system begins in a calm state where fish move in cohesion in a fluid formation until the system is disturbed by a shark that comes to a random vertical point of the screen which makes the fish swim in different directions thus breaking the formation and the flocking system for a shirt period of time.
The project focuses on tension and release, where the calm flock represents order, the shark introduces disruption, and the recovery phase reflects reformation. Rather than presenting a literal narrative, the work aims to explore how collective systems respond to external pressure and how coherence can break and re-emerge over time.
Process
In the beginning my goal was to just add the fish and implement simple movement and flock behavior so I didn’t really focus too much on the look of the fish.
After the flocking behavior was working it was time to add the shark spawning and the fish avoiding it.
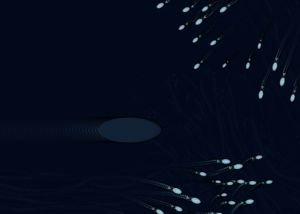
Again I was just testing things out so the shark looks more like an ellipse than a fish. But since everything was working correctly it was time to add the colors to the fish and some more details to the shark to get the final design.
The structure converts the flocking algorithm into a time-dependent dance routine, in which different algorithms and parameters are used depending on the stage of the process. The system does not remain fixed with one behavioral pattern but moves through various stages without necessarily programming an event sequence.
I also played a bit with linear interpolation (lerp) to make the shift between the calm mode and the panic mode feel more natural rather than abrupt.
I am very happy with how the project turned out. I think it demonstrates well the tension and release part of the assignment and I think that choosing to give fish different colors was the right move artistically as it makes the assignment more visually appealing. If I was to add anything to the assignment that would definitely be sound. I believe that maybe different sound depending on the tension or if the shark is in sight would work really well for the overall project. But overall I am happy with the final result and am glad I got to work on flocking mechanism even more.
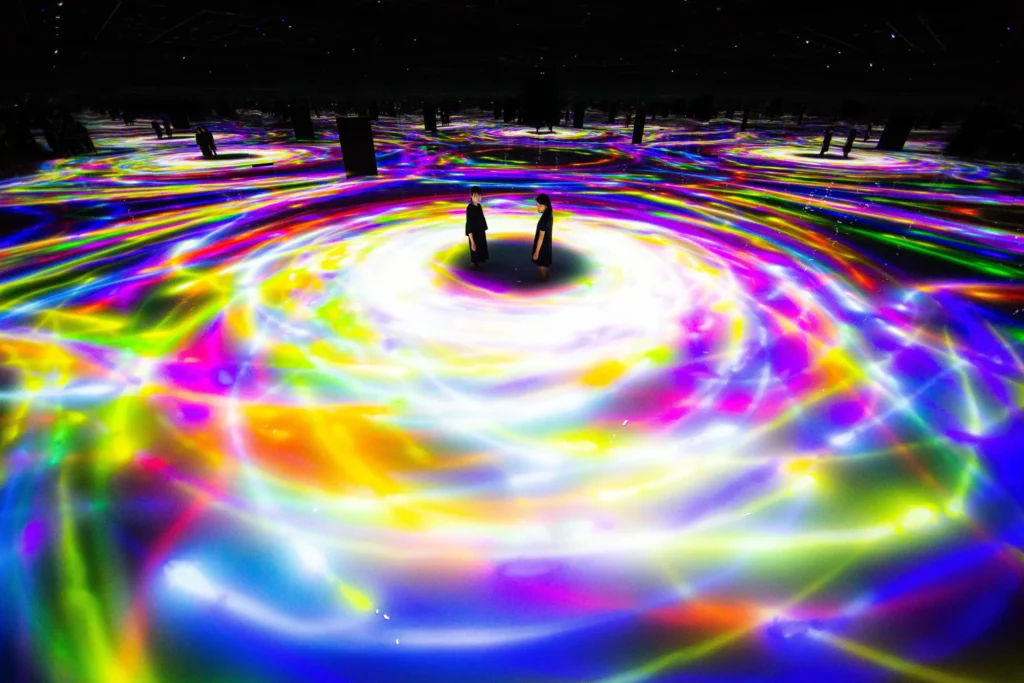
When looking through the teamLab installations the one I found the most visually striking was the Koi fish installation:
I unfortunately wasn’t able to attend the trip to teamLab but regardless I found this image from which I took inspiration.
Milestones
Unfortunately because of the dark background it is hard to see some of the smaller details I’m referring to but it should be possible to see.
Stage 1
Although this step is fairly basic in my opinion it is still worth mentioning. At the very beginning I made the canvas render using WEBGL and added orbitcontrol() this would be useful for all of the following steps.
Stage 2 – Koi Fish (Random Motion)
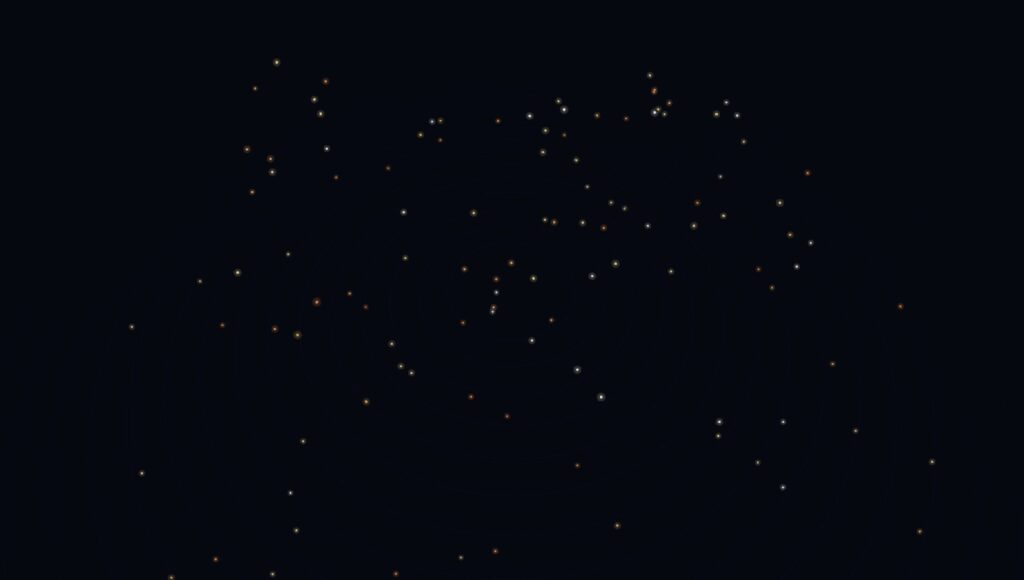
At this point I created the Koi fish class. It’s called Koi but really the logic is like the vehicles we discussed in class. At this point in time the motion was fairly random but later the motion would become more fluid and they would travel in flocks using boid logic.
I thought about using more intricate fish models rather than simple dots and trails but I felt that strayed too far from the original installation since I didn’t get the impression that it was about the aesthetics of the fish but rather the movement and colors.
Stage 3 – Trails + Boid Movement
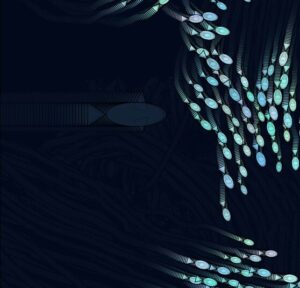
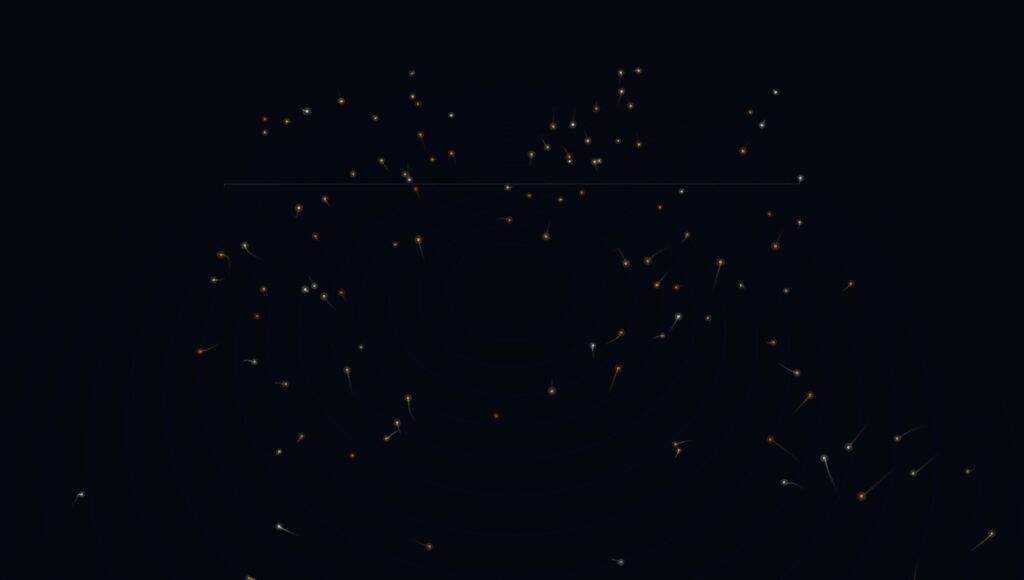
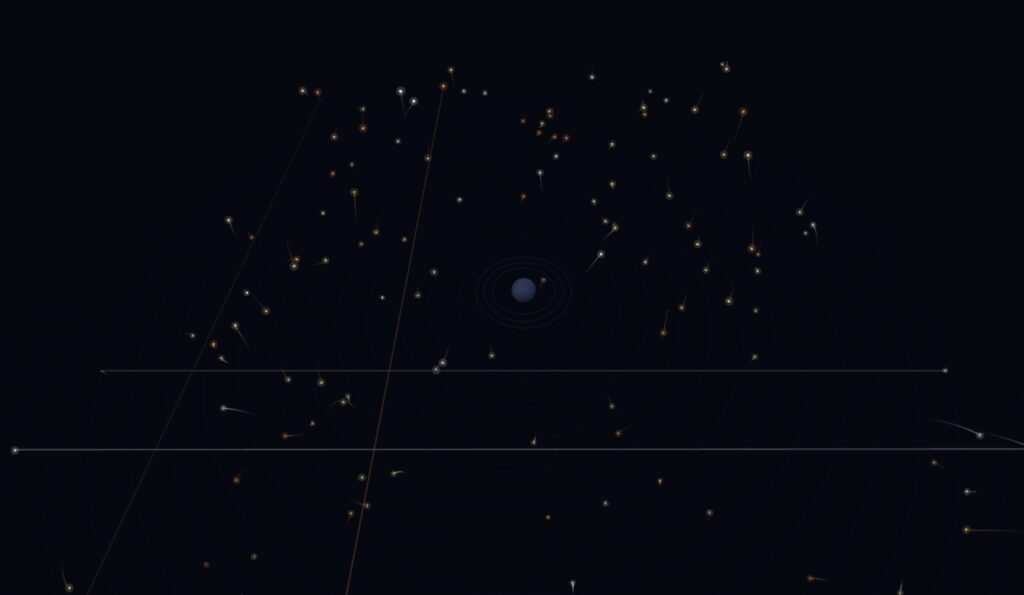
Now each ‘fish’ had a trail to make it’s movement more apparent. This also came with a surprising feature. To make sure that the fish would not go too far I had it so that at a certain distance it would return back to the opposite side but this had an unintended effect of this line that would go across the canvas (one can be seen at the back). I liked the look of it so I decided to keep it.
Boid movement refers to movement that replicates the movement of birds. Although it would normally be used to simulate birds moving in flocks I decided it could work in this sketch since I wanted them to move in flocks. In this screenshot the cohesion was set to a lower value but I would later try out different settings.
Stage 4 – 3D Player + Light Interaction + Avoidance
Afterwards I decided to add the ‘player’. In the original picture there are two people and I’m unsure how the fish act around the two people whether they follow them or always circle them but I decided to do something similar by having the fish avoid the player. In addition the color from the fish would illuminate the player accordingly.
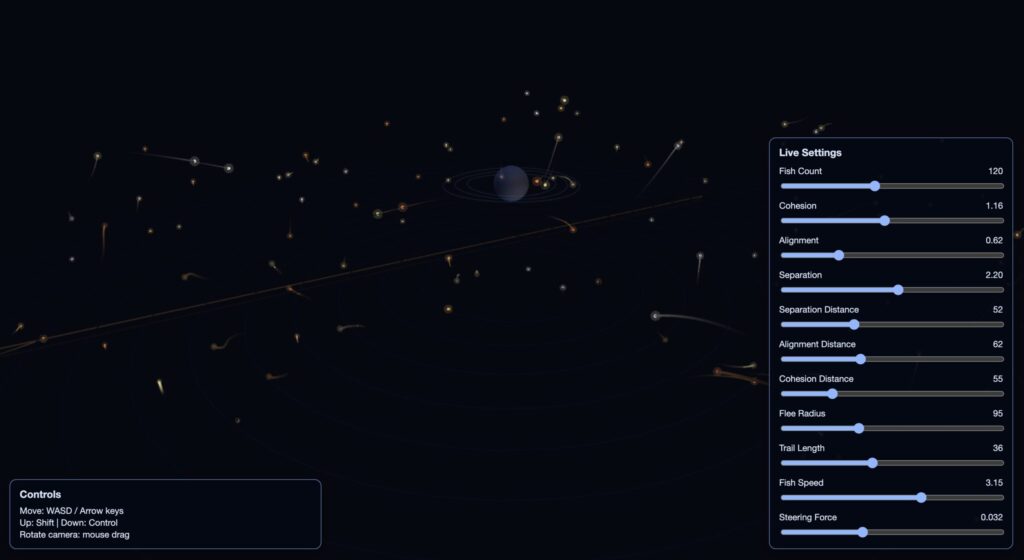
The player can move around using either WASD, or the arrow keys and using shift/control to move up and down respectively.
Stage 5 – HTML UI Controls
Lastly, I added UI controls. You can edit the settings in real time by adjusting the sliders. I coded this part using html so that the UI would be 2D since the WEBGL sketch is 3D the UI wouldn’t follow the camera view. I am sure there is a way to still use p5 to achieve the same effect but I think this turned out well regardless.
I highlighted this code because it makes each koi fish avoid the player in an organic way. When the player enters the fish’s flee radius, the fish measures that distance, converts it into a stronger or weaker escape response, and then applies a limited steering force so it turns away smoothly instead of abruptly.
Embedded Sketch
Viewing the sketch directly through the web editor and in window size achieves the best effect.
Reflection and Ideas for Future Work
I’m happy with the movement of the fish and the minimalistic aesthetic but there’s still room for improvement in the future. The following is what I would add in the future if I were to continue on this project or do something similar.
Add optional shader-based water caustics and soft volumetric fog.
Introduce seasonal color palettes as a toggleable mode.
For this assignment, I was influenced by the glitch-aesthetic of Ryoichi Kurokawa and the organic precision of Robert Hodgin. The project tells a visual story of a digital organism struggling to maintain its structural integrity, moving through a scripted cycle of Crystalline Order, Kinetic Chaos, and Digital Decay. I was able to do this by layering standard flocking rules with a custom “Glitch” variable.
There are three modes you can switch through by pressing the spacebar, which I called Order (Cohesion high), Chaos (Wander & Flee high), and Decay (Fading trails).
Code Highlight:
I am particularly proud of the State-Dependent Steering Logic within the flock() method. This snippet acts as the nervous system of the simulation, allowing the agents to instantly reconfigure their behavior based on the current global state. By using vectors and dynamically shifting the weights of Cohesion, Wander, and Separation, I can transition the entire system.
if (state === 0) { // ORDER: High Cohesion to center
  let center = createVector(width/2, height/2);
  coh = this.seek(center).mult(2.5); // Force into a rigid cluster
  this.maxSpeed = 1.8;
} else if (state === 1) { // CHAOS: High Velocity & Randomness
  glitch = p5.Vector.random2D().mult(6.0); // Introduce erratic energy
  this.maxSpeed = 7;
  this.maxForce = 0.6;
} else { // DECAY: High Separation & Drifting
  sep.mult(5.0); // Force agents apart
  this.maxSpeed = 0.8;
}
Milestone 1:
This milestone focused on the mathematical accuracy of the core steering behaviors. At this stage, there was no tension and release or interactivity. The agents simply moved in a continuous, unchanging loop. The visual was kept basic to ensure the Separation, Alignment, and Cohesion logic was solid.
Milestone 2:
In this milestone, I shifted from representational triangles to the Kurokawa-inspired line aesthetic. I introduced the “Nearest Neighbor” logic, where agents “reach out” to one another to create a web-like structure. I also added low-alpha background clearing to create the smoky history trails seen in Robert Hodgin’s work.
Final Sketch:
Reflection and ideas for future work or improvements:
This project taught me that compelling generative art often emerges from the disruption of rules. This shift, combined with a low-alpha background, transformed a simple steering simulation into a smoky, ethereal system that bridges the gap between predictable math and the emotional tension seen in the works of Kurokawa and Hodgin. Moving forward, I plan to integrate p5.sound to map the “Chaos” phase to granular synthesis and implement Obstacle Avoidance using invisible voids to force agents into even more intricate woven patterns possibly within a 3D WebGL environment.
Ephemeral Flocks: Painting with Boids and Live Video
Concept & Inspiration
For this project, I wanted to explore the intersection of organic, emergent systems and digital surveillance/capture. The concept revolves around using a simulated flocking system (boids) not just as moving entities, but as autonomous painters that “decode” and reconstruct reality.
The sketch operates in three distinct phases, creating a natural cycle of tension and release:
The Live Feed (Reality): The user sees a standard, real-time webcam feed.
The Freeze & Draw (Tension/Emergence): Upon clicking, time stops. A snapshot is captured, and suddenly hundreds of boids swarm the canvas. Instead of clearing the background, they leave continuous trails, acting as a generative brush. They read the brightness of the frozen pixels beneath them, mapping the light and shadow of the captured moment through their chaotic flight paths.
The Dissolve (Release): After fifteen seconds of frantic drawing, the image slowly dissolves back into the live video feed, erasing the boids’ hard work and resetting the cycle.
Visually and conceptually, this was heavily inspired by the generative artwork of Ryoichi Kurokawa and Robert Hodgin, who both excel at blending chaotic particle systems with structured, recognizable forms, making the digital feel tactile and natural. The specific mechanic of using boids as a “brightness brush” was directly inspired by Valerio Viperino’s brilliant “Drawing with boids” experiment.
Code Highlight: The Autonomous Brush
The part of the code I am most proud of is within the Boid class’s show() method. Rather than telling the boids what to draw, I simply tell them how to see.
show() {
  // Constrain coordinates to prevent array out-of-bounds errors
  let px = constrain(floor(this.pos.x), 0, snap.width - 1);
  let py = constrain(floor(this.pos.y), 0, snap.height - 1);

  // Calculate 1D pixel array index
  let index = (px + py * snap.width) * 4;

  // Extract RGB and calculate rough brightness
  let r = snap.pixels[index];
  let g = snap.pixels[index + 1];
  let b = snap.pixels[index + 2];
  let brightness = (r + g + b) / 3;

  // Draw the trail mapped to the pixel brightness
  stroke(brightness, 150);
  strokeWeight(1);
  line(this.prevPos.x, this.prevPos.y, this.pos.x, this.pos.y);
}
This snippet is the bridge between the physical world (the camera pixel array) and the simulated world (the boids’ coordinates). By tying the stroke color to the underlying image brightness and lowering the opacity, the boids slowly layer their trails to create an etching-like quality.
Video Documentation :
Embedded Sketch [PLEASE OPEN IN WEB EDITOR AND GIVE WEBCAM PERMISSIONS]
Milestones & Challenges
Milestone 1: Establishing the Trails Before integrating the camera, the first major hurdle was getting the boids to leave a continuous trail without the sketch crashing or looking like complete static. I had to modify the standard Craig Reynolds boid model to track.
Milestone 2: Reading the Environment The next challenge was getting the boids to “read” data. Before complicating things with a live video feed, I created a hidden canvas with a basic geometric shape. I programmed the boids to change their stroke color based on whether they were flying over the shape or the background. This confirmed the pixel-array math was working.
Challenge: Managing States Integrating the webcam introduced a massive flow challenge. I had to implement a state machine (LIVE, DRAWING, FADING) utilizing millis() to handle the timing. Ensuring the snapshot (snap.get()) only triggered exactly when the state shifted was tricky but crucial for performance.
Reflection & Future Work
This project pushed me to think about interactive media not just as tools that react instantly to a user, but as living systems that take time to develop. The 15-second drawing phase forces the user to pause and watch the algorithm work, highlighting the beauty of creative coding.
For future iterations, I would love to experiment with color data instead of just brightness, perhaps mapping the RGB values to the boids’ strokes to create a pointillist, impressionist painting. Additionally, mapping the flocking variables (like separation or speed) to audio input could make the drawing process even more dynamic and expressive.
So this one genuinely caught my attention when I saw it in the field trip. The reason I picked it specifically is the concept behind it. The piece is called Phenomena and teamLab describes it as being about bodies that exist in the world and influence one another just by being close to each other, like how two people standing near each other are quietly affecting their shared space even before they do anything. I find that really compelling as an idea, especially as something you’d try to turn into code. It’s not just a visual effect, it’s a statement about proximity and influence as a kind of physics. That got me thinking about this assignment very differently than the previous ones.
On top of that there were two things about the installation mechanics that genuinely puzzled me. The first one was the bloom trigger. My initial assumption was that the objects were flowering when they hit each other — some kind of collision detection causing the growth, and during the field trip I learned from one of the teamLab staff the I do not need to hit them to see them glow; the trigger is shaking. You pick up one of the floating objects and you shake it, and the flowers grow from inside it. The impact isn’t what causes the bloom, the movement is. That’s a completely different system and I thought it was a much more interesting design decision. It makes the interaction feel alive in a different way, you’re not smashing things together, you’re waking something up.
The second thing I got stuck on is something I remember discussing with Mustafa in the trip and actually brought up with the professor in class: how are those objects charged? There are LEDs glowing inside physical spheres that are being handed to and shaken by museum visitors, but there are no visible cables. I was honestly baffled by this for a while. The answer is (as professor said I searched it up and confirmed) wireless charging built into the table/base they rest on, the spheres charge inductively when placed down and then run on their own battery while being carried. It’s a small detail but knowing it makes the installation feel even more thoughtfully designed.
The Concept for the Sketch
I wanted to recreate this in 2D with two types of interaction: you can drag an orb and throw it to shake it (the throw velocity drives how much it blooms), and you can drag one orb into another to trigger a collision bloom on both. The idea is that every orb is an independent body with its own personality, its own color, its own slow drift, but they’re all part of the same shared space and they influence each other when they collide.
The twist I added is that the bloom direction is sensitive to what triggered it. A shake-bloom fires petals in the direction the orb was thrown, it follows the impulse. A collision-bloom fires petals in all directions equally, it’s a symmetric eruption. Both go through the same bloom() function, the only difference is whether I pass a direction angle or null. I really like that distinction because it matches the physics logic: a shake has a direction, a collision doesn’t.
The Physics Behind It
There are really three systems running here and they each borrow from what we’ve been building in class.
Petals are just particles with a lifespan. Each one has a position, velocity, and a slow angular spin. They get an initial velocity from the bloom call, then drag pulls them to a stop as lifespan ticks down.
Shockwave rings expand outward from the center of the bloom using lerp(r, maxR, 0.12) so they ease into their final radius rather than jumping there linearly.
Orb collision uses the same axis-projection pattern from the flocking separation work but instead of a steering force it does a proper 1D elastic velocity exchange:
let dvA  = a.vel.dot(axis);
let dvB  = b.vel.dot(axis);

a.vel.sub(p5.Vector.mult(axis, dvA - dvB));
b.vel.sub(p5.Vector.mult(axis, dvB - dvA));
This is just transferring the velocity component along the collision axis from one orb to the other. It’s not perfectly accurate rigid-body physics but it looks right and it’s enough to trigger the bloom.
Building It Up: Milestones & Challenges
Milestone 1: One Orb, Shake to Bloom
I started with a single orb. The goal was just to nail the interaction loop: grab → drag → release → bloom. Everything else could wait.
I stored the last 6–8 mouse positions in a dragHistory array during the drag. On release I subtract the first position from the last and divide by the length to get an average throw velocity. That average becomes both the orb’s initial velocity and the intensity input to bloom(). Fast throw = dense bloom, soft release = barely anything. This felt much more natural than just using the distance of the drag.
Getting the petal shape right took longer than I expected. My first attempt used circle() for all the petals and it looked like a sneeze. I switched to ellipse(0, 0, sz * 0.45, sz) after the rotate(this.angle) call and that immediately gave the petal elongation that reads as organic.
Milestone 2: Multiple Orbs and the Collision Problem
Adding five more orbs was straightforward. The harder thing was getting collision to feel right.
My first implementation just pushed overlapping orbs apart, same as separation. It looked fine statically but when you threw one orb into another the receiving orb barely moved and no bloom fired. The problem was I wasn’t measuring the impact. I needed to know how violent the collision was to decide bloom intensity, and that means comparing velocities before and after, not just positions.
The fix was computing impact = abs(dvA - dvB) — the difference in velocity components along the collision axis right before the velocity exchange happens. A slow drift touching another orb gives a tiny impact value. A fast throw gives a big one. I feed that directly into onCollision(impact) and map it to bloom intensity. Once I had that, smashing two orbs together at speed gives a massive synchronized double bloom and it looks exactly like what I was going for.
Petal Count vs. Performance
Once I had 6 orbs and was generating up to 55 petals per bloom event, I noticed the frame rate dropping noticeably after a few big collisions especially if I triggered two or three in quick succession. The sketch was potentially running hundreds of petal particles at once, each doing its own update() and show() call every frame.
The fix was two-pronged: I capped the max petal count per bloom at 55 (was originally 80), and I bumped the decay rate range from random(1, 3) up to random(2, 4) so petals die faster. After that the performance was fine even with all six orbs being thrown around simultaneously.
The Bloom Direction Distinction (The Part I’m Most Proud Of)
This is the piece of code I keep coming back to:
bloom(intensity, dirAngle) {
  let count = floor(map(intensity, 0, 1, 6, 55));
  for (let i = 0; i < count; i++) {
    let angle = (dirAngle !== null)
      ? dirAngle + random(-0.6, 0.6)
      : random(TWO_PI);
    // ...
  }
}
The dirAngle !== null check is doing a lot of work. Shake-blooms get the throw heading with a ±0.6 radian spread so the petals fan out in the direction of the throw like water spraying off a shaken bottle. Collision-blooms pass null and get random(TWO_PI) full circle. One function, one parameter, two completely different visual results. It felt like a clean way to encode the physics intent directly into the visuals.
The Final Result
Six glowing orbs drifting slowly in a dark space. Drag any one and throw it to see a directional petal bloom. Drag it into another to trigger a symmetric collision bloom on both. Faster collisions make bigger blooms. The orbs bounce off walls and off each other and slowly come to rest.
Controls:
Click + drag: grab an orb and move it
Release: throw it to bloom
Drag into another orb: collision bloom on both
Reflection & Future Work
What I kept thinking about while building this is how the teamLab piece communicates its concept through its interaction design. The fact that shaking causes the bloom (not hitting) is a deliberate choice that makes you feel like you’re agitating something alive. Because it’s a shake it feels like you’re disturbing something that was at rest. I tried to preserve that feeling in the code by making throw velocity the input rather than a click event.
I also really like how the six orbs end up telling different stories in the same run. The slow-moving ones barely bloom at all unless you grab them. The ones that happen to drift into each other bloom spontaneously. The whole thing feels organic in a way that I didn’t explicitly program.
What I’d do differently or add next:
Chained blooms: if a petal from one bloom hits another orb and crosses its radius, trigger a small secondary bloom. This would match the “influence” theme of the original much more directly
Sound: a soft tone triggered at bloom intensity would complete the sensory loop; teamLab installations always have audio that’s responsive to the interaction
This project explores a flocking system that evolves over time, not just in movement but in behavior and structure. Instead of keeping the system stable, I wanted to push it toward moments of tension, where the agents begin to compress, lose balance, and then break apart before reorganizing again.
The core idea is to treat flocking not as a natural simulation, but as a system under pressure. At certain moments, the swarm pulls inward and becomes dense, almost like it is being compressed into a single point. At other moments, that pressure releases and the system fractures outward.
In the prototype, I approached flocking as a kind of signal network, where agents connect through proximity and form temporary constellations. In the final version, I pushed this further into a more aggressive visual language, where the agents behave like fragments moving through cycles of compression and release.
Inspiration
In unfold by Ryoichi Kurokawa, visual structures emerge from data and gradually distort, fragment, and reorganize. This sense of systems building toward instability and then collapsing influenced how I approached the tension and release within my flocking system.
In the first prototype, I focused on building a flocking system that reads as a network rather than a group of individual agents.
Each agent connects to nearby agents, creating temporary lines that appear and disappear as the system moves. This produces a constantly shifting constellation-like structure. The motion is relatively stable, but the visual output is already starting to move away from traditional flocking representations. However, there is no strong sense of progression yet. The system exists in a continuous state without clear tension or release.
Final Sketch
In the final version, I introduced a time-based system that pushes the flock through cycles of compression and release.
The agents are no longer rendered as points, but as elongated shards, which changes how motion is perceived. Instead of reading as individuals, they begin to feel like fragments of a larger structure.
The system moves through phases:
Compression: agents are pulled toward the center, increasing density and tension
Instability: movement becomes more chaotic and tightly packed
Fracture: agents are pushed outward, breaking the structure apart
Reformation: the system reorganizes and the cycle repeats
These transitions are continuous rather than abrupt, allowing the system to feel more natural and performative over time.
Code Highlight
One part of the system I focused on was controlling the transition between compression and explosion:
let cycle = (sin(t * 0.6) + 1) * 0.5;

let compress = pow(sin(cycle * PI), 2.2);
let explode = pow(sin((cycle + 0.5) % 1.0 * PI), 2.2);
This allows the system to move through phases smoothly instead of switching behaviors on and off. The forces applied to each agent are then adjusted based on these values:
let alignW = lerp(1.2, 0.35, compress);
let cohesionW = lerp(0.7, 1.6, compress);
let separationW = lerp(0.9, 2.5, explode);
By shifting these weights over time, the same flocking rules produce very different behaviors, which creates the sense of development.
Milestones and Challenges
1. Breaking away from the “boids look” At first, everything still looked like a standard flocking simulation. Changing the rendering from points or triangles into lines and shards made a big difference in how the system is perceived.
2. Creating actual tension Early versions just moved smoothly without any variation. Introducing compression toward a central point made the system feel more unstable and intentional.
3. Balancing forces When separation was too strong, everything scattered too quickly. When cohesion was too strong, the system became static. The challenge was finding a balance that allowed both buildup and release.
4. Making transitions feel continuous Abrupt changes felt artificial. Using sine-based modulation allowed the system to evolve gradually, which made the motion feel more cohesive.
Reflection + Future Improvements
This project shifted how I think about generative systems. Instead of focusing only on movement, I started thinking about how a system can develop over time and create a sense of rhythm.
The most important change was moving from a stable simulation to a system that goes through cycles of tension and release.
If I were to continue developing this, I would:
Introduce sound so the system reacts to audio input
Explore depth by moving into a 3D space
Add trails to visualize past movement and build memory into the system
Refine the pacing so that each phase feels more intentional
Right now, the system loops continuously, but it could be pushed further into a more defined narrative structure.
Concept
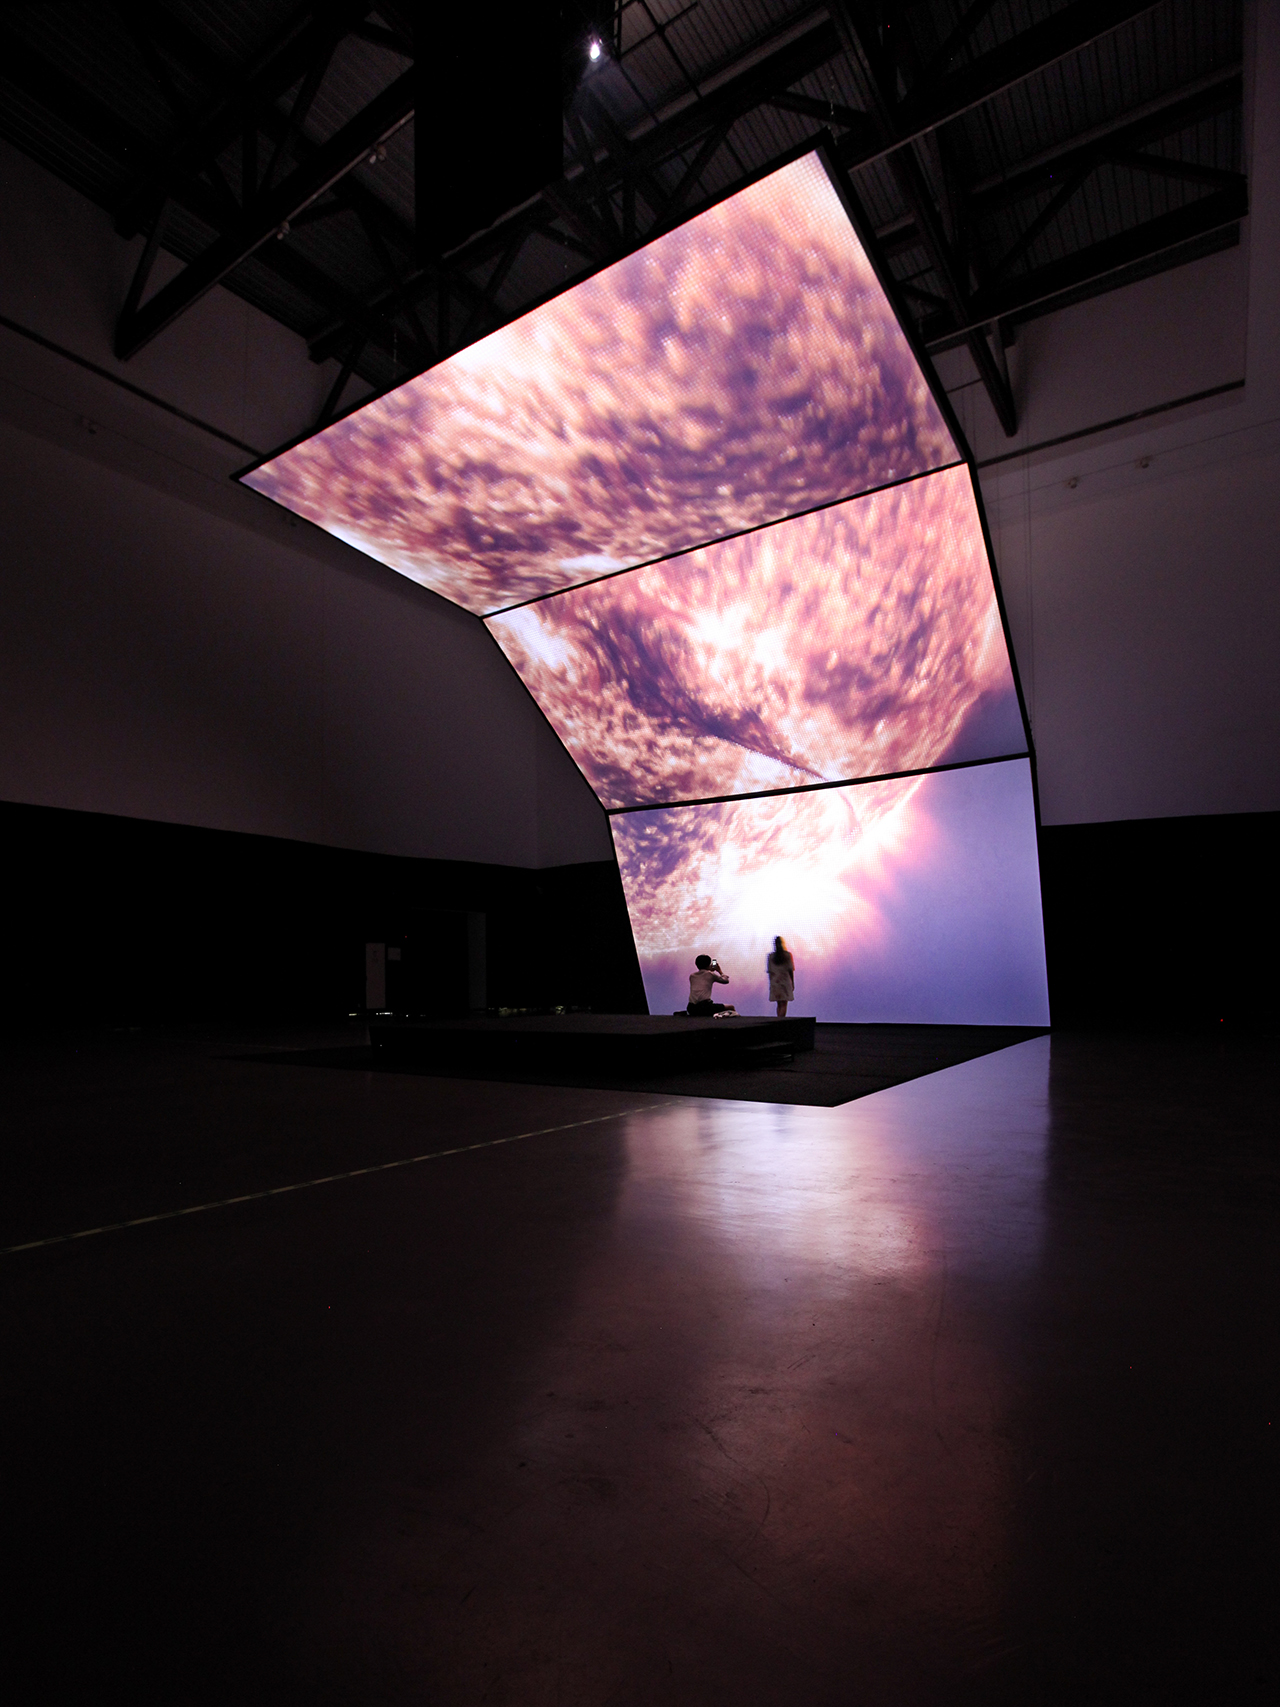
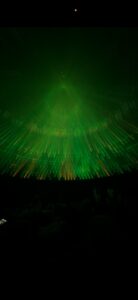
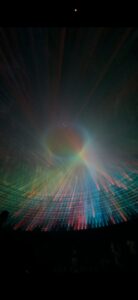
After our visit to the teamLab exhibition, one installation stopped me cold. It was the room with scale laser piece — hundreds of beams of colored light radiating inward from sources arranged in a wide circle around the perimeter, all converging at a central point where they interfered and stacked into a glowing, slowly morphing orb. The shape at the center wasn’t static. It pulsed. It shifted — sometimes a perfect sphere, sometimes something more irregular — as if the light itself was breathing. The whole thing cycled through color states: a deep emerald green, then teal, then a full-spectrum rainbow, each transition preceded by a complete blackout before the next color bloomed back in. A low ambient drone played underneath it all, its pitch and texture shifting subtly with the light.
What struck me most was the sense of three-dimensionality. The beams weren’t converging on a flat point — they were targeting different parts of a rotating surface, and as that surface turned, the beams swept up, down, and sideways, making the central structure feel genuinely volumetric. It looked less like a projection and more like a physical object built entirely out of light. I wanted to recreate that.
Inspirations
Code Highlight
The piece I’m most proud of is the beam tapering system combined with depth-based brightness. These two things working together are what give the sketch its sense of physical space.
Real laser beams in a foggy room are dim at the source and brighten as they converge — the light accumulates. I replicate this by splitting each beam into three segments and drawing each progressively brighter:
// Tapered beam: dim at source, bright at convergence
let mx = lerp(b.sx, tgt.x, 0.5),  my = lerp(b.sy, tgt.y, 0.5);
let qx = lerp(b.sx, tgt.x, 0.78), qy = lerp(b.sy, tgt.y, 0.78);

strokeWeight(0.8);
stroke(hue, 88, 100, bA * 0.30 * depth);
line(b.sx, b.sy, mx, my);       // outer — dim

strokeWeight(1.0);
stroke(hue, 72, 100, bA * 0.50 * depth);
line(mx, my, qx, qy);           // mid

strokeWeight(1.3);
stroke(hue, 38, 100, bA * 0.88 * depth);
line(qx, qy, tgt.x, tgt.y);    // inner — brightest
On top of that, depth is derived from the sphere point’s perspective scale — points on the near side of the rotating sphere get a higher depth value and therefore brighter beams, while the far side is dimmer. This is what makes the 3D rotation actually readable:
Controls: move your mouse to tilt the sphere in 3D · click to toggle sound
Milestones and Challenges
Getting the direction right. My first build had the sources at the bottom arcing upward, like stage lights — which looked completely wrong. The actual installation has sources in a full circle, all shooting inward. Once I switched to a full 360° ring of sources the whole thing immediately felt closer to the reference.
Making the 3D readable. For a long time the sphere rotation was happening mathematically but you couldn’t see it — the beams just seemed to flicker randomly. The fix was depth-based opacity. Once beams targeting the near side of the sphere were noticeably brighter than those going to the far side, the rotation immediately read as three-dimensional. A small change with a huge perceptual payoff.
Fixing the orb banding. The central glow had visible rings — discrete concentric circles always show banding unless the steps are small enough to fall below the perceptual threshold. I switched to drawing 200 circles in 1-pixel steps using an exponential falloff curve:
This makes the transition from bright core to outer haze completely continuous. It costs more per frame but is imperceptible on modern hardware at pixelDensity(1).
Syncing audio to visuals. Browsers block audio without a user gesture, so the first click starts the audio context. After that, the master gain and filter cutoff update every frame tracking globalAlpha directly — so the sound fades out during blackout transitions and breathes with the pulse automatically, without any separate audio state machine.
Reflection and Ideas for Future Work
The process taught me how much perceptual rendering depends on implied physics. The beams don’t actually accumulate light — I’m just drawing lines with varying opacity — but tapering them correctly is enough to convince the eye that something real is happening. The same is true of the depth gradient. These aren’t physically accurate simulations; they’re visual shortcuts that exploit how we expect light to behave.
For future improvements I’d want to explore:
Shape morphing at the convergence point. The sphere is a clean starting point but the installation showed the central structure shifting form during my visit — flattening into a disc, stretching vertically. Morphing the convergence surface between geometries over time would get much closer to that full visual range.
Reactive audio. Right now the audio is a static generative drone. Mapping the rotation speed or morphing intensity to filter resonance or oscillator detune would make the sound feel more alive and more directly tied to what the light is doing.
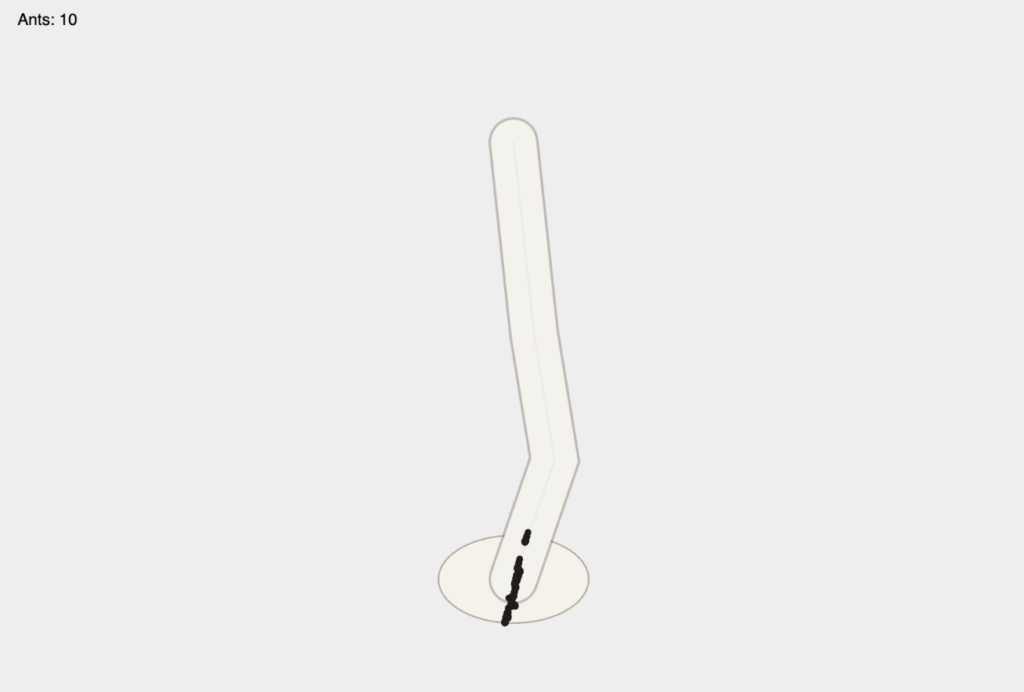
My concept started from noticing that steering behavior looked very similar to moving ants. That gave me the idea to build an ant colony cross section simulation where ants travel between underground burrows and the surface like a terrarium. The simulation uses seek behavior and path following to create ant-like movement patterns.
Code Highlight
The part I am most proud of is the state machine in my Ant class. It coordinates each ant going to the surface, roaming, returning to the path, going back to the burrow, waiting, and repeating. Adding the returnToPath state was especially important because it fixed the issue where ants were cutting through the ground instead of reconnecting to the path at the surface first.
if (this.state === "roamSurface") {
    if (!this.roamTarget || p5.Vector.dist(this.pos, this.roamTarget) < 16) {
      this.pickNewRoamTarget();
    }
    this.seek(this.roamTarget);
    if (millis() >= this.roamUntil) {
      this.state = "returnToPath";
    }
    return;
  }
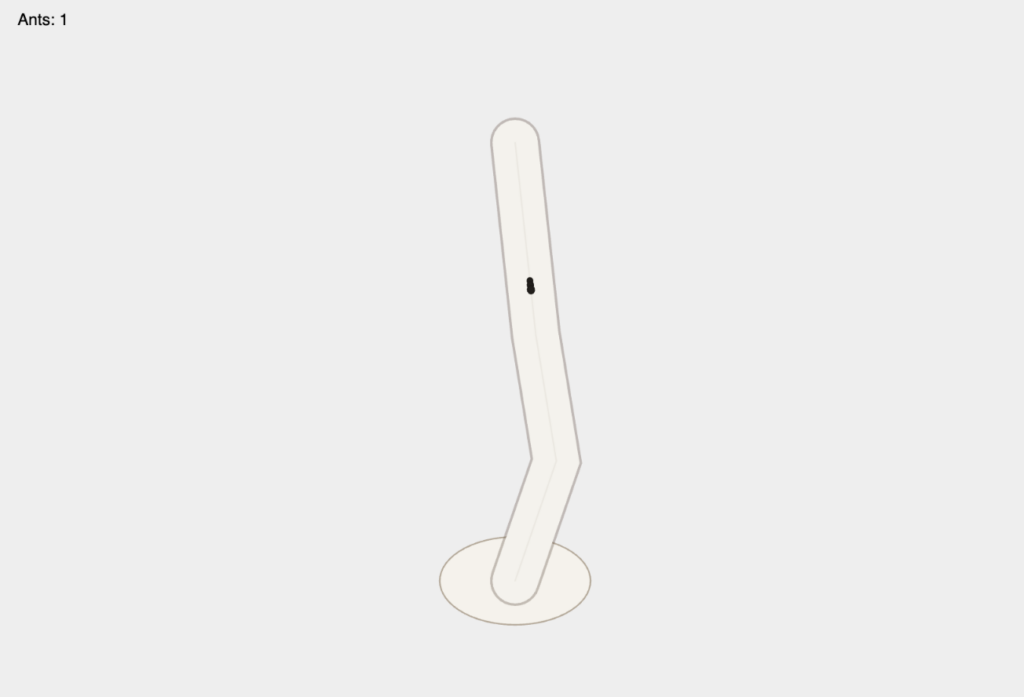
I started with one ant following one path to verify that seek and basic path following were working correctly.
Stage 2: One path, multiple ants
After confirming the basic behavior, I added multiple ants on the same path to test how the movement looked in a colony-like flow.
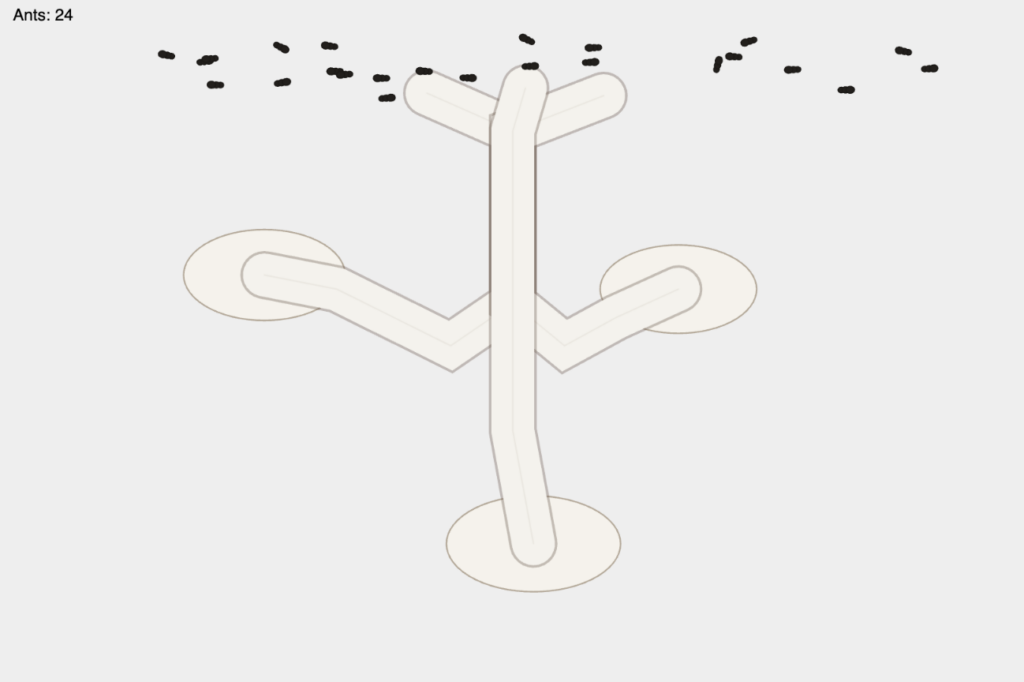
Stage 3: Multiple paths, multiple ants per path
I expanded the colony to multiple burrows and assigned ants to specific paths so each group had a consistent route to and from the surface.
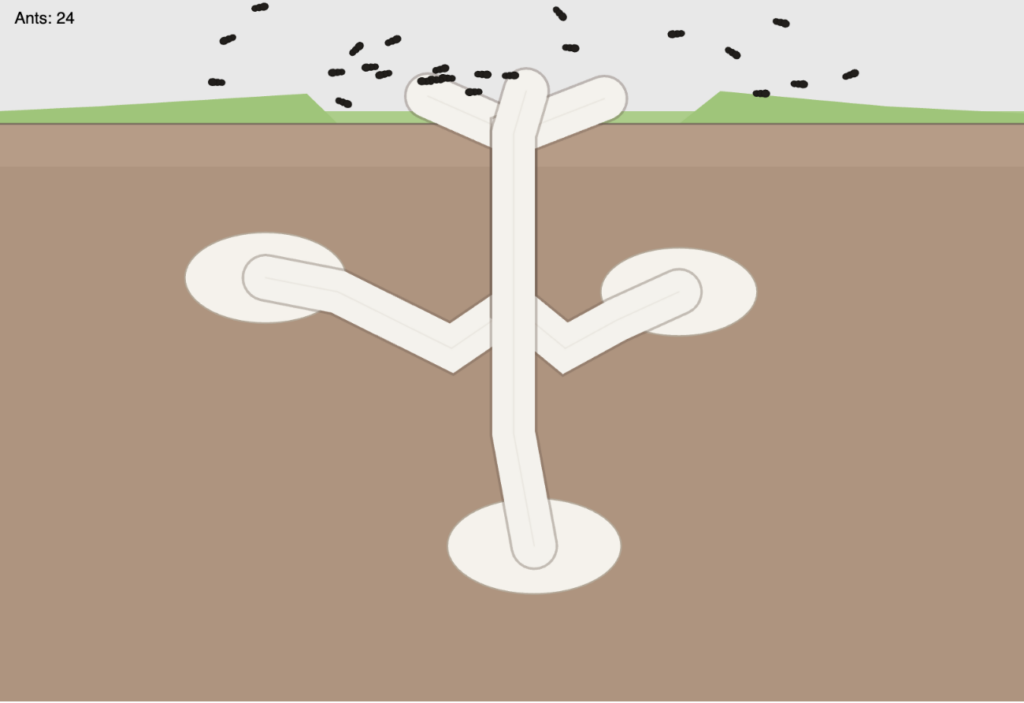
Stage 4: Ground/grass visuals and roaming fix
I added the dirt and grass cross-section layout and introduced a roamSurface state for surface movement. A key challenge was that ants sometimes traveled through the ground when returning. I fixed this by adding a returnToPath state so ants first reconnect at ground level and then follow the tunnel path back down.
Reflection and Future Improvements
Right now, over ground, the ants still look like they are flying rather than staying fully attached to the ground surface. A future improvement would be to constrain or project overground motion to a ground contour so movement feels more realistic. I would also like to continue the ant colony idea further, or expand this into a larger ecosystem simulation with multiple interacting species and behaviors.
Inspired by this paper I read called Steering Behaviors for Autonomous Characters, I made an interactive exploration of Steering Behaviors and how they manifest as group intelligence. The project moves beyond simple animation by giving every agent a “brain” that constantly calculates its next move based on its environment. By layering Craig Reynolds’ classic steering forces—Separation, Alignment, and Cohesion—the herd achieves a lifelike, emergent flow. When the user moves the “Lion” (mouse), the Flee steering behavior becomes the dominant force, overriding the social urge to flock. Conversely, clicking the canvas plants “Grass Patches,” which activates a Seek behavior, pulling the autonomous agents toward a new goal.
Instructions:
Move Mouse: Control the Lion. Watch the herd split and reform.
Click Canvas: Plant a Grass Patch. The herd will navigate toward it.
Spacebar: Clear all grass patches.
Code Highlight:
I am proud of the handleInteractions method. It creates a hierarchy of needs: Safety > Hunger > Socializing. If the predator (mouse) is close, the animal ignores the grass and the herd to save its own life.
handleInteractions(predator, foodSources) {
    let mouseDist = dist(this.pos.x, this.pos.y, predator.x, predator.y);

    if (mouseDist < 100) {
      // Flee from the lion
      let fleeForce = this.flee(predator).mult(5.0);
      this.applyForce(fleeForce);
      this.isPanicking = true;
    } else {
      this.isPanicking = false;
      // Seek the nearest grass
      if (foodSources.length > 0) {
        let closest = foodSources[0];
        let huntForce = this.seek(closest.pos).mult(1.5);
        this.applyForce(huntForce);
      }
    }
  }
Milestones and Challenges:
My first milestone was the fear state. I added a boolean isPanicking. This allows the animals to change color and increase their maxSpeed when the lion is near, which makes the flee behavior much more visible.
A challenge I ran into was resource management. Initially, the animals would just stay on the grass forever so I gave the grass health. As the herd grazes, the health drops until the patch disappears, forcing the herd to look for the next patch.
The final challenged I faced was from how the sketch looks like below. After getting all the core functionality done, the sketch still felt “unalive”. Following the feedback from my professor, I decided to add to the diversity of the sketch by making two different looking, and behaving, species: Wildebeests and Gazelles. By differentiating their steering weights, I created a “Social Anchor” group that prioritizes cohesion and a “Scout” group that favors independent wandering, making the collective movement feel like a real ecosystem.
Reflection and Future Improvements:
This project taught me that “life” in code is about the priority of forces. The biggest challenge was balancing steering behaviors so agents wouldn’t just clump like magnets. Fine tuning the Separation weight was the breakthrough as it provided breathing room, transforming a messy cluster into a coordinated, organic herd.
Future Work:
Leader Dynamics: Adding a Leader agent with a stronger Seek force to see if the herd naturally follows its path.
Obstacles: Implementing “Rocks” or “Rivers” to force the herd to navigate around barriers using Obstacle Avoidance steering.
Vision Cycles: A Night Mode where the vision radius shrinks, forcing agents to rely more on Alignment when targets are out of sight.
Sound: Using p5.sound to map the Panic state to a rising ambient hum, making survival tension audible.
 I started with one ant following one path to verify that seek and basic path following were working correctly.