Week 3 Assignment – Elyazia Abbas

Concept and Inspiration:

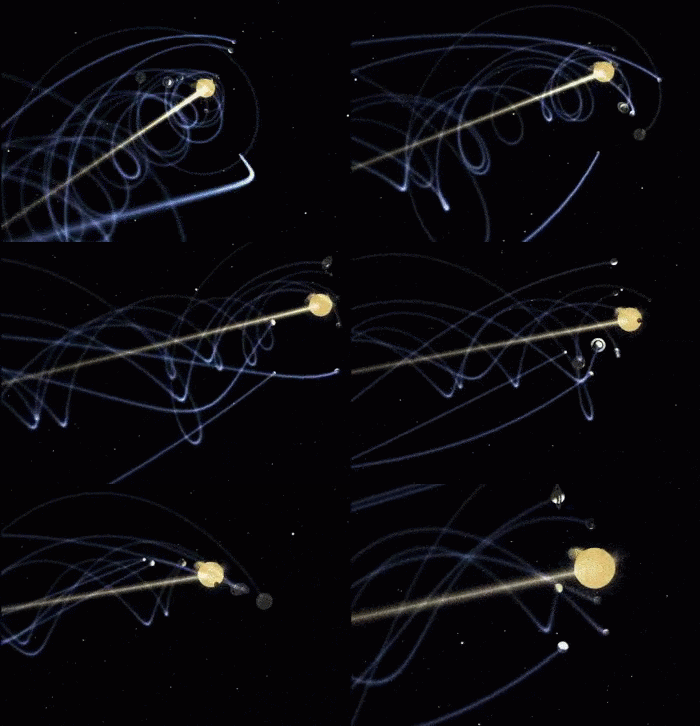
Our task this week was to use invisible attractors and visible movers to create a pattern from the objects moving around attractors. I immediately imaged planets and orbital motion when thinking of this concept. Although the attractor in this case would be the sun, which is not invisible, in my implementation, I used a thin outline of a white circle just for reference and to easily track the orbital motion.

Something new that I was interested in while writing this program, was randomly picking a randomly sized image of a planet from a list to display in orbit, which I will further explain later. Every time the program is started the attractor is placed on a random spot on the screen through using random coordinates, and the user can use the mouse in order to drag the attractor top different spots, and the movers will continue to move around the allocated spot.

Code Snippet:

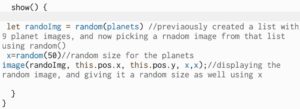
In the sketch file I created a list of 8 images of planets in our galaxy, and used this new function I learned by watching this video on youtube on how to randomly generate images on p5 https://www.youtube.com/watch?v=hxjEl-pun7o. I also made sure to randomly size the images as well to make it look more natural.

Trial Sketches before the final Product:

These were just a few trials to experiment before finishing my program:

Assignment Week #3 – MAGNETS

Concept:

My idea was to simulate a magnetic field by making attractors and movers. Attractors pull objects towards them and repel if they are too close and they also attract other attractors, while movers navigate this field of forces. The movers when in motion look like a visual representation of what a magnetic field would look like

Implementation:

  1. Attractors: These are objects that exert attractive forces on nearby movers. They are represented as red points on the canvas and move randomly. Attractors demonstrate the concept of attraction within the simulation.
  2. Movers: These are objects that are affected by the forces exerted by attractors and other movers. Each mover experiences both attraction and repulsion forces. These forces influence the motion and behavior of the movers.
  3. Turbulence: To add an extra layer of complexity and randomness, turbulence forces are applied to the movers. This turbulence causes the movers to exhibit unpredictable behavior.

Sketch:

https://editor.p5js.org/mi1171/full/TP9sdc9VE

Code:

function applyRepulsionFromAttractors(mover) {
  for (let attractor of attractors) {
    let force = attractor.copy().sub(mover.pos);
    let distance = force.mag();
    
    if (distance < repelDistance) {
      let strength = -repelStrength / (distance * distance);
      force.setMag(strength);
      mover.applyForce(force);
    } else if (distance < attractionDistance) {
      let strength = 5000 / (distance * distance);
      force.setMag(strength);
      mover.applyForce(force);
    }
  }
}

function applyRepulsionFromMouse(mover) {
  if (attractToMouse && mouseIsPressed) {
    let mouseForce = createVector(mouseX, mouseY).sub(mover.pos);
    let mouseDistance = mouseForce.mag();
    
    if (mouseDistance < repelDistance) {
      let mouseStrength = -repelStrength / (mouseDistance * mouseDistance);
      mouseForce.setMag(mouseStrength);
      mover.applyForce(mouseForce);
    }
  }
}

function applyRepulsionBetweenMovers(mover) {
  for (let j = 0; j < movers.length; j++) {
    if (mover !== movers[j]) {
      let otherMover = movers[j];
      let force = otherMover.pos.copy().sub(mover.pos);
      let distance = force.mag();
      
      if (distance < moverRepelDistance) {
        let strength = -moverRepelStrength / (distance * distance);
        force.setMag(strength);
        mover.applyForce(force);
      }
    }
  }
}

function applyAttractionToMouse(mover) {
  if (attractToMouse && mouseIsPressed) {
    let mouseAttraction = createVector(mouseX, mouseY).sub(mover.pos);
    let mouseAttractionDistance = mouseAttraction.mag();
    let mouseAttractionStrength = 500 / (mouseAttractionDistance * mouseAttractionDistance);
    mouseAttraction.setMag(mouseAttractionStrength);
    mover.applyForce(mouseAttraction);
  }
}

function applyTurbulence(mover) {
  let turbulence = createVector(random(-1, 1), random(-1, 1));
  turbulence.mult(0.1);
  mover.applyForce(turbulence);
}

function applyAttractionBetweenAttractors() {
  for (let i = 0; i < attractors.length; i++) {
    for (let j = i + 1; j < attractors.length; j++) {
      let force = attractors[j].copy().sub(attractors[i]);
      let distance = force.mag();
      if (distance < attractionDistance) {
        let strength = attractionStrength / (distance * distance);
        force.setMag(strength);
        attractors[i].add(force);
        attractors[j].sub(force);
      }
    }
  }
}

These are the functions behind the forces that are in play in the simulation:

  • applyRepulsionFromAttractors(mover): Computes forces that repel a “mover” from nearby “attractors.”
  • applyRepulsionFromMouse(mover): Calculates repulsion forces on a “mover” from the mouse cursor when a certain condition is met, simulating user interaction.
  • applyRepulsionBetweenMovers(mover): Computes repulsion forces between different “mover” objects, preventing them from getting too close.
  • applyAttractionToMouse(mover): Applies an attraction force from the mouse cursor to a “mover” when another condition is satisfied, allowing users to pull objects toward the cursor.
  • applyTurbulence(mover): Adds random turbulence forces to create unpredictable, jittery motion in the “mover” objects.
  • applyAttractionBetweenAttractors(): Calculates attraction forces between pairs of “attractor” objects, simulating magnetic attraction.

Challenges:

– Force Calculation: Calculating and applying the correct forces to achieve realistic attraction and repulsion between objects.

Future Improvements:

Some potential future improvements include:

– Additional Forces: Experiment with different types of forces, such as gravitational forces or custom-defined force fields, to create diverse and intriguing simulations.

– User Controls: Implement sliders or input fields to allow users to adjust parameters like attraction and repulsion strengths, turbulence intensity, or the number of objects in the simulation.

– Visual Effects: Incorporate visual effects like trails, color variations, or particle-like representations to add depth and visual appeal to the simulation.

Week 2 Assignment

Concept

The inspiration came out of nowhere when my friends and I were telling a running joke about how we can each be a character in the Ratatouille movie over our dinner, and it struck me that it’d be fun to create a mouse chasing its cheese for this assignment.

Highlight

I thought it’d be fun to have the mouse be the “cheese” by linking an image to it and another so the first thing I set to watch was this video about acceleration towards the mouse. Then I set onto creating my canvas, uploading images, and so on.

For the images I used these cute clip arts of cheese and mouse.

Something that I struggled with in this assignment was trying to get the mouse image to be portrayed on top of the cheese image, because it looked a little weird when it was vice versa — it was almost as if the cheese was eating the mouse, not the other way around. I tried searching up solutions for it, but I still couldn’t figure out the answer in the end.

Despite this complication, I managed to add the elements of velocity, acceleration, etc. correctly in a way such that the object (mouse) will move towards the cursor (cheese), thus tracking its movement — this part of the code is shown below:

class Mickey {
  constructor(x, y) {
    this.pos = createVector(x, y);
    this.vel = p5.Vector.random2D();
    this.vel.mult(random(3));
  }

  update() {
    let mouse = createVector(mouseX, mouseY);
    this.acc = p5.Vector.sub(mouse, this.pos);
    this.acc.setMag(1);

    this.vel.add(this.acc);
    this.vel.limit(5);

    this.pos.add(this.vel);
  }


Embedded sketch

I ended up adding a maze background to make this look a little more fun and exciting, which I drew inspiration from this image.

And here’s the final sketch.

Reflection

I think this could become much better after revisions, such as figuring out how to overlay the mouse image over the cheese image as well as setting edges to work for the right side’s x and y values of the canvas — for some reason, it seemed like only the left side of the canvas’ edges were working. I also thought it’d be fun to potentially turn this into a game similar to the concept of the good old Packman game!

Week #2 Coding Assignment, Cairo Skyline

https://editor.p5js.org/oae233/sketches/JMRwbzGgE

Concept

For this assignment I wanted to simulate the movement of a flock of pigeons and the way they fly in unison, mainly inspired by the Cairo skyline and its pigeon towers. I found a lot of information about how exactly to do this online, one beneficial resource was Craig Reynolds’s blog on the topic, and I found a tutorial by Daniel Schiffman on how exactly to implement this. The tutorial made a 2D flocking simulation, I applied the same principles to 3D, added some stylistic choices, and adjusted values so that the most reminiscent of the pigeon flock movement.

Some Code I’m Proud Of

class pigeonTower {
  constructor() {
    // Define the size and corners of the pigeon tower
    this.size = createVector(200, 100);
    this.tlcorner = createVector(-this.size.x / 2, -this.size.y / 2);
    this.blcorner = createVector(-this.size.x / 2, this.size.y / 2);
    this.trcorner = createVector(this.size.x / 2, -this.size.y / 2);
    this.brcorner = createVector(this.size.x / 2, this.size.y / 2);
    this.maincolor = [38, 141, 0];// Main color for the tower
    this.secondarycolor = [190, 180, 80]; // Secondary color for the tower
  }
  render() {
    push();
    translate(width / 2, height / 2);
    stroke(0);
    strokeWeight(1);
    // Draw the main body of the tower
    fill(this.maincolor);
    rect(-this.size.x / 2, -this.size.y / 2, this.size.x, this.size.y);
    
    fill(this.secondarycolor);
    triangle(
      this.tlcorner.x,
      this.tlcorner.y,
      this.blcorner.x,
      this.blcorner.y,
      -30,
      0
    );
    triangle(
      this.trcorner.x,
      this.trcorner.y,
      this.brcorner.x,
      this.brcorner.y,
      30,
      0
    );
    push();
    rotate(0.785);
    rect(-22.5, -22.5, 45, 45);
    pop();
    fill(19, 71, 0);
    rect(this.blcorner.x, this.blcorner.y, 10, 200);
    rect(this.brcorner.x, this.brcorner.y, -10, 200);
    push();
    rotate(-1);
    rect(this.blcorner.x, this.blcorner.y - 98, 10, 220);
    rotate(2);
    rect(this.brcorner.x, this.brcorner.y - 98, -10, 220);
    pop();
    push();
    fill(0, 110, 149);
    triangle(-20, this.blcorner.y, 20, this.brcorner.y, 0, 30);
    triangle(-20, -this.blcorner.y, 20, -this.brcorner.y, 0, -30);
    translate(40, 0);
    triangle(-20, this.blcorner.y, 20, this.brcorner.y, 0, 35);
    triangle(-20, -this.blcorner.y, 20, -this.brcorner.y, 0, -30);
    translate(-80, 0);
    triangle(-20, this.blcorner.y, 20, this.brcorner.y, 0, 35);
    triangle(-20, -this.blcorner.y, 20, -this.brcorner.y, 0, -30);
    pop();
    fill(50, 170, 150);

    pop();
  }
}

In this part, I hard-coded the drawing of the pigeon tower. I know hard coding isn’t as exciting as drawing something adaptable or dynamic, but I genuinely enjoy drawing things with code using simple shapes, and making this pigeon tower was nice. I actually coded it on my phone on a bus ride because I was curious to see if p5.js works on Safari / mobile browsers, and it does!

Reflection & ideas for future work

I really really wanted to figure out some way to make the pigeons look more like pigeons in flight, I had a couple of different ideas on how I might do that. I also wished that the program could handle more pigeons and that I could’ve implemented the rule of pigeons not being directly behind eachother so that their line of sight is not blocked. However, right now my code only spawns about 200 pigeons and it barely gives me the effect I want, so optimising the code is first on the list of improvements that I’d love to make. I’m pretty sure the most computing-intensive thing is calculating the distances between each boid so I might have to think of a smarter way to do that.
Coding Assignment – Week #2 – The Buzzing Bee

For this weeks assignment, I decided to go with a bee’s movement as I was inspired by the flies around campus annoying me around the palms but wanted something a bit cuter. I wanted to make sure the bee’s movement wasn’t smooth and a bit static. I also want to incorporate images in my second IM. project so learnt how to handle images. The following is a bee video of the inspiration.

https://www.youtube.com/watch?v=-d_pQ3DyzHg

This was my initial code but it made the bee images simply move smoothly.

class Bee 
{
  constructor(x, y) 
  {
    this.position = createVector(x, y);
    this.velocity = createVector(random(-0.65, 0.5), random(-0.75, 0.5));
    this.acceleration = createVector(0, 0);  
    this.img = bee_img;
  }

  update() {
    
    this.acceleration.limit(3);

    // Update velocity and position based on acceleration
    this.velocity.add(this.acceleration);
    this.position.add(this.velocity);

I added some additional behaviours and randomness, alongside a ‘slow down’ vector to have the acceleration decrease whenever the acceleration was a bit too high.

constructor(x, y) 
  {
    this.position = createVector(x, y);                  //positioning of the bee
    this.velocity = createVector(random(-0.65, 0.5), random(-0.75, 0.5));          
    this.acceleration = createVector(0, 0);               // start acceleration 0
    this.personality = random(-0.1, 0.25);       // random multiplier
    this.slow_down = createVector(-1.5,-1);      //for when the bee comes close to y-borders
    this.img = bee_img;
  } 

  update() 
  {
    let randomForce = createVector(random(-5, 5), random(-5, 5));//even chnace
    randomForce.mult(this.personality);
    this.acceleration.add(randomForce);
    
    this.acceleration.limit(3);        //no faster than 3

    this.velocity.add(this.acceleration);
    this.position.add(this.velocity);

    this.velocity.mult(random(0.55,0.65));      //slow down as a way of showing air       resistance
    
    
    if (this.position.x > width) this.position.x = 0;
    if (this.position.x < 0) this.position.x = width;
    if (this.position.y > 350) this.position.y -= 150;      //if hits top/bottom borders
    if (this.position.y < 50) this.position.y += 150;
    if(this.acceleration.x > 2.6)                            //if acceleration too high
    {
      this.acceleration.add(this.slow_down);
    }
  }


I also had some problems when it came to uploading images from the URL so I learnt how to get it from GitHub making sure it would always work on any device.

What would I do differently next time?

I want to try and add some more insects and items in nature that attract bees like honey so that there is a chance the bee will buzz around a certain area.
>
My final code

https://editor.p5js.org/kk4827/full/1Mx0g_u9n

Assignment Week #2

Concept:

This week’s assignment represents water droplets falling on the ground. They are visually represented as ellipses and they exhibit natural falling and splashing behavior.

It is inspired by the following slow-motion video:

Demo:

Code: https://editor.p5js.org/bdr/sketches/YS6DBtNOH

Process:

https://imgur.com/WlcV5ZmCode Walkthrough:

Drop Class:

Constructor: The constructor initializes a new water drop object with the following properties:
– Position: A 2D vector representing the initial position of the raindrop on the canvas. It is set to a random location within the boundaries.
– Velocity: A 2D vector representing the initial velocity of the raindrop. It starts with no horizontal velocity and a downward velocity of 5 pixels per frame.
– Acceleration: A 2D vector representing the acceleration of the raindrop. It starts with no horizontal acceleration and a vertical acceleration of 0.2 pixels per frame.
– Length: The length of the water drop, which is a random value between 10 and  20 pixels.
– r: Control the size of the splash.
– Opacity: Set a smooth transition for the splash.
– Landed: A boolean variable to indicate whether the water drop landed on the ground.

Methods:
– Update(): Update the water drop’s position based on the velocity and acceleration. It also limits the raindrop to a certain velocity.
– Display(): Draw the drop on the canvas as an ellipse. The color is white with an opacity of 120. When landed, its length is gradually reduced to create a disappearing effect.
– Land(): Display a landing effect. It is a shrinking ellipse with decreasing opacity.

Setup(): Create the canvas 640×640, and initialize an array of water drops (40 droplets).

Draw(): Call the object’s methods, and replace the drops that have landed with a new one creating a continuous simulation.

Challenges:

One of the challenges is certainly creating the perfect splashing effect, it took some trial and error before landing on the ideal parameters.

Improvements:

– Add water splash sound.
– Allow the user to control where the drops are originating from using mouseX and mouseY.

Assignment Week #2 – FROG

Concept:

This assignment revolves around an interactive frog and fly simulation. In this sketch, the player can click on the canvas to spawn a fly which the frog will eat extending its tongue to catch it. The primary objective is to create an experience that simulates the movements of a fly and a frog.

Sketch:

https://editor.p5js.org/mi1171/full/aMpw5OAKN

Code:

function draw() {
  background(220);

  food.show();
  food.update();
  // Update and display the tongue
  if (choice == 1) {
    if (food && !food.isEaten) {
      food.show(); // Display the food
      if (
        tongueLength <
        dist(
          player.position.x,
          player.position.y,
          food.position.x,
          food.position.y
        )
      ) {
        player.extendTongue(); // Call the extendTongue method of the Player class
      } else if (
        tongueLength > 0 &&
        tongueLength >=
          dist(
            player.position.x,
            player.position.y,
            food.position.x,
            food.position.y
          )
      ) {
        food.isCaught = true;
        player.retractTongue(); // Call the retractTongue method of the Player class
      }

      // Check for collision between player and food
      if (
        dist(
          player.position.x,
          player.position.y,
          food.position.x,
          food.position.y
        ) <
        player.radius + food.radius
      ) {
        food.isEaten = true; // Food is eaten
        food.isCaught = false;

        tongueLength = 0; // Retract the tongue when food is eaten
        choice = 0;
      }
    }
  }
  player.update();
  player.show();

  if (millis() > nextJumpTime) {
    bool = random(0, 10);
    if (bool > 2) {
      player.randomJump();
    } else {
      choice = 1;
    }
    setNextJumpTime();
  }
}


This block of code is the main logic behind the frog’s behavior. It continuously updates and displays the positions of the frog and the food item on the canvas. The game logic includes extending the frog’s tongue towards the food, retracting the tongue when the food is caught, and marking the food as eaten. In addition, the random jumping and tongue extensions, are controlled based on random chance combined with time intervals.  The frog has a 20 percent chance of extending its tongue and an 80 percent chance of randomly jumping.

Challenges:

During the development of this frog game, several intriguing challenges were encountered:

Collision Detection: Implementing accurate collision detection algorithms to determine when the frog’s tongue makes contact with food.

Random frog/fly Movements: To create a somewhat realistic experience, the frogs’s random jumping behavior had to be balanced carefully along with the fly’s erratic movements. Random vectors were employed to determine both vertical and horizontal velocities.

Future Improvements:

Looking ahead, there are several exciting possibilities for enhancing and expanding upon this interactive frog game:

Additional animals: Incorporate multiple animals to simulate a full ecosystem.

Audio Enhancements: Elevate the gaming experience by adding sound effects for jumping, food catches, and background music.

Coding Assignment Week #2 – Sand Much?

INSPIRATION

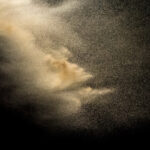
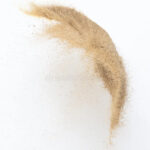
Last week I went to the outer Falcon field for my cricket practice and saw sand being pushed aside, and thrown into the air as people walked. I decided to take a closer look and base this week’s coding assignment on this nature of sand flying in the air. Here is a video of what it looked like. I was unable to get a good video of the sand flying in the air (it was so thin and dispersed that it barely showed in the video), so I uploaded one taken from the internet:

CONCEPT

The concept of my assignment this week is to have sand particles initially at the bottom of the screen, and then depending on the movement of the mouse, apply acceleration to the sand particles to have them appear as if flying in the air. I also added a bit of gravitational acceleration to the sand particles to make the simulation more realistic and have the particles settle down after a while.

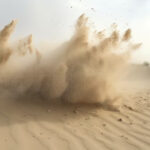
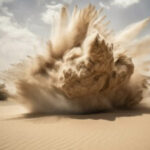
MOOD BOARD

Before I started coding, I prepared a mood board for my project. This gave me clarity on the vision I was trying to build towards.

CODE & WORKING VIDEO

I have to admit it was pretty hard to code it and I struggled to model the behaviour accurately. After many failed attempts and tweaking the parameters of particle acceleration and gravity, I could get something close to what I observed.

Here are the various attempts and outputs I got:

For the code part, I built on the mover class sketch we saw in class – having the circle accelerate in the direction of the mouse. I used that as a skeleton for my program and added other features/variables and components to make it more complex and achieve the desired results.

class Particle {
  constructor() {
    let x = randomGaussian(width/2,100); // to have all particles near the center and close to ground initially
    let y = random(height-20, height);
    this.position = createVector(x, y);
    this.velocity = createVector(0, 0);
    this.acceleration = createVector(0, 0);
    this.gravity = createVector(0, 0);
    this.netAcc = createVector(0, 0); // sum of particle acceleration and gravity
    this.scaleFactor = random(0.01); // scale the acc by what factor?
  }

  update() {
  
  let mouse = createVector(mouseX, mouseY);

  // compute direction of acc
  let dir = p5.Vector.sub(mouse, this.position);
  dir.normalize(); // normalize
  dir.mult(-1*this.scaleFactor); // scale

  // accelerate only if mouse is in Screen
  if (mouseX < width && mouseX > 0 && mouseY > 0) {
    this.acceleration = dir;
    this.gravity = createVector(0,0.005);
    this.centerGravity = createVector(0,0.001);
    this.netAcc = p5.Vector.add(this.acceleration, this.gravity);
    this.velocity.add(this.netAcc);
    this.velocity.limit(5);
    this.position.add(this.velocity);
  }
    else {
      // print(this.acceleration);
      if (this.acceleration != 0) { // change acceleration direction to have particles come back
        this.acceleration.x *= -1;
        this.acceleration.y *= -1; 
      }
    }
  constrain(this.position.y, 0, height);
}

  display() {
    push()
    stroke(225,191,146);
    strokeWeight(2);
    fill(127);
    ellipse(this.position.x, this.position.y, 2, 2);
    pop();
  }

  checkEdges() {
    if (this.position.x > width) {
      this.position.x = 0;
    } else if (this.position.x < 0) {
      this.position.x = width;
    }

    if (this.position.y > height) {
      this.position.y = height;
      this.acceleration = 0;
    } else if (this.position.y < 0) {
      this.position.y = height;
      // this.acceleration.y *= -1;
    }
  }
}
let particles = []; // array to strore all sand particles
let num = 1000; // number of particles in the system

function setup() {
  // background(51);
  createCanvas(400, 400);
  for (let i = 0; i < num; i++)
    particles[i] = new Particle(); //populate particle array
}

function draw() {
  
  background(189,246,254);
  
  for (let i = 0; i < num; i++) {
    particles[i].update();
    particles[i].checkEdges();
    particles[i].display();
  }
}

P5 SKETCH

https://editor.p5js.org/shreyagoel81601/sketches/luBPK9fMi

FUTURE WORK AND IMPROVEMENTS

There is a lot that could be improved in this project. While it is close to stimulating sand flying in the air, it is not completely accurate. It is because once the sand particles go up in air, they must come down (at a faster rate than what it is right now), and that cannot be achieved only by acceleration. We will have to play a bit with forces there. We could also add wind direction and air resistance to make it more realistic. Also, currently, the acceleration keeps increasing and we move the mouse, but that is not a real-life scenario. If someone walks past the sand or kicks it, the force is momentous and not ongoing. So this also could be improved once we learn about forces and modelling that.

Xiaozao Coding Assignment #2

Create your Planet System

Source code: https://editor.p5js.org/Xiaozao/sketches/55EaOIHQ9

Reference: The Coding Train https://thecodingtrain.com/learning/nature-of-code/2.5-gravitational-attraction.html

Part 1: Concept

The movement of objects that I found in nature was the solar system.

It’s amazing to discover how the sun and the planets interact with each other and apply acceleration to each other’s movement. Therefore I intended to simulate this process. I watched the videos for forces from the Coding Train, and learned how to generate a N-body system. However, I wasn’t able to simulate the solar system in the end. It’s because the real parameters are extremely large, and the gravitational interaction is actually far more complicated than I expected. It is impossible to simulate it using only Newton’s gravitational law. Therefore although I was not satisfied with the final product, I had no better solutions and had to turn it in. But I will definitely try it in the next weeks!

Part 2: Coding

The basis of my coding gained lots of help from the Coding Train. I defined one class called “Mover”, which is basically every planet in the system. I set the position, initial velocity, mass, and acceleration for every object of the class. And then I defined an attract() function that calculates the distance between two planets to get the mutual force using Newton’s gravitational law. I’ve got an array for storing all the Mover objects, and calculate the force between every single pair of movers.

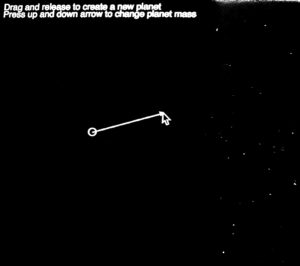
The fun part was to design the user interface that enables the players of the system to generate their new planets in whatever mass and initial velocity they want. The user simply has to press the up or down arrow key to adjust the mass of the planet and drag and drop the mouse to release a new planet in any direction.

The larger the circle, the larger the mass. The longer the arrow, the higher the initial speed.

However, if I draw the circle and arrow in the mousePressed and mouseDragged functions, there will be a problem. The mousePressed will only be called once at the exact moment the mouse is being pressed, and the mouseDragged will also stop looping when the mouse position doesn’t move, even if the mouse is still triggered. This will cause the circle and arrow to be covered by the background of the next draw loop.

To solve this, I store every parameter of the detail of the circle and arrow in some variable, and draw them in the draw loop under certain conditions.

  // in draw:
  if (mouseIsPressed) {
    stroke(255);
    strokeWeight(1);
    noFill();
    ellipse(mouseXStore, mouseYStore, newSize, newSize);
    arrow(mouseXStore, mouseYStore,mouseX, mouseY);
  } else {
    ellipse(mouseX, mouseY, newSize, newSize);
  }
  
  if (keyIsPressed) {
    if (keyCode === UP_ARROW ) {
      newSize += 0.5;
    } else if (keyCode === DOWN_ARROW) {
      newSize -= 0.5;
    } else if (key == "c" || key == "C") {
      for (let i = movers.length - 1; i >= 0; i --) {
        movers.splice(i,1);
      }
    }
  }
  noStroke();
  fill(255);
  text("Drag and release to create a new planet", 10,15);
  text("Press up and down arrow to change planet mass", 10, 25);
}


function mousePressed() {
  mouseXStore = mouseX;
  mouseYStore = mouseY;
}


function mouseReleased() {
  movers.push(new Mover(mouseXStore, mouseYStore, newDir.x, newDir.y, newInitSpd, newSize**2)); 
}


function arrow(x1,y1,x2,y2) {
  let vec = createVector(x2-x1,y2-y1);
  let dist = vec.mag();
  newInitSpd = dist/30;
  stroke(255);
  strokeWeight(1);
  fill(255);
  line(x1,y1,x2,y2);
  push();
  translate(mouseX, mouseY);
  let dir = atan2(vec.y, vec.x);
  rotate(dir);
  triangle(0,0,-3,-2,-3,2);
  pop();
  newDir = vec.normalize();
}

Part 3: Reflection

I don’t think I did well on this assignment. I failed to learn more about the physics principles of gravity interaction and didn’t achieve my initial goal of simulating the solar system. Instead, I only did a customizable n-body system. Given that I had two semesters’ experience in p5js coding, I should try to create more original and math/physics-based projects next time!!!

Coding Assignment – Week #2

This week’s project was inspired by ducks and their swimming movement. Here is a short calming 5 hour video of the phenomenon in question:


Here is the sketch:

As I was scrolling through my camera roll, I noticed that I had quite a few videos of ducks swimming by the shore of a pond. I remembered the mouse tracking example task that we did last class, and it occurred to me that the walker was moving in a similar fashion like the ducks following a human on the shore who is holding a piece of bread. I thus wanted to alter the code of the task to simulate a group of swimming ducks.

To translate this idea into code, I decided to create a scenario where the ducks were drawn towards a fish instead of a human with bread, adding a more natural and engaging touch. Additionally, I aimed to introduce a bit of unpredictability to mimic real-life scenarios by randomizing the number of ducks with each sketch as they swim in both smaller and larger groups. Since they often come together in one spot, I wanted them to form circular patterns while changing positions.

In order to achieve this, I used object-oriented programming to create the duck objects, and vectors to simulate their movement. For instance, I employed vectors to determine the distance between each duck and the fish cursor. This enabled me to simulate the ducks’ natural tendency to swim toward a target, just like real ducks follow food. By calculating these distances and adjusting the ducks’ directions accordingly, this behavior was replicated in code.

The part of the code for which I was proud of was the snipet where I tried to make the ducks avoid collisions. To achieve that I needed to calculate a ‘pushForce’ vector that points away from the current duck, which was then assigned as a new acceleration vector. Here is the snipet:

avoidCollisions(ducks) {
    let avoidance = createVector(0, 0);
    
    //Looping through each of the ducks
    for (let i = 0; i < ducks.length; i++) {
      // Checking if the current duck being checked is not the same as this duck
      if (ducks[i] !== this) {
        // Calculating the distance between this duck and the current duck in the loop
        let distance = p5.Vector.dist(this.position, ducks[i].position);
        // Checking if the distance is less than the desired distance
        if (distance < minDistance ) {
          // // Calculating a 'pushForce' vector that points away from the current duck
          let pushForce = p5.Vector.sub(this.position, ducks[i].position);
          // Setting the magnitute
          pushForce.setMag(0.1); 
          // Adding the 'pushForce' vector to the 'avoidance' vector
          avoidance.add(pushForce);
        }
      }
    }
    // Changing the acceleration to the 'avoidance' vector
    this.acceleration = avoidance;
  }

Although the movement of the fish was not my main concern, I was very satisfied with how it turned out. The little glitches that occur during the cursor movement actually appear similar to how smaller fish actually tend to have uneven swimming patterns and often do sudden turns and unexpected movements.

For further improvements, I would love to make the ducks also swim in a V like shape, where one of them would take the lead and others would stay a little behind forming the V. Another idea could be to simulate the ducks going underwater and disappearing for a while why they attempt to catch the fish. Of course, it would also be a big plus to improve the visual appearance of the ducks, and perhaps simulate some water movement as well.