Salem Al Shamsi – Final Project

FALAJ — Project Blog

Project Overview

For my final project in Decoding Nature, I built FALAJ, an interactive artwork that simulates the ancient Emirati falaj irrigation system.

The Falaj

A falaj is one of the oldest water systems in the world. It works entirely on gravity, with water flowing from an underground source called the Umm Al Falaj through carved stone channels down to farmland and date palms below. No pumps, no machinery, just water finding its natural path downhill. The earliest falaj systems in the UAE were found in Al Ain, and scientists have confirmed they are over 3,000 years old (UAE History and Culture). The Al Ain oasis, which still has working aflaj today, is recognized as a UNESCO World Heritage Site (UNESCO).

What makes the falaj special is the dawran, a time-based system where each farmer receives water for a set period before it moves to the next plot. It is one of the earliest examples of a community sharing a natural resource fairly, managed by time rather than ownership.

The Idea

This course taught me to look at nature differently. The falaj is something I grew up around in the UAE without ever really thinking about it. Studying natural systems this semester made me see it as something worth exploring more deeply.

The challenge was figuring out how to bring it to life visually. I thought about it for a long time. Should it look realistic, should it be a diagram, should it feel like a game? Earlier in the semester we visited teamLab and I saw Waterfall of Light Particles. That experience stayed with me. teamLab does not simulate water realistically, they express it as light, as movement, as something you feel rather than understand. When I started thinking about the falaj, that approach made complete sense. Water flowing through ancient stone channels is already something beautiful and alive. It deserved to be shown that way.

That became the goal of FALAJ. Not a diagram, not an educational tool. A living visual piece that lets you feel how this ancient system works.

Implementation Details

FALAJ was built phase by phase, with each stage adding a new layer on top of the last. It was a long process with many rebuilds and unexpected challenges along the way. What you see in the final sketch is the result of all of that.

Phase 1 — The Mother Well

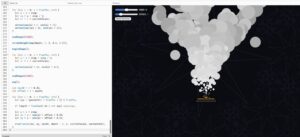
Particles fall from the mother well. blendMode(ADD) makes them glow like light rather than paint.

Phase 2 — The Channel and Sharia Pool

Particles now flow down a stone channel and collect in the sharia pool.

Phase 3 — Branching and the Dawran

Water splits into three branches with the dawran rotating between them automatically. Click to switch manually.

Phase 4 — Palm Trees

Palms grow at each branch tip and respond to water level, fuller and brighter when fed, and dimmer when dry.

Phase 5 — Seasons and Polish

Four seasons with different moods, wind, and timing. Visual details like shimmer, foam, and pool depth were added.

Phase 6 — Sharia Pool and Mouse Interactions

A real water pool with rising and falling levels. Each season gets its own mouse interaction.

Phase 7 — Intro, Stars and Ground

An intro fade-in sequence was added. Winter stars appear in the sky. A solid ground plane anchors the palms to the scene.

Phase 8 — Design Polish

Bigger palms, seasonal ground texture, smooth season transitions, a unified HUD, and water rates tuned.

Final Sketch — FALAJ

Water falls from the mother well through stone channels into the sharia pool. The dawran timer rotates water between three date palms. You can redirect it manually by clicking the selector dots. Palms respond visually to how much water they receive. Dates ripen in the summer and can be harvested by clicking the crown. Four seasons cycle with different moods, wind, and ground textures. Each season has its own mouse interaction. In Winter, stars and shooting stars appear in the sky.

Technical Implementation

Particle Systems

420 particles, each with its own lifespan, visibility, and trail. Only a fraction draws visible trails, which creates the sparse glow.

let ageMult = [1.0, 0.58, 0.92, 1.35][season];
this.maxAge = int(random(100, 230) * ageMult); 
let visMult = [0.16, 0.10, 0.14, 0.20][season]; 
this.visible = random() < visMult;

Vectors and Forces

Gravity, seasonal wind, and Perlin noise wobble are all applied as forces to the velocity each frame.

this.vy += 0.035 * spd; // gravity 
this.vx += windPush * WIND_STR[season]; // seasonal wind 
this.vx *= lerp(0.95, 0.97, 1 - spd); // damping

Autonomous Agents

Once inside a branch, particles steer toward the channel centerline using a projection and a soft pull force.

let t = constrain((apx*abx + apy*aby) / (abx*abx + aby*aby), 0, 1); 
let nearX = ax + t*abx; 
this.vx += (nearX - this.x) * 0.04; // pull toward centerline 
this.vx += (abx / len) * 0.06; // push along branch

Cellular Automata

Simple fill/drain rules applied every frame. Dates only ripen in Summer above 85% water.

if (b === activeBranch) {
  waterLevels[b] = min(1.0, waterLevels[b] + SEASON_FILL[season]);
} else {
  waterLevels[b] = max(0.0, waterLevels[b] - SEASON_DRAIN[season]);
}
if (season === 1 && waterLevels[b] > 0.85) {
  dateLevels[b] = min(1.0, dateLevels[b] + DATE_FILL);
}

Perlin Noise

Used for particle wobble, channel shimmer, stone texture, and pool breathing.

let n = noise(this.x * NOISE_SC, this.y * NOISE_SC, frameCount * 0.006);
let wobble = map(n, 0, 1, -0.5, 0.5);
this.vx += wobble * 0.06 * wobbleMult;

Flocking — Separation

In Summer, the mouse repels nearby particles outward, the separation principle.

let d = dist(p.x, p.y, mouseX, mouseY);
if (d < 50 && d > 1) {
  let f = map(d, 0, 50, 0.07, 0);
  p.vx += (p.x - mouseX) / d * f;
}

Video Documentation

A walkthrough of FALAJ showing all four seasons, mouse interactions, date harvesting in Summer, season skipping, and branch redirection.

Reflection

The moment the falaj and teamLab connection clicked was when the whole project made sense to me. Water already flows naturally through ancient stone channels, expressing that as light felt right.

The dawran arc ended up being one of my favorite parts of the sketch. What started as a simple timer turned into something that actually feels like it belongs to the falaj.

Sound was the hardest part. I could not find the right audio and synthesized sounds never felt natural. Real recorded water from an actual falaj would be the first thing I would add.

If I continued, I would push the visual design further and build the historical UAE aflaj map reveal that I originally planned but did not have time to finish.

References

    1. UAE History and Culture — The Falaj: Ancient Engineering Genius in the Desert
    2. UNESCO World Heritage Centre — Cultural Sites of Al Ain
    3. The National — Your guide to UAE dates
    4. teamLab Phenomena Abu Dhabi — Waterfall of Light Particles
    5. Shiffman, Daniel. The Nature of Code. No Starch Press, 2024. natureofcode.com

Yash – Final Project Update

Progress Update: Building a Living Doorway

The Concept: A Cosmic Order that Listens
At its core, this project is an exploration of silence and the emergent connection between humanity and the natural world. I am trying to step away from the idea of “nature as background scenery” and instead treat it as a listening intelligence.

The artwork imagines the human body as a living doorway between the visible and the hidden. I want the screen to feel like a nocturnal ecosystem, a digital shrine or a night garden. It is driven by the sacred geometry of the sunflower spiral (phyllotaxis), representing cosmic order. But this order is not fixed. When you interact with it, your hand becomes a seed, and your breath becomes the weather. Technology, in this space, is not just displaying an image; it is acting as a translator for invisible life.

The Output: What You Are Seeing

In the attached screen recording, you can see this ecosystem beginning to wake up.

When the space is quiet, the system rests in a state of bioluminescence. Thousands of digital seeds swarm and pulse with a deep blue, oceanic glow. As a hand is raised to the camera, an intimate disruption occurs: a clear, living portal opens. The physical body merges with the digital darkness, and the glowing flora physically pushes away, dissolving at the edges of your palm.

Then, the environment listens. As I speak or clap in the video, the audio input physically unravels the cosmic spiral. The quiet bioluminescence flashes into a neon, psychedelic surge of light, proving that the system is acutely aware of the energy in the room.

What I Have Built So Far

Getting to this point required layering several different systems to make the interaction feel organic rather than mechanical:

The Botanical Geometry: I successfully implemented the base p5.js engine to generate the 2,500 seeds using the golden angle (137.5 degrees). This creates the foundational, meditative mandala.

Audio-Reactive Weather: The system now actively listens through the microphone. I’ve mapped smoothed audio volume to three distinct states: low volume triggers the blue biological swarm, medium volume unwinds the physical rotation of the spiral, and high volume triggers sudden, colorful surges.

The Human Portal: Using the ml5.js HandPose model, the canvas now tracks the user’s palm. I built a dynamic masking system that reveals the raw webcam feed only within the boundary of the hand, while calculating the distance of every seed to the palm so they naturally fade and push away when touched.

What is Pending

While the core interaction is alive, there is still work to be done to deepen the emotional resonance of the piece:

Fine-Tuning the Fragility: I need to refine the audio and visual thresholds. The transition between the quiet bioluminescence and the loud neon states needs to feel a bit more fluid and less chaotic.

Final Project – Progress Update

Introduction

I was without any ideas for a while. I originally thought about doing something that would replicate something around me in nature, then I thought about the previous features that I enjoyed most such as: Conway’s Game of Life, because of the simplicity; Boids, because I found the movement satisfying; and creating 3D simulations. The problem was I didn’t know where to start so I began searching online for other interactive installations. Perhaps I might find something I liked such as other installations in teamLab or some of the previous installations we viewed in class.

Then when I began to think about the features more deeply I remembered a class we did learning ml5.js to create a sketch with hand recognition. I immediately knew I wanted to use that with whatever I would end up creating.

Inspiration

During my search I found an installation called Pulse Topology by artist Atelier Lozano-Hemmer. It’s a large array of pulsing LED lightbulbs hanging from the ceiling, each with a different height, such that it resembles a noise map. From some of the videos he showed I did not like the rate at which they pulsed; I felt it was too aggressive when visually with the curves it looks like it should be calmer.

Made by the same artist was Pulse Island I (I had no idea this was made by the same person until I began searching for an image to write this). I liked the rate of pulsing from that installation more.

In my search for hand gesture recognition examples I stumbled upon this GitHub repo. It wasn’t made in p5; instead it was made using Three.js and something else. It used gesture recognition to rotate objects, zoom in and out, and cycle between different variations.

Seeing gesture recognition used to rotate an object reminded me of this video from SpaceX from 2013 showing gesture-based design. However, after seeing this video and interacting with the GitHub repo I saw before, I decided I wouldn’t use gestures as just another way to rotate an object because it felt unnatural, ironically. This was because I, and I imagine most people, are so used to using a keyboard or mouse/trackpad to rotate something in 3D that using anything else felt slower and less precise.

At the end I decided I liked the topology installation and wanted something like it in my sketch, but rather than lights from the ceiling I wanted it to be more minimalistic with dots, and have them be at ground level. Rather than pulsing, they would move up and down and their brightness would change accordingly. Secondly, gesture recognition is nice at first, but an effect I found much more exciting was to see your hands in 3D space in the sketch. There are a couple of VR headsets such as the Meta Quest 3 which have gesture recognition where you can see your hands in a virtual simulation, and I wanted to get as close to that as I could using the webcam, hoping that maybe the ml5.js library could be enough.

Meta Quest 3 Hands

Sketch

Watch the sketch demo on YouTube

I couldn’t get the embedded sketch to work properly because of a bug when putting it into the web editor.

Milestones

Milestone 1: Programming hands with ml5.js in a 3D space, but the result was flat.

I tried to use the depth estimation method in ml5.js to have the hands move back and forth. This approached the result I wanted, but it couldn’t handle rotation of the hand.

Needed to find an alternative library that could handle this. Needed help from AI to program it since it was my first time, but finally found something that worked.

Milestone 2: MediaPipe Hand Landmarker

Its hard to tell from an image alone but with orbitcontrol() you’ll be able to see that it does move back and forth.

Milestone 3: Topology Map

Found that combined there were performance issues. Realized it was because rendering and calculations were done on the CPU, but if I could use a shader it would perform better.

Got help from AI to create a shader that would achieve the same effect without affecting performance.

Milestone 4: Bringing both together

Having the hands cause indentations in the topology, like those pin screen toys. Again, from an image alone its hard to tell.

Pending Features

So far I’ve completed what seems like most of the technical implementation, but there is one more feature I want to add: boids. I want it so that with a clenched fist the boids will be repelled, but if you open your hand and extend your fingers some will be attracted and will go between your fingers and maybe twirl around them.

I will also need to change the hand from a skeleton to a mesh or some kind of model more resembling a hand, like the ones seen when using the VR headset shown earlier. Something semi-transparent, but I want the lighting from the topology at the bottom to have an effect on the hand.

Reflection

I’m happy with how things have turned out but there’s still much more work to be done. I did need to use AI for a couple of things: optimizing the topology grid and switching from using ml5.js to using MediaPipe Hand Landmarker, since it could output an estimation of the hand in the xyz coordinate system whereas ml5.js could only do x and y.

Final Project- Batool Al Tameemi

Project Overview

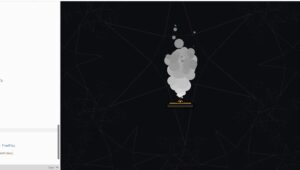
This project started from something very familiar to me. Bukhoor is not just something you look at, it is something you interact with. You light it, you wait, and then you blow on it. When you blow, it responds. The smoke becomes thicker, the coal reacts, and it feels alive. I wanted to recreate that exact behavior digitally.

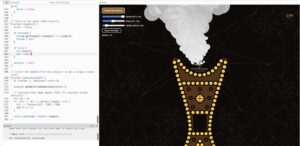
So instead of drawing smoke, I built an interactive oud burner that reacts to the user’s breath through the microphone. When the user blows into it, the smoke becomes denser and more active. When there is silence, it calms down and almost disappears.The goal was not to simulate smoke perfectly, but to translate the experience of bukhoor into a responsive system.

Implementation Details

This project combines a few key ideas from class to build a system that behaves naturally. I focused on using the concepts where they actually mattered.

Key Concepts Applied

  • Random + Noise
    Used Perlin noise to create variation in: smoke turbulence, wind, background

This keeps the system from feeling mechanical.

  • Vectors + Forces

Each particle moves using forces: upward force (smoke rising), horizontal wind, noise-based turbulence

This is what makes the smoke behave instead of just animate.

  • Oscillation
    Subtle sine movement adds: soft sway in smoke, slight pulsing in the system

It keeps everything alive even when idle.

  • Particle Systems

Smoke is built from particles: particles grow and fade, particles continuously spawn and disappear

The smoke exists as a system, not a fixed drawing.

  • Autonomous Agents + Flocking
    Each particle reacts to nearby particles: avoids crowding, aligns slightly, stays grouped

This creates a continuous smoke flow instead of random dots.

  • Fractals
    Used in the background: recursive shapes, slow animation, adds depth without taking focus

Core Interaction (Bukhoor Logic)

Sound is treated as breath.

  • silence → almost no smoke
  • small sound → light smoke
  • blowing → dense smoke

Video interaction

Embedded sketch

Milestones / Process

Step 1: Background and Fractals 

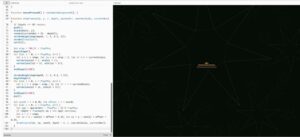
I started with the background because I wanted the sketch to feel atmospheric before the bukhoor even reacts. I used a recursive fractal system to create repeated star-like shapes that slowly rotate and shift over time. and I also drew an oud

Step 2: Forces

I built a Movement + Noise system where particles respond to forces like gravity (upward movement) and wind. This made the motion feel physical.

Step 3: Particle System

I replaced static drawing with particles that spawn, grow, and disappear. This is when the smoke started feeling alive.

Step 4: Flocking

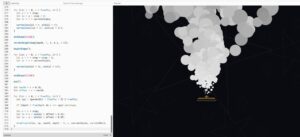
I introduced flocking so particles move together instead of randomly. This created a cohesive smoke form.

Step 5: Sliders

After the smoke system was working, I added sliders so the user could control the behavior more directly.

The main sliders are:

  • Sensitivity: controls how strongly the microphone input affects the smoke
  • Wind Direction: pushes the smoke left or right
  • Smoke Speed / Morph: changes how fast the smoke rises, sways, and disappears

The morph slider was important because it makes the smoke feel less fixed. The user can slow it down for a softer bukhoor effect, or speed it up so the smoke becomes more energetic and animated.

Step 6: Refinement + User Feedback

Based on feedback, I made the smoke more animation-like instead of realistic:

  • clearer shapes
  • more exaggerated motion
  • stronger response to input

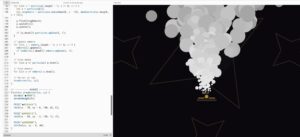
This made the interaction more obvious and satisfying. and I added the Mic interaction and the illustrated Bukhoor

Reflection

I am so soooooooo proud of how this project turned out, This project shifted how I think about making visuals.

At first, I focused on how smoke looks. But the project only started working when I focused on how it behaves.

The biggest improvement came from simplifying the smoke and making the interaction clearer. When someone naturally tries to blow into it without instructions, that is when the project succeeds.

The strongest part of the work is that it translates a real-world habit into a digital interaction in a way that feels intuitive.

Future Improvements

  • move beyond circular particles into more dynamic smoke shapes
  • add hand interaction instead of only sound
  • make the coal react more physically
  • connect the background to sound
  • push the visual language further

References

Technical

  • p5.js
  • Web Audio API
  • Flocking systems

Conceptual

  • Bukhoor as an interactive and sensory experience

AI disclosure 

AI was used to help refine the structure of the code and debug specific technical parts, especially around audio input and signal processing.

I used AI to better understand and implement the RMS (Root Mean Square) calculation used to detect microphone intensity:

analyzer.getByteTimeDomainData(dataArr);

let sum = 0;
for (let i = 0; i < dataArr.length; i++) {
  let v = (dataArr[i] - 128) / 128;
  sum += v * v;
}

return sqrt(sum / dataArr.length);

This part was important for making the system respond smoothly to sound instead of being too sensitive or unstable.

All creative decisions, including the concept of translating bukhoor into an interactive system, the visual direction, and how the interaction behaves (blowing = more smoke), were developed and implemented by me.

Uutforskede bonuser ved MonsterWin Casino

MonsterWin Casino er en stigende stjerne innen online gambling, og tilbyr en rekke uutforskede bonuser som kan være spesielt attraktive for nye spillere. Nettstedet har et brukervennlig grensesnitt og en variert portefølje av spill, noe som gjør det til et populært valg blant spillere i Norge. Denne artikkelen vil undersøke de forskjellige bonusene som er tilgjengelige på monsterwin casino og hvilke fordeler de gir.

Ulike typer bonuser og tilbud

MonsterWin Casino tilbyr en rekke bonuser som kan forbedre spillopplevelsen betydelig. Spillere får tilgang til flere typer tilbud, inkludert velkomstbonuser, innskuddsbonuser, gratisspinn og lojalitetsprogrammer. Hver bonus har sine egne vilkår og betingelser, noe som er viktig for spillere å være klar over.

  • Velkomstbonus: Generelt en stor prosentandel av det første innskuddet.
  • Innskuddsbonus: Ekstra midler ved påfølgende innskudd.
  • Gratisspinn: Antall spinn på utvalgte spilleautomater.
  • Lojalitetsprogram: Belønninger for gjenkjøp og hyppig spill.
  • Temabaserte kampanjer: Periodiske tilbud som kan gi ekstra verdi.

Betingelser for utbetaling

Det er viktig for spillere å være oppmerksomme på betingelsene for å kunne ta ut gevinster fra bonusene. De fleste tilbydere, inkludert MonsterWin, har bestemmelser angående omsetningskrav, som må oppfylles før uttak kan gjøres. Les nøye gjennom vilkårene for å unngå misforståelser.

Bonustype Omsetningskrav Gyldighetsperiode
Velkomstbonus 30x 30 dager
Gratisspinn 20x 7 dager
Innskuddsbonus 25x 60 dager

Lojalitet og VIP-program

MonsterWin Casino verdsetter sine lojale spillere og tilbyr et eksklusivt VIP-program. Spillere på høyere nivåer får fordeler som personlig kontoadministrasjon, høyere innskudds- og uttaksgrenser, samt spesielle bonuser og tilbud. Dette gjør det mer attraktivt å forbli aktiv på plattformen.

FAQ – Vanlige spørsmål

1. Hvordan aktiveres velkomstbonusen?
Velkomstbonusen aktiveres automatisk ved det første innskuddet, så lenge minimumsbeløpet er nådd.

2. Hva er omsetningskravene for gratisspinn?
Gratisspinn har vanligvis omsetningskrav på 20 ganger gevinsten før uttak kan gjøres.

3. Finnes det spesielle bonuser for eksisterende spillere?
Ja, MonsterWin tilbyr jevnlig kampanjer og lojalitetsbonuser for spillere som allerede er registrert.

Assignment 9 — Three Modes

The Concept

The two references for this assignment are really different from each other visually but I think they’re pointing at the same thing. Robert Hodgin’s Murmuration is basically a love letter to flocking as a visual phenomenon thousands of agents moving like one organism, the shape constantly shifting. Ryoichi Kurokawa is more abstract, but what I find interesting about his work is that it’s never just a system running. It’s always a system building toward something and then either resolving or falling apart. There’s always a direction to it.

What I wanted to do for this assignment was combine both of those ideas. The flocking is the base, but instead of just running it at fixed parameters and watching it loop forever, I wanted to design three distinct modes that the system moves through over time, each one pulling a different force to the foreground. The first mode is Scatter: cohesion and alignment are weak, the flock barely holds together, boids drift around loosely. The second is Order: alignment and cohesion spike up, the flock snaps into a tight murmuration and starts moving as one. The third is Break: flocking forces drop off and each boid gets its own slow random wander, so the flock fragments and individuals peel off in different directions.

The thing that made this interesting to work on is that the three modes aren’t really about telling a story, they’re just three different parameter states of the same flocking system. What surprised me is that even without trying to make it narrative, it ends up feeling like one. The flock coalesces and then falls apart and it just reads that way.

Code I’m Particularly Proud Of

The part I keep coming back to is the phase table + lerp structure:

const PHASES = [
  { sep: 1.8, ali: 0.4,  coh: 0.15, wan: 0.0, hue: 210 },  // Scatter
  { sep: 1.1, ali: 2.4,  coh: 2.0,  wan: 0.0, hue: 160 },  // Order
  { sep: 0.5, ali: 0.12, coh: 0.06, wan: 0.6, hue: 30  },  // Break
];

curSep = lerp(curSep, tgt.sep, LERP_SPEED);
curAli = lerp(curAli, tgt.ali, LERP_SPEED);
curCoh = lerp(curCoh, tgt.coh, LERP_SPEED);
curWan = lerp(curWan, tgt.wan, LERP_SPEED);
curHue = lerp(curHue, tgt.hue, LERP_SPEED * 0.6);

All the artistic decisions about how each phase feels live in that one table. The five lerp calls handle every transition. What I really like is that the hue gets its own slower lerp multiplier, 0.6 of the normal speed, so the color shift lags slightly behind the behavior shift. The flock has already started tightening before the color fully reaches cyan, and the amber is still coming in as the boids are beginning to scatter. It makes the color feel reactive to the motion rather than synchronized with it.

Building It Up: Milestones & Challenges

Milestone 1: Getting the Three Rules Working

I started with the simplest possible thing, just to get the basic flocking running and understand what the three rules actually look like before doing anything else with them. No phases, no colors, no timer. Just separation, alignment, and cohesion on 120 boids against a black background.

This was more useful than I expected as a standalone step. Just watching the raw flocking with a plain white fill really helped me see what each rule contributes. I played with the weights a lot at this stage messing cohesion way up makes everything clump into a tight ball and stop moving. Messing separation makes them scatter and never reform. The balanced values I landed on here (sep: 1.8, ali: 1.0, coh: 0.8) ended up being the starting point for the Scatter mode in the final sketch.

One thing I noticed that I didn’t expect: the faint motion trails from the semi-transparent background actually read as a really clean visual even in pure black and white. I kept that in all three versions.

Milestone 2: Three Phases + Lerp Transitions

Once the base flocking felt right I added the three modes: Scatter, Order, Break, with a phase clock that advances every 660 frames and a set of target weights for each one. Still black and white at this point, but now with trails added and the lerp system in place.

The first version of the transitions used a hard switch, when the timer hit the phase boundary everything snapped to the new weights in a single frame. It looked bad. The flock would visibly lurch. Replacing the hard switch with lerp(cur, target, 0.018) means the weights drift toward the new values over about 50 frames, which smooths it out completely. You stop noticing the phase change and just feel the mood gradually shift.

Getting the Break phase right was the trickiest part of this milestone. Reducing cohesion and alignment alone wasn’t enough. The flock would just slow down and drift more randomly but stay roughly in the same area. I needed something that actively pulled individual boids away from the group, not just weakened the forces holding them together. That’s what the wander behavior is for. Each boid has its own wanderAngle that slowly drifts by a unique random amount each frame, so when the wander force ramps up during Break, every boid pulls off in its own direction. The flock fragments organically rather than just dispersing uniformly.

I also added a minimal phase label and a thin progress bar at the top left here — not for the final version necessarily, but useful to see while testing so you know which phase you’re actually in.

Challenge: Balancing the Color Shift

Moving from Milestone 2 to the final version was mostly about adding the color treatment, and the trickier part was making the color feel right rather than just technically correct.

My first attempt colored the boids directly by the current hue in HSB mode, which worked but looked flat. Every single boid was exactly the same color at any given moment. Adding a per-boid hueOffset of ±18 degrees fixed that immediately. The flock has a dominant color temperature but individual boids sit slightly warm or cool relative to it, which makes the whole thing look organic instead of painted.

The bigger issue was the timing of the color transitions. The hue lerps on the same LERP_SPEED as the weight changes, so originally the boids would turn amber at the exact same time as they started scattering. It felt too mechanical, like a mode switch rather than a natural shift. Slowing the hue lerp down to LERP_SPEED * 0.6 added enough lag that the color and the behavior feel like they’re influencing each other rather than switching together. That small change made a bigger difference to the feel of the piece than I expected.

The neighbor lines during Order were also something I wanted to get right visually. They connect boids within 48px of each other and fade based on distance, so as the flock compresses during Order the lines naturally get denser without me doing anything extra. I didn’t plan that, it just falls out of the density increasing.

The Final Result

Three modes cycling continuously: Scatter (cool blue, loose), Order (cyan-white, tight lattice), Break (amber, flock fragments and fades). Weights lerp smoothly between modes, color shifts on a slower delay. Grain overlay kills the flatness.

Controls:

  • R — restart
  • S — save frame

Reflection & Future Work

What I find most interesting looking back at this is how much work the parameter table does. The flocking code itself is basically unchanged from Milestone 1 — same three rules, same math. All the artistic decisions are in those five numbers per phase. Changing the coh weight during Order from 1.8 to 2.0 makes the flock noticeably tighter. Changing the wan weight during Break from 0.4 to 0.6 makes the collapse feel more violent. I spent most of my time in the final version just in that table, adjusting numbers and seeing what changed.

I also really like the neighbor lines as an emergent feature. I didn’t think “I want a lattice effect during Order”. I added the lines as a visual layer and the lattice emerged automatically because the boids happen to be close together during Order. That’s exactly the kind of thing I find satisfying about this kind of work, you set up the rules and the visuals kind of discover themselves.

What I’d explore next:

  • User control over phase timing: being able to hold Order longer or trigger Break early with a keypress would make it interactive in an interesting way
  • Multiple flocks running offset: two flocks on the same canvas at different points in the arc, occasionally interacting when their spaces overlap
  • Predator boid: during Break, instead of just wander, have a single predator that chases the flock. The flock tries to reform against the predator, which adds conflict to the Break phase instead of just dissolution

FInal Project Progress

Overview

This post documents the development progress on my final project, a direct and substantial expansion of Assignment 7. The core idea is to take the passive, decorative floor world from that assignment and transform it into a living ecosystem the user can shape in real time. The flock moves through the same visual world as the original sketch, the floor creatures react to what passes above them, coral grows and recedes based on where the flock lingers, and the entire mood of the world shifts between warm dusk and deep night based on how the flock behaves. On top of all of that, the microphone listens to the room, and sound directly disturbs the ecosystem.

At this stage, all the major systems are built and running together. What remains is the UI sliders panel and a final visual polish pass.

Milestone 1 — Environment

The first thing built was the environment with no agents at all. The goal was to get the visual foundation right before anything moved.

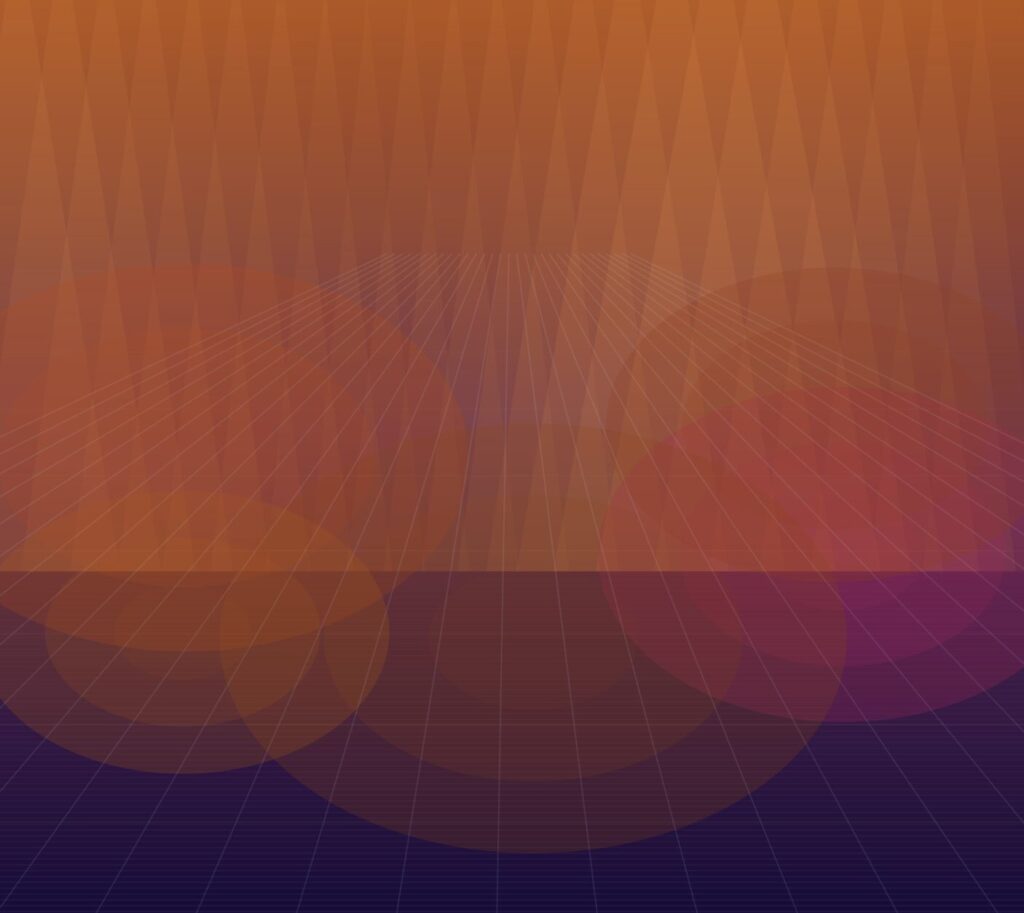
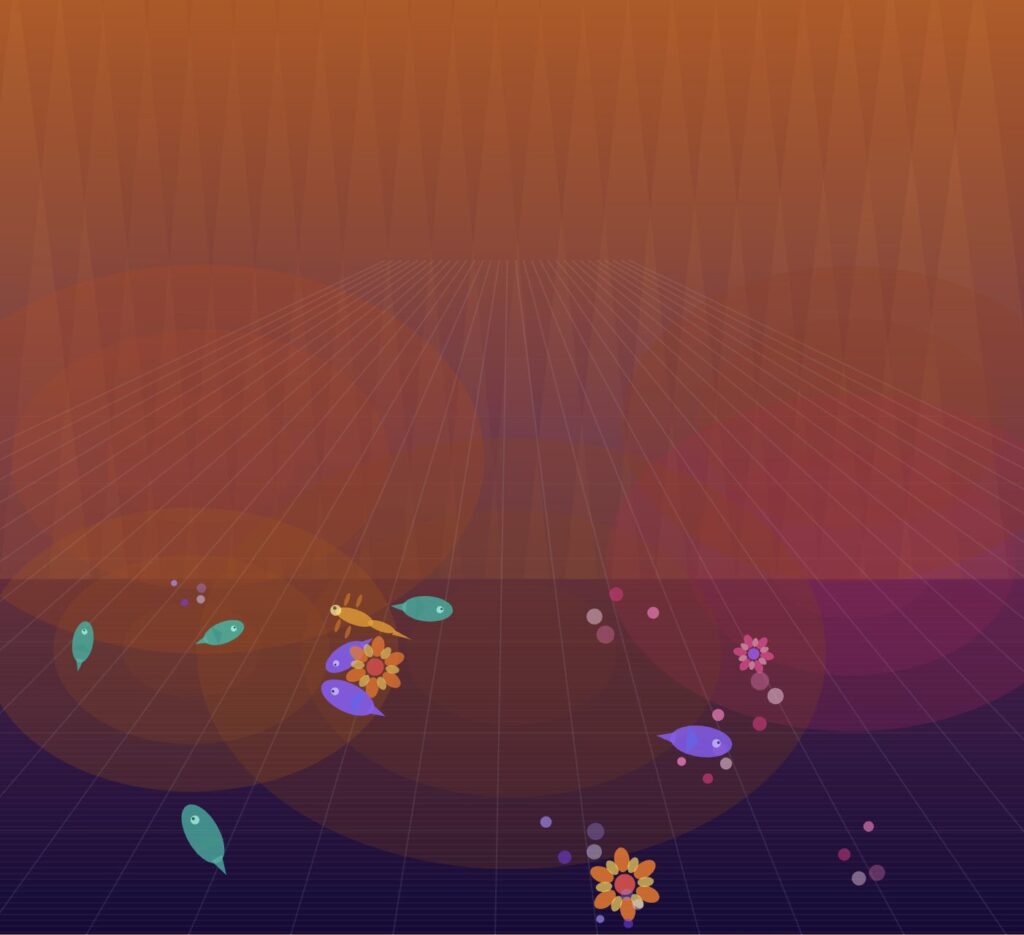
The background is a gradient that runs from warm amber at the top to deep indigo at the bottom. Unlike Assignment 7 where the background cycled through palettes on a fixed timer, this one responds to the flock’s behavior — but at this stage it was set to dusk to verify the colors. Perlin noise generates god-ray light shafts that taper downward from the top of the canvas, shifting slowly each frame. Five large ambient light blobs drift across the scene, carried directly from Assignment 7. The perspective vanishing-point floor grid sits at the bottom third of the canvas with a warm glow rising from below.

The first challenge here was getting the god-rays to feel like light through water rather than painted stripes. The fix was using noise to vary the width and brightness of each ray independently rather than giving them a uniform appearance, so some are wide and bright and others are thin and barely visible. The result reads as diffused underwater light.

Milestone 2 — Floor Creatures

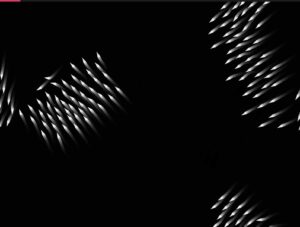
With the environment stable, the floor creatures from Assignment 7 were brought in next. All four designs — flowers, fish, lizards, and swirls — wander across the floor using the same wander steering from the original sketch: tiny random velocity nudges each frame produce organic, unpredictable paths that feel alive rather than mechanical.

At this point the sketch looks almost identical to Assignment 7. That is intentional. The point of this milestone was to confirm the visual foundation was intact before adding the new behavioral layer on top of it. Everything from the original — the wobble animation offsets, the soft vertical boundaries keeping creatures on the floor, the creature drawing code — carried forward without modification.

Milestone 3 — Flock and Flow Field

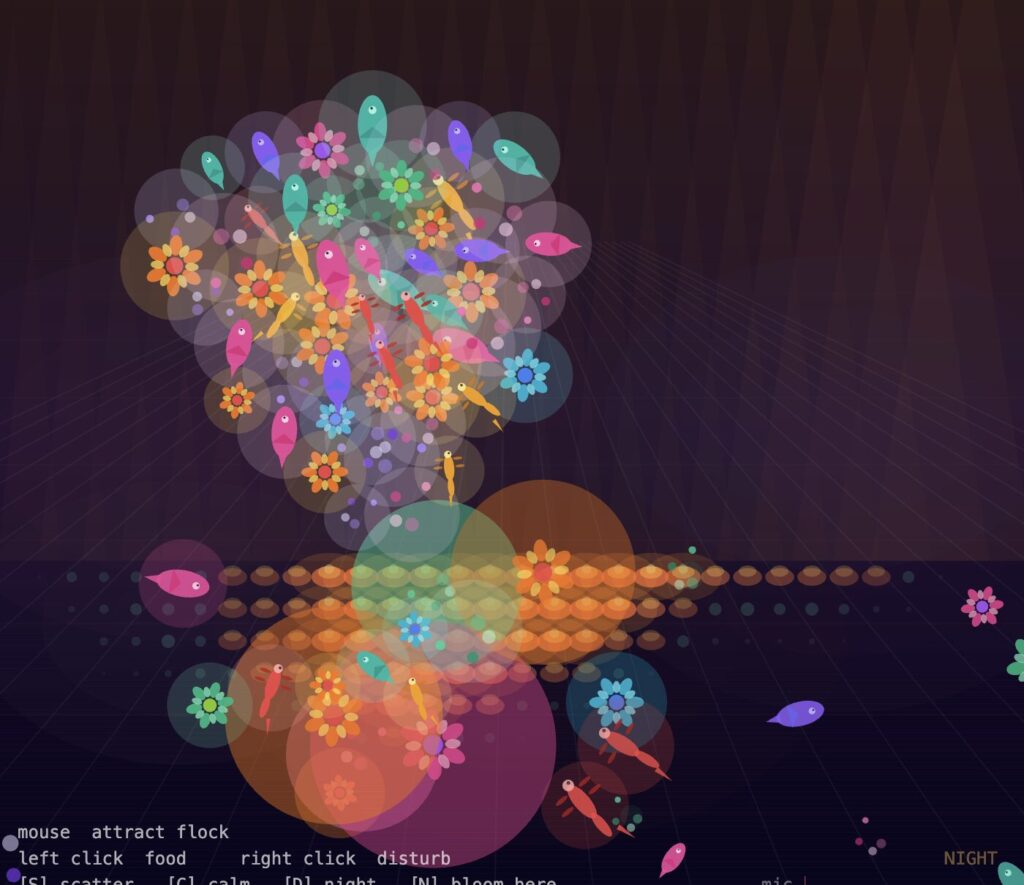
This is where the project becomes something genuinely new. The single butterfly from Assignment 7 is replaced by a flock of 65 agents, each randomly assigned one of the four creature designs. They are all the same behavioral system underneath but look completely different from one another, so a tight cluster contains spinning flowers next to fish next to swirling orbs all moving as one body.

The flock uses three steering forces running simultaneously: separation keeps agents from crowding each other, alignment steers each agent toward the average heading of its neighbors, and cohesion pulls each agent toward the average position of its neighbors. On top of those, a Perlin noise flow field applies a gentle base current to every agent, and the mouse acts as a continuous attractor — the flock swims toward the cursor at all times. Moving the mouse slowly produces a calm trailing formation. Moving it quickly makes the flock chase and spread.

The floor creatures gained awareness at this milestone too. Each one finds the nearest flock agent every frame and, if it is close enough, turns toward it and glows. The glow fades smoothly when the flock moves away.

The most technically interesting part of this milestone was blending the flocking forces with the mouse seek force without the mouse completely dominating. The solution was limiting the seek force to a lower multiplier than separation and cohesion, so the flock follows the mouse as a group rather than every agent rushing toward the cursor independently.

Milestone 4 — Coral Cellular Automata and Food

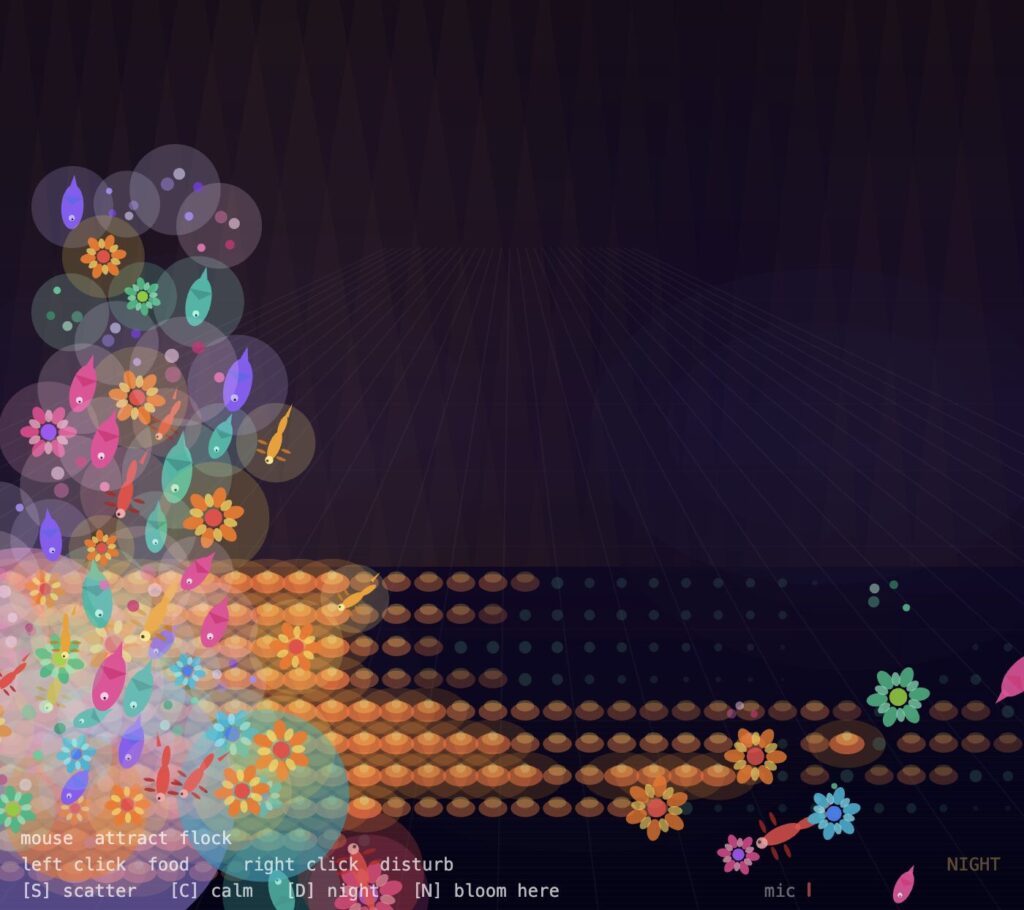
The coral system is what gives the floor memory. A grid of cells covers the floor zone. Each cell tracks how long the flock has spent above it. Sustained presence causes cells to grow through three visible stages: a small dim polyp, a growing mid-stage coral with layered orange and amber ellipses, and a full bloom with a glowing halo that intensifies in night mode.

Left-clicking drops a food source at that point. The flock detects it and converges tightly, clustering directly above it. A dense cluster above a cell accelerates its growth noticeably. The food dissolves after a few seconds and the flock reforms. Clicking several times in the same area produces a visible coral patch that persists even after the flock moves away, slowly receding over time.

The mouse also interacts directly with the coral independent of the flock. Cells near the cursor pulse with a slow breathing glow driven by a sine wave, and cells directly beneath a stationary mouse grow faster than cells the flock is simply passing over.

The challenge in this system was performance. Checking every flock agent against every coral cell every frame is expensive. The fix was sampling only agents within a fixed radius of each cell rather than checking the full flock, which kept the frame rate stable even with 65 agents and a dense grid.

Embedded Sketch

What Still Needs to Be Built

A UI sliders panel in the top right corner giving the user direct control over flock size, coral growth speed, and current strength. This is the last remaining interactive layer before the project is complete.

A final visual polish pass on the creature drawing, the coral bloom stages, and the transition smoothness between dusk and night.

Reflection on Progress

The most surprising result of building this was how much the mood system changed the feeling of the sketch. In early tests without it, the world was visually interesting but static in character — it always looked the same regardless of what the user did. Once the mood system was connected, the world started responding with a personality. A chaotic session where the user keeps pressing S and right-clicking feels genuinely different from a calm session where the flock clusters quietly and coral builds up slowly on the floor. The same code produces two completely different emotional experiences depending on how the user interacts.

The microphone input was the most technically uncertain part of the build. p5.sound requires the library to be loaded separately in the p5.js editor and the browser must grant microphone permissions before any level data is available. Once running, the effect is immediate and visceral — speaking or clapping near the laptop produces a visible shockwave through the flock that no mouse interaction can replicate.

References

Shiffman, D. (2024). The Nature of Code, v.2. https://natureofcode.com

Reynolds, C. (1999). Steering behaviors for autonomous characters. Game Developers Conference.

Wolfram, S. (2002). A New Kind of Science. Wolfram Media.

Assignment 7, teamLab “Color Your World” recreation (Bismark Buernortey Buer) — direct visual foundation.

Assignment 8, The Shoal (Bismark Buernortey Buer) — flocking system reference.

p5.sound library documentation. https://p5js.org/reference/p5.sound

AI disclosure: Claude (Anthropic) was used to help structure and articulate this progress documentation. 

Buernortey – Final Project proposal

Concept

During a class field trip to teamLab, visitors could pick up a pencil drawing of a butterfly, flower, or lizard, color it in, and slide it under a scanner. Seconds later, their drawing appeared on the floor, glowing, animated, and moving freely through all the other visitors’ creations. I chose a butterfly and colored it yellow. Watching that specific butterfly appear on the floor and drift between everyone else’s drawings was unlike anything else in the installation. Every other room at teamLab was something you walked through. This one was something you contributed to. The floor felt like a collective painting that no single person made, a shared canvas where hundreds of people’s choices coexisted at once.

That feeling is what I tried to recreate in Assignment 7. The sketch built a glowing, color-shifting floor world populated by wandering creatures: flowers rotating their petals, fish with tails and fins, lizards with wagging tails and four legs, and swirling orbs of orbiting light, all drawn entirely in code with no images. A single yellow butterfly entered from the left edge and drifted organically through the crowd. The background cycled through deep blue, purple, and magenta gradients, with large soft blobs of colored ambient light drifting across the floor to simulate the projected pools of color from the real installation.

It looked alive. But it was passive. Nothing responded to the user. Nothing changed based on what anyone did. The world was the same at the end of a session as it was at the beginning. In my own reflection on that assignment I noted exactly what was missing: flocking behavior, user control, convincing depth, and a sense that the world had memory. This project delivers all of it.

The single butterfly becomes a flock of dozens of mixed creatures, all drawn from the same visual vocabulary as before but now governed by separation, alignment, and cohesion forces. The flock swims directly toward the user’s cursor at all times, so the mouse becomes a living presence in the water rather than a control dial. The floor creatures react to the flock above them. Where the flock lingers, coral grows on the floor through a cellular automata system, pulsing and glowing when the mouse hovers nearby and blooming faster when the mouse stays still. The entire world’s lighting mood shifts continuously between warm dusk and deep night based on how dense and calm the flock is. And the world listens: the microphone picks up sound in the room, and loud sounds scatter the flock like a shockwave while quiet lets the coral bloom undisturbed.

The user is no longer watching. They are conducting.

What Carries Forward

The visual foundation is preserved entirely. The perspective vanishing-point floor, the gradient background that cycles through color palettes, the five ambient light blobs drifting across the scene, and all four creature designs carry forward without modification. The hand-coded creature drawing system, the wobble animation offsets, the bezier butterfly wings, and the soft boundary system that keeps creatures on the floor plane all remain. The additive blending glow technique used for the butterfly trail becomes the basis for the coral bioluminescence and the mood lighting system.

What changes is everything above the visual layer: behavior, interaction, memory, and mood.

The World

The environment is the same floor world, now reframed as a deep-sea scene at dusk. The background gradient runs from warm amber at the top to deep indigo at the bottom and responds to flock behavior rather than cycling on a fixed timer. Perlin noise generates slow-moving god-ray light shafts that cut through the scene each frame, their intensity tied to the current mood state.

The flock occupies the mid-canvas zone. Each agent is randomly assigned one of the existing creature designs, so the flock is visually diverse: a tight cluster might contain spinning flowers next to fish next to swirling orbs, all moving as one body under the same steering forces. They are all the same behavioral system wearing different costumes.

The coral cellular automata grid covers the floor. Each cell tracks how long the flock has spent above it. Sustained presence causes cells to grow through stages from bare floor to young polyp to full coral bloom, drawn using layered colored ellipses with additive blending. Cells the flock abandons slowly regress. The floor is a living record of the session. Coral cells near the mouse cursor pulse with a slow breathing glow, and cells directly beneath a stationary mouse grow noticeably faster.

The mood system reads the average spacing between flock agents every frame and produces a single value between 0 and 1, where 0 is fully calm and dense and 1 is fully scattered and disturbed. This value drives the background palette interpolation, the intensity of the god-ray shafts, the brightness of the ambient blobs, and the prominence of the coral glow. A calm flock means warm amber dominates. A scattered flock means the scene goes dark and the coral becomes the primary light source. The transition is continuous and never snaps abruptly.

Interaction

The project uses four simultaneous input channels. All four work at the same time and all four produce visible consequences in the world.

The mouse is the primary presence in the water. The flock swims toward the cursor continuously, so wherever the mouse moves the school follows. Moving slowly produces a calm, trailing formation. Moving quickly makes the flock chase frantically and spread out. Hovering still over the floor makes the coral beneath pulse and grow faster.

The microphone listens to the room through p5.sound. Quiet input lets the world stay warm and the coral bloom undisturbed. A loud sound, whether a clap, a voice, or music playing nearby, sends a shockwave through the flock, scattering every agent outward and darkening the world toward deep night instantly. Sustained loud input keeps the world in night mode. When the room goes quiet again the flock slowly reforms and the light returns. The amplitude of sound maps directly and continuously to the disturbance force on every agent.

The keyboard gives the user three dramatic state changes. Pressing S fires an explosive scatter force outward from the center of the flock. Pressing C activates a calm force that pulls every agent toward the flock’s center and slows them down, shifting the mood toward dusk. Pressing D forces the world into deep night immediately, making the coral glow at full intensity and dimming everything else to near black. Pressing N drops an instant coral bloom at the current mouse position.

Left-clicking drops a food source that the flock converges on, triggering rapid coral growth and a bioluminescent pulse spreading outward across the floor creatures. Right-clicking releases a disturbance ring that scatters the flock and darkens the world.

Course Concepts

Perlin noise drives the flow field the flock steers through and the god-ray light shafts shifting above. Vector forces govern the seek force pulling agents toward the cursor, the sound-driven scatter shockwave, the food attraction force, and the keyboard scatter and calm impulses. Oscillation animates the creature wobble, the coral pulse rhythm, and the breathing quality of the mood lighting transitions. Particle system techniques handle the bioluminescent glow on the coral and the bloom effects using additive blending, carried directly from the butterfly trail in the previous assignment. Autonomous agent steering powers the independent wander behavior of the floor creatures and their seek response toward the flock. Flocking is the core behavioral engine governing the flock’s separation, alignment, and cohesion. Cellular automata drives the coral growth and regression on the floor grid, with mouse proximity and sound amplitude both feeding into the growth rate.

Every system depends on at least one other. The flocking depends on the flow field. The coral depends on the flock. The mood depends on the flock density. The god-rays depend on the mood. The microphone feeds into the scatter force, the mood, and the coral suppression simultaneously. Nothing runs in isolation.

References

Shiffman, D. (2024). The Nature of Code, v.2. https://natureofcode.com

Reynolds, C. (1999). Steering behaviors for autonomous characters. Game Developers Conference.

Wolfram, S. (2002). A New Kind of Science. Wolfram Media.

Gardner, M. (1970). Mathematical games: The fantastic combinations of John Conway’s new solitaire game “Life.” Scientific American, 223(4), 120–123.

Assignment 7, teamLab “Color Your World” recreation (Bismark Buernortey Buer): https://decodingnature.nyuadim.com/2026/03/24/buernortey-assignment-7/

Kurokawa, R. — tension and release in generative audiovisual systems.

Hodgin, R. — flocking as visual composition.

p5.sound library documentation. https://p5js.org/reference/p5.sound

AI disclosure: Claude (Anthropic) was used to help develop and articulate the project concept and structure this proposal documentation.

Afra Binjerais – final project

Interactive Sadu Weaving Environment

Project Overview

My final project explores how traditional UAE heritage can be translated into a contemporary interactive digital environment. The work is inspired by Al Sadu, a traditional Bedouin weaving practice known for its geometric motifs, repetition, rhythm, and handcrafted structure.

The project imagines the user a weaver. Through hand gestures captured by a webcam, the user interacts with a woven digital textile in real time. Their movement shapes patterns, places motifs, and disturbs the surface of the cloth, creating a continuously evolving visual field.

The artistic intention is to explore how cultural heritage can exist dynamically through technology. Instead of presenting tradition as something static, the project allows it to be experienced as something responsive, alive, and constantly transforming.

The key themes explored are:

  • Handcraft vs algorithm
  • Tradition translated through code

Implementation Details

The project was developed using p5.js and ml5.js HandPose tracking. The webcam detects the user’s hand, and the index finger is used as the primary interaction point. This position is mapped from camera space to canvas space and used to interact with a grid-based woven system.

The project evolved through four main milestones:

Milestone 1: Basic Interactive Weaving System

The first version established the core interaction. A grid of cells represented a simplified woven surface, where each cell could either display a background block or a basic cross motif.

Using HandPose, the position of the user’s index finger was tracked and mapped onto the canvas. When the finger moved across the grid, nearby cells flipped states, creating the effect of disturbing or weaving the pattern.

Outcome:
This stage confirmed that the core interaction worked. However, the visual system was limited, and the interaction felt more like toggling pixels rather than weaving a rich textile.

Milestone 2: Motif Expansion and Generative Behavior

In the second version, the visual complexity increased significantly. Multiple Sadu-inspired motifs were introduced, including cross, diamond, stripe, and block-based patterns.

A cellular automata system was added, allowing the weave to evolve over time. Cells could grow, spread, or disappear depending on their neighbors, making the textile feel alive even without user input. Hand speed was also incorporated as a parameter. Faster movement resulted in a larger brush radius, allowing the user to affect a wider area of the weave.

Key additions:

  • Multiple motif types
  • Sadu-inspired color palette
  • Cellular automata system
  • Hand speed controlling brush size
  • Keyboard-based motif switching

Outcome:
The system became more generative and dynamic. The textile was no longer static but continuously evolving. However, interaction was still partially dependent on the keyboard, which interrupted the flow of the experience.

Milestone 3: Interface Design and User Experience

This stage focused on improving usability and visual clarity. Motif selection was moved into visible buttons, making the system easier to understand. The interaction area was restricted to the woven field, preventing accidental input in the interface zones.

Outcome:
The interface became more intuitive and readable. However, motif selection still relied on mouse interaction, which created a disconnect from the hand-based system. This is where I took it to the second stage where I wanted the hand to hover on the buttons

Milestone 4: Gesture-Based Interaction and Flow Field System

The final version fully integrates gesture-based interaction across the system. Users can select motifs by pointing at buttons and holding their hand steady for three seconds. A visual progress bar provides feedback during this interaction. The most significant development in this stage is the transformation of Motif 4 into a flow field system.

Unlike the other motifs, which are governed by cellular automata, Motif 4 operates as a dynamic flow field. Each cell contains directional movement, causing the internal elements of the motif to continuously shift and distort over time. The user’s hand acts as a force within this system. 

This creates a layered interaction:

  • Motifs 1–3 behave as structured, generative weaving systems
  • Motif 4 behaves as a fluid, responsive flow field shaped by gesture

Motif 4 is also excluded from the cellular automata system, meaning it does not grow or decay automatically. It remains as a direct trace of the user’s interaction.

Key additions:

  • Gesture-based UI (hover + dwell interaction)
  • Flow field system for Motif 4
  • Hand-influenced distortion behavior
  • Separation of algorithmic and gesture-driven layers

Outcome:
This version successfully merges interaction, generative systems, and visual expression. The system now reflects both structured weaving and fluid transformation, aligning more closely with the conceptual goals of the project.

Technical Process

The project is built around a grid system where each cell represents a unit of the woven textile. Each cell stores a value corresponding to a motif type. Hand tracking data from the webcam is mapped to the canvas, allowing the user to “paint” motifs onto the grid. Hand speed determines brush size, creating variation in interaction. A cellular automata system controls the growth and decay of Motifs 1–3 based on neighboring cells, introducing generative behavior. Motif 4 operates differently. It uses a flow field where each cell has a directional vector that affects how its internal elements are drawn. This produces continuous motion and distortion.

Video Documentation

Reflection

My project translates elements of traditional Sadu weaving into an interactive digital form. The use of hand tracking allows the user to engage with the system in a physical and intuitive way, reinforcing the idea of weaving as a gesture-based practice.

One of the most important developments was introducing the flow field in Motif 4. This created a contrast between structured, rule-based generation and fluid, responsive movement. It reflects the tension between tradition and transformation, which is central to the project’s concept.

A key challenge was balancing user control with generative behavior. Early versions either felt too static or too unpredictable. Separating Motif 4 from the cellular automata helped resolve this by giving the user a more direct and lasting impact on the system. I was also facing an issue of implementing decoding nature codes into this idea and i felt that motif 4 helped with that.

For future improvements, I would like to:

  • Add sound elements that respond to interaction
  • Develop more motifs based on authentic Sadu patterns
  • Introduce gesture variations (e.g., open palm, multiple hands)
  • Allow users to save or export their woven compositions (this was something i was willing to do but due to time constraints i decided to draft this idea)

F1 Track: Multi-Vehicle Steering Behaviors – Assignment 8

The Concept

So after doing the F1 attractor simulation in assignment 3, I kept thinking about it. It worked, it looked cool, but something about it always felt a bit… mechanical. The car was basically just getting yanked from point to point by invisible gravity wells. There was no real intelligence there, it was just physics doing all the work.

When we started going through the steering behaviors in class, path following, separation, the flocking stuff, I immediately thought: this is how I can rebuild that track properly. Not with attractors pulling a car around, but with a car that actually decides where to go, that reads the path and steers toward it, and knows to stay away from other cars around it. That difference matters to me. One feels like a simulation, the other feels like behavior.

So the idea for this assignment was to reimplement my F1 track from assignment 3 but change the physics underneath. Instead of attractors, I define an actual closed Path using the same centerline points. Then I put five cars on it, each with their own random top speed, and let them figure it out. Path following gets them around the track, separation keeps them from piling up on each other.

The thing I really wanted to see was whether giving each car a slightly different speed would naturally create that staggered grid effect you see in real racing where fast cars pull away and slow ones fall behind. It absolutely does and I love how it turned out.

The Physics Behind It

The two behaviors powering everything here come straight from what we did in class.

Path Following works by looking ahead  each car projects a “future position” 30px in front of itself based on its current velocity. It then finds the closest point on the path (the normal point) to that future position. If the future position has drifted more than the path radius away from the centerline, the car steers toward a target 25px ahead on that segment. If it’s still within the band, it does nothing and just keeps going.

Separation is the same weighted-distance pattern from the flocking exercise. Each car checks all neighbors within a 55px radius, and for each one it builds a repulsion vector pointing away, scaled by 1/d so closer cars get pushed harder. That sum gets turned into a steering force. I weighted separation at 1.8× and path following at 1.0×, so when two cars are about to collide, staying apart wins over staying on the line. In practice this means they’ll briefly drift wide in a corner to avoid each other, then snap back  which honestly looks exactly like real racing.

Each car also gets a random top speed assigned at setup, between 4.0 and 7.0 units per frame. That’s the one thing I really wanted to explore and it gives the whole thing this organic feel where cars naturally pull away from each other over time instead of bunching up into a permanent traffic jam.

Building It Up: Milestones & Challenges

Milestone 1: One Car, One Path

I started simple, just get a single car to follow the path before worrying about anything else. I defined the Path class using the same centerline coordinates I had mapped out in assignment 3, set the radius to 15px so there’s a comfortable band to work in, and got one car steering around the track.

Here’s Milestone 1:

This was actually more annoying to get right than I expected. The path is closed, which means I’m looping through all segments including the one that wraps from the last point back to the first. For a while I forgot to do (i + 1) % pts.length on the segment index so the car would follow the track fine for 12 segments and then just fly off the canvas when it hit the end. Once I fixed the wraparound it went smoothly.

I also had to think about what happens when the normal point falls outside a segment like when the car is near a corner and the normal projects past the endpoint. I clamped it using a dot product check, same way the vehicle path sketch from class handles it. Once the clamping was in, corners became much smoother.

Milestone 2: Adding the Other Four Cars

Once one car worked I duplicated it out to five, gave each one a random speed, and staggered their starting positions around the track so they wouldn’t spawn on top of each other. I used five positions that are roughly equally spaced top of the track, two in the straight sections, and two in the lower curves.

The first run with five cars immediately showed me the separation wasn’t strong enough. They’d follow the path totally fine individually but the moment two of them got close they’d just kind of phase through each other because the separation force wasn’t overriding the path force. I bumped the separation weight from 1.0 to 1.8 and that was enough; they now visibly push each other apart without losing the track completely.

Challenge: Minimum Speed vs. Separation Pushing Cars Off Track

The hardest thing to balance was what happens when separation is pushing a car sideways and the car’s velocity drops below the minimum threshold at the same time. My minimum speed enforcement was vel.setMag(topSpeed * 0.45) which always points the velocity in the direction it’s already going — but if separation had rotated that direction sideways or slightly off-track, locking in the minimum speed in that direction would send the car drifting into the infield.

The fix was ordering things correctly: I apply all behavior forces first, then let vel.add(acc) happen naturally, then apply vel.limit(topSpeed) for the max, then the minimum check. That way the minimum speed respects whatever combined steering direction the car has already settled on for that frame, rather than fighting the other forces. Once I got the order right the cars stopped randomly deciding to drive through the grass.

Milestone 3: Colored Cars and Trail Polish

Once the behavior was solid I went back to visuals. I gave each car its own color based on real F1 team colors: Ferrari red, Williams blue, McLaren orange, Aston green, a purple one. The trail draws with per-car color and fades using the same opacity and stroke weight gradient from assignment 3.

I also added a showPath toggle on the P key so you can see the path band overlaid on the track. This was really just for debugging but I kept it in because it’s actually interesting to see how the path sits right on the centerline and how the cars drift around within the band.

The Final Result

Five cars, each with a different top speed, following a closed path around the same F1 track from assignment 3. Faster cars pull ahead and lap slower ones. When two cars get close their separation forces kick in and they move apart like they’re actually racing side by side instead of overlapping.

Controls:

  • P — toggle path debug overlay
  • R — reset cars with new random speeds
  • S — save frame


Reflection & Future Work

What I find genuinely interesting about this compared to assignment 3 is how different the result feels even though the track looks identical. The attractor version felt deterministic, the car went where the physics sent it. This version feels like the cars have preferences. They want to stay on the path but they also want space. Watching two cars negotiate a corner together and one briefly drifts wide to give the other room is really satisfying.

What I learned:

  • Path following with look-ahead handles closed loops way more gracefully than I thought it would. The math is simple but it generalizes well.
  • Steering behavior weights matter a lot, changing separation from 1.0 to 1.8 was the difference between cars clipping through each other and cars that actually race properly.
  • Force application order is not trivial. You have to think about what each operation is doing to the velocity vector before the next one sees it.
  • The same visual output can feel completely different depending on the system underneath it.

What I’d add next:

  • Lap times: record how long each car takes per lap and display a live leaderboard
  • Slipstream effect: if you’re directly behind a car you should go slightly faster (draft effect)
  • Pit stops: a car exits the path, slows down in a pit lane area, then re-enters at a fresh speed